How to Temper Chocolate for Candy Making
With the holiday season upon us, you may be melting chocolate more now than you do all year long. With chocolate dipped cookies, candies, and more you may find that your chocolate is melting in your hands after it’s coated your confections. So, I’m sharing how to temper chocolate for candy making so you can make chocolate covered baked goods on a professional level this holiday season!
If you’re looking for more baking tutorials, check out some of my other articles that will help you bake like a pro such as How to Lattice a Pie Crust, How to Parbake a Pie Crust, How to Make the Best Streusel Topping, How to Stack a Layer Cake with Filling, or How to Crumb Coat a Cake.
In This Baking Guide
- How to Temper Chocolate for Candy Making
- What is tempering chocolate
- When you should temper chocolate
- Different kinds of chocolate you can temper, plus temperatures for all
- How to test if chocolate is tempered
Summarize & Save This Content On
Jump to:
- In This Baking Guide
- What is tempering chocolate?
- Why do you temper chocolate?
- When should you temper chocolate?
- How do you temper Chocolate?
- How do you test to see if your chocolate is tempered?
- How can I create a double boiler?
- What is the best chocolate for tempering?
- What kind of recipes would I use tempered chocolate in?
- Chocolate Tempering Temperatures
- Baker’s Tips
- How to Temper Chocolate for Candy Making
- Recipe FAQ’s
- Recipes to Use Tempering Chocolate For
- More Baking Tutorials
- How to Temper Chocolate for Candy Making
- The Bake Shop
What is tempering chocolate?
Tempering chocolate means that you are melting chocolate to a certain temperature so that it will harden and stabilize. This will prevent it from melting or sweating at room temperature or when you touch it. Scientifically, if you just melt chocolate, the molecules separate.
But, if you temper it, then you are able to meld those molecules back together and this creates a nice hardened and glossy finish that won’t sweat or melt when you touch it. And it also has a nice snap to it, like when you bite into a chocolate bar. If it’s not tempered, the chocolate can seem soft when bitten into.
What That Really Means…
When I had my bake shop, I used to explain tempering chocolate to new staff members like this. If you just melt chocolate, then the chocolate “thinks” it’s melted. But, if you temper chocolate, you melt it in a way that makes the chocolate “remember” that it was once hardened chocolate and then it will “remember” to become chocolate again when it sets up.
If that makes it easier for you to understand, this is why tempered chocolate is hard to the touch with a nice snap where chocolate that is not tempered can easily melt onto your hands or sweat if left out at room temperature. And non tempered chocolate is also softer when you bite into it.
Any kind of chocolate dipped candy that you buy — the chocolate is always tempered. Big companies have chocolate tempering machines and even small candy shops that make chocolates on a daily basis probably have these as well. But, I owned a small bake shop for over ten years and we made chocolate bark daily, and we had no tempering machine, it was all done by hand! So, you can easily temper chocolate at home as long as you have a chocolate thermometer!
Why do you temper chocolate?
Tempering chocolate will prevent the chocolate from sweating or melting at room temperature. This is ideal if you are selling baked goods covered in chocolate or candy made of chocolate, as you don’t want your customer to not be able to touch the candy without getting their hands all chocolatey.
If you are giving chocolates as a gift or hosting a party where you want to leave chocolate candies or chocolate dipped cookies out for a long period of time, then tempering the chocolate is a good thing to do.
When should you temper chocolate?
If you are just baking for yourself and your family and you’re just going to eat all the candy or chocolate dipped cookies within a day or two, then I always say fuck it and don’t temper the chocolate. It’s definitely more work and takes more time. So, if you don’t mind chocolate that gets a little sweaty, rubs off on your hands a little, or if you are going to store it in the fridge anyways, then there is really no need to temper chocolate.
If you are melting chocolate to cover candy that needs to be refrigerated, like buttercreams, then I say don’t temper the chocolate because it has to be stored in the fridge anyways. And the refrigerator will keep untempered chocolate hardened, so there’s really no need to do the extra work.
But, if you are selling chocolate, gifting chocolate, or serving chocolates at a party where they will be out for hours at a time, then that’s when I would spend the extra time and temper the chocolate. I never want to do extra work in the kitchen, and tempering chocolate can feel like “extra” work. So, do what I do and temper only when necessary!
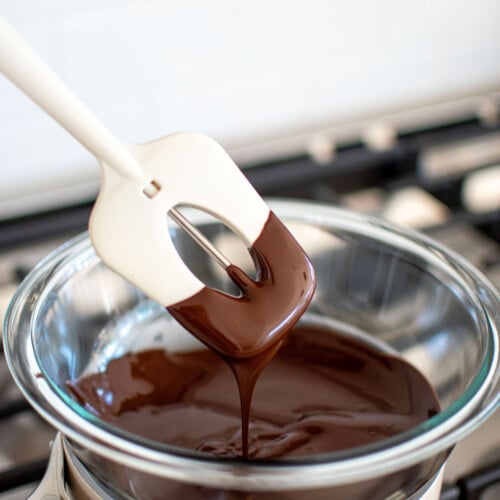
How do you temper Chocolate?
Tempering chocolate is similar to melting chocolate, but there are a couple more steps. You do need a chocolate thermometer and a double boiler to temper chocolate. I just create a double boiler using a heat proof bowl and a small pot.
Start with Chocolate…
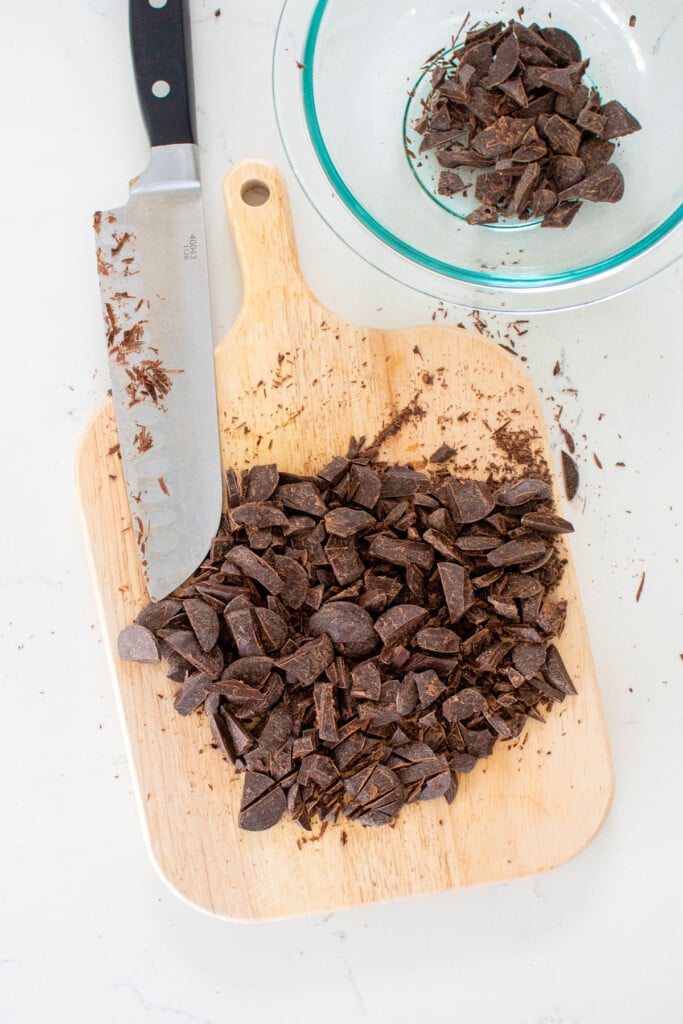
To temper chocolate, you start with chocolate pieces that are all the same size, just like you would if you were just melting chocolate. This can be chocolate chunks or a chocolate bar chopped into pieces. But the main thing is they should all be the same size so they melt at the same rate. The smaller the pieces, the quicker they will melt and it will be much easier, so I do recommend that these pieces be very small.
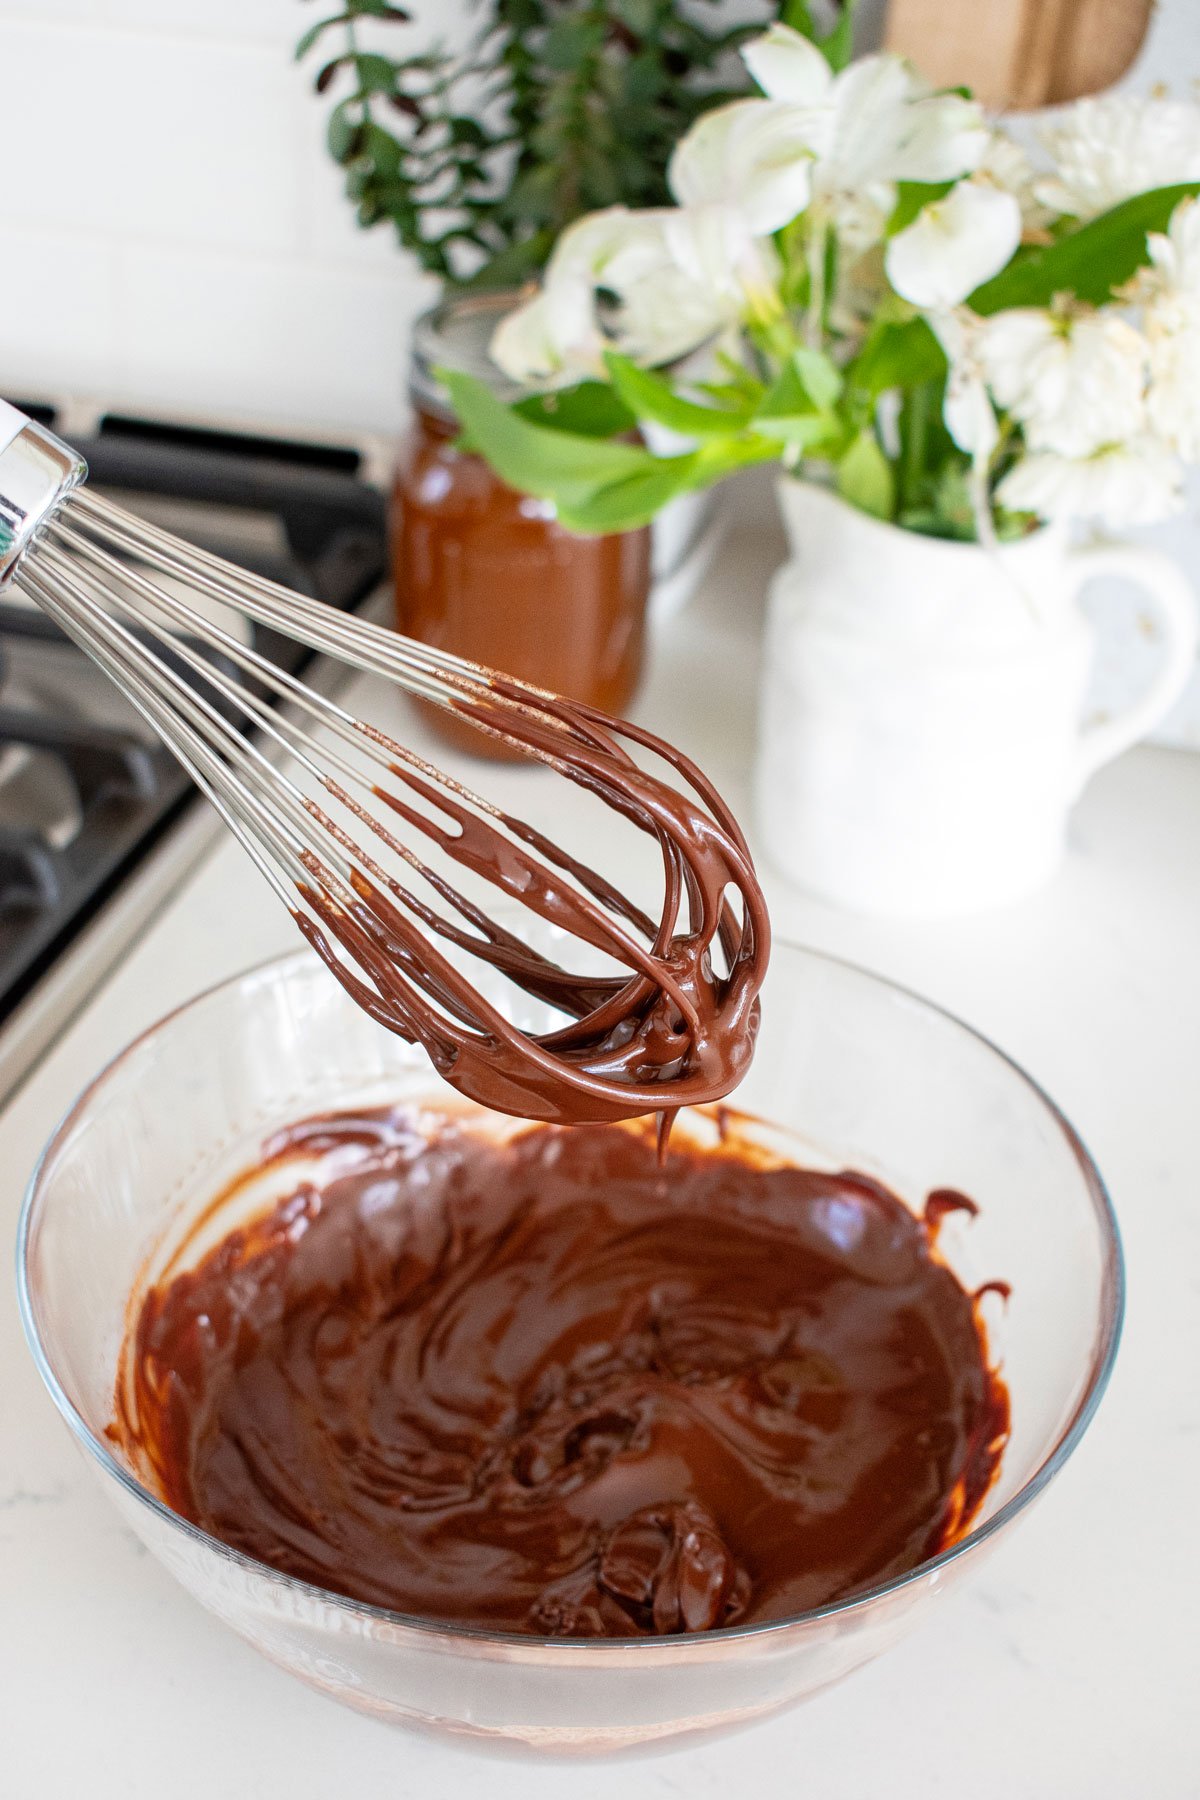
Melt Chocolate…
Once your chocolate is chopped, start by adding about 80% of the total chocolate you need to temper into your heat proof bowl. Set aside the remaining 20% of chocolate (you can eyeball this). Melt the 80% of chocolate and use your chocolate thermometer. Depending on the kind of chocolate you are melting (white, milk, dark) there will be different tempering temperatures that you will need to melt it to before removing from the heat. You can find these temperatures from the chocolate company that you purchase your chocolate from. And I have temperatures below for my favorite chocolates.
Temper Chocolate…
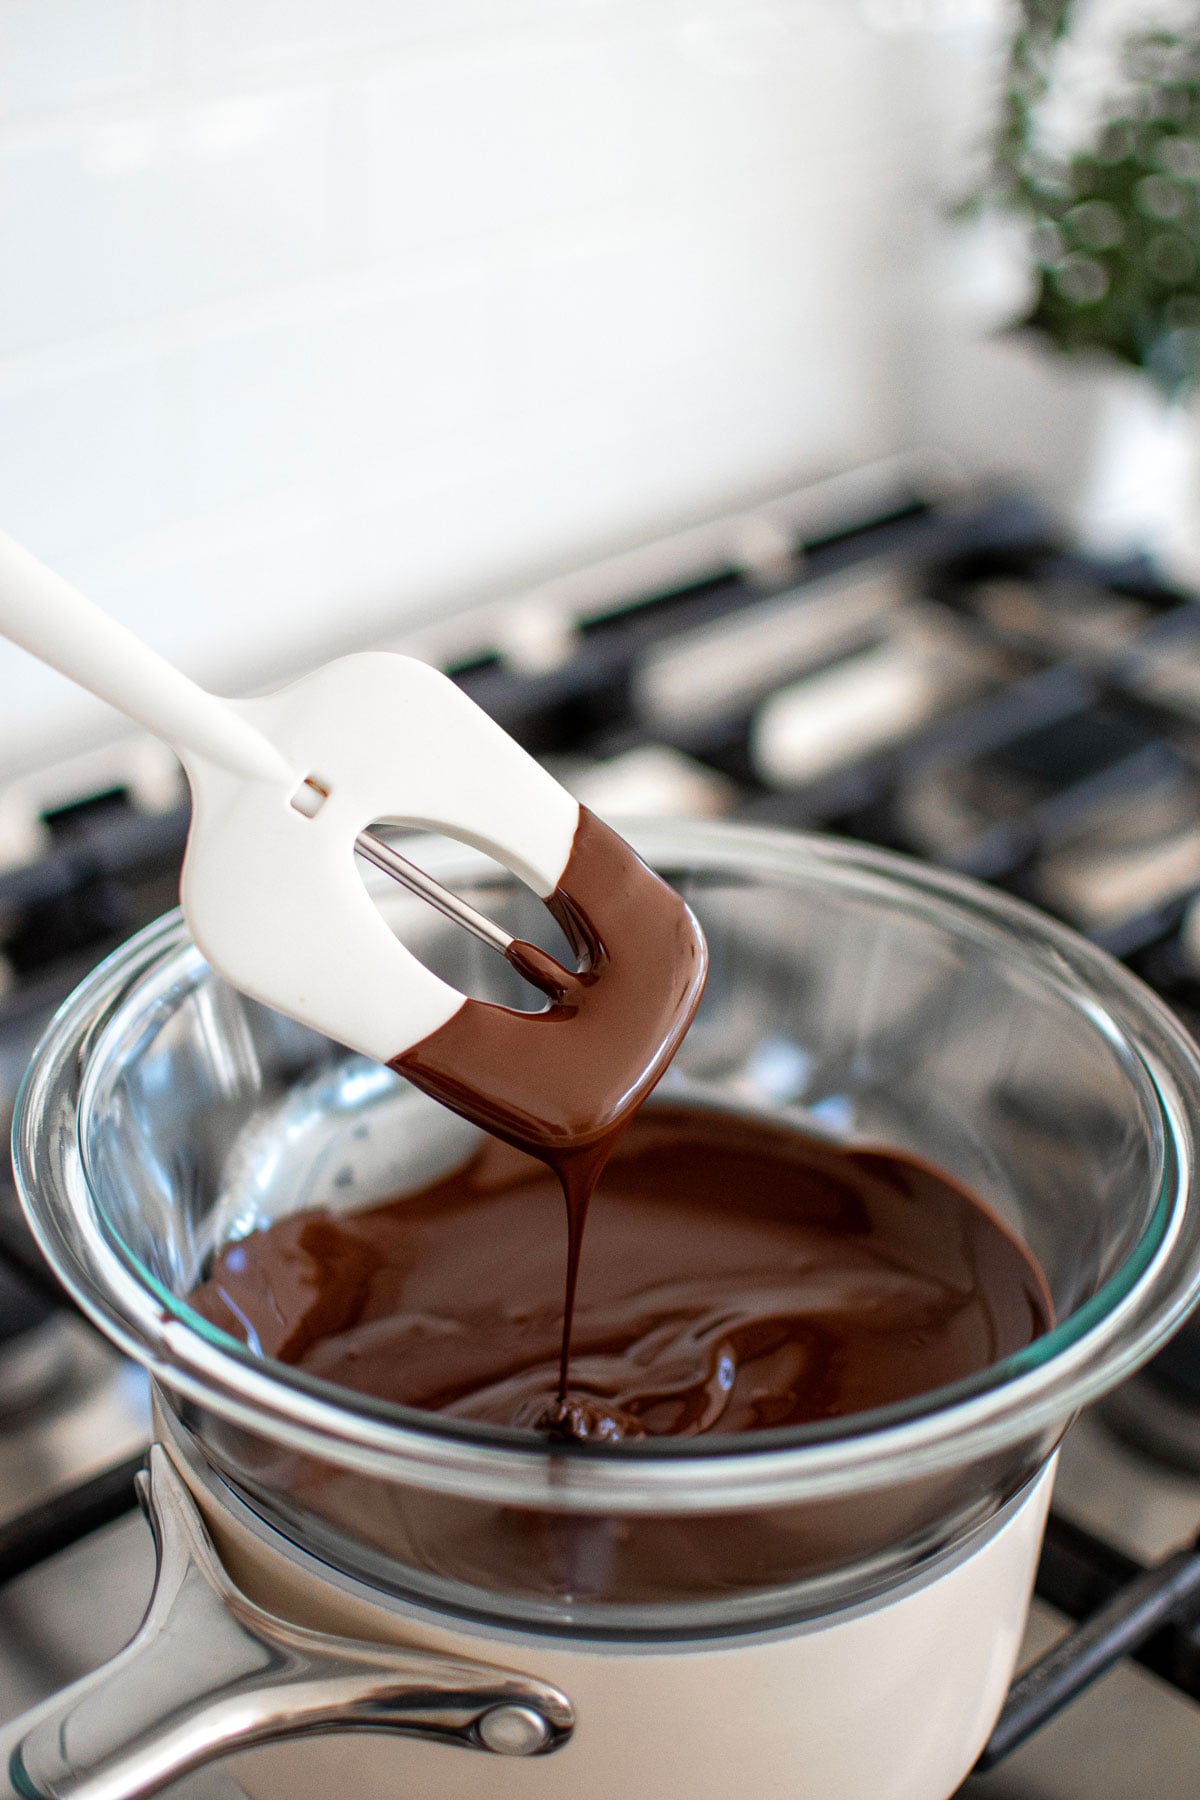
After the chocolate is melted to the right temperature, you will remove it from the heat immediately. You can use a bag of frozen fruit or an ice pack and set the bowl directly on top of that to stop the chocolate from heating, as chocolate can easily continue to rise in temperature. But, if you use this method, be sure to just set it on for a second to stop the heating, if you leave it on the ice, then the chocolate will completely harden on the bottom of the bowl.
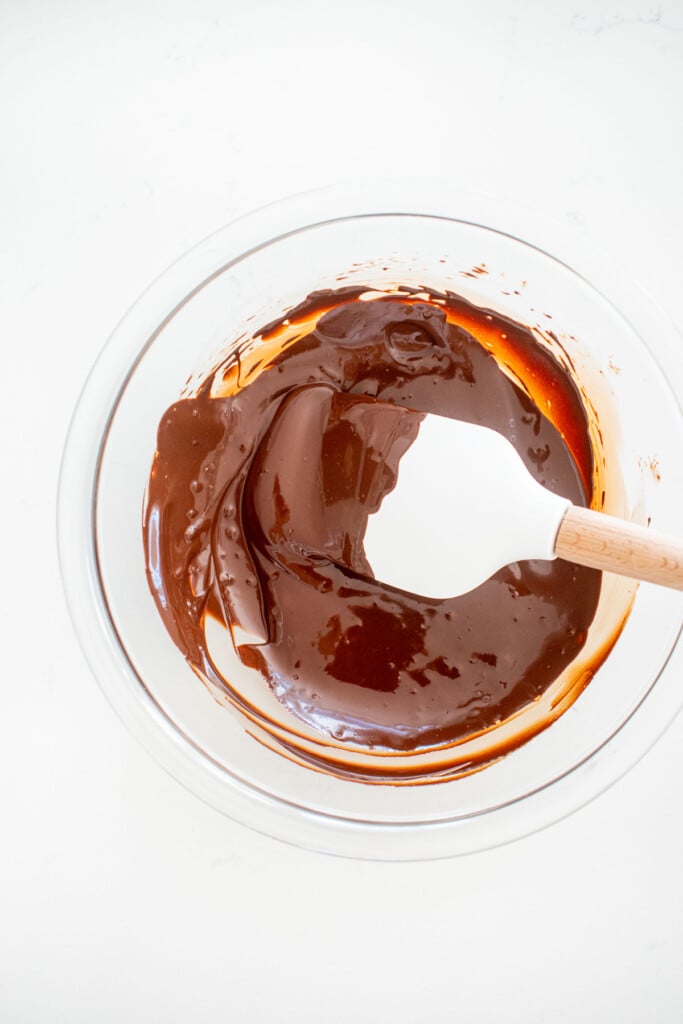
Then, you’ll add in the remaining 20% of chocolate slowly and stir it vigorously to combine it completely. Adding in this remaining 20% of chocolate will help the melted chocolate “remember” what it’s supposed to become once set. Once the remaining chocolate is added in, then you let the chocolate come down to a certain temperature. This temperature, again, depends on the kind of chocolate being tempered.
Ready to Use!
Once it comes down to the specific temperature, it’s ready to use for coating candy or dipping cookies! Once your confections are covered, I like to pop them in the fridge to speed up that process of setting the chocolate. Then your chocolate will be tempered.

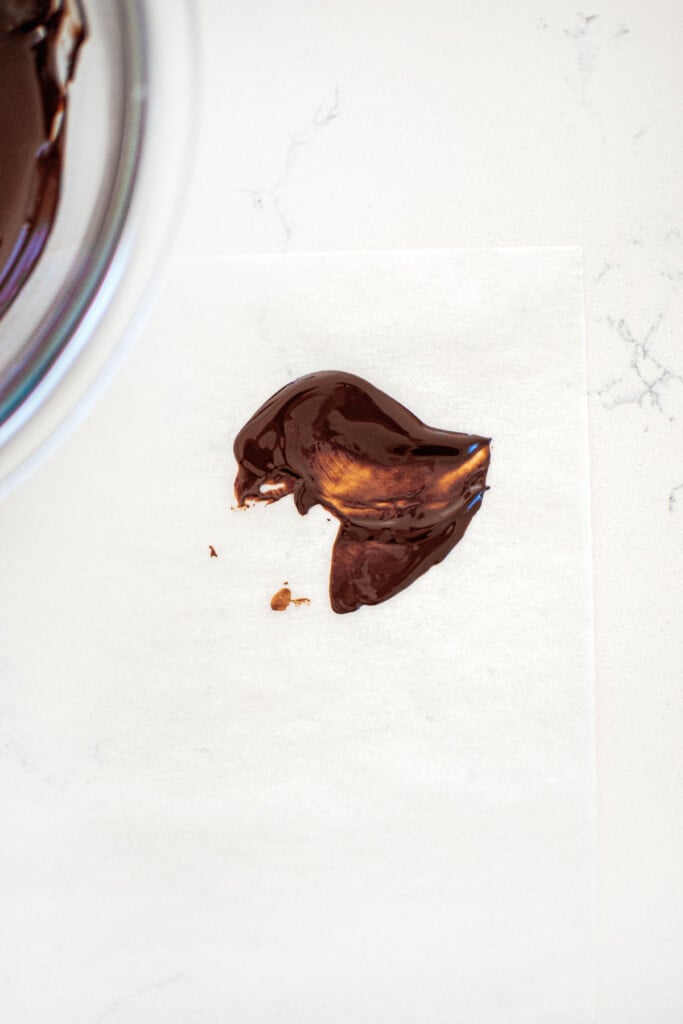
How do you test to see if your chocolate is tempered?
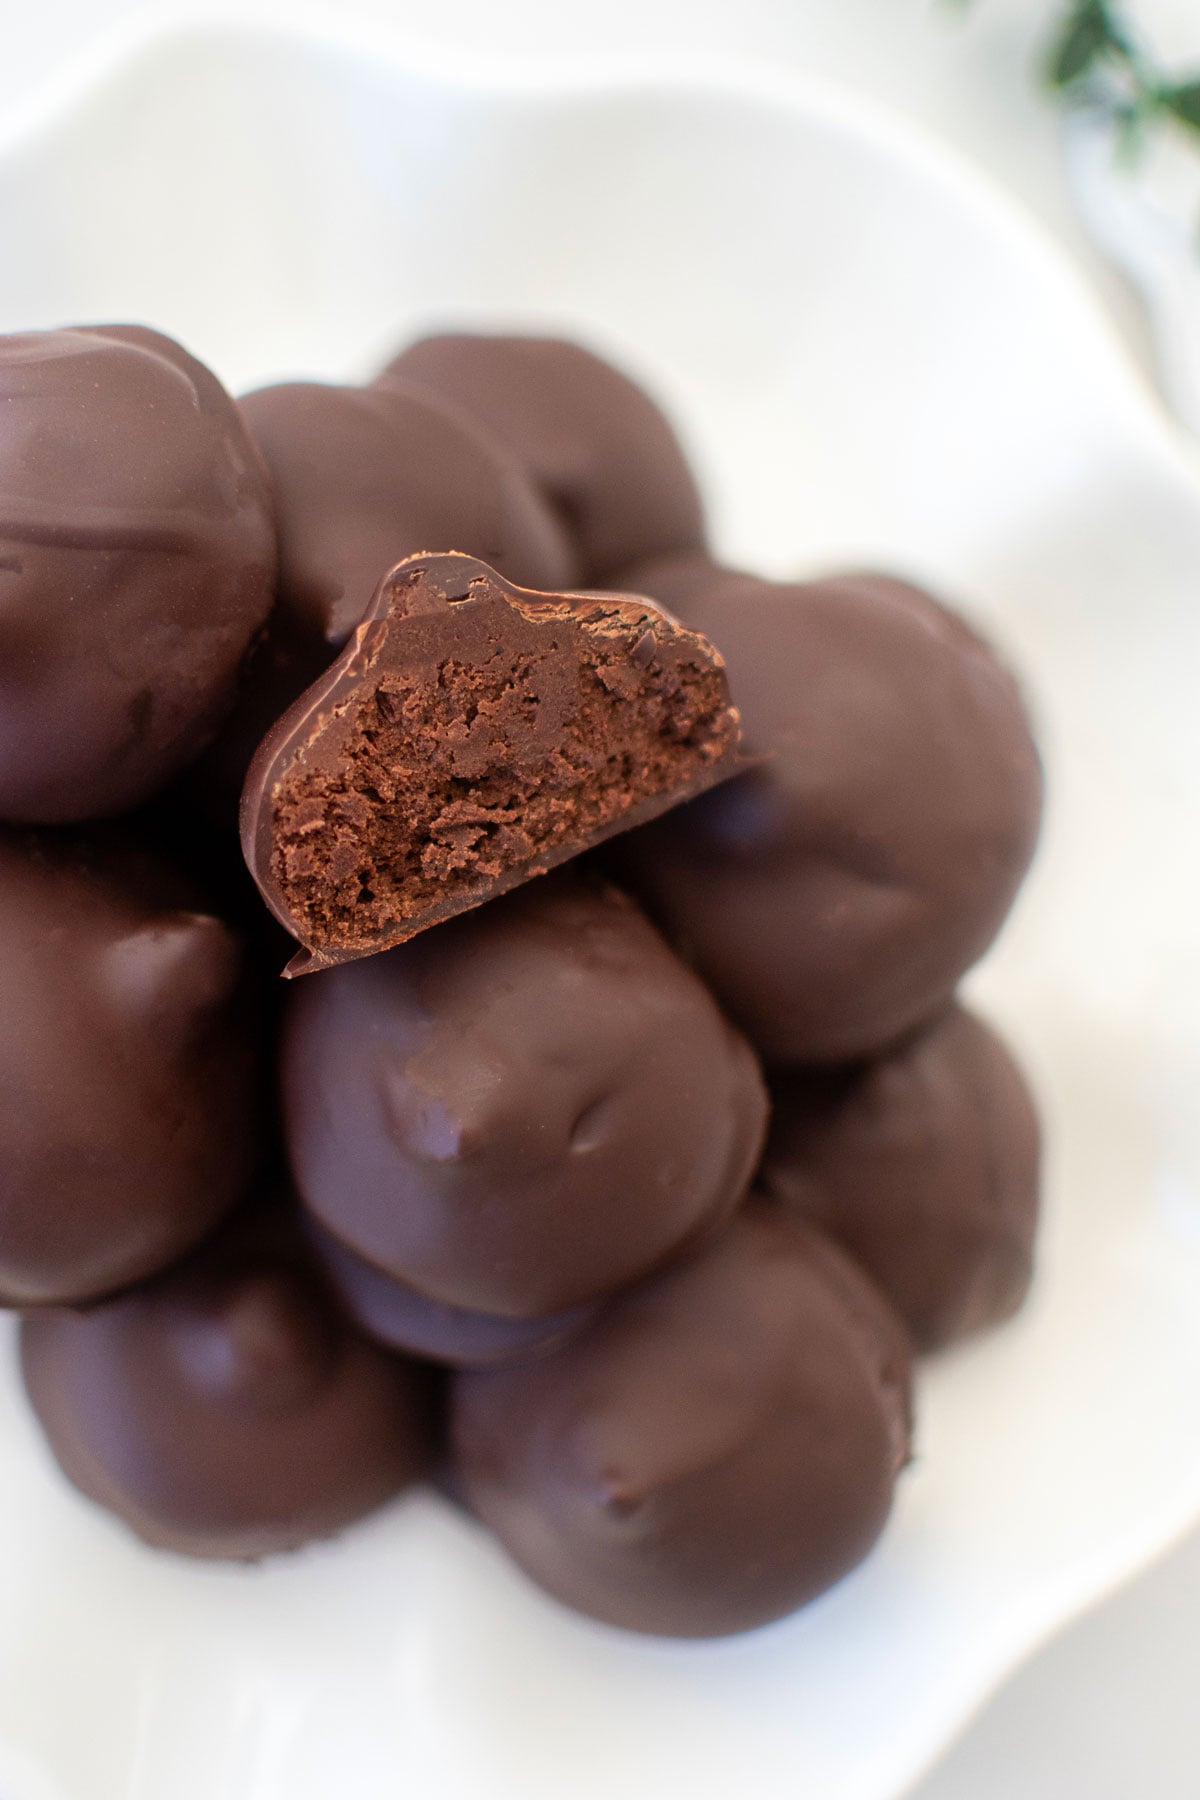
If you are unsure if you successfully tempered chocolate, you can test it before coating candies or cookies. The way to do this is to spread a small bit of chocolate onto a piece of parchment paper. You can just dollop a small spoonful onto the parchment paper and place it in the freezer for about 5 minutes.
Remove it from the freezer and let it sit out for a few minutes until it’s at room temperature. If it’s glossy and dry to the touch and snaps when you break it in half, then you’ve done it! If it’s sticky or soft, then something went wrong. But, the best part is you can just re-temper that chocolate. There’s no need to throw it out, you can just allow it to harden again, then chop, melt, and temper again.

How can I create a double boiler?
When creating a double boiler to melt chocolate, you want to use a heatproof bowl and a small pot. Your heatproof bowl can be metal or glass (I prefer metal for melting chocolate, maybe that’s just from my commercial baking experience). I use just a 2-quart pot usually as at home, I’m not doing that much.
I fill the pot about one-third full of water and put it over high heat. Once the water is boiling, add the heatproof bowl on top. Make sure that the bowl does not touch the water. If it does, then pour some of the water out and dry the bowl completely and start over. If the bowl touches the water it will get too hot, which could burn the chocolate, so that’s why it’s important to make sure it’s not touching as you are just using the heat of the water to melt the chocolate.

What is the best chocolate for tempering?
If you want to temper chocolate, the best chocolate for tempering is a chocolate that is made for melting or candy making. Classic chocolate chips that you use for baking are not that great for tempering as they can have additional ingredients in them that can make them more difficult to melt and temper.
I only temper white chocolate, milk, chocolate, or dark chocolate from Mama Ganache Chocolates. They are my favorite chocolate company for making any kind of candy or tempered chocolate things. You can buy directly on their website and they ship right to your door!
What kind of recipes would I use tempered chocolate in?
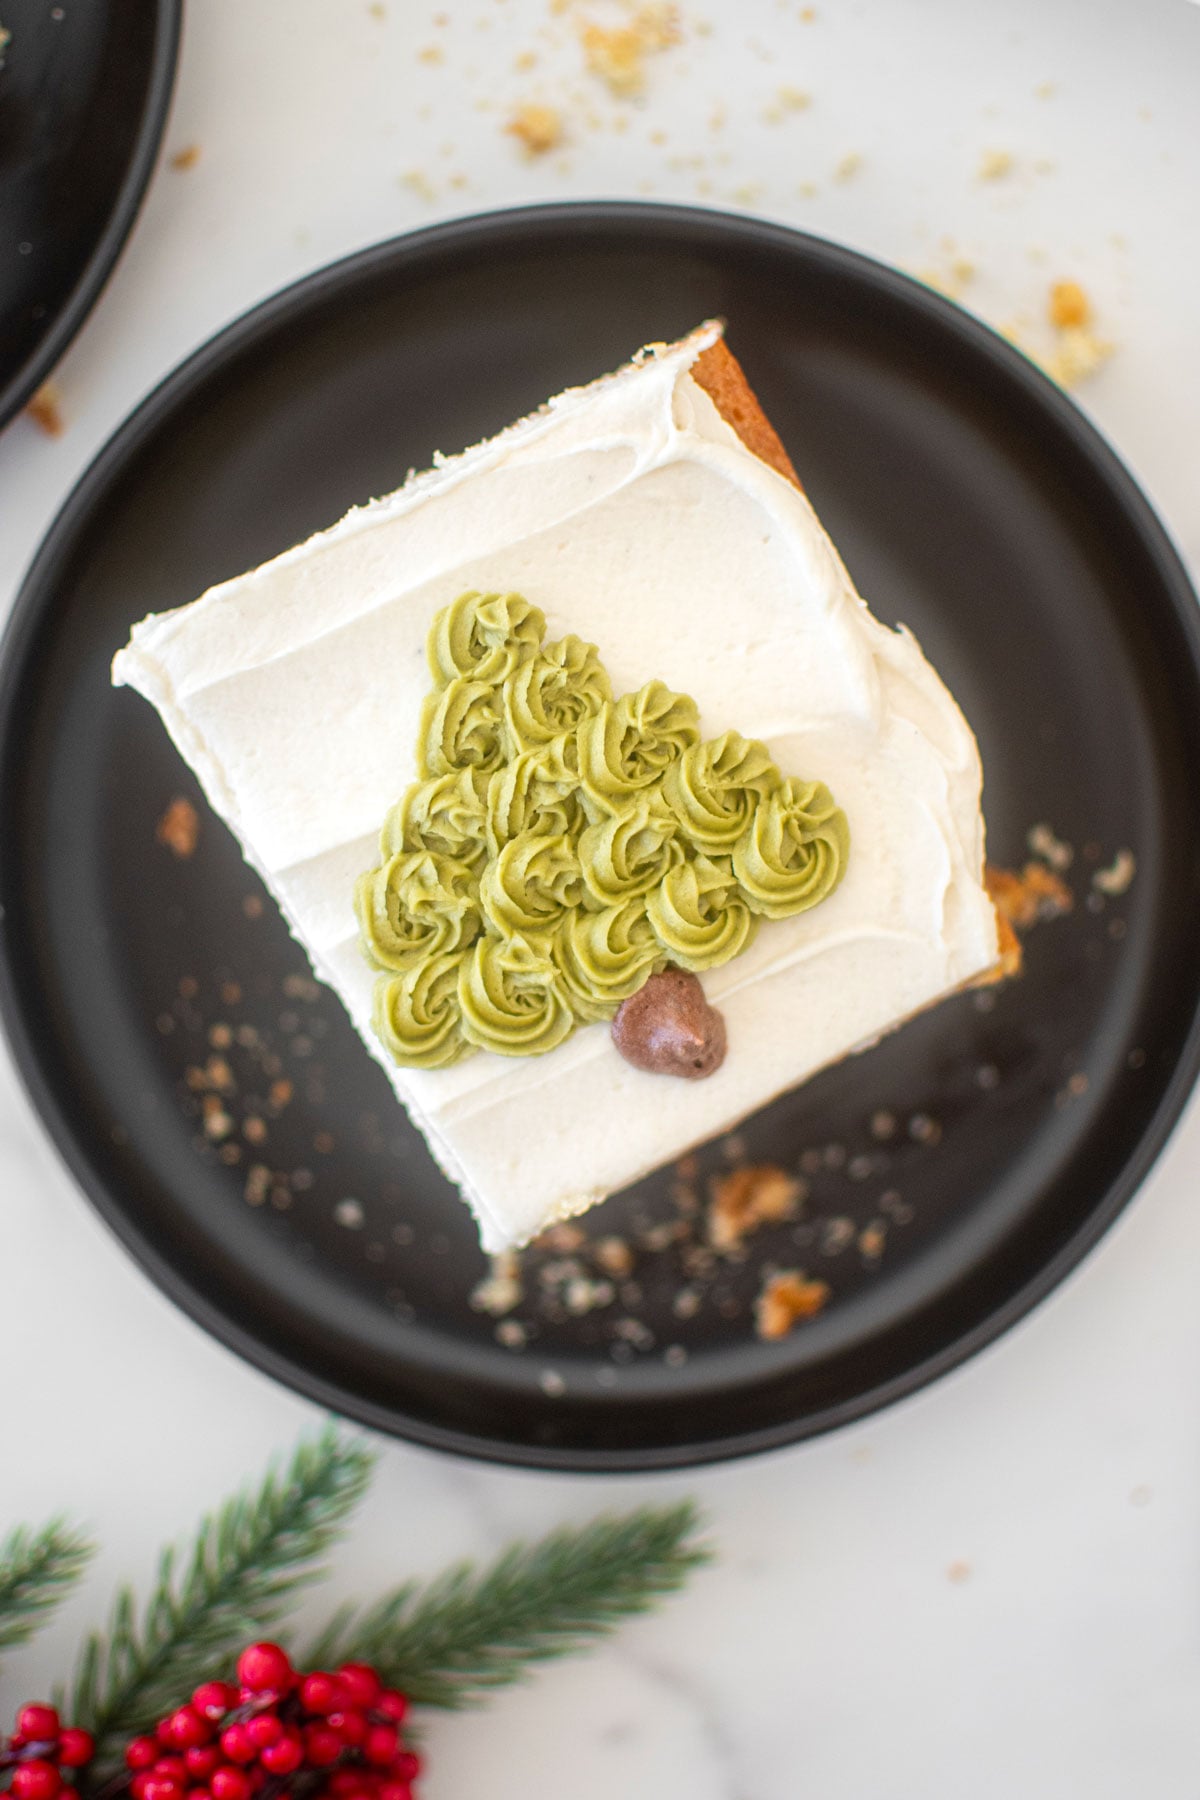
You can temper chocolate for any recipe that calls for melted chocolate. So, things like chocolate dipped cookies, buttercream candies, peanut butter cups, chocolate covered pretzels — you can temper chocolate for all of these recipes. Candy recipes like Peanut Turtle Candy, Chocolate Covered Raisin Clusters, Salted Almond Dark Chocolate Bars, or Pink Peppermint Ice would all be great recipes to temper chocolate if you want!
Chocolate Tempering Temperatures
These are the chocolate tempering temperatures that I got from the company I buy my chocolate from, Mama Ganache Chocolates. They have the best white, milk, and dark chocolate for melting and making candies. And, I got these tempering temperatures directly from them, so I know they are the exact temperatures for this exact chocolate. If you're using a different chocolate, you could ask the company what the tempering temperatures are.
White Chocolate
- Heat until it reaches 100°F
- Let it come down to 89°F
Milk Chocolate
- Heat until it reaches 110°F
- Let it come down to 89°F
Dark Chocolate
- Heat until it reaches 115°F
- Let it come down to 91°F
Baker's Tips
- Use chocolate that is made for melting or candy making.
- You can use any kind of chocolate (dark, milk, or white). Just be sure to to follow the tempering temperatures for each different kind.
- You can use a metal or glass bowl for melting, either works.
- You don't need to temper chocolate for recipes that will be stored in the fridge as the fridge will keep non tempered chocolate hard anyways, so there's no need to do extra work.
- High Altitude — Follow the recipe as noted. It may take a bit longer to temper chocolate at high altitude as water boils at a lower temperature, therefore the heating process will take longer to reach the desired temperature.
How to Temper Chocolate for Candy Making
- Make sure your chocolate is chopped (if need be) and all chocolate pieces are the same size. If you are using Mama Ganache Chocolates, then I usually don’t chop these more, the medallions that they come in are just fine for melting. But, if you want it to be quicker and smoother, then you can chop these too!

- Add about 80% of your chocolate that you want to temper into a heat proof bowl. Set aside the remaining 20%. You can use your scale for this or you can eyeball, either way is fine. Melt the 80% chocolate that is in the heatproof bowl using the double boiler method. Melt until the chocolate reaches 100°F degrees for white chocolate, 110°F degrees for milk chocolate, or 115°F degrees for dark chocolate. Remove from the heat immediately.
- Slowly add in the remaining 20% of chocolate and vigorously stir to combine completely. Allow the chocolate to come down to 89°F temperature for white chocolate and milk chocolate, or 91°F temperatures for dark chocolate.
- You can test to see if it's tempered by putting a small bit on a piece of parchment paper. Place it in the freezer to set. Remove it and let it come to room temperature. If it's glossy and snaps, then it's tempered. Use the tempered chocolate in your recipe to coat candies or cookies.
Recipe FAQ's
I note in the recipe to use 10 ounces of chocolate, this is about 10 servings. This will be enough chocolate for half dipping one batch of cookies in chocolate. If you need more chocolate, you can simply temper more. Or, if you're following a recipe that is chocolate coated, use the amount of chocolate the recipe calls for and just follow the steps to temper it.
Yes! No matter how much chocolate you're tempering, the process is exactly the same. So you can apply this technique to any recipe you are using that you want to have tempered chocolate.
You can temper dark chocolate, milk chocolate, and white chocolate. You do not want to temper chocolate chips or other chocolates that have additional ingredients like stabilizers in them, as those will not melt very well for tempering.
Recipes to Use Tempering Chocolate For
I recommend tempering chocolate for candies or cookies that are dipped and are going to sit out at room temperature. Here's some recipes when you would use this technique. While you don't need to temper here, you can if you're gifting or serving these at a party!
More Baking Tutorials


We Love Organic Feedback!
Thanks a waffle lot for stopping by 🧇 If you loved this recipe, sprinkle some love by leaving a ⭐⭐⭐⭐⭐ review — it really helps me organically reach dog loving foodies like you! I personally read and appreciate every message!
Also, be sure to subscribe to our YouTube channel and join John John and me in the kitchen for step by step recipe videos! And subscribe to our newsletter for new and seasonal recipes!
How to Temper Chocolate for Candy Making
Equipment
- Digital Food Scale
- Chocolate Thermometer
- Heatproof Mixing Bowl
- Small Pot
- Spatula
Ingredients
- 10 ounces chocolate of your choice, melting chocolate preferred
Instructions
- Make sure your chocolate is chopped (if need be) and all chocolate pieces are the same size. If you are using Mama Ganache Chocolates, then I usually don’t chop these more, the medallions that they come in are just fine for melting. But, if you want it to be quicker and smoother, then you can chop these too!
- Add about 80% of your chocolate that you want to temper into a heat proof bowl. Set aside the remaining 20%. You can use your scale for this or you can eyeball, either way is fine.
- Melt the 80% chocolate that is in the heatproof bowl using the double boiler method. Melt until the chocolate reaches 100°F degrees for white chocolate, 110°F degrees for milk chocolate, or 115°F degrees for dark chocolate. Remove from the heat immediately.
- Slowly add in the remaining 20% of chocolate and vigorously stir to combine completely. Allow the chocolate to come down to 89°F temperature for white chocolate and milk chocolate, or 91°F temperatures for dark chocolate.
- You can test to see if it's tempered by putting a small bit on a piece of parchment paper. Place it in the freezer to set. Remove it and let it come to room temperature. If it's glossy and snaps, then it's tempered.
- Use the tempered chocolate in your recipe to coat candies or cookies.
Notes
- Use chocolate that is made for melting or candy making.
- You can use any kind of chocolate (dark, milk, or white). Just be sure to to follow the tempering temperatures for each different kind.
- You can use a metal or glass bowl for melting, either works.
- You don't need to temper chocolate for recipes that will be stored in the fridge as the fridge will keep non tempered chocolate hard anyways, so there's no need to do extra work.
- High Altitude — Follow the recipe as noted. It may take a bit longer to temper chocolate at high altitude as water boils at a lower temperature, therefore the heating process will take longer to reach the desired temperature.
- White Chocolate: Heat until it reaches 100°F. Let it come down to 89°F.
- Milk Chocolate: Heat until it reaches 110°F. Let it come down to 89°F
- Dark Chocolate: Heat until it reaches 115°F. Let it come down to 91°F
Nutrition
The Bake Shop
Visit The Bake Shop for foodie inspired tees, sweatshirts, and accessories. Find my favorite kitchen tools (with discounts!) in the Kitchen Shop. And shop our collection of food inspired dog accessories too!

Love using this technique for gifting chocolate.