How to Roll Out a Pie
Pie season is here, and if rolling out a pie has been something that you have shied away from, then this is your time to learn how to roll out a pie! I am going to share with you all the tips and tricks I have from when I owned my bake shop, and I taught so many people (with zero baking experience) how to roll out a pie.
If you're looking for pie recipes you can apply these techniques to, check out some of my favorite fall pie recipes like Brown Sugar Honey Apple Pie, Brown Butter Apple Pie Without Eggs, Cherry Chocolate Chip Pie, or Vanilla Bean Apple Pie.
In This Baking Guide
- How to Roll Out a Pie
- Step by step photos
- Tips and tricks for rolling out a pie
Summarize & Save This Content On
Rolling out a pie is really fun, and while it may seem intimidating, it is really quite freeform and easy. I am going to show you, step by step, with photos, how to roll out a pie! I’ll go through all the steps, provide tips and tricks, and you’ll learn how to flute a pie crust.
You can use these easy tips and tricks for how to roll out a pie for any pie recipe you are using. This includes any of my recipes or any other recipe that you may have in your family recipe box. Learn how to roll out a pie and put it together with my easy tutorial.

How to Roll Out a Pie and Put It Together
Let’s dive into how to roll out a pie (and put it together!). First you should have your pie crust made. If you are new to baking pie crust, and want some tips and tricks, make sure to check out How to Make Pie Crust in a Mixer recipe as it has great tips for beginners on making pie dough. You can also check out How to Make Pie Crust with Sourdough Discard if you want to use up that extra sourdough discard for a tangy pie crust option!
Step 1 : Make Filling & Egg Wash
While you may be thinking that step 1 would be to roll out your pie crust, there are a few steps before that. Before you start rolling out your pie crust, you want to make sure your filling is made and ready. Some recipes may call for you to cook filling and let it cool before assembling. And some recipes may just call for mixing together apples and sugar.
Either way, make sure that your filling is made and it’s ready to put into the pie crust before you roll it out. Next, you want to make sure your egg wash (or pie wish if you are not using egg) is also ready. This may entail cracking and whisking an egg so it could take a few minutes. Get both of these things ready now. Pie crust is temperamental as it is cold, so the longer it sits out, the more it is compromised. I talk about this in my How to Make Pie Crust in a Mixer post, so make sure to check that out.
And, if you are making a pie where the pie crust needs to be par baked, like Chocolate Bourbon Pecan Pie or Honey Pecan Pie, then the filling step may be done later (follow the recipe). But, traditional fruit filled pies, you'll want to do this first.


Step 2 : Flour Your Work Surface
Flour your work surface lightly with flour. This will help your pie crust from sticking. But, you do not need a lot of flour. Only a couple tablespoons at most. If your pie crust is cold (which it should be), the it really doesn’t need much flour as it won’t stick that much. So keep that in mind.
Step 3 : Grease Your Pie Pan
Grease your pie pan. Make sure this is out and ready to go and it’s greased. You can use a little bit of soft butter to do this, or you can save the butter wrapper from your pie crust for this. Check out The Best Nontoxic Pie Pans to Bake With for tips on the best pie pans to use and why it matters.
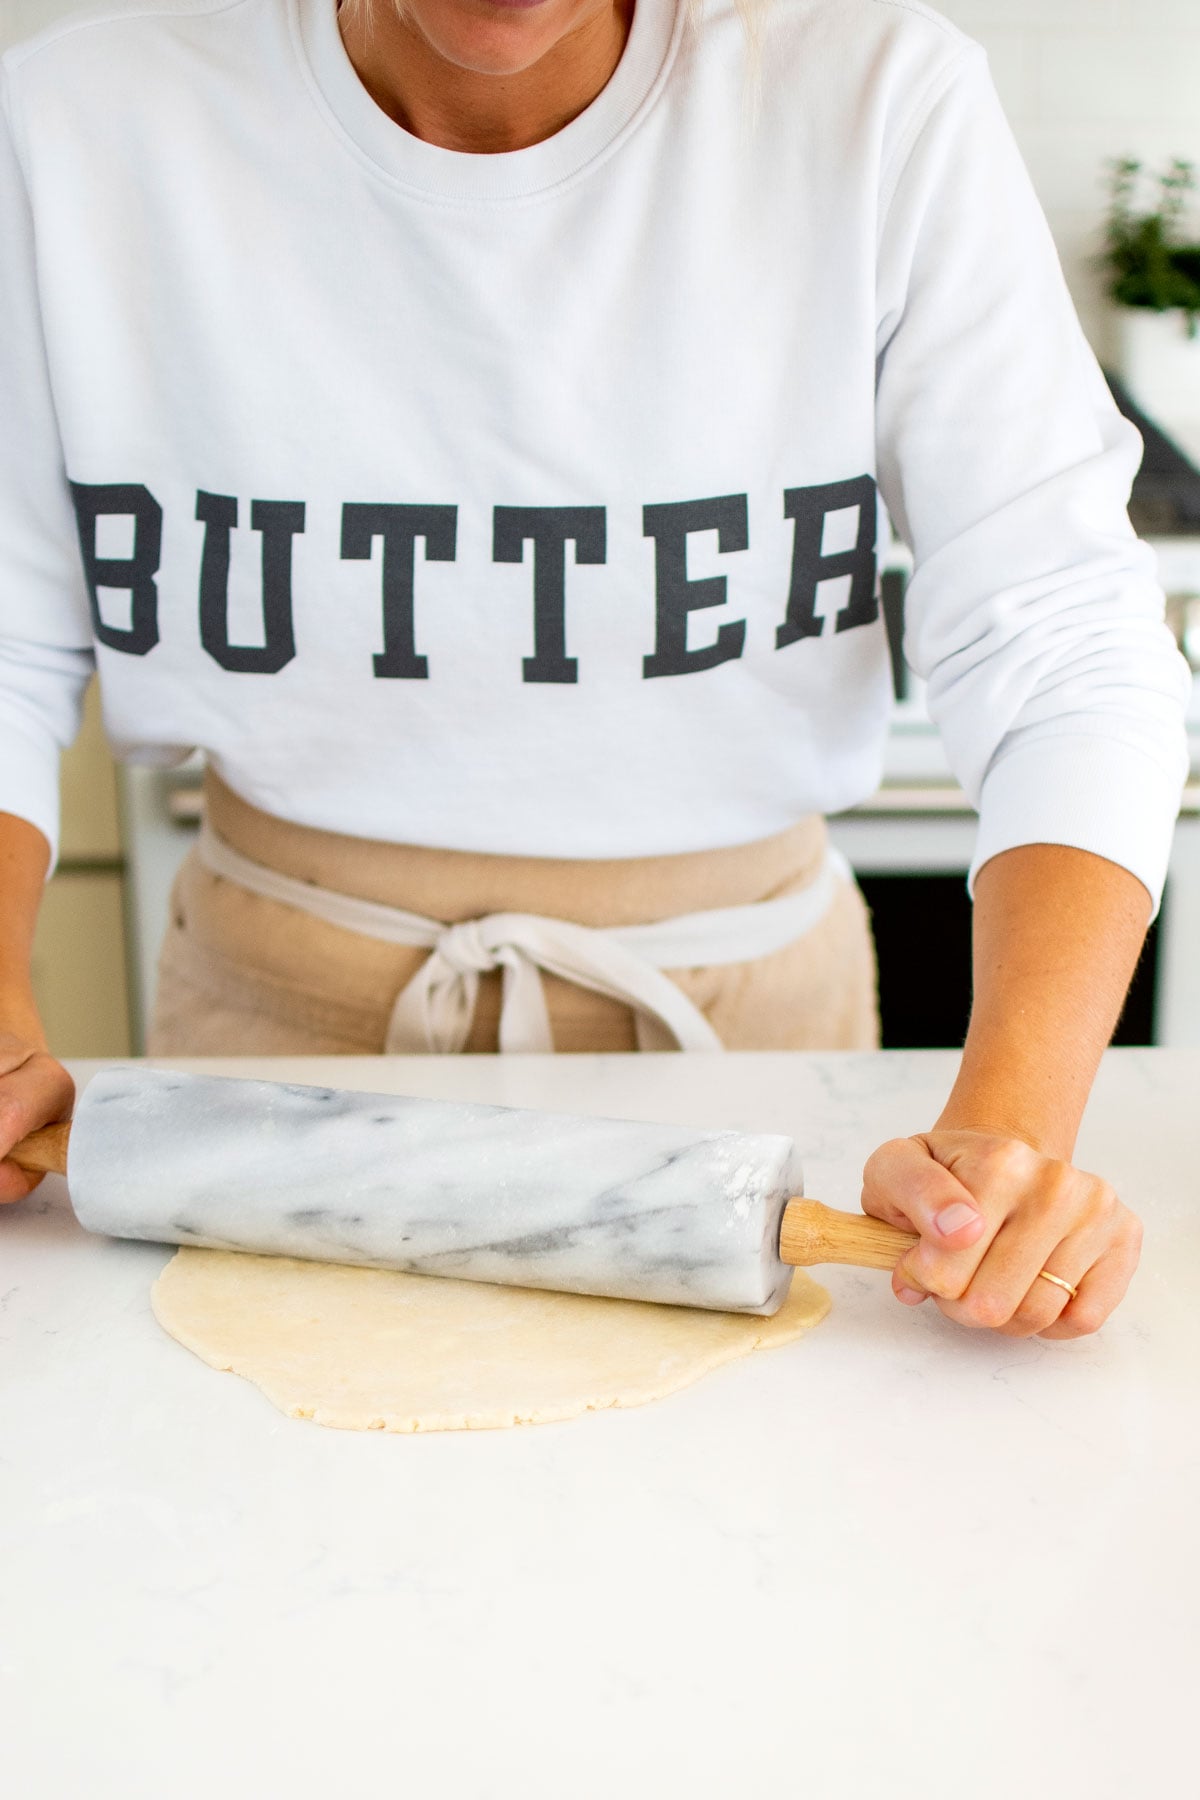
Step 4 : Roll Out The Bottom
Start by rolling out the bottom pie crust first. Start rolling the rolling pin evenly along the disk of pie dough. Then turn it 45 degrees and roll a few more times. Turn it 45 degrees and roll a few more times. Continue to do this so you get an even pie crust, as this helps so it doesn’t get too thin on either side from you rolling it one certain way. Roll it out to about ¼-inch thick.
This should be slightly larger than your pie pan. If your pie pan has a lip, it should fit right onto the lip. You want to have a little extra, about 1 ½-inches or so, because you will need to fold it over the top and roll it in to create the crust. This helps seal in the filling.
Place your pie crust into the pie pan and lightly press it up against the sides. At this time, you can put the pie pan in the fridge so that this bottom crust stays nice and cold! This is a great trick if you are new to baking pie or not very fast.


Step 5 : Roll Out The Top
Now, roll out the top of the pie crust by using the same method as above so you get an even disk. Your top pie crust should fit right to the edge of the pie pan, enough that there won’t be a gap between the bottom crust and the top as you don’t want filling to ooze out.
Place the top pie crust into the pan with the bottom and leave it in the fridge for a few minutes. You can use this time to clean up your workspace and preheat your oven. This will ensure that your pie crust remains flaky as it will be nice and cold right as it goes into the oven.
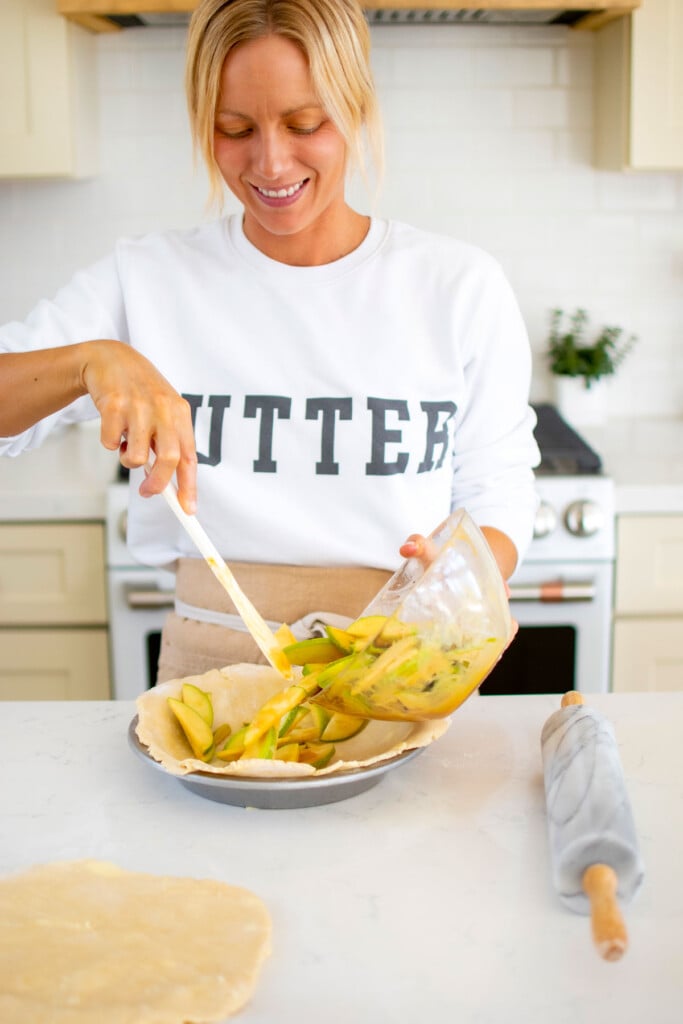
Step 6 : Fill Your Pie
Once your oven is preheated, remove the pie pan from the fridge. Remove the top pie crust and fill the pie with filling. When you have a fruit filling, try to make a mound of filling so it’s shorter towards the edges and taller in the middle. This will help prevent leakage when baking.


Step 7 : Seal Your Pie
Place the top pie crust onto the filling. Now it’s time to seal the pie closed. This is important for baking so the filling doesn’t leak out, but also so that it cooks properly all wrapped up inside.
To seal your pie, pinch the top pie crust into the bottom pie crust with your fingers, this is known as crimping it shut. Then roll the top pie crust into the middle of the pie pan, so it’s even with the edge of the dish. Once you get familiar with putting together pies, this will be more like one motion.


Step 8 : Flute Your Pie
The next step is to flute your pie crust. This is very simple to do, and it’s completely optional. But, it will give your pie that signature ruffle crust!
To flute your pie, take the thumb and pointer finger of your right hand and the pointer finger of your left hand. Take your right hand (thumb and pointer) and put it on the rolled portion of the dough on the outer edge. Then take your left hand (pointer) and put it on the inner edge of the dough in between those fingers.
Push your left pointer finger in, as you pinch your right thumb and pointer together. This creates a flute! Move your hands over a notch and continue to do this all around the edge of the pie. Now, your pie is fluted!


Step 9 : Pie Wash Your Pie
Next step is to “pie wash” your pie. You have this ready to go already, so all you have to do is grab a pastry brush and brush it all over the entire pie crust. If you are using egg or an egg substitute pie wash, you can do this now as well. (I'm actually using heavy whipping cream in these photos as this is my Caramel Apple Pie).
You can use a beaten egg, heavy whipping cream, or a 1 to 1 ratio of honey and water (I find 1 tablespoon of each works best). If using honey and water, microwave the two ingredients together for 20 seconds to melt the hone so it combines with the water.
You want to do this before venting your pie because if you're using egg wash it can sometimes be thick, and this can cause it to stick into the vent and prevent it from venting. Which we don’t want! So, that’s why I say do this before venting.


Step 10 : Vent Your Pie & Add Turbinado Sugar
All you have left to do now is vent your pie! I use a pairing knife or even a steak knife to vent my pies. Make about four vents in the middle like a plus sign. I start in the middle and I poke in with my knife. I actually make the top part of the vent larger by wiggling my knife back and forth, and then cut down a little bit more. It ends up looking like a tear drop, and I do this four times in the shape of a plus sign.
This is a typical pie vent. You can get a little fancy if you want and do three of these or do five of these and make it look more like a star. You can even do one large slit in the middle if you prefer. It doesn’t really matter here, so long as your pie has some breathing vents!
If you are adding Turbinado sugar to the top of your pie for that signature crunch and sparkly finish, then you would also do that now. It sticks great to pie wash, so right after you pie wash, you can just sprinkle the entire crust with Turbinado sugar. This is completely optional, so feel free to skip if you don’t have it or don’t want this addition.
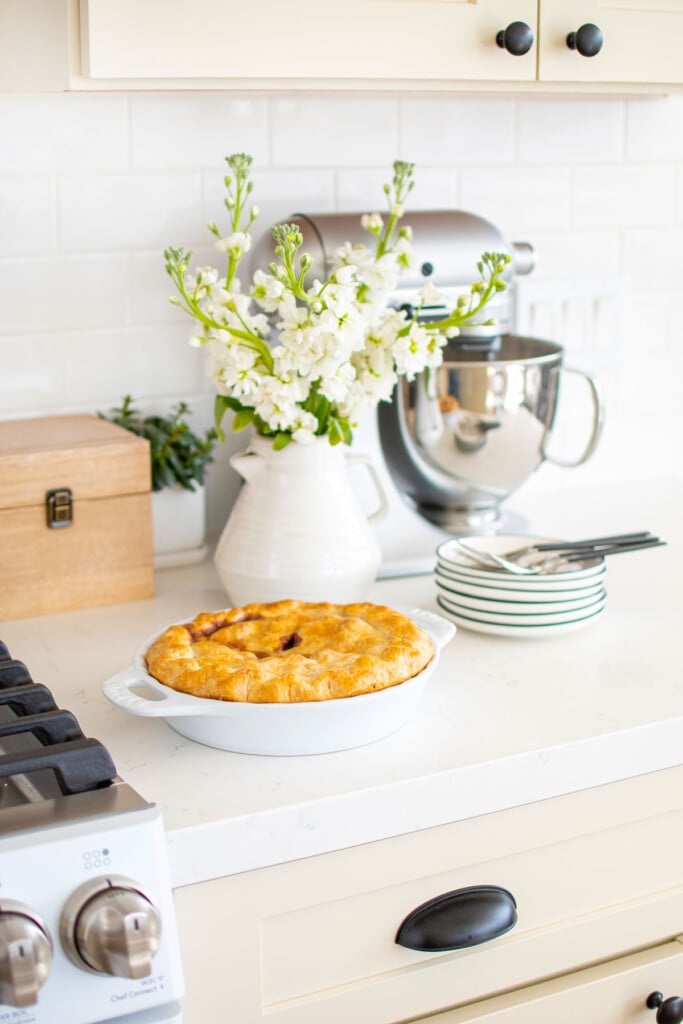
Now that you have successfully rolled out and put together a pie, all you must do now is bake it! I always bake my pie on a baking sheet, (just in case). You never know when you may have an explosion or if some fruit was just juicer than you could have imagined.
It’s always better to be safe than sorry and it really helps tremendously in keeping your oven cleaner if you bake your pie on a baking sheet! Plus, it helps when putting in and removing from the oven as it’s more stable.
Make sure to bake your pie until golden brown and always look for visual signs that it’s done. Most pies bake at 350°F for about an hour or so. If you like an extra golden brown crust, my trick is to turn the oven up to 400°F for the last 5 to 10 minutes. Happy pie baking!

Looking for my sweatshirt? Shop my Butter College Sweatshirt. Want the recipe for this pie? Check out my Caramel Apple Pie.
Pie Baking FAQ's
You can use any kind of rolling pin you like to roll out a pie. It can be wood, marble, or even plastic. As long as you are comfortable using it, then that’s what matters! I prefer a marble rolling pin as it's more durable and lasts longer.
Yes, you should always grease your pie dish to be safe. While most pie crusts are made up of mostly butter, you can get away with not greasing a dish a lot of the time. Trust me, as I do forget sometimes! But I have had the pie stick sometimes as well. So, to be on the safe side, you should get in the habit of always greasing your pie dish. You can do this with a little bit of butter from your butter dish. Or if you save the butter wrapper from the pie crust, this is a great use for that to just swirl that around in the dish.
Cast iron, aluminum or stainless steel will give you the most buttery, flaky pie crust because these materials conduct heat the best. I prefer cast iron as my top choice. Read more and watch the video in The Best Nontoxic Pie Pans to Bake With.
Crimping means to press together two pieces of dough to seal it shut. In the case of pie, that means press together the top and bottom crust to crimp it shut. If you've made my pie recipes before, you've heard me say crimp the pie when you place the top crust on top and you are sealing and rolling the edge.
Absolutely not! After crimping (sealing) your pie and rolling your pie crust, you can flute it, but you do not have to. This is traditionally how pies are finished, giving them that signature crust look. However, it will not affect how they bake, just how they look! But, with my easy instructions, you surely can learn how to flute a pie crust right here! If you're feeling lazy, press a fork into the rolled pie crust for a quick and easy pattern that requires minimal effort!
If you do not want to flute your pie crust, you can leave it pinched or rolled just as it is. Or you can take a fork and go around the edges and press down little fork marks, making a simple design. If you want to get really fancy you can take excess pie dough and cut out shapes (such as flowers, dots, leaves) and place them on the edge of the pie.
No, you do not have to egg wash any pie it’s just optional. While egg wash can help the pie brown more in the oven and give it a shiny finish, it’s not necessary. You can skip the egg wash on any recipe if you don’t eat eggs, or if you simply ran out. You can also brush your pie crust with milk or heavy whipping cream if you are egg free or run out of eggs. These two options will also help give your pie a golden brown crust.
Yes, venting your pie is very important as steam needs to be released from the pie during the baking process. This will help your pie filling cook evenly and also prevent a soggy pie crust.


The Bake Shop
Visit The Bake Shop for foodie inspired tees, sweatshirts, and accessories. Find my favorite kitchen tools (with discounts!) in the Kitchen Shop. And shop our collection of food inspired dog accessories too!

Leave a Reply