How to Pipe Buttercream Christmas Trees 5 Ways
Learn how to pipe How to Pipe Buttercream Christmas Trees five different ways! In this easy tutorial, I’m walking you through how to add buttercream Christmas trees to cookies, cakes, cupcakes, or brownies this holiday season.
If you want more Christmas recipes, be sure to check out some of my other favorites like Festive Gingerbread Snack Cake Without Frosting, Christmas Lights Gingerbread Snack Cake, Peanut Butter Pretzel Christmas Crack, Vegan Christmas Tree Brownies, or Easy Christmas Present Brownies.
A Quick Look At The Recipe
- Recipe Name: How to Pipe Buttercream Christmas Trees 5 Ways
- Ready In: 10 minutes
- Makes: 24 servings
- Main Ingredients: butter, powdered sugar, matcha powder
- Flavor Profile: sweet vanilla buttercream
- Dietary Info: eggless, no seed oils, gluten free, vegan swap available
- Difficulty: Easy!
- Why You’ll Love It: piping techniques for buttercream Christmas trees
Summarize & Save This Content On
Why You’ll Love This Technique
- Easy AF: I’m using 3 different techniques that are all incredibly easy! I also have a video so you can see exactly how these are piped.
- Festive: This is a simple way to be festive around the holidays! You can add these buttercream Christmas trees to any kind of desserts. Everything from cakes to cookies, I have instructions on how to add them below.
- Quick: This decorating technique is quick and simple. I don’t like to spend a ton of time decorating desserts. But, during the holidays it can be fun to slow down a bit and add some festive flair! So, this technique is quick and easy! Once you learn how to pipe Christmas trees, it just adds a few extra minutes to making your desserts that much more festive!
While I’m not a huge decorator, Christmas has my heart when it comes to taking a little extra time to decorate desserts! I’m usually a firm believer that spending too much time on something that you will just eat is absolutely nuts. But I can’t not do a little something extra around the holidays!
So, I’m going to show you how to pipe Christmas trees with a simple buttercream frosting. This technique is easy, quick, and it can make cakes, cupcakes, cookies, and brownies more festive. Plus, you can use organic dyes, making this a natural way to celebrate the holidays without any artificial colors. So, let’s learn how to pipe Christmas trees with my easy tutorial!
Ingredients

- Butter or Shortening: I usually use organic salted butter for buttercream, but you can also use organic vegetable shortening if you are vegan or simply don’t want to use butter.
- Powdered Sugar: You’ll need organic powdered sugar for the frosting.
- Vanilla Extract: I always put a little vanilla extract in my buttercream. My favorite is Simply Organic.
- Milk or Water: You’ll need milk or water for the buttercream, this will help get the desired consistency that you want that is best for piping out.
- Food Dye: You can use organic food dye, such as Suncore Foods Organic Green Dye or Pink Dye like you see here.
- Cocoa Powder: I use organic Dutch cocoa powder for the tree trunks.
- Sprinkles: This part is optional, but you can add naturally colored sprinkles on top of your trees if you would like. Some of my favorite sprinkles with no artificial colors are India Tree Nature’s Colors Nonpareils (these look like tiny ornaments!), India Tree Nature’s Colors Snowflakes, and India Tree Nature's Colors Red Sprinkles.
*For a full list of ingredients and measurements, visit the recipe card below. And, find all the natural dyes and sprinkles in my Amazon Shop.
Baker’s Tips
- If you are decorating a cake or cupcakes, you may be able to just use a little bit of the frosting from that recipe and use this technique. It just depends on how much frosting the cake recipe makes, but you may want to consider if you don’t want a ton of leftover frosting.
- If you want to decorate cookies or brownies then you’ll need to make additional frosting, so you can use the recipe here.
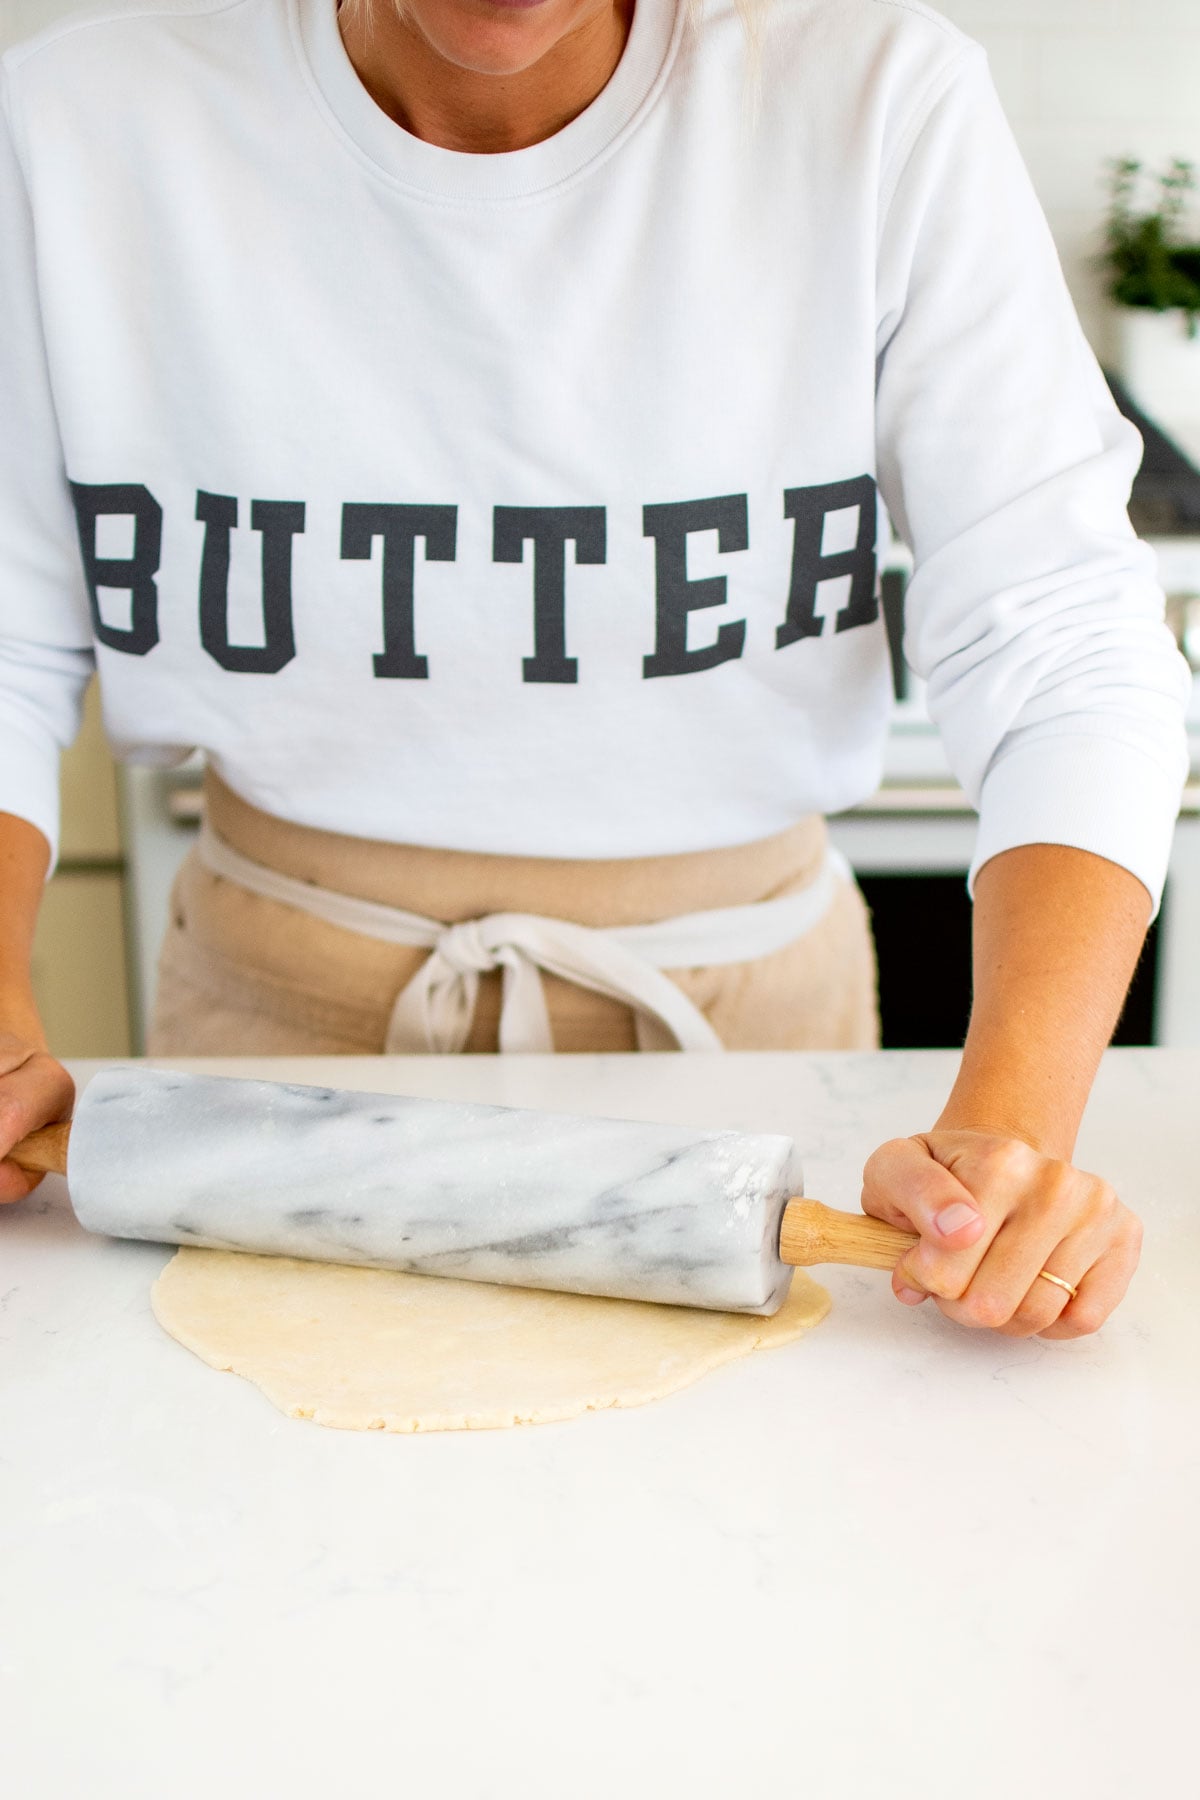
- Make sure your butter is soft when starting the buttercream. I prefer to leave butter out on the counter to soften naturally. You can do this overnight in the wintertime.
- Always sift powdered sugar, this is key for smooth and creamy buttercream. But it’s even more key to ensure you have no chunks in your buttercream for piping out of small decorating tips like we’re doing here.
- You can color the frosting any way that you like!
- You can use larger versions of these decorating tips if you are making a larger cake. Ateco makes larger option for all of these tips.
- Vegan: Use vegan butter or shortening and nondairy milk.
How to Pipe Buttercream Christmas Trees 5 Ways
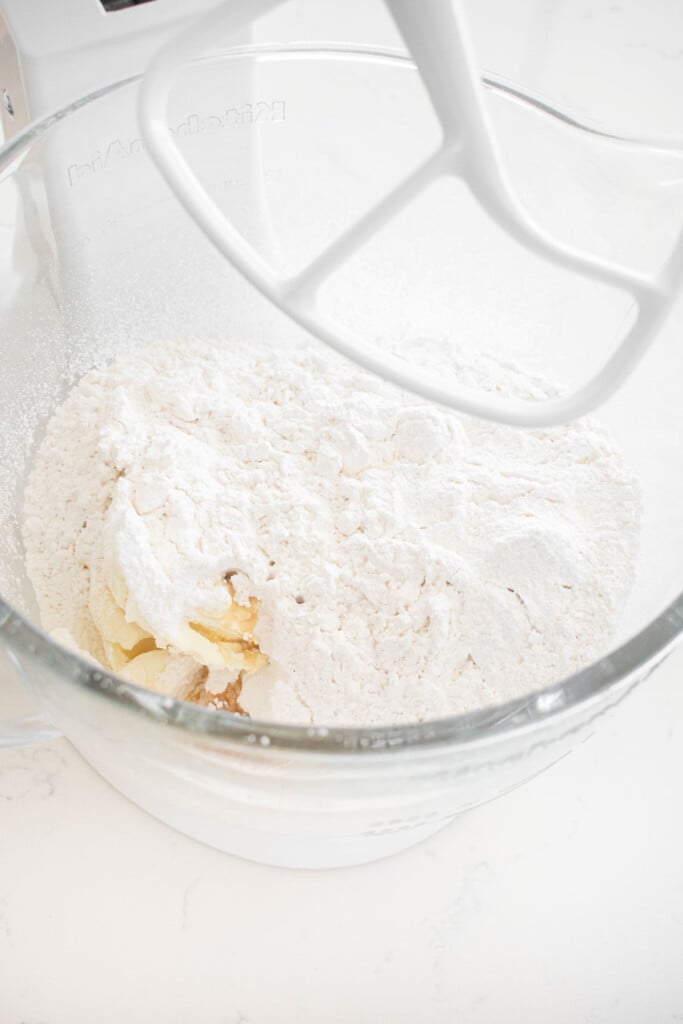
- To make the frosting: In the bowl of a stand mixer fitted with the paddle attachment, add the butter, powdered sugar, vanilla extract, and milk. Mix on low until combined.
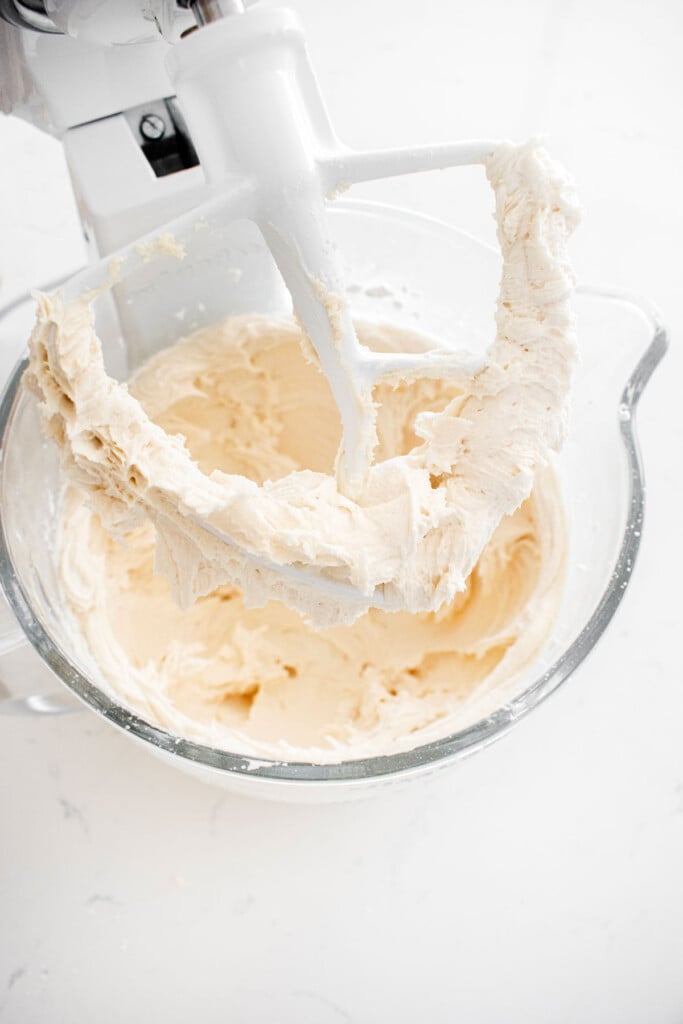
- Speed up mixer to high and mix for 2 to 3 minutes or until it’s light and fluffy. Be sure to scrape down the sides of the bowl halfway through and continue to mix. You want the frosting to be very smooth, creamy, and not super stiff as you’ll need to pipe it out of small decorating tips. If the frosting seems very stiff, you can add a bit more milk (1 tablespoon at a time) until you get the desired consistency.
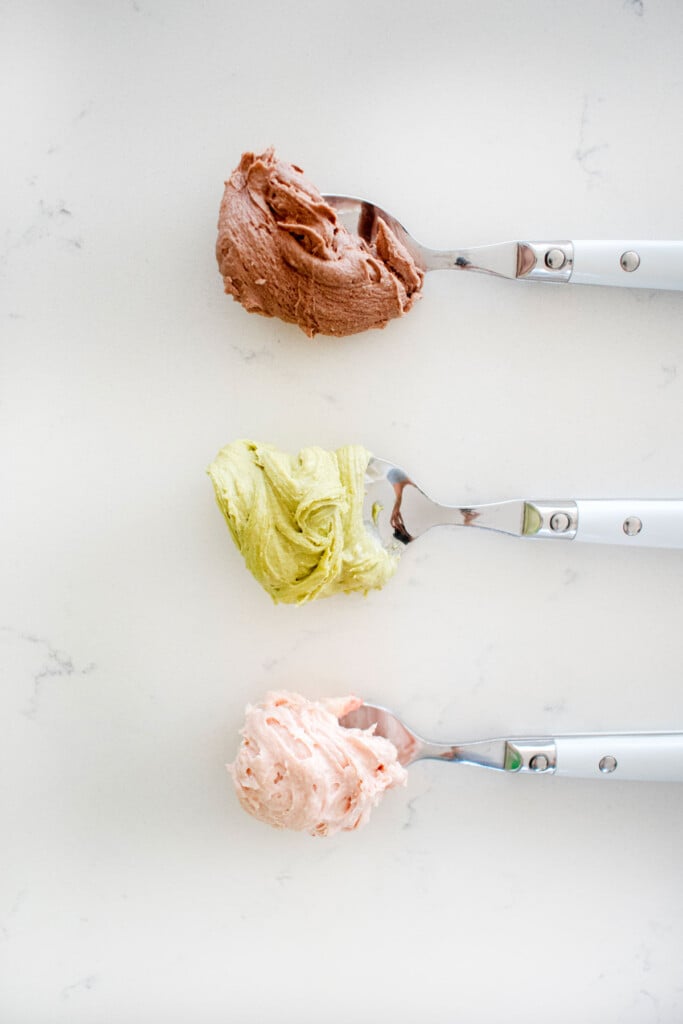
- Remove a small amount of frosting (about ¼ cup) and put in a small bowl. Add in a small amount of Dutch cocoa powder (about 1/2 to 1 teaspoon) and stir to combine completely. Add more if you want a darker brown. Transfer this to a piping bag with Ateco tip #12 or you can use no tip at all and just cut a small hole.
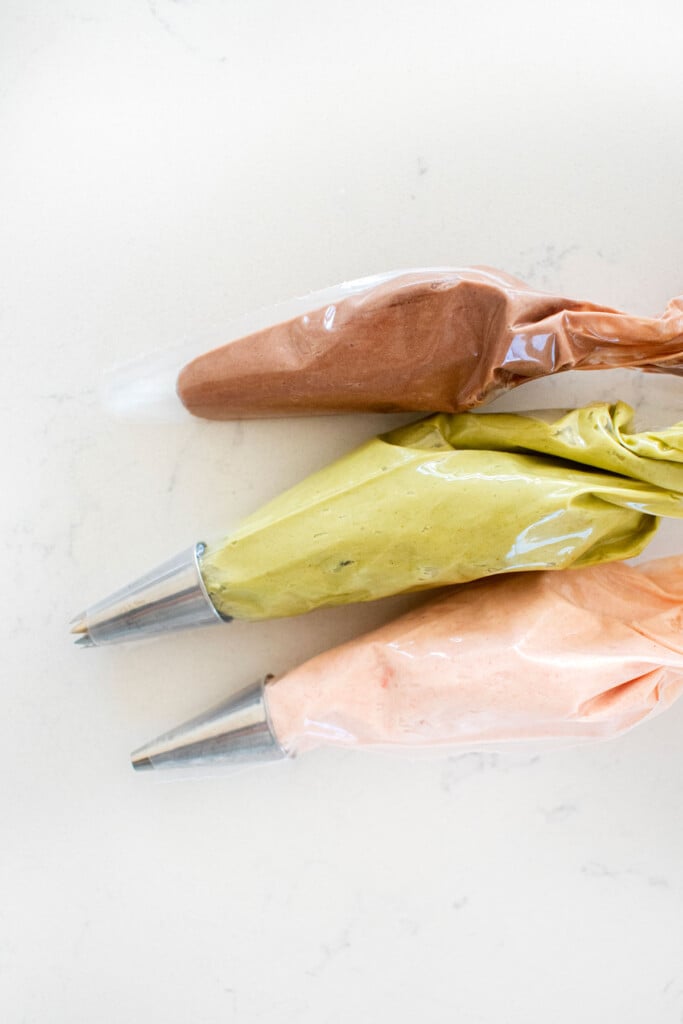
- With the remaining frosting, you can color it different colors if you want different colored trees (such as green and pink). Or you can color it all one color if you just want to do green. Add in a small amount of food coloring and stir until you get your desired colors. If you’re using one frosting and want to make multiple different types of trees, then make sure to put a coupler into the piping bag before filling it with frosting. The coupler will allow you to swap out the different tips. Once you have your piping bags made up, then it’s time to start piping your trees.
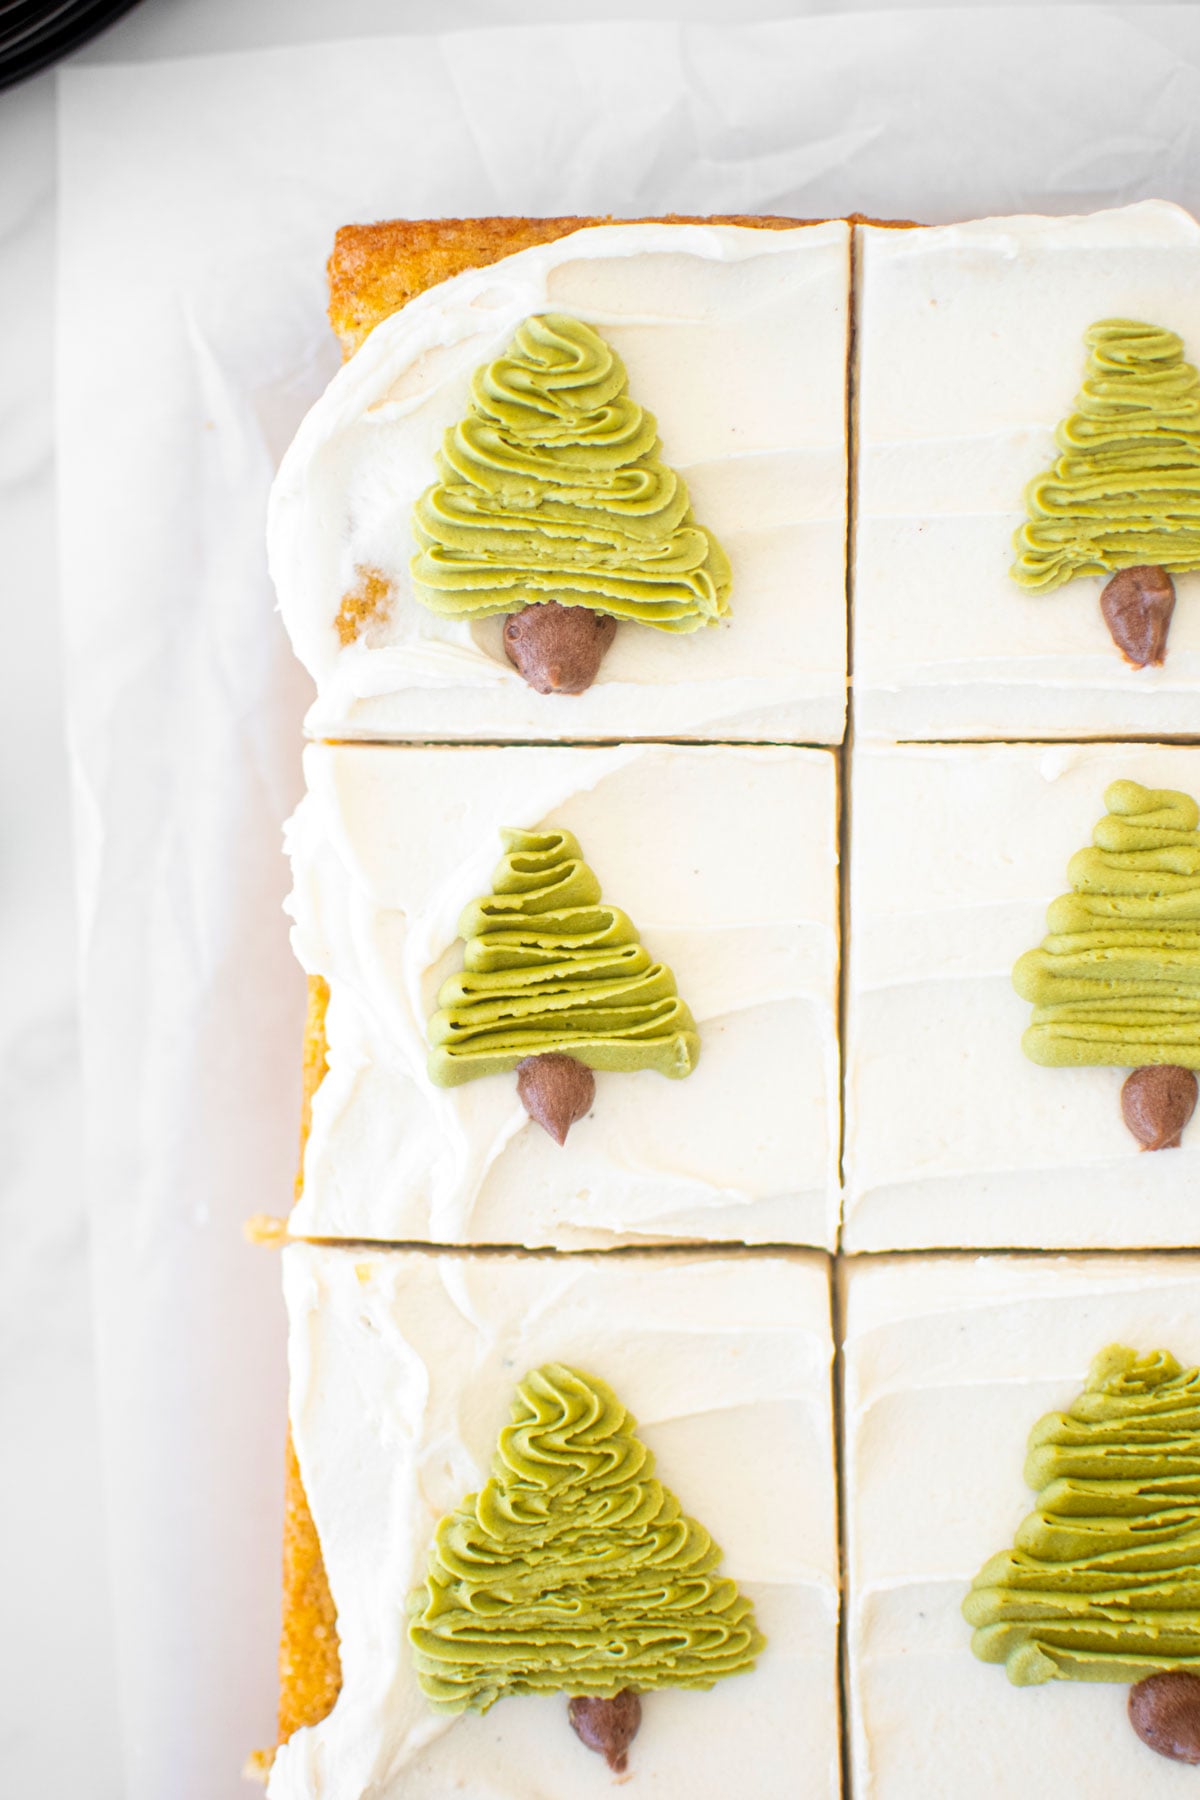
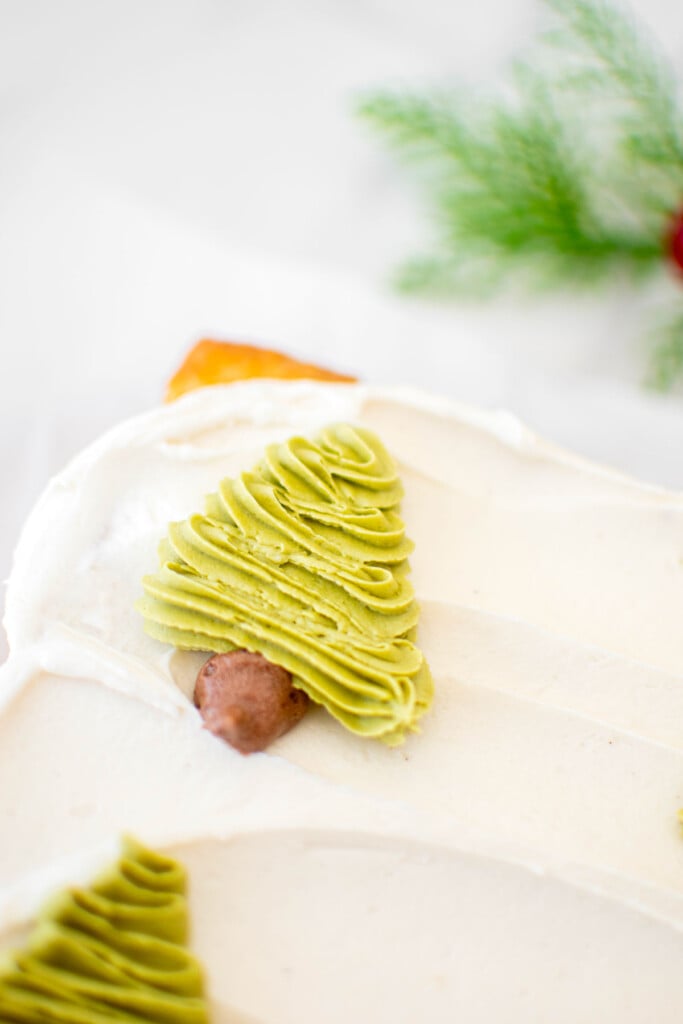
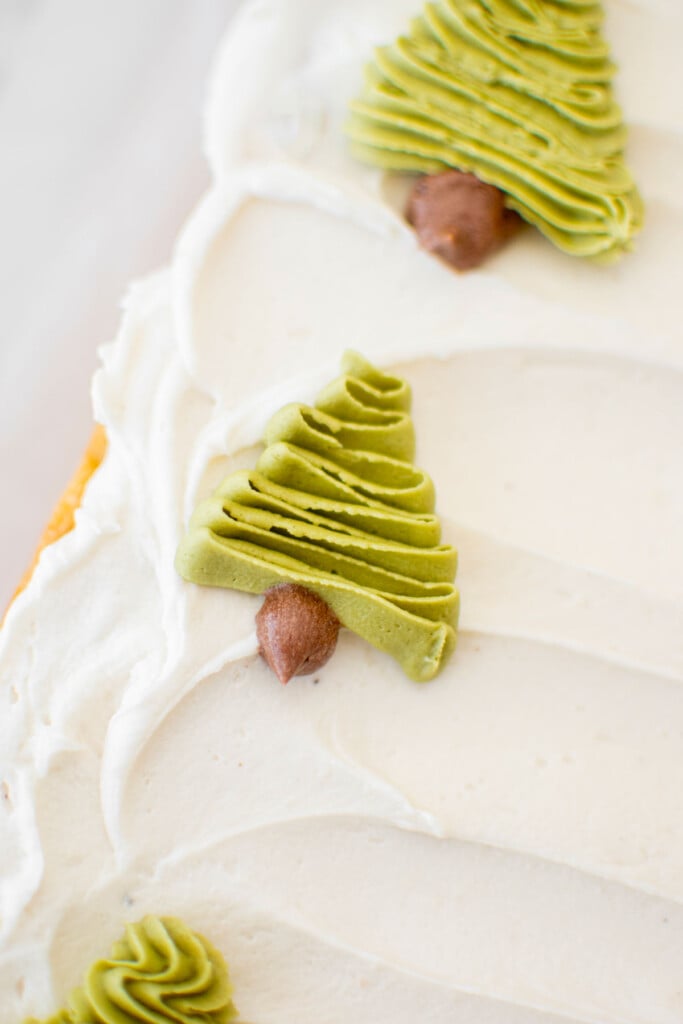
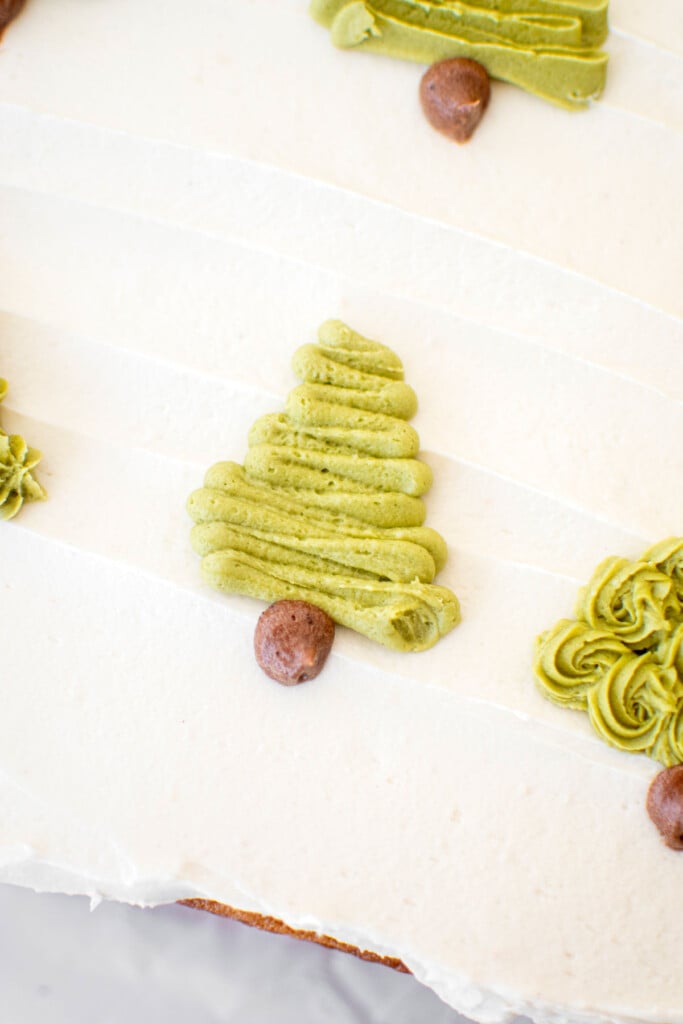
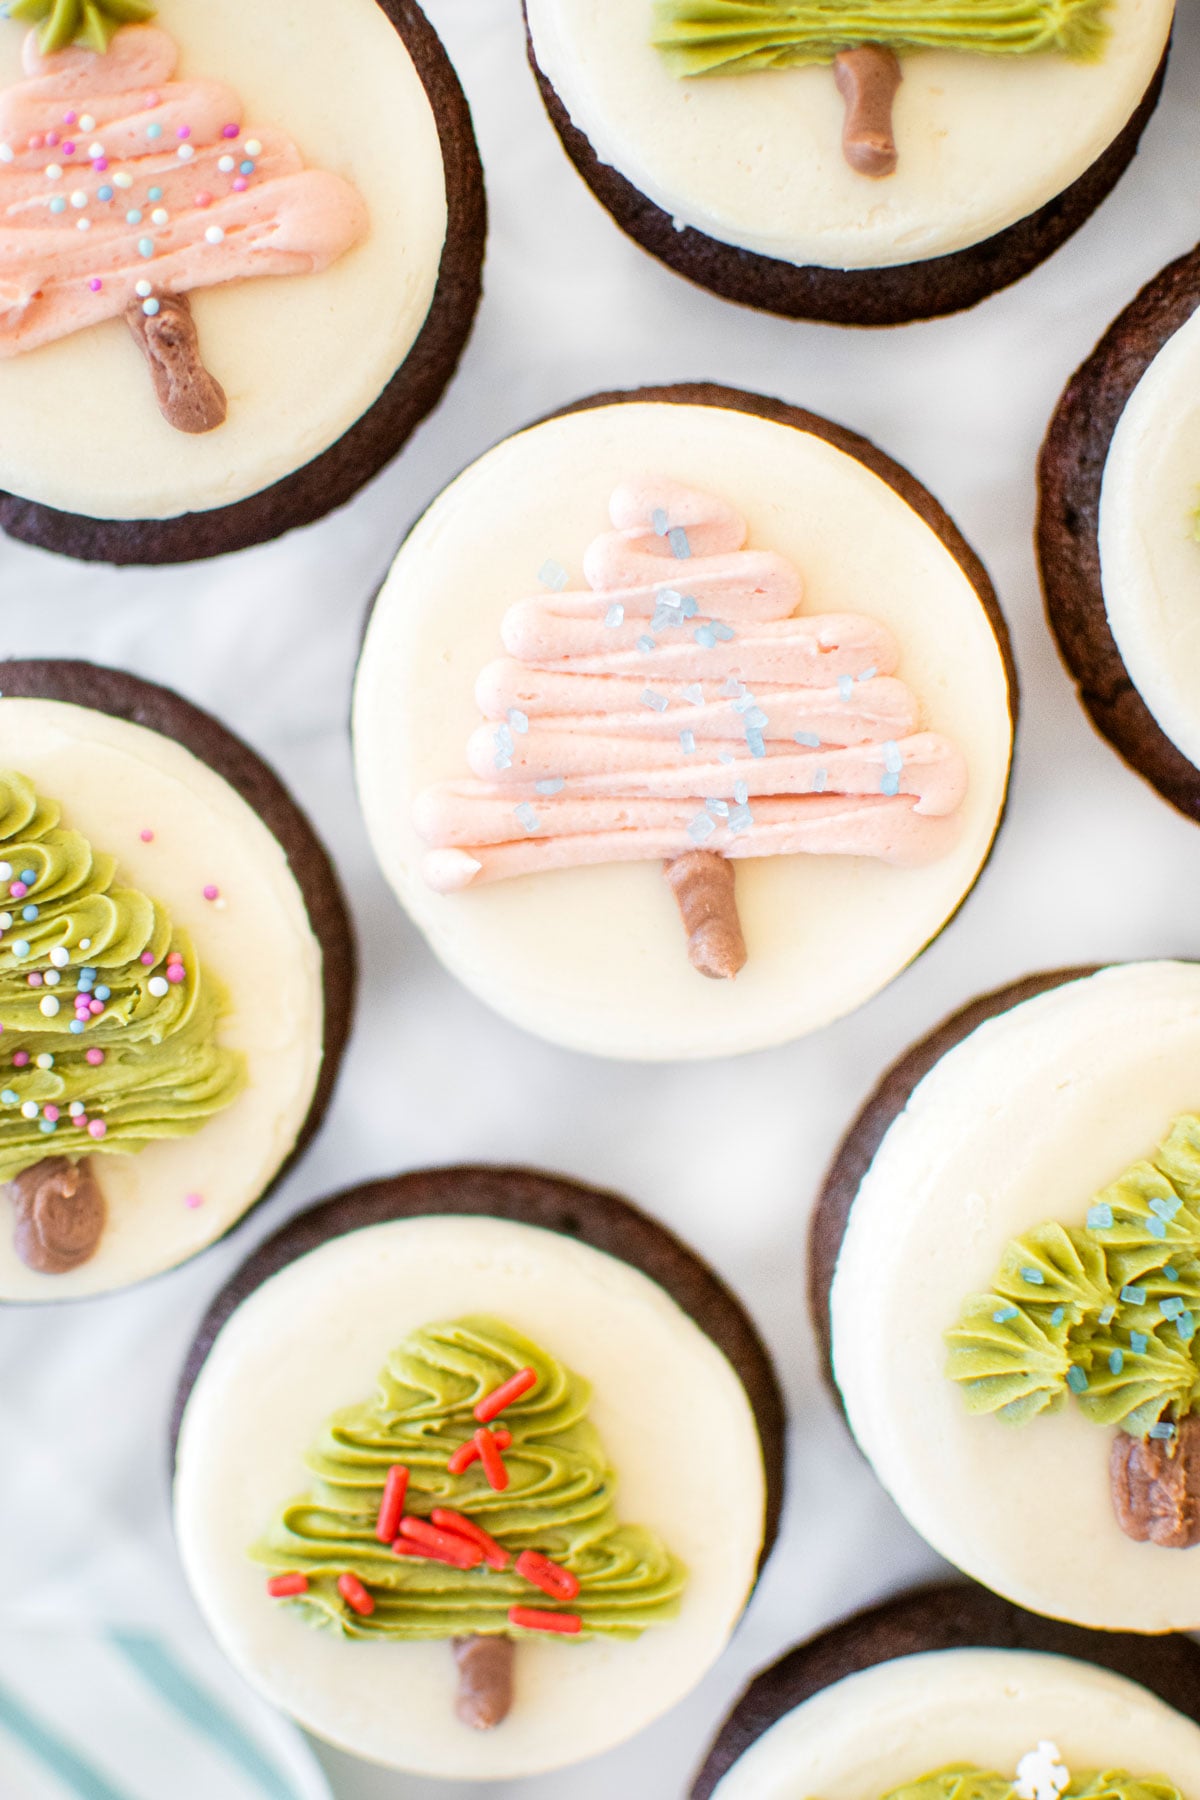
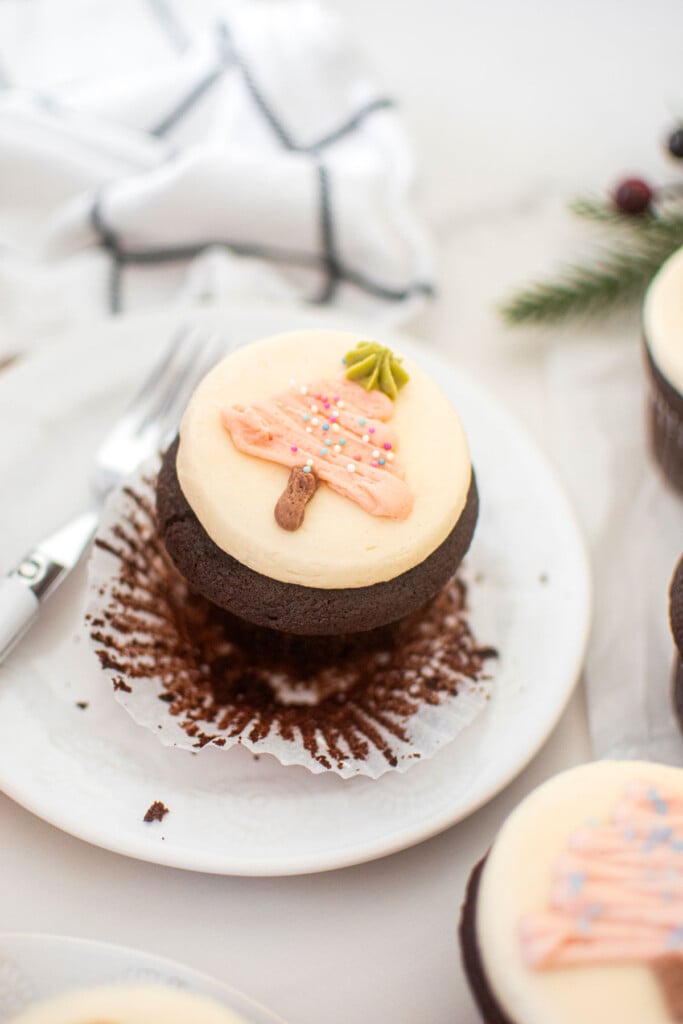
- For Ateco tip numbers 6, 15, 21, and 101 I am using the same technique, but you get different results for the different kinds of tips. For this technique, you’ll start by piping a zigzag triangle wherever you want your Christmas tree. Once the tree is piped, then make a small line at the bottom using the chocolate frosting.


- For the next type of tree, use Ateco tip #21 and pipe small dollops of frosting in the shape of a triangle. Then add a small line of the chocolate frosting at the bottom for the trunk.
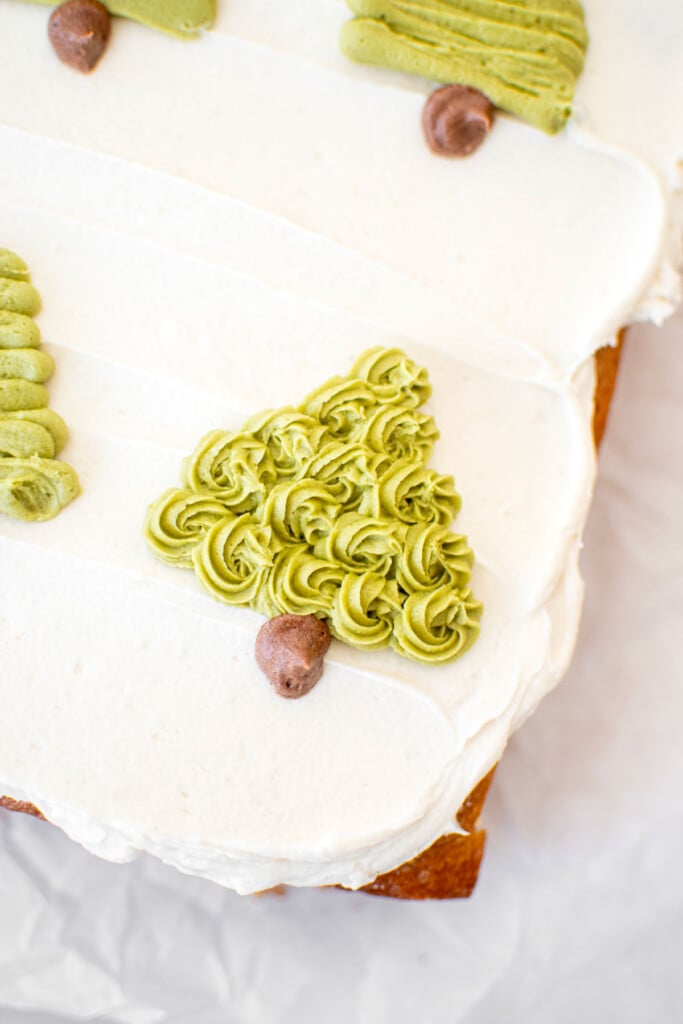
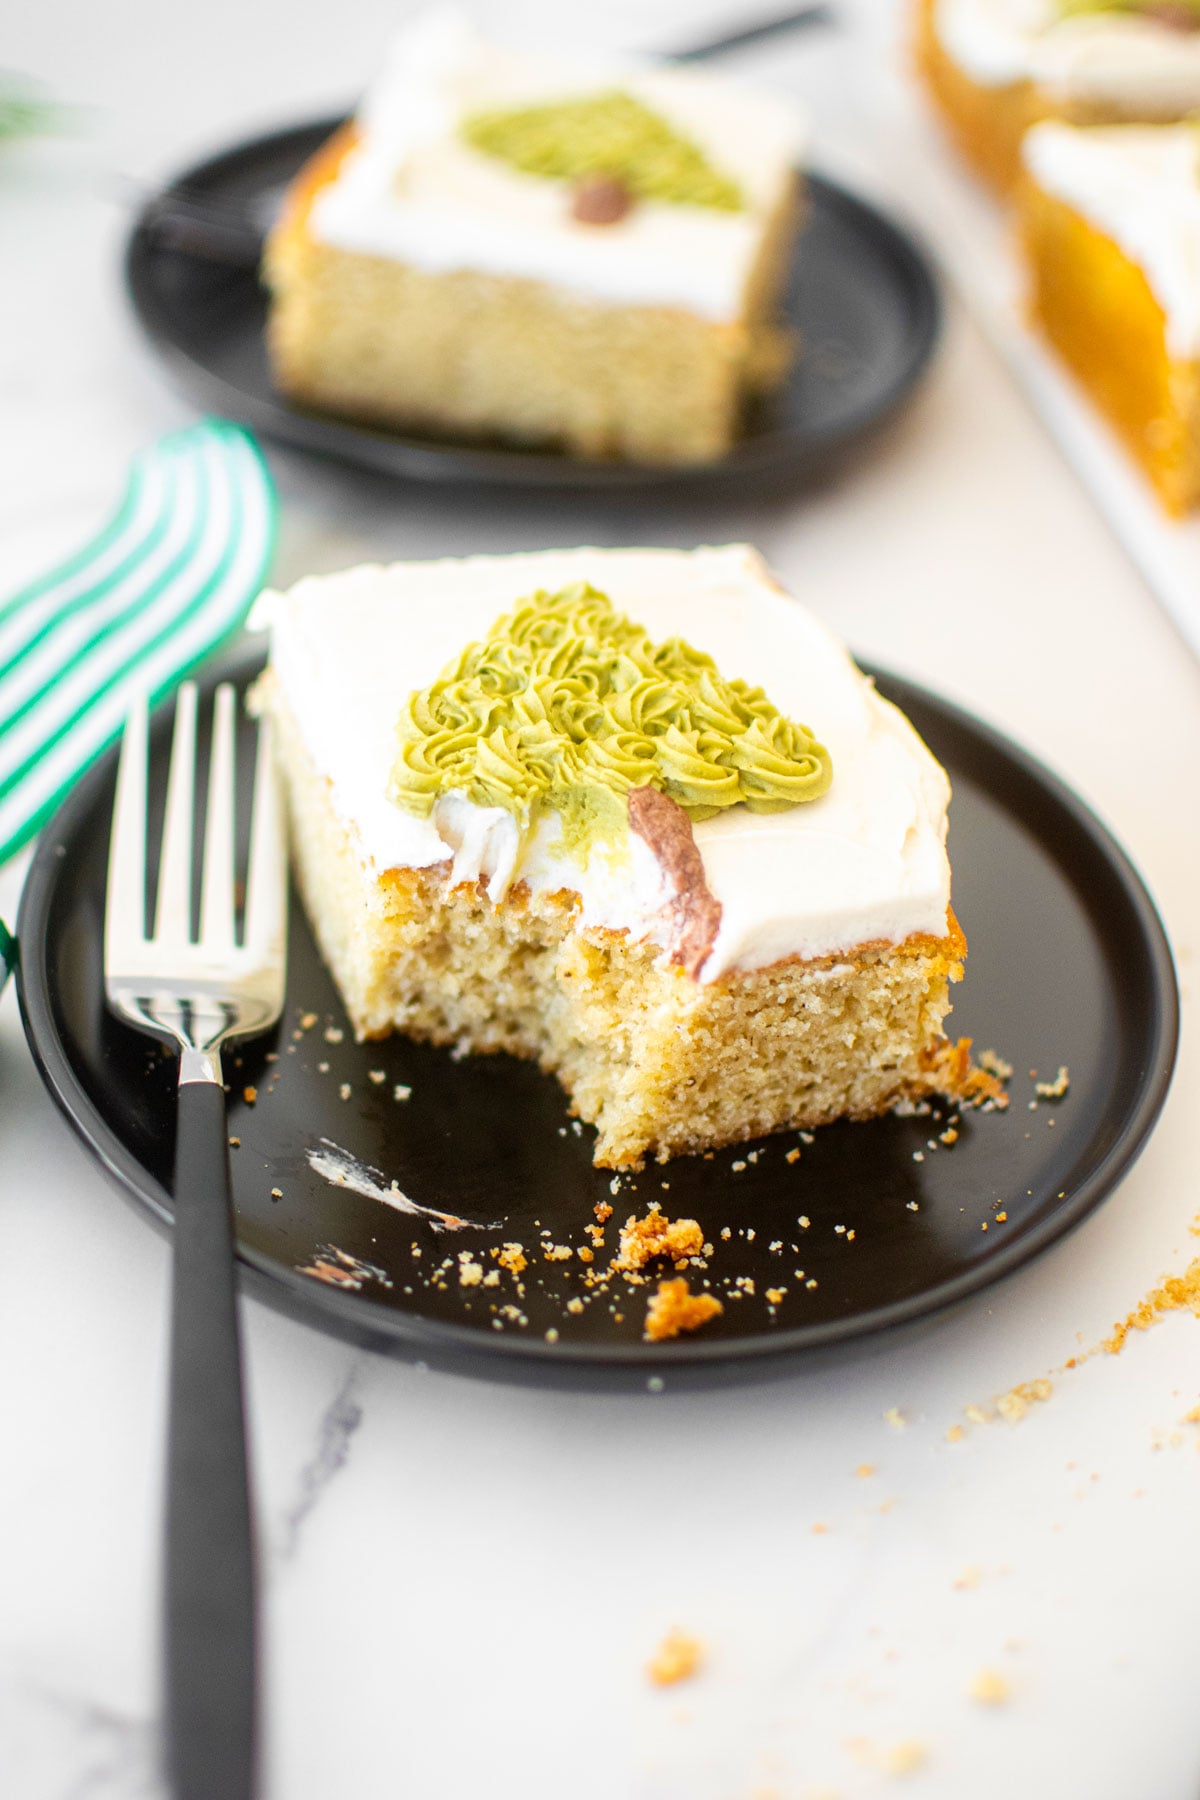
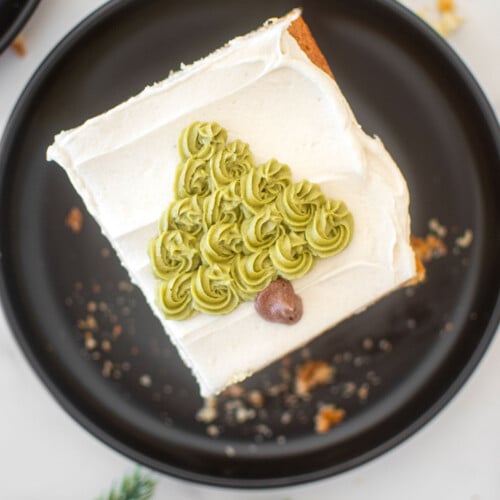
- For the last type of tree, use Ateco tip #15 and pipe small rosettes by pipe a spiral (starting in the middle, going outwards) until you get your desired size. Do this in the shape of a triangle, starting with one at the top, then two on the second row, three on the third row and so on until you get the size tree you like. Finish with a small line of the chocolate for the trunk.
- If you are adding sprinkles on top of your trees, you should do that immediately after piping them so that they stick as buttercream will begin to harden once it’s piped out of the bag. Continue to decorate your dessert with Christmas trees anywhere you want them!
How to Use
- Cakes: You can use this technique on top of one layer sheet cakes like I do with my Eggnong Sheet Cake. Or you can also pipe these trees on the sides of a layer like I do with my Christmas Eve Cake.
- Cupcakes: I use this technique on my Chocolate Peppermint Christmas Tree Cupcakes. In this post I show you how to flatten buttercream frosting, which is what you’ll need to do if you want to pipe buttercream Christmas trees on top of cupcakes.
- Cookies: You can use this technique to pipe buttercream Christmas trees on top of any cookies. They can be sugar cookies that are plain or even on top of my Holiday Sugar Cookies with Icing. You can also do this on top of any shortbread cookie like my Simple Christmas Shortbread Cookies.
- Brownies: Simply use any of these techniques on top of any brownie recipe for festive brownies!
Recipe FAQ's
Yes, just taste the frosting to see if you'd like to add a pinch for flavor.
No, you can leave them white! They would look great on top of a colored cake, cookies or even on top of brownies as white trees.
You can do this with Ateco tip #21 and just add a dollop. You'll see how that looks on top of the cupcake with the pink tree and green star (in the photo right below!).

More Holiday Recipes


Loved it? Tell us!
Thanks a waffle lot for stopping by 🧇 If you loved this recipe, sprinkle some love by leaving a ⭐⭐⭐⭐⭐ review — it inspires others to try this recipe and helps me organically reach dog loving foodies like you! I personally read and appreciate every message!
Also, be sure to subscribe to our YouTube channel and join John John and me in the kitchen for step by step recipe videos! And subscribe to our newsletter for new and seasonal recipes!
How to Pipe Buttercream Christmas Trees 5 Ways
Equipment
- Digital Food Scale
- Stand Mixer
- Piping Bags
- Coupler
- Ateco Tip #6
- Ateco Tip #12
- Ateco Tip #15
- Ateco Tip #21
- Ateco Tip #101
Ingredients
Frosting
- 170 grams salted butter (softened)
- 340 grams powdered sugar (sifted)
- 1 teaspoon vanilla extract
- 2 to 3 tablespoons milk (or water)
Decorating
- Suncore Foods Organic Green Dye
- Dutch cocoa powder
- Sprinkles (optional)
Instructions
- Be sure to have whatever dessert you’ll be decorating made before making the frosting for the trees. This is the last step in decorating your cake, cupcakes, cookies, or brownies.
- To make the frosting: In the bowl of a stand mixer fitted with the paddle attachment, add the butter, powdered sugar, vanilla extract, and milk. Mix on low until combined.
- Speed up mixer to high and mix for 2 to 3 minutes or until it’s light and fluffy. Be sure to scrape down the sides of the bowl halfway through and continue to mix. You want the frosting to be very smooth, creamy, and not super stiff as you’ll need to pipe it out of small decorating tips. If the frosting seems very stiff, you can add a bit more milk (1 tablespoon at a time) until you get the desired consistency.
- Remove a small amount of frosting (about ¼ cup) and put in a small bowl. Add in a small amount of Dutch cocoa powder (about 1/2 to 1 teaspoon) and stir to combine completely. Add more if you want a darker brown. Transfer this to a piping bag with Ateco tip #12 or you can use no tip at all and just cut a small hole.
- With the remaining frosting, you can color it different colors if you want different colored trees (such as green and pink). Or you can color it all one color if you just want to do green. Add in a small amount of food coloring and stir until you get your desired colors.
- If you’re using one frosting and want to make multiple different types of trees, then make sure to put a coupler into the piping bag before filling it with frosting. The coupler will allow you to swap out the different tips.
- Once you have your piping bags made up, then it’s time to start piping your trees.
- For Ateco tip numbers 6, 15, 21, and 101 I am using the same technique, but you get different results for the different kinds of tips. For this technique, you’ll start by piping a zigzag triangle wherever you want your Christmas tree. Once the tree is piped, then make a small line at the bottom using the chocolate frosting.
- For the next type of tree, use Ateco tip #21 and pipe small dollops of frosting in the shape of a triangle. Then add a small line of the chocolate frosting at the bottom for the trunk.
- For the last type of tree, use Ateco tip #15 and pipe small rosettes by pipe a spiral (starting in the middle, going outwards) until you get your desired size. Do this in the shape of a triangle, starting with one at the top, then two on the second row, three on the third row and so on until you get the size tree you like. Finish with a small line of the chocolate for the trunk.
- If you are adding sprinkles on top of your trees, you should do that immediately after piping them so that they stick as buttercream will begin to harden once it’s piped out of the bag.
- Continue to decorate your dessert with Christmas trees anywhere you want them!
- If you have extra frosting, you can store it in an airtight container in the fridge for up to 5 days.
Video

Notes
- If you are decorating a cake or cupcakes, you may be able to just use a little bit of the frosting from that recipe and use this technique. It just depends on how much frosting the cake recipe makes, but you may want to consider if you don’t want a ton of leftover frosting.
- If you want to decorate cookies or brownies then you’ll need to make additional frosting, so you can use the recipe here.
- Make sure your butter is soft when starting the buttercream. I prefer to leave butter out on the counter to soften naturally. You can do this overnight in the wintertime.
- Always sift powdered sugar, this is key for smooth and creamy buttercream. But it’s even more key to ensure you have no chunks in your buttercream for piping out of small decorating tips like we’re doing here.
- You can color the frosting any way that you like!
- You can use larger versions of these decorating tips if you are making a larger cake. Ateco makes larger option for all of these tips.
- Vegan: Use vegan butter or shortening and nondairy milk.
- High Altitude — Follow the recipe as noted.
Nutrition
The Bake Shop
Visit The Bake Shop for foodie inspired tees, sweatshirts, and accessories. Find my favorite kitchen tools (with discounts!) in the Kitchen Shop. And shop our collection of food inspired dog accessories too!


I love using this technique on top of cupcakes, brownies, and cake to make anything festive for Christmas!