How to Parbake a Pie Crust
Learn how to parbake a pie crust with my easy step by step tutorial with photos and a full video! Recipes like pumpkin pie and quiche will call for a parbaked pie crust, so get all the tips and tricks here.
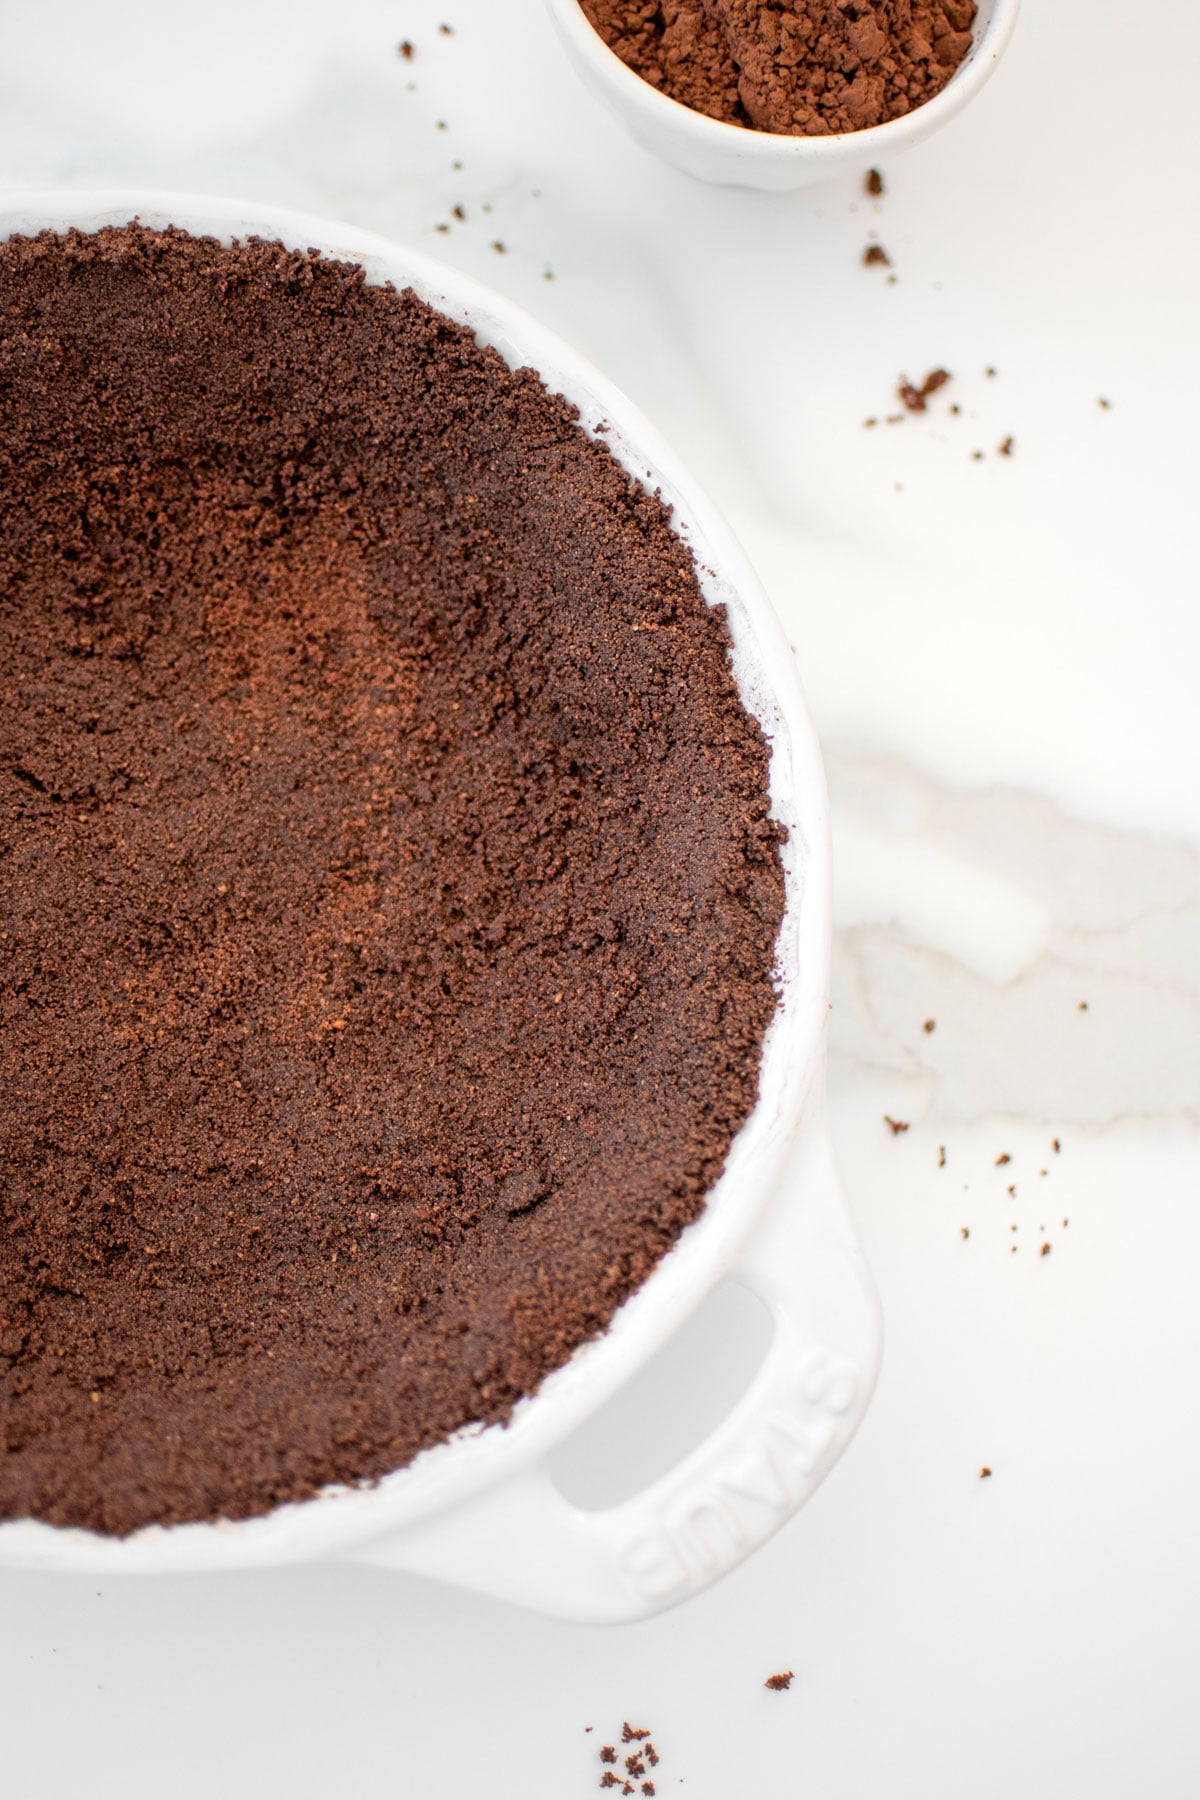
If you want to level up your pie baking skills, check out some of my other posts like Tips for Golden Brown Pie Crust, Brown Butter Pie Crust, How to Make Chocolate Graham Cracker Crust from Scratch, Should You Cook Pie Filling Before Baking? or my tutorial How to Roll Out a Pie.

A Quick Look At The Recipe
- Recipe Name: How to Parbake a Pie Crust
- Ready In: 24 hours
- Makes: 9-inch bottom pie crust
- Main Ingredients: butter, cane sugar, all purpose flour
- Flavor Profile: buttery, rich, flaky
- Dietary Info: eggless, no seed oils
- Difficulty: Medium
- Why You’ll Love It: learn how to parbake a pie crust for quiche, pumpkin pie and more
Summarize & Save This Content On
Why You'll Love This Recipe
- Easy: Parbaking a pie crust may seem intimidating, but it's really so easy! I'm walking you through it here.
- Step by Step: I have step by step photos and show you exactly how to do this.
- Use for Any Pie: You can use this bottom pie crust recipe and technique for any pie that calls for a partially baked pie crust.
What does parbaking mean?
Parbaking stands for “partially baking” and it means exactly that, you partially bake the pie crust. You will need to partially bake a pie crust for recipes that have a liquid filling that need to be baked.
Eggless Sourdough Pumpkin Pie, Honey Pecan Pie, or Chocolate Bourbon Pecan Pie are a great examples of this kind of pie. If you put a liquid filling, like in pumpkin pie, into a raw pie crust, the weight of the filling will not hold up the raw crust. This will then begin to soften in the oven and sink into the middle of the pie. You'll also have a soggy bottom as well.
If you are making a pie such as Old Fashioned Dutch Apple Pie or Peach Crumble Pie, the weight of the fruit is enough to hold up the crust. So, you don't need to parbake it.
Ingredients

- Butter: I use organic salted butter. If you want to use unsalted you can, just add a pinch of salt.
- All Purpose Flour: You'll need organic all purpose flour.
- Water: Make sure your water is cold, this makes the best flaky pie crust as you want to keep everything cold.
*For a full list of ingredients and measurements, visit the recipe card below.
Baker's Tips for How to Parbake a Pie Crust
- Always weigh ingredients for the best results.
- You need parchment paper, you cannot do this without it as this is what separates the pie crust from the pie weights.
- You don't need fancy or expensive pie weights. You can simply use rice, quinoa, or even beans. I use rice as I like that it's very small so it can get into the corners of the fluted pie crust well which ensures it holds it shape as it bakes. I reuse the same rice as “pie weights” and just store it in an airtight container in my pantry to reuse every time.
- You can use this recipe for any pie recipe that calls for a partially baked crust.
- If you need a pie crust that is fully blind baked (completely baked) to add pudding or something into it, you can just bake this for 15 to 20 minutes on the second bake, or until it looks golden brown and done.
- High Altitude — Bake for 15 minutes, remove pie weights and then bake again for another 5 minutes. (If you need to blind bake, instead of baking for only 5 minutes at this step, bake for an additional 15 to 20 minutes or until the crust looks completely done and is lightly golden brown).
How to Parbake a Pie Crust
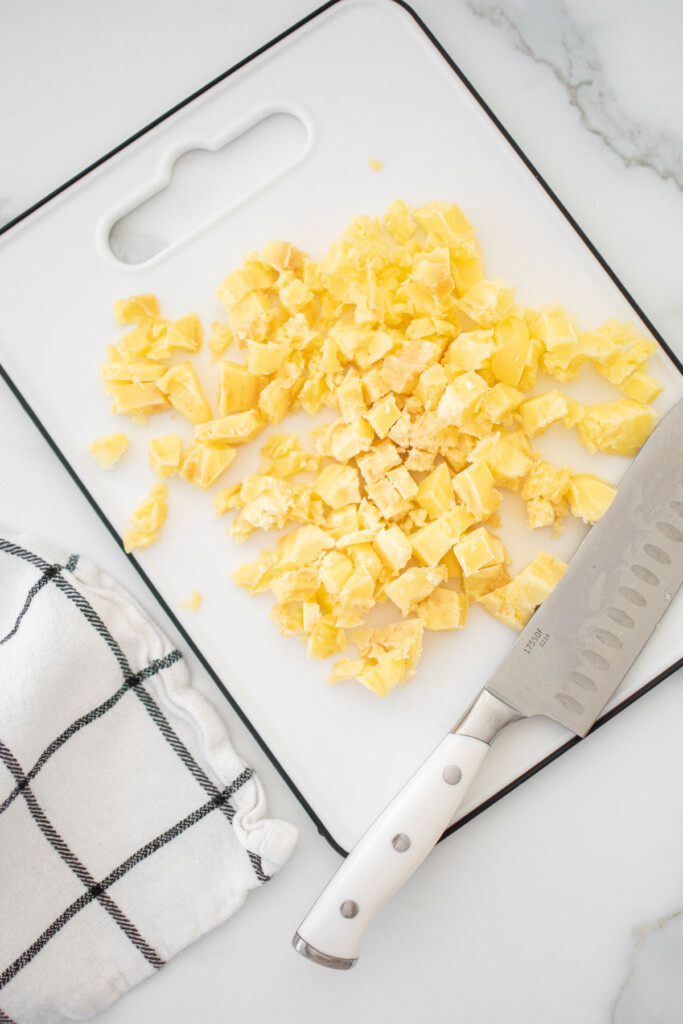
- In the bowl of a stand mixer fitted with the paddle attachment add the flour. Remove the butter from the fridge and chop into small cubes. The smaller the cubes, the flakier the crust: Cut the stick of butter into four and then chop into small cubes from there.
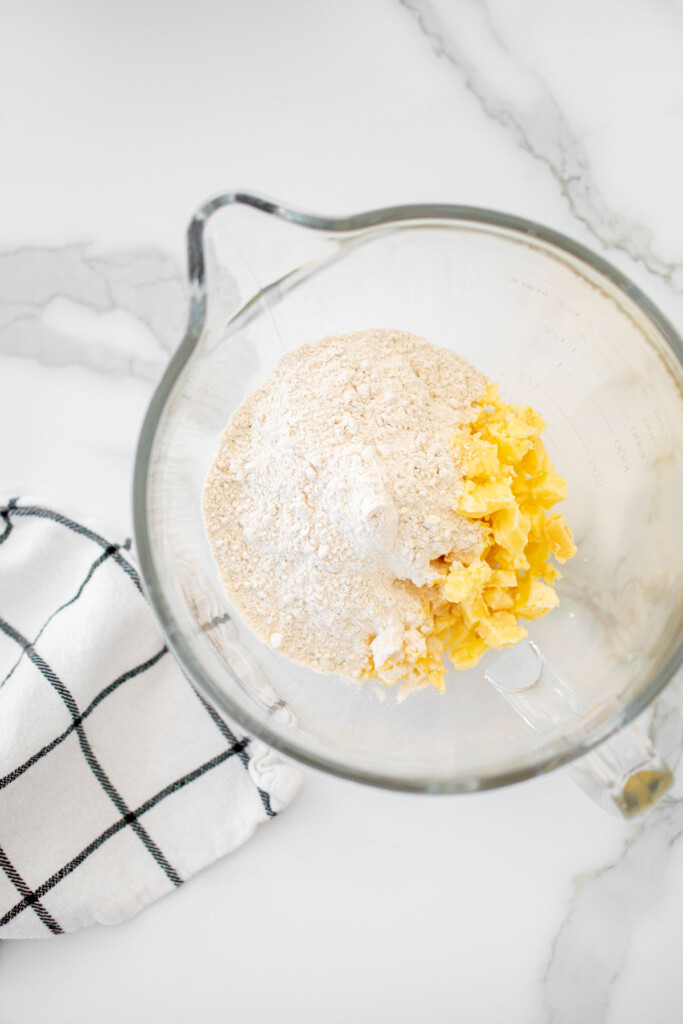
- Add the cold, cubed butter to the flour mixture. Measure out the cold water and have it ready.
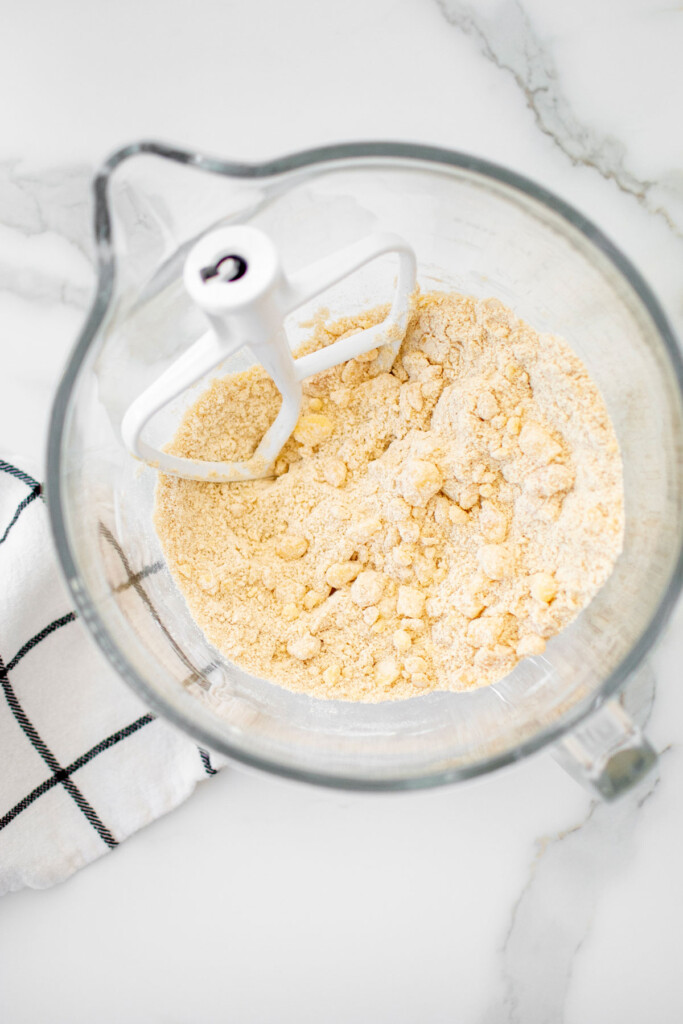
- Turn the mixer on low and slowly start to incorporate the ingredients. Gradually turn the mixer to medium speed. Once the butter mixture looks like wet sand, immediately add in all the cold water.
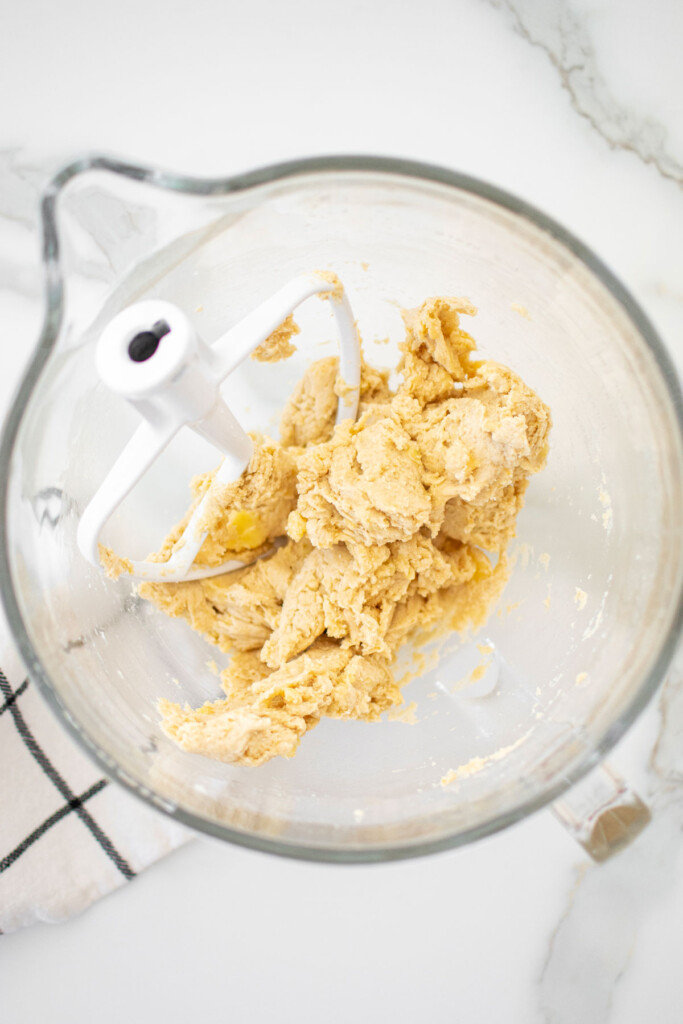
- As soon as the dough comes together, stop the mixer.
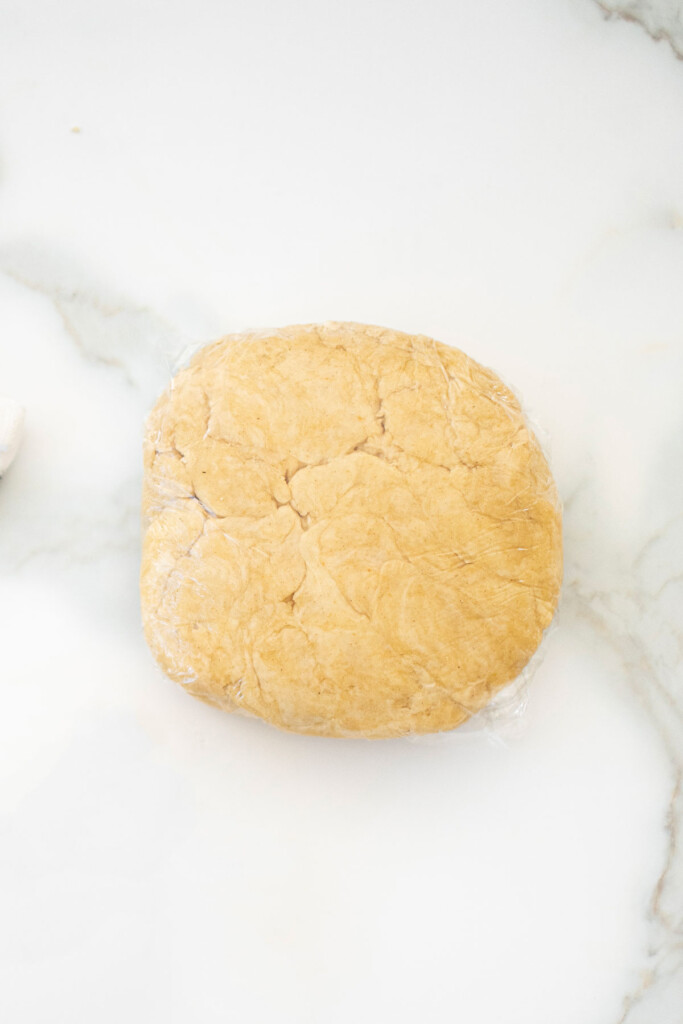
- Have a piece of plastic wrap ready and form it into a disk and wrap in plastic wrap. Allow to chill in the fridge for at least 4 hours or overnight.
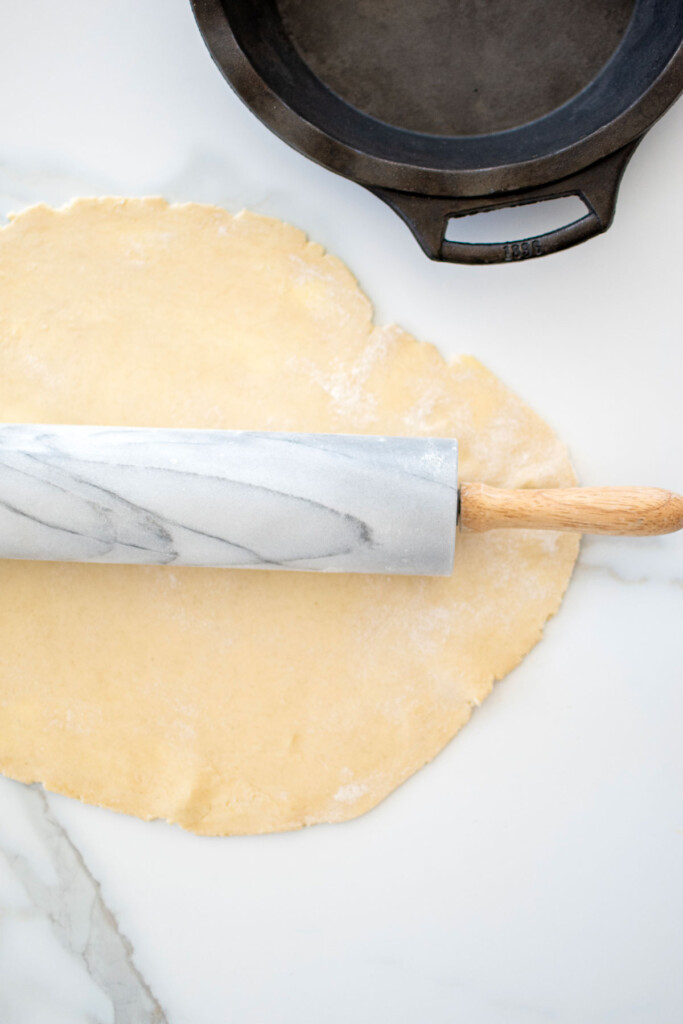
- Preheat the oven to 350°F. Grease a 9-inch pie pan with butter. Remove the pie dough from the fridge. Remove the plastic wrap and place on a floured surface. Roll out the into a disk that is ¼-inch thick, it should be about 11-inches in diameter.
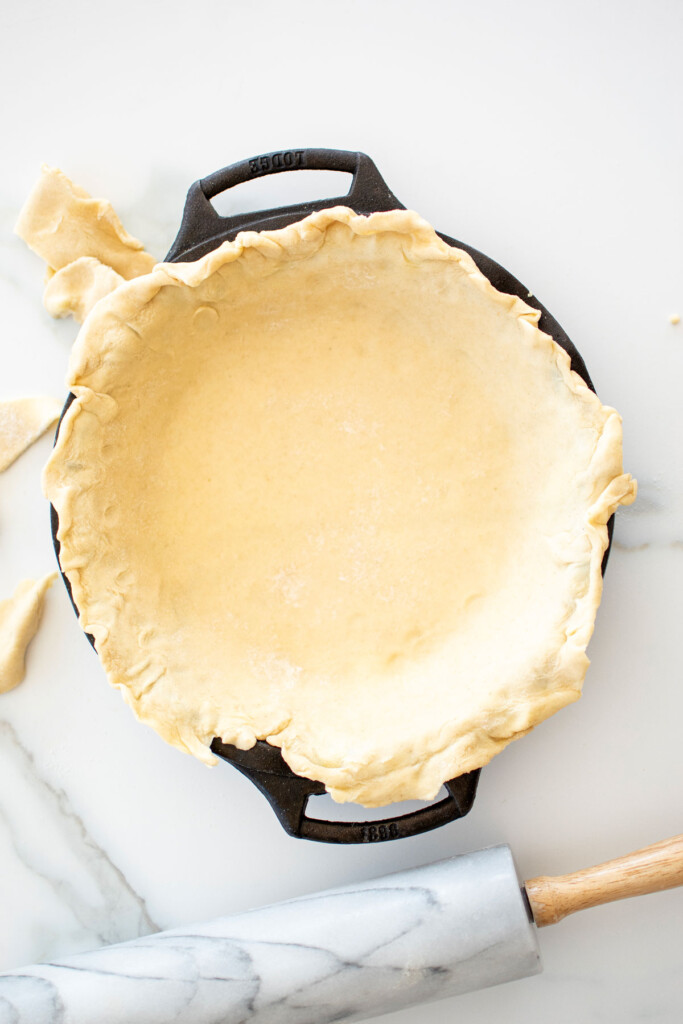
- Place the pie dough into the pie pan and press lightly to form against the pan. It should be large enough that the dough folds right over the top of the pan.
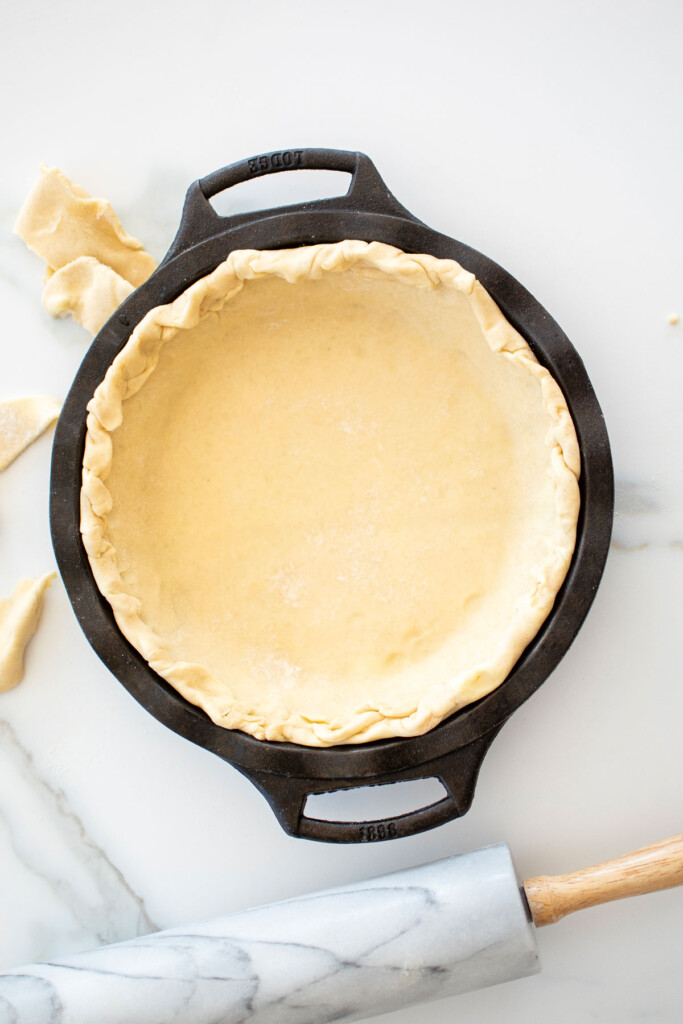
- Roll the excess dough into the pie pan so it’s even with the edges of the pie pan.
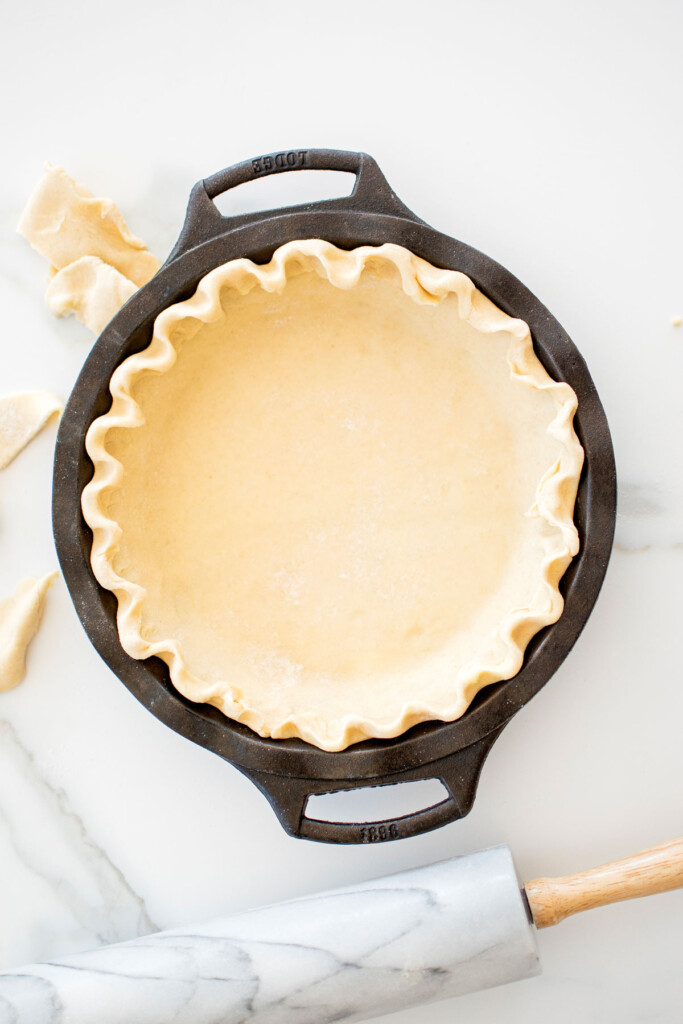
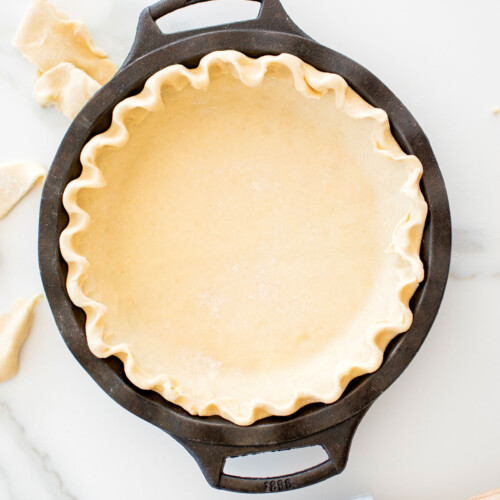
- Flute the edges by using your thumb and index finger of your right hand to pinch the rolled edge of dough and push your index finger of your left hand into it to create the “flute”. Continue around the entire pie to flute the edges.
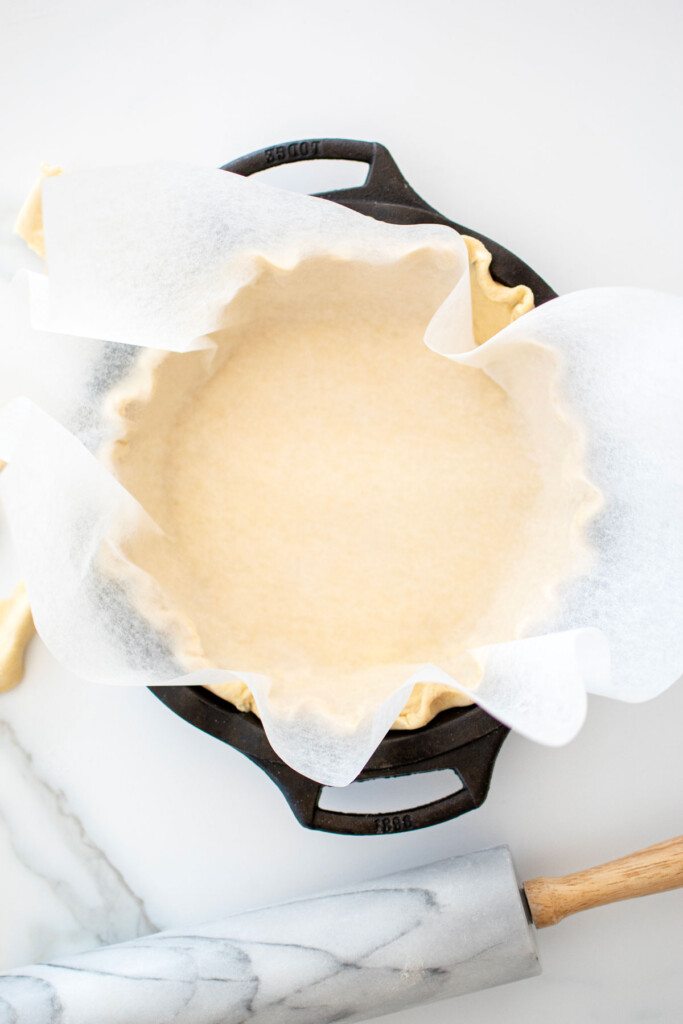
- Place a piece of parchment paper into the pie pan and form it to the sides.

- Add rice or pie weights and parbake for 20 minutes.
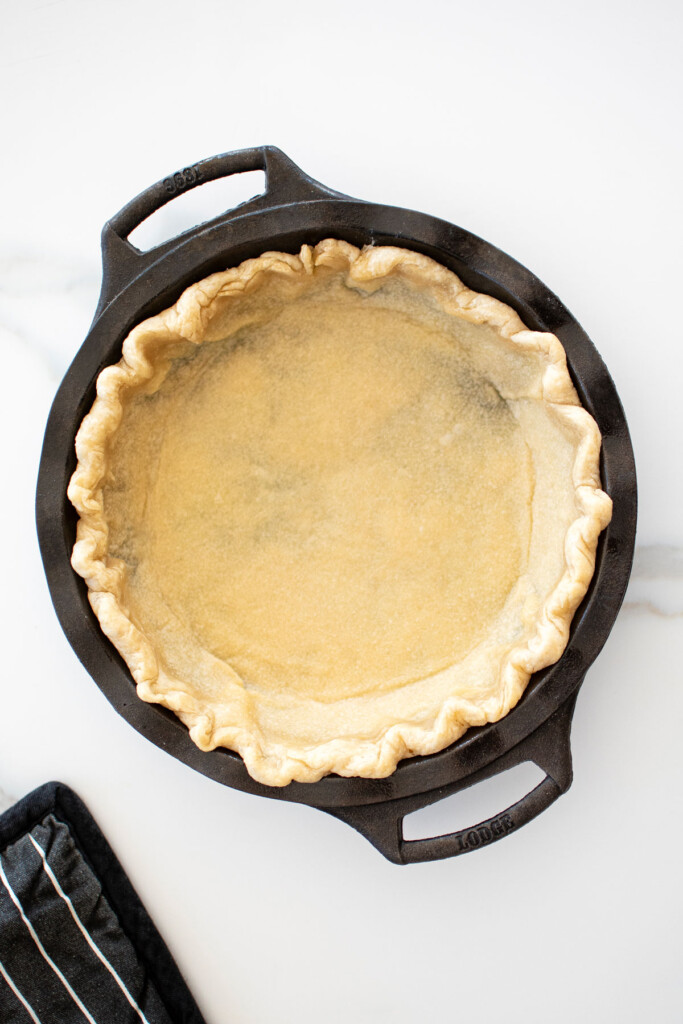
- Remove the parchment paper and weights, and bake for another 5 minutes. (If you need to blind bake, instead of baking for only 5 minutes at this step, bake for 15 to 20 minutes or until the crust looks completely done and is lightly golden brown.)

- Use this partially baked crust for any recipe that calls for a parbaked pie crust.
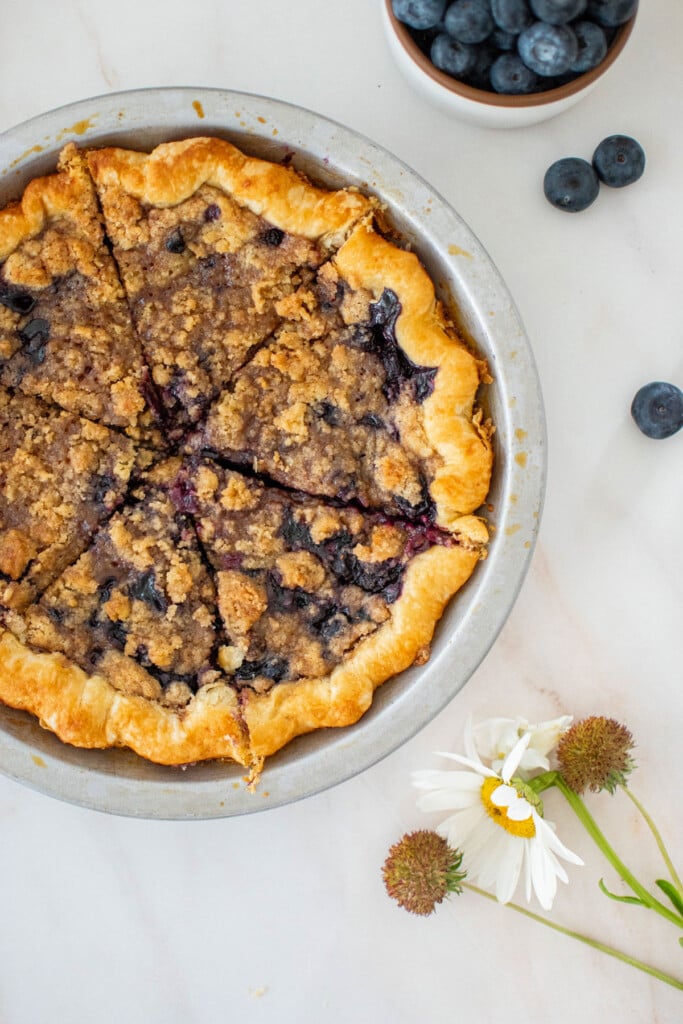
How to Use In Recipes
You can use this partially baked (or blind baked) pie crust anywhere that calls for one in any pie recipe. You'll mostly see this in quiches, pumpkin pie, or any type of pie with a liquid filling. Try it with Tomato Basil Quiche with Bone Broth or Chocolate Pumpkin Pie Without Eggs.
Recipe FAQ's
Whenever making a pie such as pumpkin or pecan pie where the filling is a liquid and it needs to bake. This is important because if you don’t parbake a pie crust and you fill a raw pie crust with a liquid, two things will happen.
First, as the butter starts to melt in the crust, the crust becomes warm. Without a solid filling (like apples, for example) the crust can sink into the middle of the pie because the filling is liquid so it can’t hold up the weight of the crust while it bakes and sets. So a Dutch apple pie, for example, does not need to be parbaked because of the weight of the apples. But a pumpkin pie does!
The second thing that will happen is you’ll most likely have a soggy pie crust on the bottom if you don’t parbake it when you fill it with a liquid filling.
No, parbaking is partially baking a pie crust and blind baking is fully baking the pie crust with no filling. You’d blind bake a pie crust for a pie that you’d add a cooked filling to, like a French Silk Pie.
The only difference in parbaking and blind baking is just more time in the oven on the second bake. As with blind baking you fully cook the pie crust. If you need to blind bake a pie crust, you can use this recipe and bake the crust for 15 to 20 minutes on the second bake, or until it looks golden brown and done.
Yes and no. You don’t need official pie weights, so you don’t need to go out and buy pie weights! But you do need something to use as pie weights. You can easily make your own pie weights out of rice, quinoa, or beans! Anything that’s small enough, can withstand the heat of the oven, and will keep the pie crust standing up is all you need. I don’t even have fancy pie weights; I just use rice! I have a jar of rice in my pantry labeled Pie Weights and I just reuse the same rice each time.
More Pie Baking Tutorials


Loved it? Tell us!
Thanks a waffle lot for stopping by 🧇 If you loved this recipe, sprinkle some love by leaving a ⭐⭐⭐⭐⭐ review — it inspires others to try this recipe and helps me organically reach dog loving foodies like you! I personally read and appreciate every message!
Also, be sure to subscribe to our YouTube channel and join John John and me in the kitchen for step by step recipe videos! And subscribe to our newsletter for new and seasonal recipes!
How to Parbake a Pie Crust
Equipment
- Digital Food Scale
- Stand Mixer (optional)
- 9-Inch Pie Pan
- Rolling Pin
- Parchment Paper Sheets
- Pie Weights
Ingredients
- 127 grams all purpose flour (plus extra for rolling)
- 113 grams salted butter (cold)
- ¼ cup cold water
Instructions
- In the bowl of a stand mixer fitted with the paddle attachment add the flour.
- Remove the butter from the fridge and chop into small cubes. The smaller the cubes, the flakier the crust: Cut the stick of butter into four and then chop into small cubes from there. Add the cold, cubed butter to the flour mixture. Measure out the cold water and have it ready.
- Turn the mixer on low and slowly start to incorporate the ingredients. Gradually turn the mixer to medium speed. Once the butter mixture looks like wet sand, immediately add in all the cold water. As soon as the dough comes together, stop the mixer.
- Have a piece of plastic wrap ready and form it into a disk and wrap in plastic wrap. Allow to chill in the fridge for at least 4 hours or overnight.
- Preheat the oven to 350°F. Grease a 9-inch pie pan with butter.
- Remove the pie dough from the fridge. Remove the plastic wrap and place on a floured surface. Roll out the into a disk that is ¼-inch thick, it should be about 11-inches in diameter. Place the pie dough into the pie pan and press lightly to form against the pan. It should be large enough that the dough folds right over the top of the pan.
- Roll the excess dough into the pie pan so it’s even with the edges of the pie pan. Flute the edges by using your thumb and index finger of your right hand to pinch the rolled edge of dough and push your index finger of your left hand into it to create the “flute”. Continue around the entire pie to flute the edges.
- Place a piece of parchment paper into the pie pan and form it to the sides. Add rice or pie weights and parbake for 20 minutes.
- Remove the parchment paper and weights, and bake for another 5 minutes. (If you need to blind bake, instead of baking for only 5 minutes at this step, bake for 15 to 20 minutes or until the crust looks completely done and is lightly golden brown.)
- Use this partially baked crust for any recipe that calls for a parbaked pie crust.
Notes
- Always weigh ingredients for the best results.
- You need parchment paper, you cannot do this without it as this is what separates the pie crust from the pie weights.
- You don't need fancy or expensive pie weights. You can simply use rice, quinoa, or even beans. I use rice as I like that it's very small so it can get into the corners of the fluted pie crust well which ensures it holds it shape as it bakes. I reuse the same rice as “pie weights” and just store it in an airtight container in my pantry to reuse every time.
- You can use this recipe for any pie recipe that calls for a partially baked crust.
- If you need a pie crust that is fully blind baked (completely baked) to add pudding or something into it, you can just bake this for 15 to 20 minutes on the second bake, or until it looks golden brown and done.
- High Altitude — Bake for 15 minutes, remove pie weights and then bake again for another 5 minutes. (If you need to blind bake, instead of baking for only 5 minutes at this step, bake for an additional 15 to 20 minutes or until the crust looks completely done and is lightly golden brown).
Nutrition
The Bake Shop
Visit The Bake Shop for foodie inspired tees, sweatshirts, and accessories. Find my favorite kitchen tools (with discounts!) in the Kitchen Shop. And shop our collection of food inspired dog accessories too!


I use this technique for pumpkin pie and quiche, it’s essential!