How to Stack a Layer Cake with Filling
Learn how to stack a layer cake with filling. In this step by step guide with photos and video, I’ll walk you through how to stack, fill, and crumb coat a layer cake with filling. You can apply this technique to any cake with a soft filling like jam, caramel, lemon curd, and more.
If you’re looking for more baking tutorials and tips, check out some of my other favorite like How to Roll Out a Pie, How to Spiral a Buttercream Cake, How to Lattice a Pie Crust, or Best Salted Butter for Baking.
In This Baking Guide
- Learn how to stack a layer cake with filling
- Use this technique for any soft filling (jam, caramel, ganache)
- Apply to any layer cake with a soft filling
- Full step by step video tutorial
Summarize & Save This Content On
Jump to:
- In This Baking Guide
- Why is stacking a layer cake with filling different than without?
- What is the trick to stacking a layer cake with filling?
- How does it work?
- What is a crumb coat?
- Tools Needed
- Baker’s Tips
- How to Secure a Cake Round On Your Turntable
- How to Stack a Layer Cake with Filling
- Watch the Video
- FAQ’s
- More Baking Tutorials
- The Bake Shop
Why is stacking a layer cake with filling different than without?
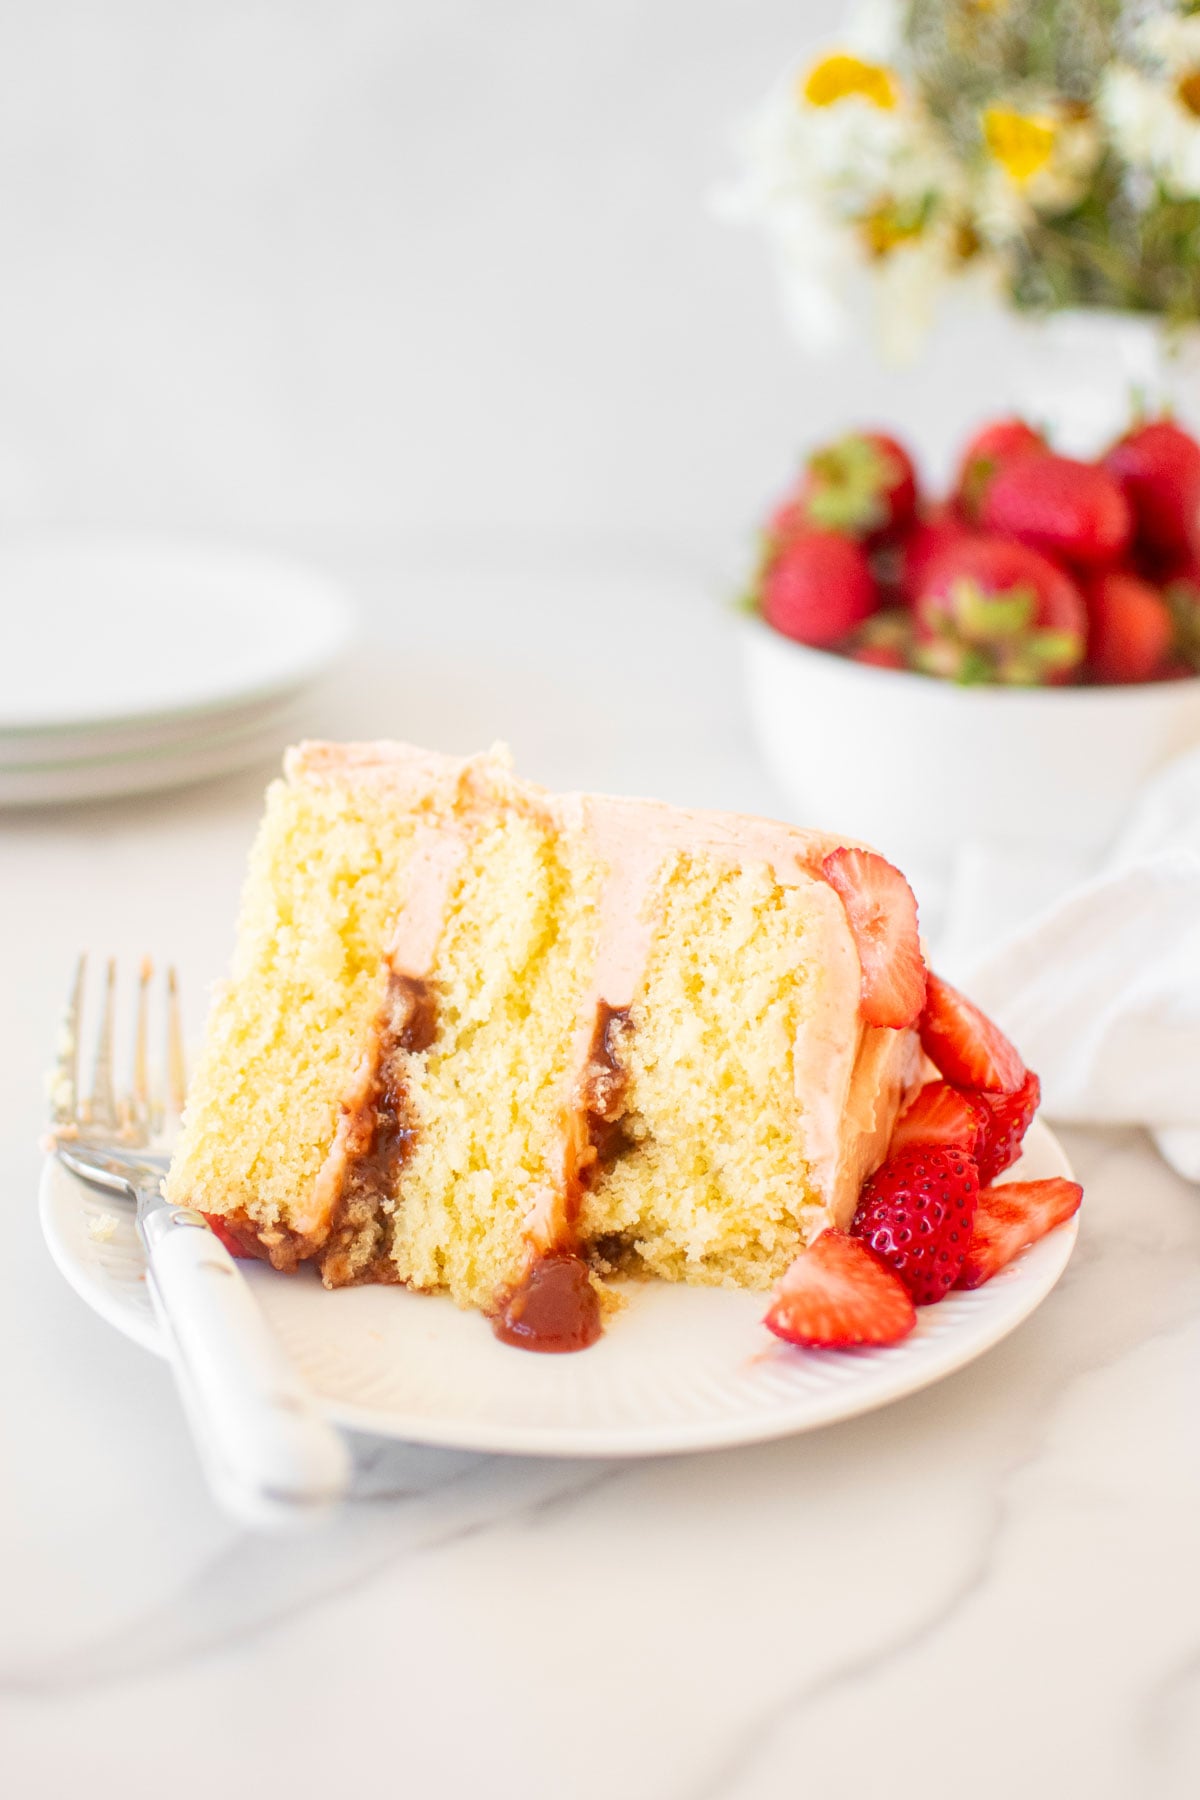
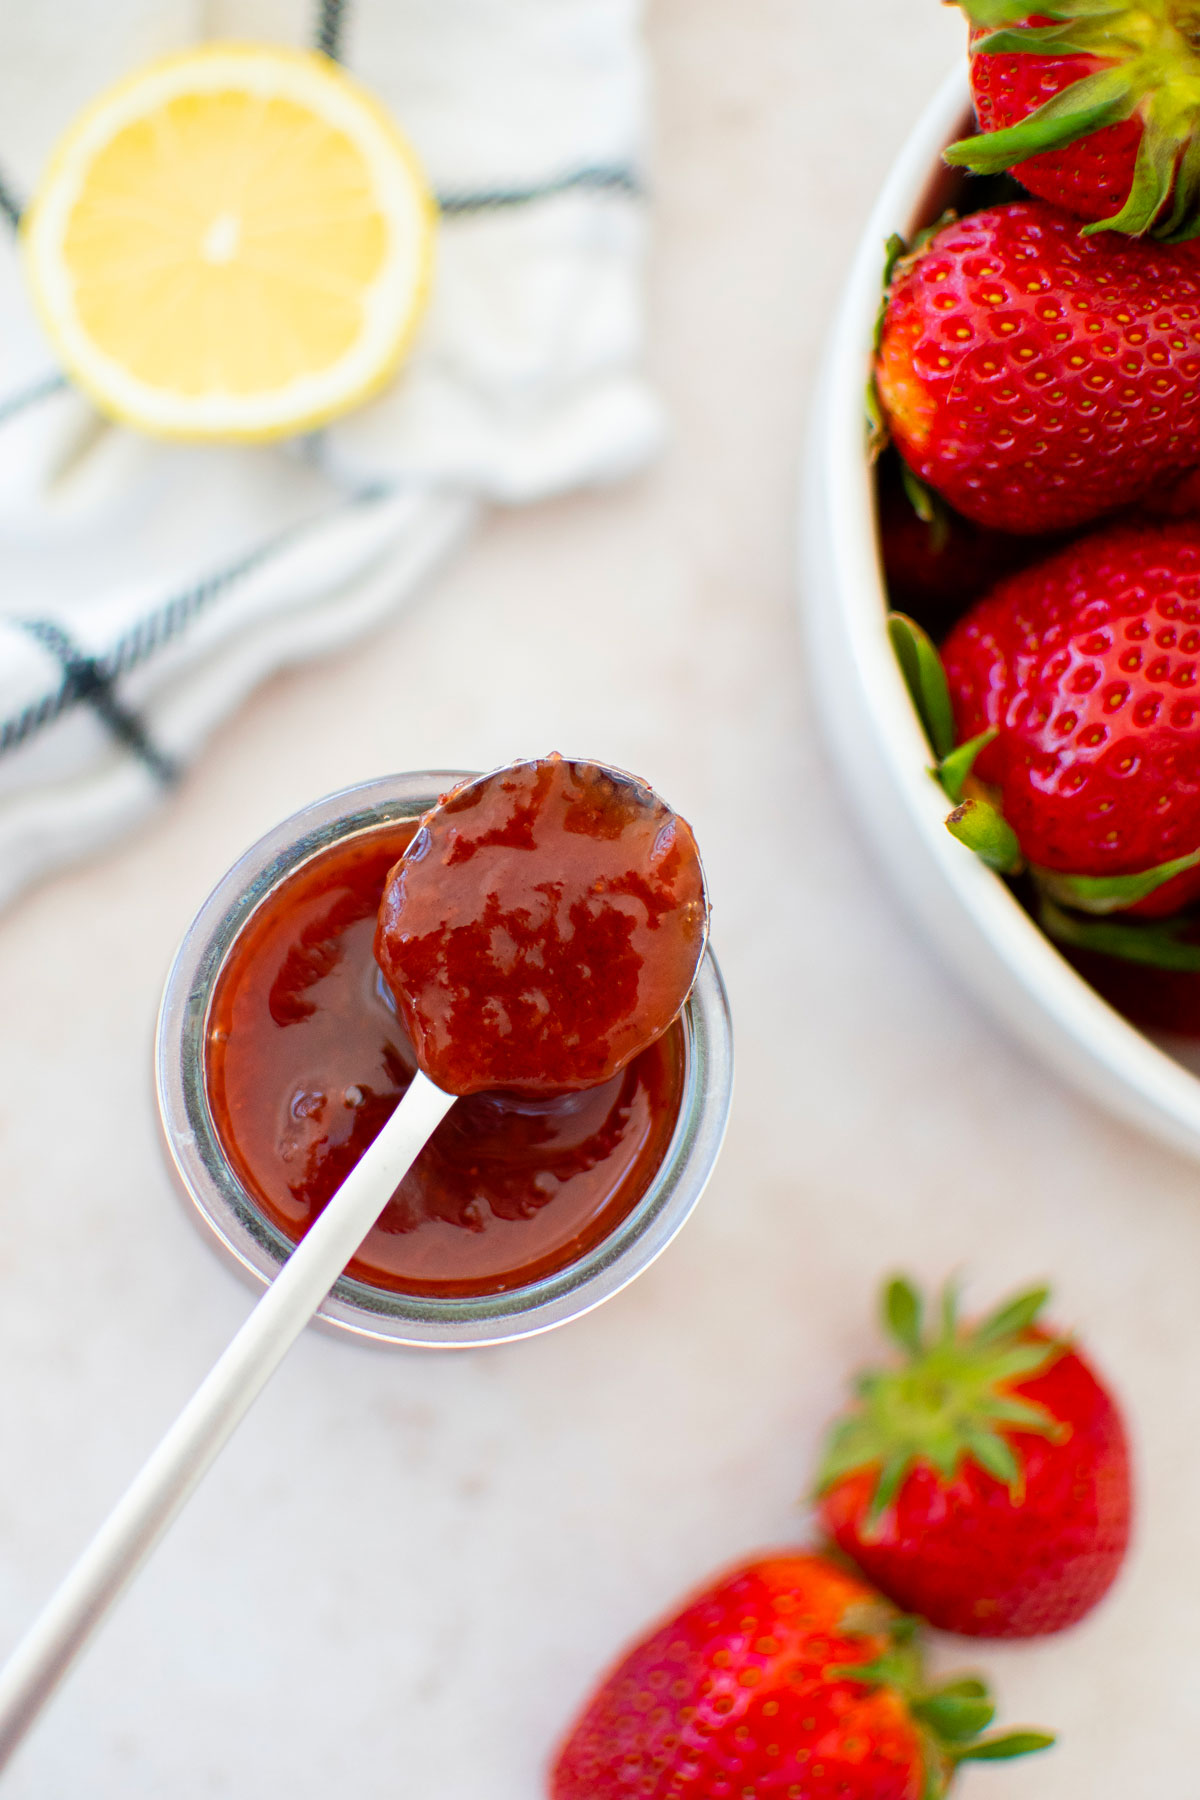
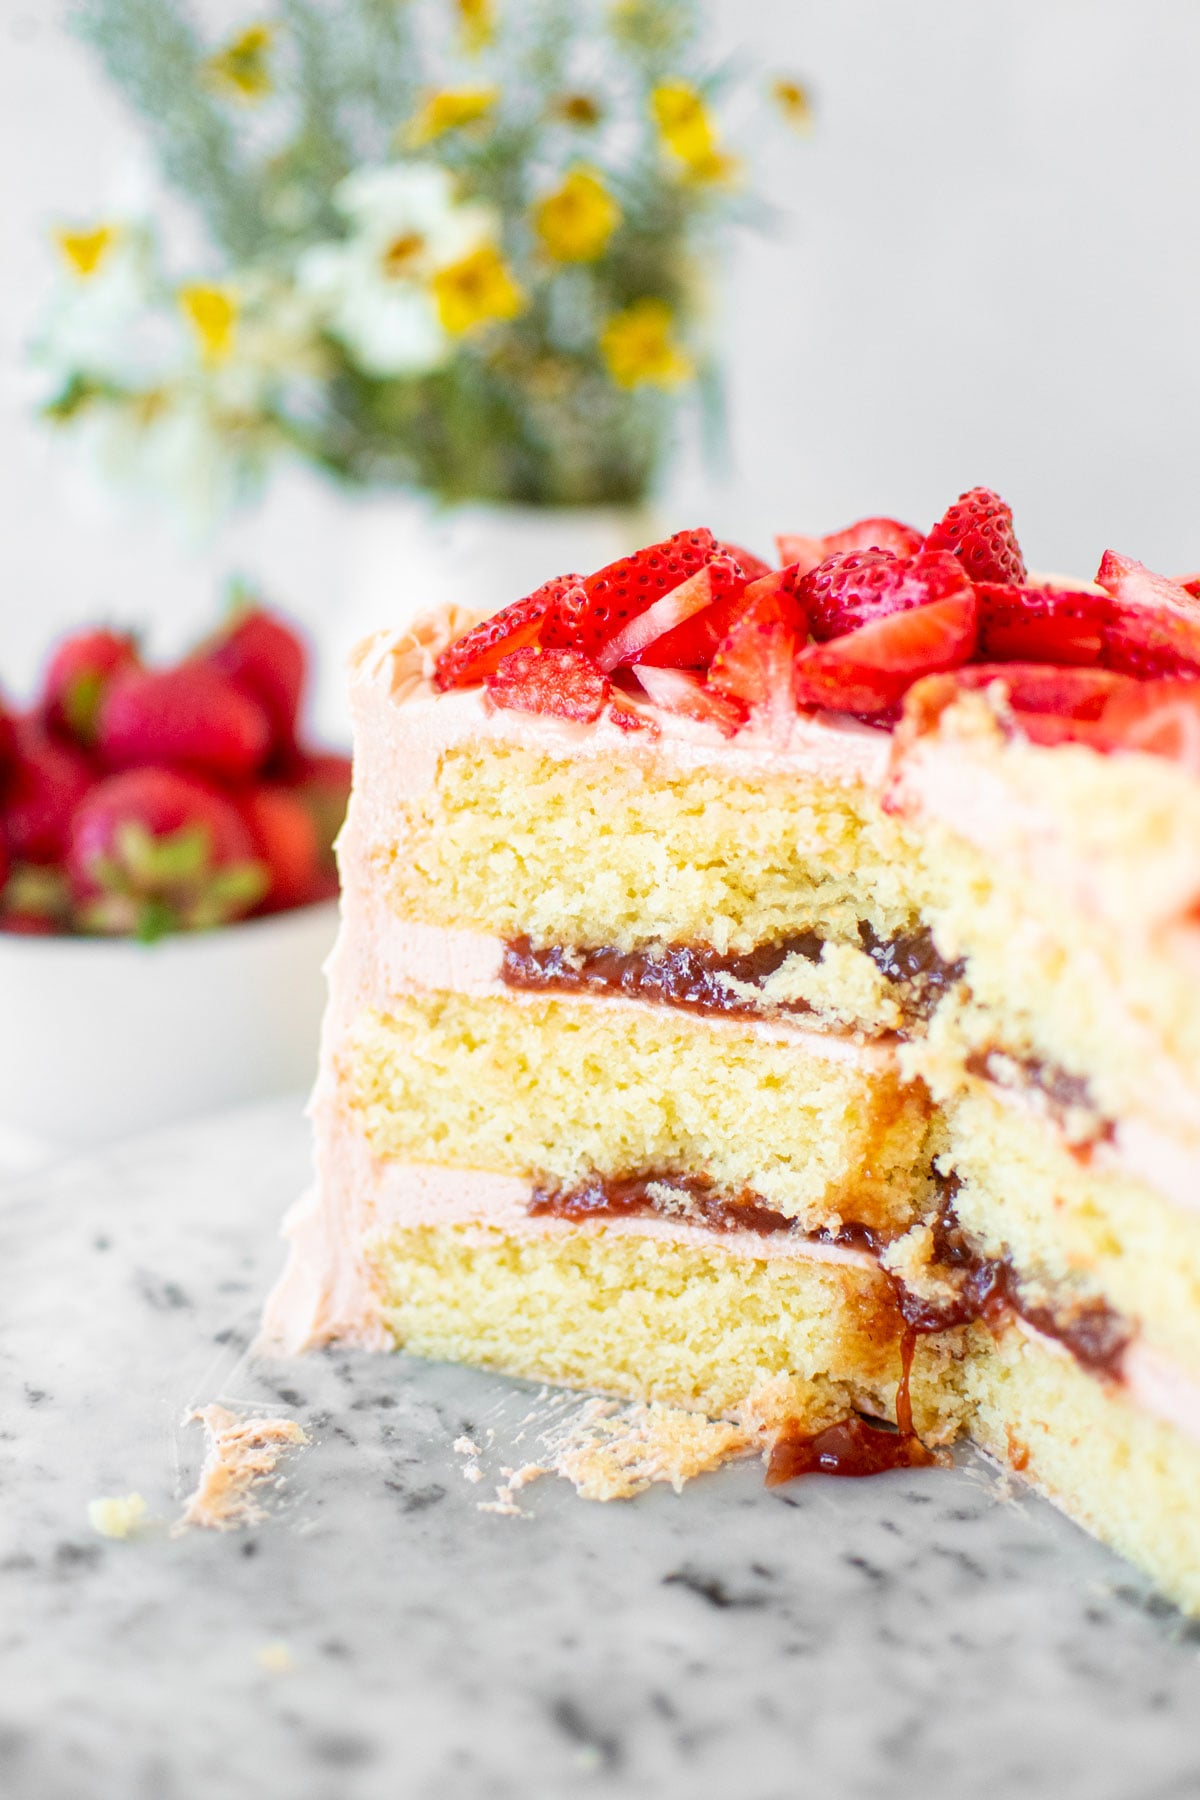
If you have a soft filling like Homemade True Caramel Sauce, jam, compote, Homemade Organic Lemon Curd With Egg Yolks, Homemade Caramel Sauce with Bone Broth, Gingerbread Caramel Sauce, or Homeamde Chocolate Ganache these are all soft and somewhat runny. So, if you stack a cake and just slap these things into the middle, they will run out the sides of your cake and also cause the layers to slide.
What is the trick to stacking a layer cake with filling?
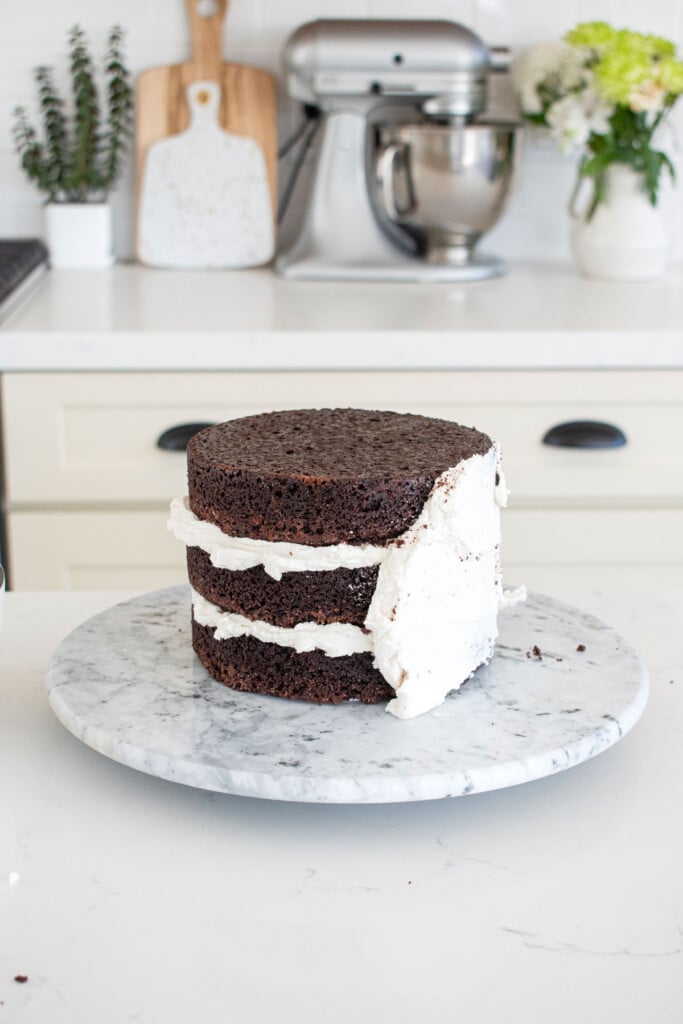
The trick to stacking a layer cake with filling is creating a boarder of frosting for that soft filling to live inside. You want to do this with a stiff frosting like buttercream. This will prevent that jam or caramel sauce from oozing out the sides of your cake. It will also prevent the top cake layer from sliding around.
How does it work?
By piping a small boarder of buttercream around the edge of each cake layer, you create a boarder for the filling to live inside. With this boarder, you also create a stiff and sticky surface for the top cake layer to sit upon. So, this prevents two things from happening — the filling from oozing out and the top layer from sliding around. After this step, you can crumb coat your layer cake like normal.
What is a crumb coat?
A crumb coat is a thin layer of frosting that catches all the crumbs on a cake. You want to crumb coat a cake first in order to catch those crumbs so they don’t show up on your finished layer of frosting. If you don’t have a cake with filling, you can head directly to my post How to Crumb Coat a Cake instead.
Tools Needed
- Piping Bag: I use a piping bag, but if you don't have one a zip bag will work too, just snip off the corner.
- Cake Spatula: I prefer a straight cake spatula, but if you like the offset cake spatula, you can use that too.
- Cake Turntable: I love my marble cake turntable because it's pretty enough for photoing or serving cake too. But, a plastic turntable also works just great too!
- Cake Rounds: You can use a cake round, or you can skip it. I usually only use them when I'm bringing a cake to a party as it makes it easy to move it around and place it in a cake box. If you are using a cake round, I recommend going 1 to 2-inches larger than your cake as this makes it easy to grab and move around if you are bringing to a party.
Baker’s Tips
- Always make sure your cake layers are chilled whenever stacking and filling a layer cake. This helps so much so your cake doesn’t break and it also prevents more crumbs from going into your frosting. I like to chill them in the freezer for about 15 minutes before starting.
- You want your frosting to be stiff when stacking a layer cake with filling. This will ensure that the filling will not ooze out the sides, and also that your layers won’t bubble. You can always add a bit more liquid to your remaining frosting after the cake has been stacked and filled so it's easier to frost the cake.
- If your filling is jam, compote or something like lemon curd, the be sure to store your finished cake in the fridge.
How to Secure a Cake Round On Your Turntable
If you are using a cake round, then you will need to secure the cake round to your turntable. (I am not using one here as this cake is living on the turntable until it’s cut and served.) But, if you are taking your cake somewhere, then you’ll most likely want to use a cake round or parchment paper so you can move it to a plate afterwards.
- When you secure your cake round to the turntable you'll need tape. I use painters tape or packing tape.
- You will need to create two loops of tape (like you’re creating your own double stick tape).
- Place them going in opposite directions on the bottom of your cake round. Start by placing one of them in the middle of your cake spinner. Then, place the other one directly below it but going in the opposite direction. For example, if you place the first piece of tape down and the holes are on the right and left side, then place the second piece of tape down vertically so the holes are the top and bottom. It’s important to stick them in opposite directions because as you push and pull as you are crumb coating your cake, the cake round will not release if it’s taped down this way.
- Last, place the cake round (or piece of parchment paper) directly onto the tape and press down so it’s secure.
How to Stack a Layer Cake with Filling

- Make sure your cake layers are baked and cooled. Make your frosting. I prefer buttercream here, such as Strawberry Buttercream with Fresh or Freeze Dried Strawberries (using freeze dried strawberries like I'm doing here).

- Chill your cake layers. You want to chill the cake layers in the freezer for about 15 to 20 minutes, no more. You don’t want to freeze them, but you don’t want them to easily break. Cake is so fragile, so chilling it before will really help you stack your cake with ease.
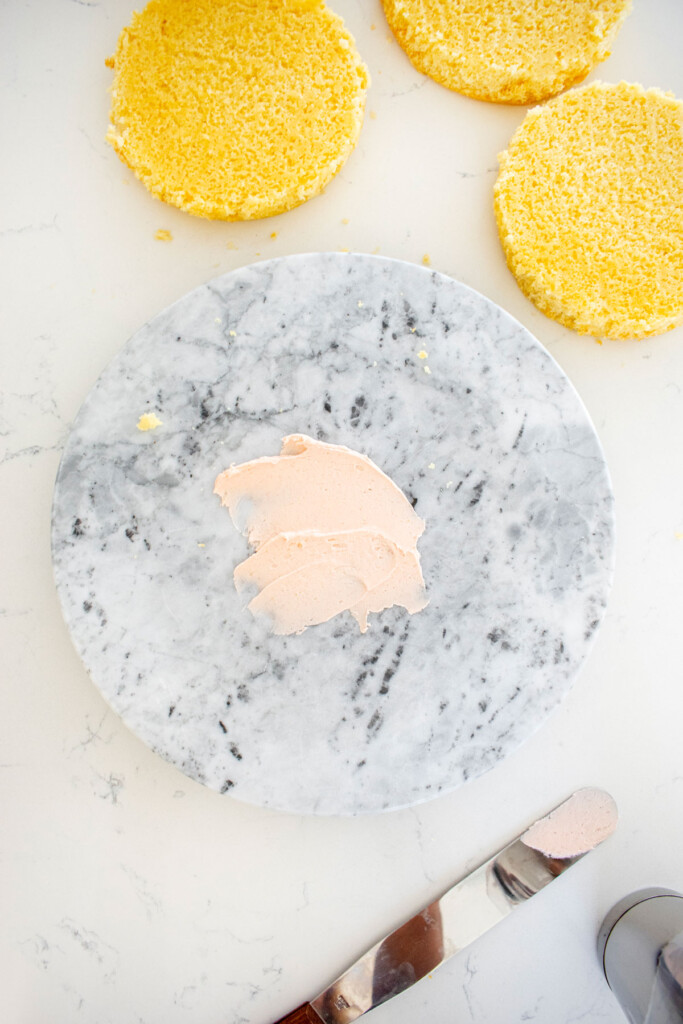
- Place a dollop of frosting onto your turntable (or secure your cake round).
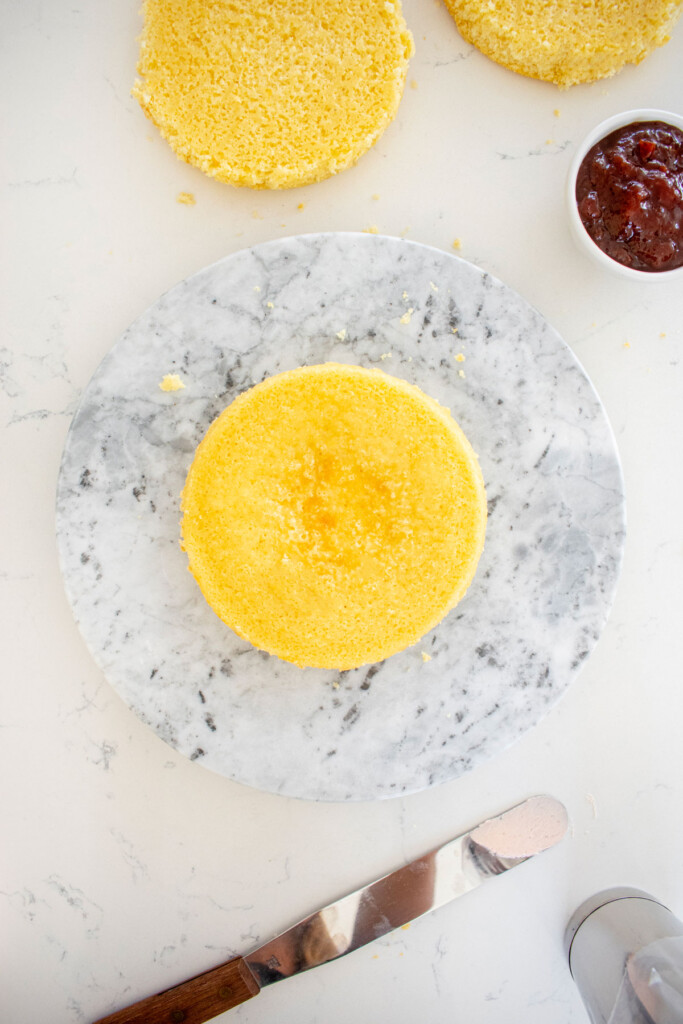
- Then place your first cake layer.
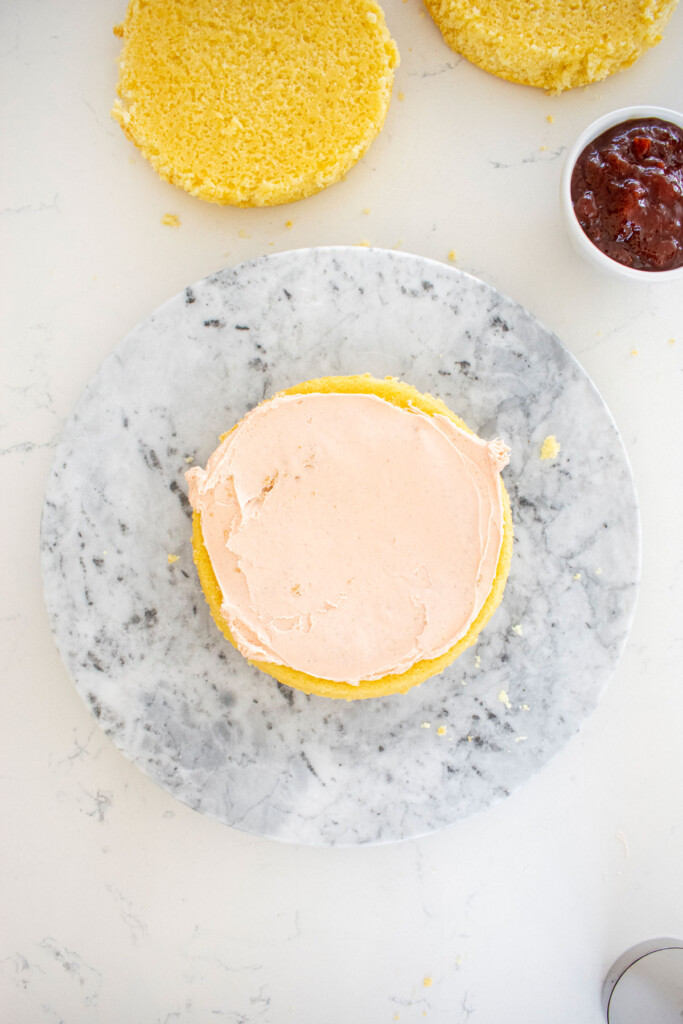
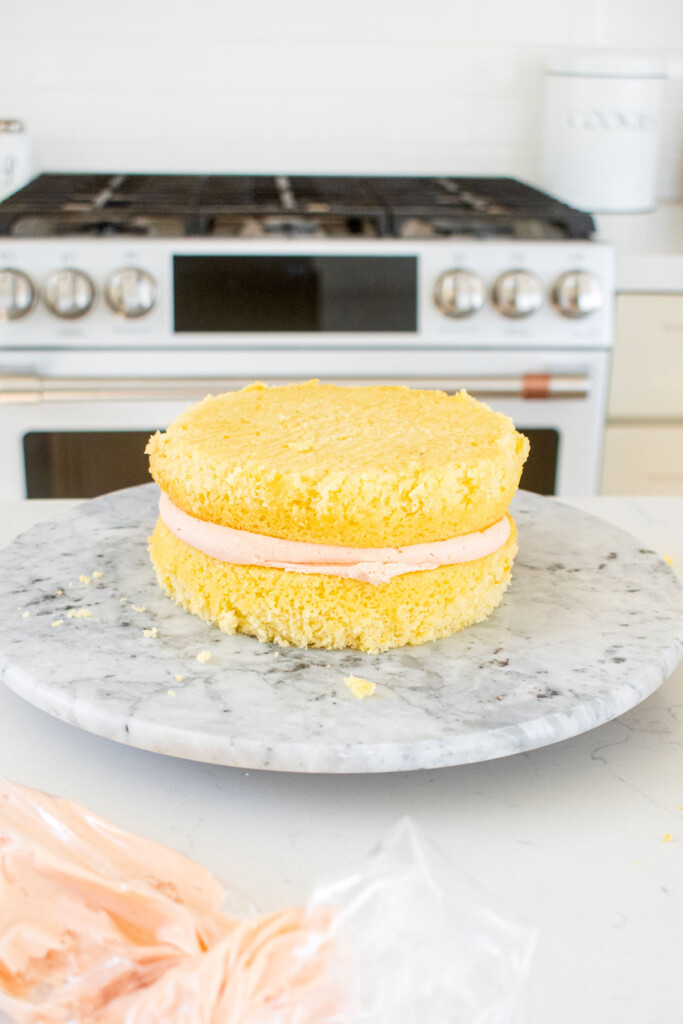
- Spread a thin layer of frosting onto the cake. I always add a little bit of frosting onto the cake before the filling, but this part is optional. I like to create a little barrier between the cake and filling that way it doesn’t get too soggy if you were to just add jam for example.
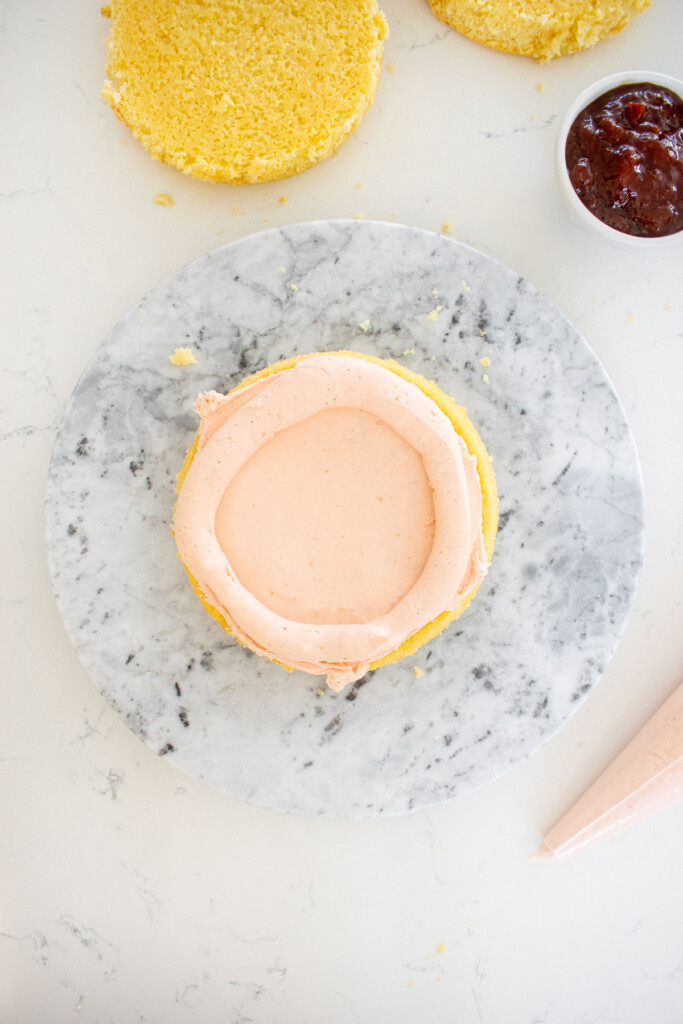
- Transfer some of the frosting to a piping bag with no tip. You don’t need to measure this amount and it’s always better to add more than less, because you can easily just pipe out the extra into the remaining frosting. Pipe a circle boarder around the edge of the cake layer.
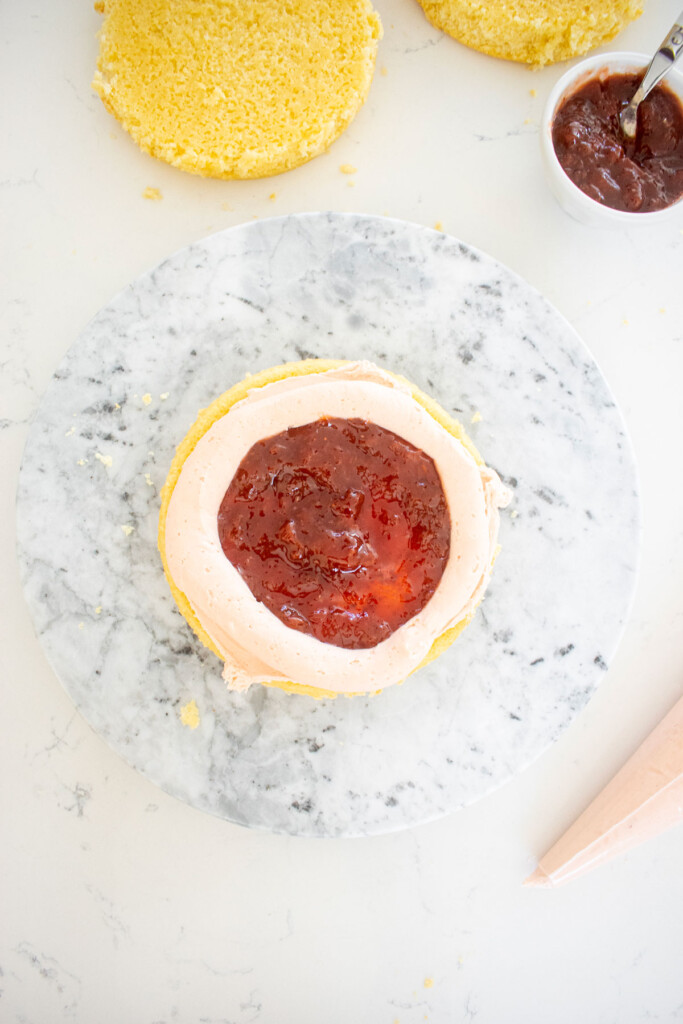
- Fill the circle with your filling (jam, caramel sauce, etc.). Be sure your filling isn't so much (or so tall) that it is spilling over the frosting boarder as that would defeat the purpose of this!
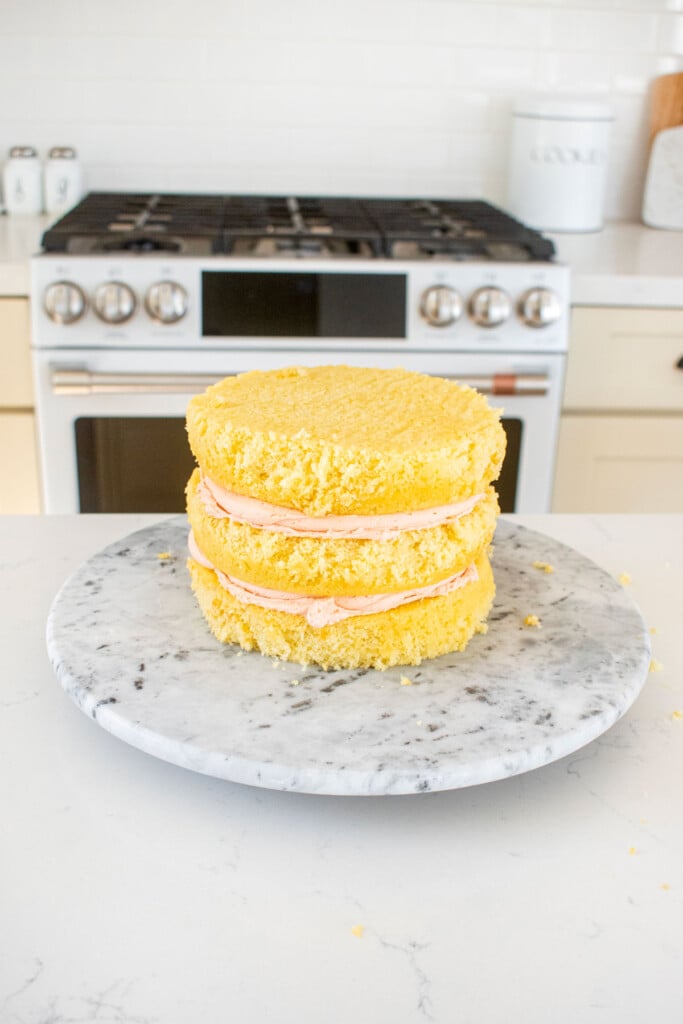
- Top with the second cake layer and repeat this process until your cake is fully stacked.
- In some cases, you may want to chill your cake in the fridge or freezer for a few minutes before crumb coating. This will help the filling set and the buttercream that’s holding the cake layers together as well.
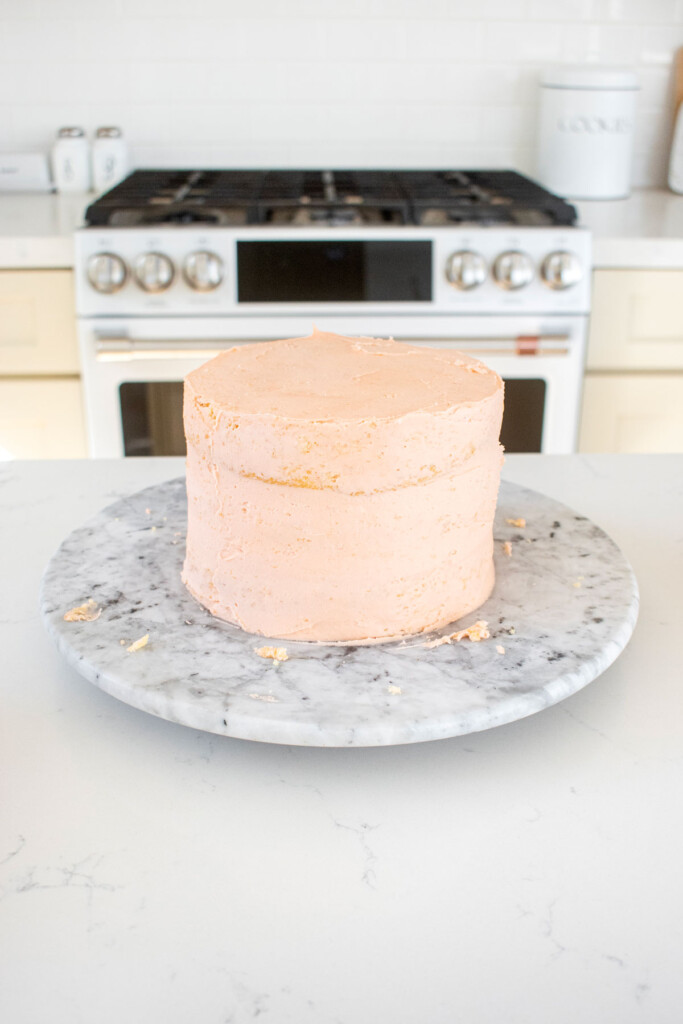
- Crumb coat your cake like you normally would. Use a small amount of frosting and add it to the top and sides. Ensure that you cover the cake completely but use as little frosting as possible. For more tips on crumb coating a cake, visit my post How to Crumb Coat a Cake.
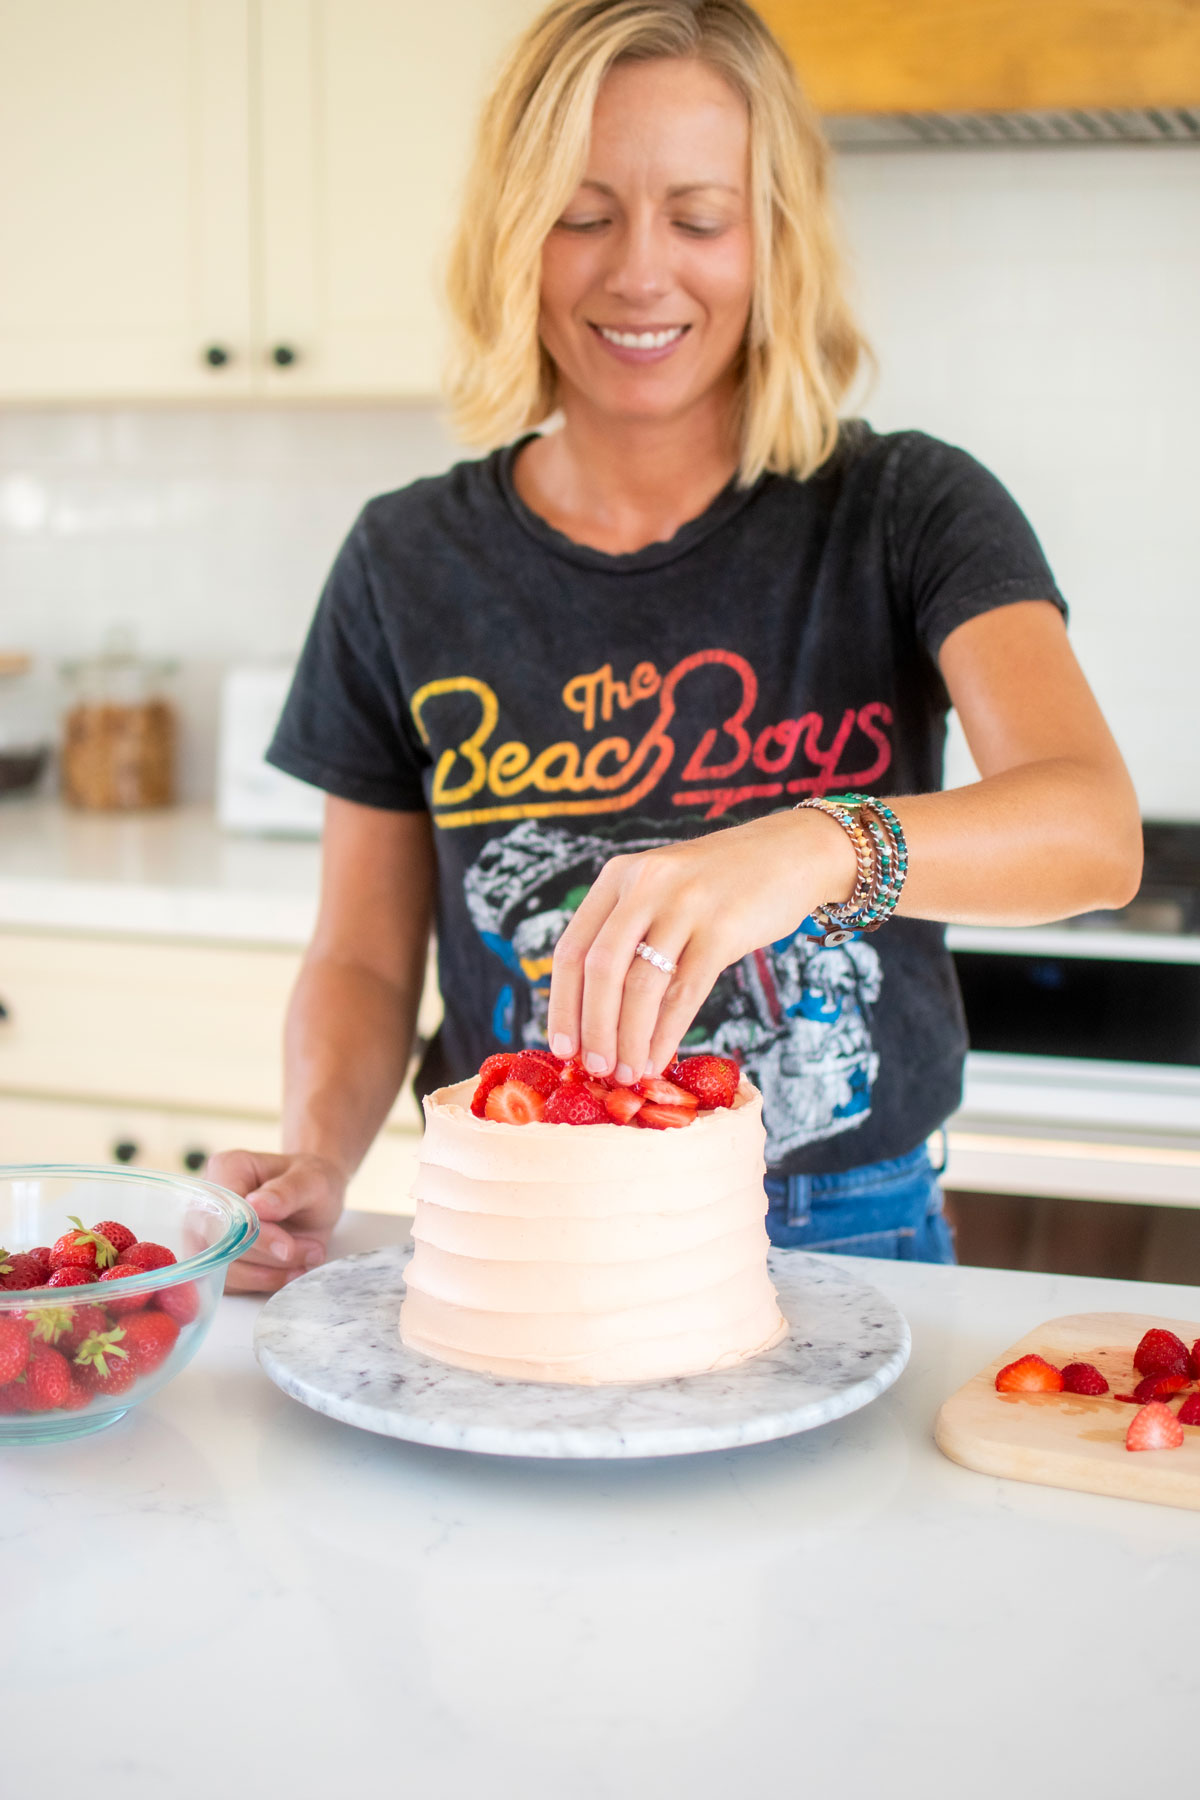
- Once your cake is stacked, filled, and crumb coated then it’s ready for its final decorating layer of frosting!
Watch the Video

FAQ's
This can be fairly small. It will be larger than a frosting tip for writing but a smaller than a frosting tip for cupcakes. If you have Ateco tip #804, this is a really good size! You just want the boarder large enough to hold in the filling.
Use a ziplock bag in its place and just snip off the corner!
That depends on the ratio of chocolate ganache that you have. In my post Homemade Chocolate Ganache, I provide three different ratios of chocolate ganache. If you are using the sauce ratio, then yes, you’ll need to use this method as that is a soft and runny, perfect for drips on a cake! But, if you’re using the frosting ratio, then no you wouldn’t have to use this method as that sets on its own.
More Baking Tutorials


The Bake Shop
Visit The Bake Shop for foodie inspired tees, sweatshirts, and accessories. Find my favorite kitchen tools (with discounts!) in the Kitchen Shop. And shop our collection of food inspired dog accessories too!

Leave a Reply