How to Crumb Coat a Cake
Learn how to crumb coat a cake with this easy step by step tutorial with photos and a video! Apply this technique to any layer cake to achieve a beautiful frosting finish that's free of crumbs.
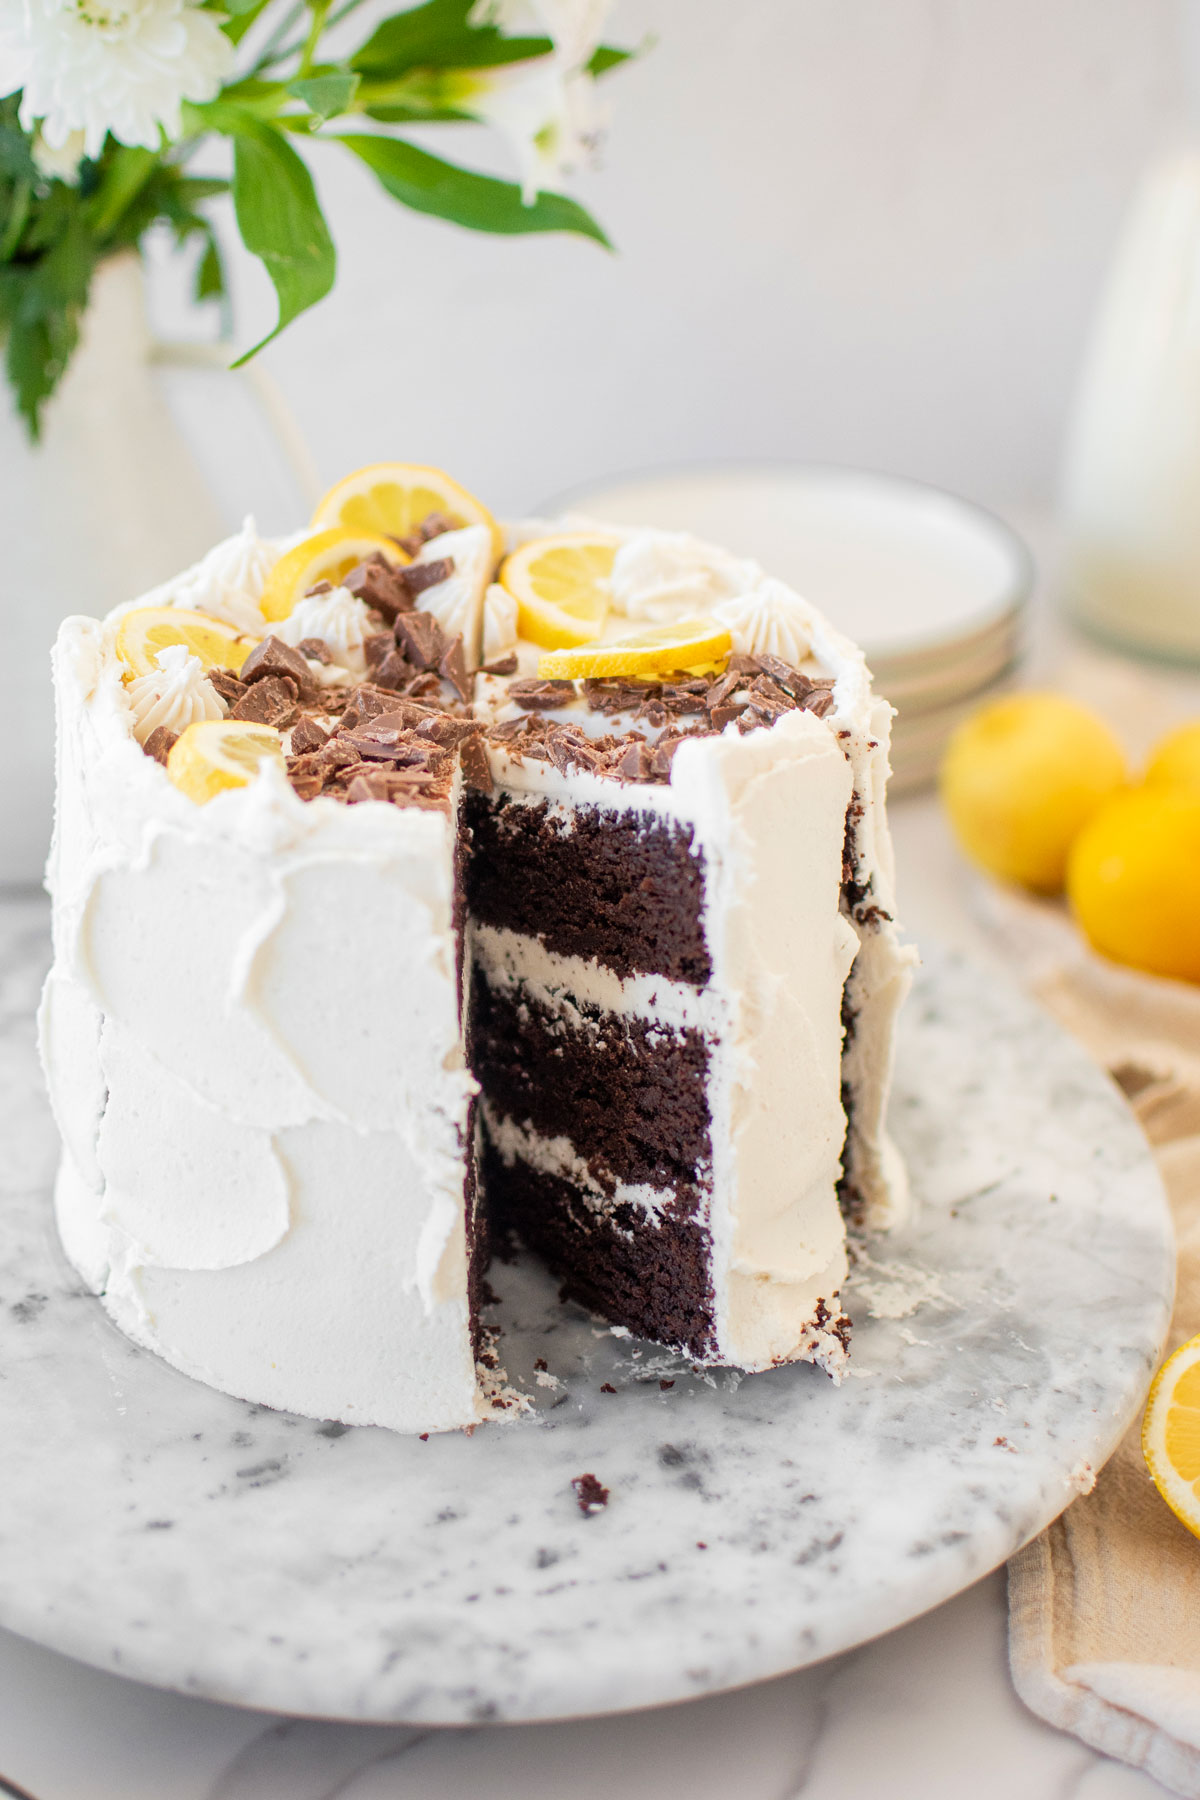
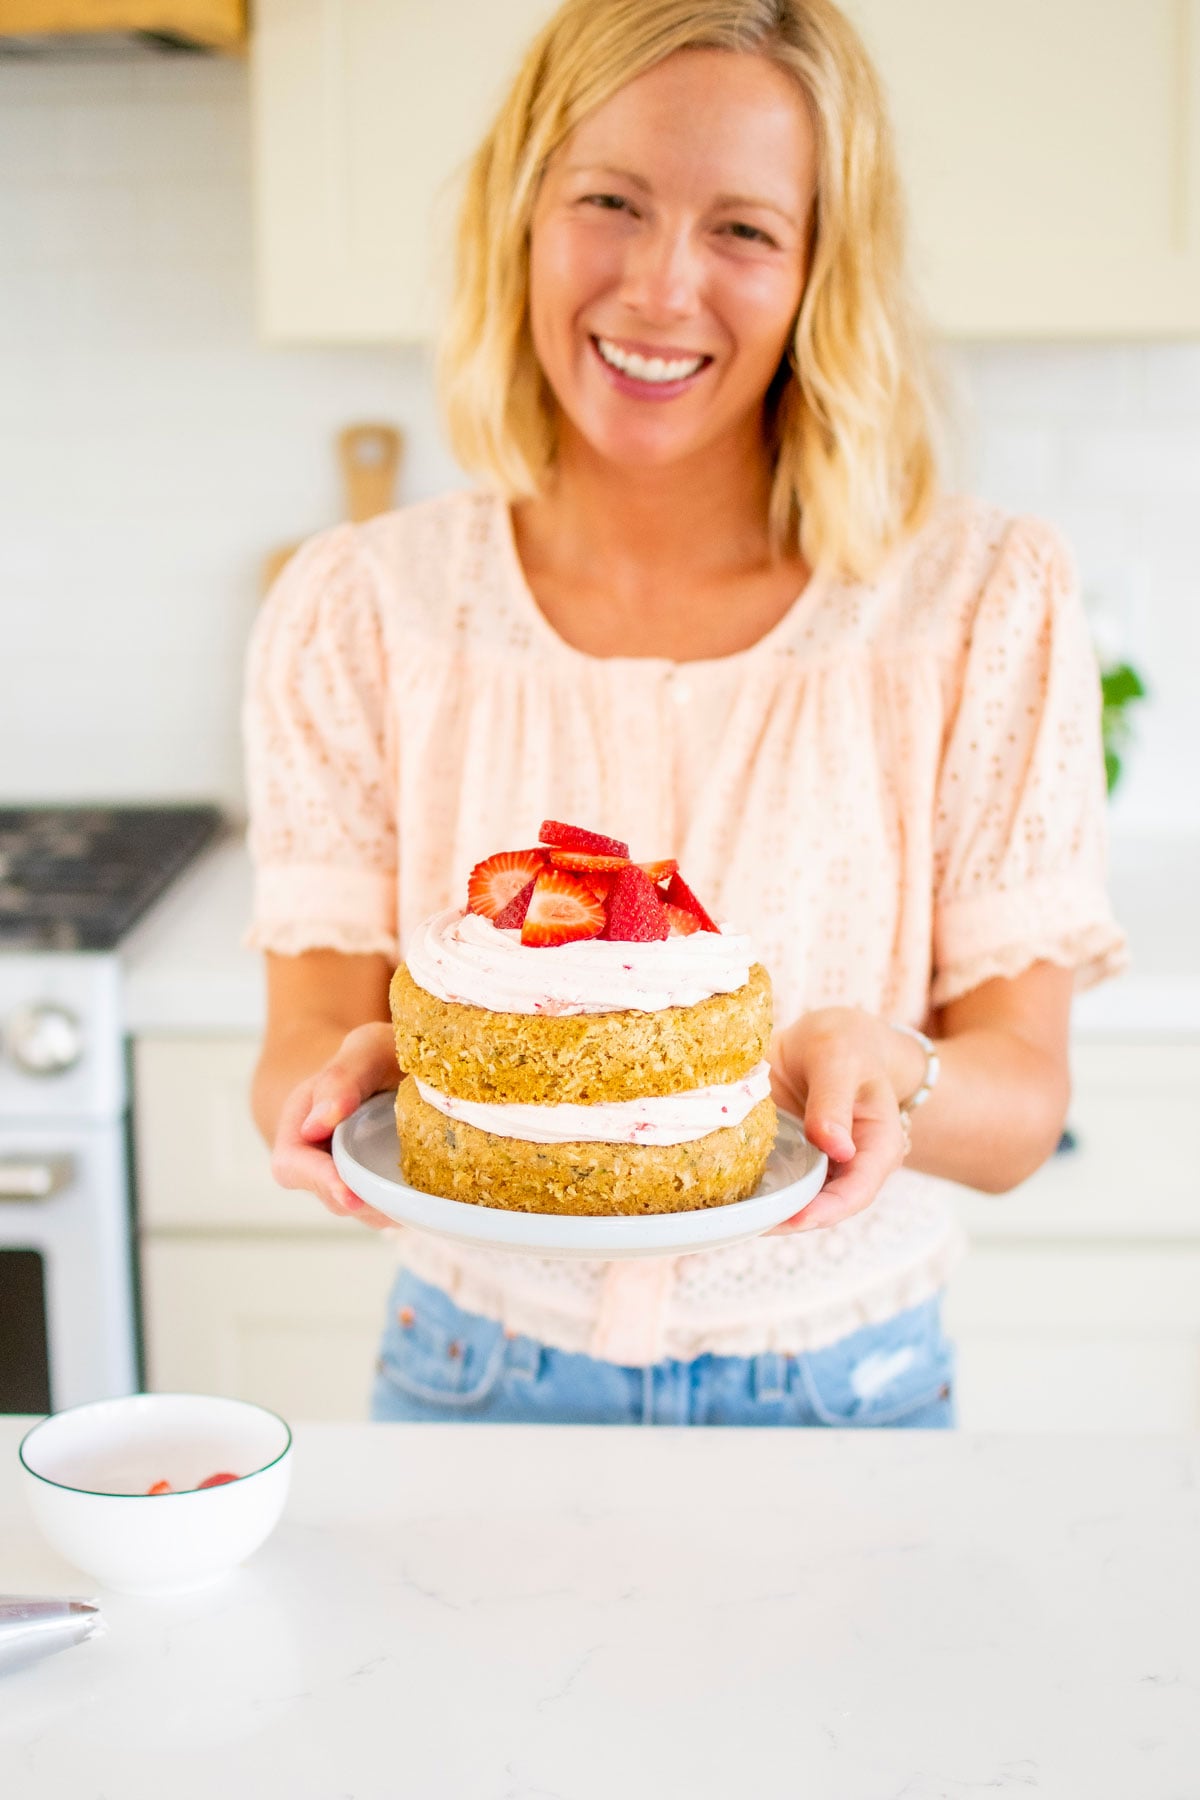
If you want to learn how to make beautiful layer cakes, then crumb coating a cake is an important step in the process! Cakes like my Strawberry Almond Cake or Simple Salted Caramel Cake With Buttercream Frosting require you to crumb coat the cake before finishing. Let me show you how to do it!

In This Baking Guide
- How to crumb coat a cake.
- You can apply this technique to any layer cake recipe.
- Essential tools for crumb coating a cake, plus links to my favorites.
- Tips and tricks from a professional baker who has taught so many people how to crumb coat a cake.
- Tips for trimming your cake layers.
Summarize & Save This Content On
Jump to:
- In This Baking Guide
- What is crumb coat for a cake?
- When to crumb coat a cake?
- How do you crumb coat a cake?
- How long should I chill my cake layers for?
- Can you crumb coat a cake the night before?
- Can you crumb coat a cake with cream cheese frosting?
- What kind of frosting is best to crumb coat a cake?
- How to crumb coat a cake with whipped cream?
- What do you use to crumb coat a cake?
- Tools Needed
- Pro Baker’s Tips for How to Crumb Coat a Cake
- How to Crumb Coat a Cake
- Video Tutorial
- More Cake Tutorials
- The Bake Shop
What is crumb coat for a cake?
A crumb coat for a cake is exactly as it sounds – it’s a coat of frosting that is put on to hold in all the crumbs – Crumb Coat. Cake is moist and fluffy, it’s part of what makes it so special. But, because of its texture, it can easily break. So, when you are smashing frosting up against it, what do you think it could do? Break off!
So, a crumb coat is added to cakes to hold in all those tiny crumbs that break off during the frosting process. Crumb coating is the first step in frosting a layer cake in order to have a finished cake that is free of crumbs. After the crumb coat is put on a cake is usually refrigerated or frozen for a few minutes to set that frosting and hold in the crumbs. Then, the final layer of frosting is added on, and it goes on nice and smooth (without crumbs) because those have been sealed into the first layer of frosting, the crumb coat.
When to crumb coat a cake?
Crumb coating a cake is not always necessary. First, crumb coating is only for layer cakes. It doesn’t apply to sheet cakes or loaf cakes. Why? Because those cakes just get a single layer of frosting on top, there really aren’t many crumbs to conceal, as the frosting usually just sits right on top of those types of cake.
Second, if you are making a naked cake, then crumb coating also does not apply because the cake layers will be showing through. So, when you make a naked cake, you are just adding one coat of frosting in a specific way. For more tips on naked cakes, check out my post How to Make a Naked Cake.
And last, a crumb coat is only necessary if you don’t want crumbs to be seen in your final layer of frosting. If you’re just baking because you just really want some cake, then by all means, skip the crumb coat and just go for it! Crumb coating a cake is only necessary if you don't want crumbs to show in the outer layer of frosting. If you're serving your cake at a party, for example.
How do you crumb coat a cake?
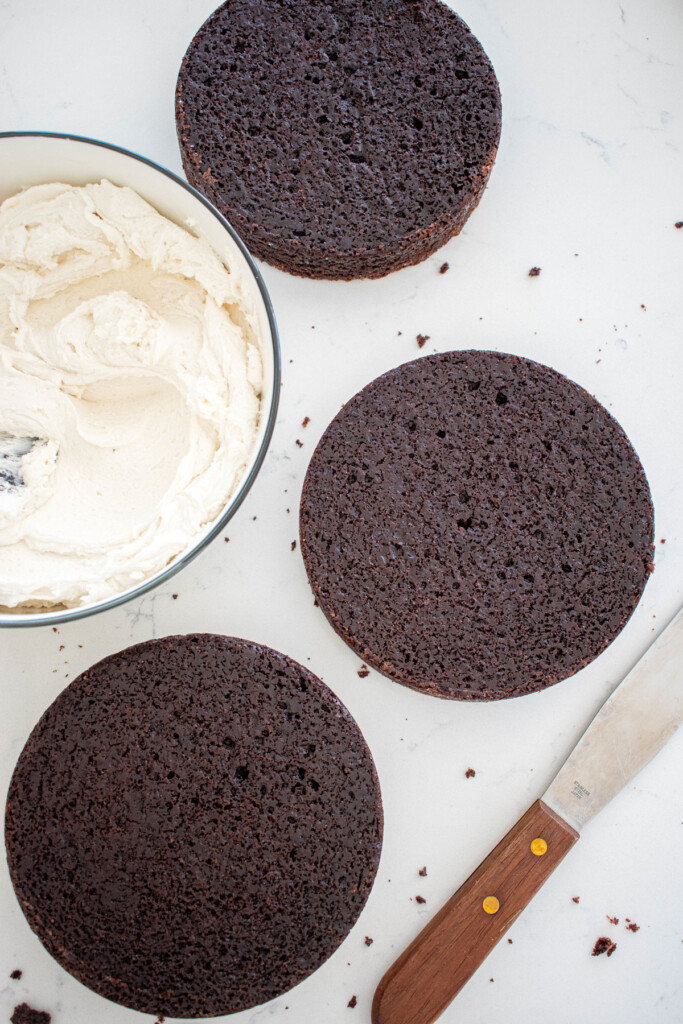
A crumb coat is the first layer of frosting added to a stacked layer cake. I prefer to freeze my cake layers when putting together and stacking layer cakes. I find this makes it much easier to deal with for the crumb coat and the final layer. If you are new cake baking, I highly suggest you try this tip, as it makes learning to stack and frost layer cakes so much easier.
After the cake layers have been frozen for 10 to 15 minutes, and the frosting is made, then it’s time to start stacking and crumb coating the cake. When you have multiple layers of cake, you will place the first cake layer on your cake spinner or stand, then top with frosting, spread it out, and top with the next cake layer. Repeat that until you have all the cake layers stacked.
Then, once they are all stacked, you’ll add a bit more frosting to the top and the sides and start sealing in the whole cake with frosting. You are now crumb coating! You want to use as little frosting as possible because it’s best if this coat is very light, just enough to hold in the crumbs.
This part can be challenging for a beginner baker, I know, but that is what you should be working up to. Using just enough frosting for the crumb coat so you have plenty for the finished layer.
After you have the crumb coat finished, chill the cake to set the frosting for a few minutes before the final layer of frosting goes on!
How long should I chill my cake layers for?
You should only chill cake layers for about 10 to 15 minutes in the freezer. You do want them to be chilled so they don't break. But, you don't want them to be so frozen that they freeze the frosting as you're trying to spread it. And, if cakes are frozen for too long, then that can create air bubbles in the final layer of frosting as the cake actually begins to come back to room temperature. So, the this is the magic number.
Can you crumb coat a cake the night before?
If you’re prepping for a party you may want to think of things you can do ahead of time. I do not recommend crumb coating a cake the night before. Instead, just make the whole cake the night before if you have to.
Crumb coating uses a small amount of frosting, like I noted above. It does not cover the entire cake; it just holds in the crumbs. So, if you just crumb coat a cake and leave it, the cake will be at risk of drying out as there is cake exposed. Plus, whenever you make frosting, you will make enough for both the crumb coat and the finished layer, so it just makes more sense to finish the entire cake.
If you do have to make a cake the night before a party, be sure to just store it in a cake dome or in the fridge and it will be just fine until the next day.
Can you crumb coat a cake with cream cheese frosting?
Yes, cream cheese frosting will work for crumb coating a cake! Try out Easy Homemade Cream Cheese Frosting (10 Flavor Options)!
What kind of frosting is best to crumb coat a cake?
I prefer cream cheese frosting and buttercream frosting as these are hardening frostings, which means they will naturally harden. When crumb coating you want the crumb coat to set, so it holds in the crumbs. That's why a hardening frosting is best. Try out Caramel Buttercream Frosting, Strawberry Buttercream with Fresh or Freeze Dried Strawberries, Vanilla Bean Buttercream Frosting, or Honey Buttercream Frosting for great frosting options.
How to crumb coat a cake with whipped cream?
I know whipped cream is really the best with cake! If you want to use whipped cream for your cake instead of frosting, that is okay. Whipped cream does not harden, like cream cheese or buttercream frosting.
So, I would recommend using my Homemade Whipped Cream Frosting and not just straight whipped cream. My Homemade Whipped Cream Frosting is made for cakes, so it has more stability than traditional whipped cream, even though it won't harden completely, it will still be better than plain whipped cream. And, it will taste just like whipped cream with your cake!
What do you use to crumb coat a cake?
There are many tools that help when crumb coating a cake. If you are getting serious about baking layer cakes, then I highly suggest that you buy these tools as it will make your life so much easier!
Tools Needed
Cake Turntable
A Cake Turntable (or also known as a cake spinner) is needed to spin the cake to easily press frosting into the sides of the cake. Trust me, this tool is totally worth it! I cannot frost a layer cake without this tool. There are many types of cake spinners, such as marble, wood, and plastic. I have used all and prefer the marble or the plastic, I feel the wood ones do not spin well enough. Check out the marble spinner I have or the plastic spinner (these are what we used at my bakery).
Straight Spatula
A straight spatula is a long metal spatula that you can use to frost the cake. There are flat spatulas and angled (offset) ones. Which kind you like is totally personal preference. I prefer the flat ones, like the Ateco Straight Spatulas. But, some people prefer angled ones like this offset spatula.
These help for both crumb coating and especially for frosting your finished cake! You can make a smooth cake with this spatula or even do textures like stripes or swirls very easily.
Cake Rounds
Cake rounds make layering and stacking cakes a lot easier, but they are not totally necessary. The two tools above are much more important than cake rounds, in my opinion. If you are buying cake rounds, try to buy ones that are actually 1 to 2-inches bigger than your cake. You want them to be larger because then you can easily frost the cake to the round and still have a way to grab it!
If you are photographing cakes and you don’t want the cake round to show, then you should buy the same size cake round as the cake. And, do not buy a scalloped cake round, it should be just round. This way, you can frost right to the edge, and while there is a cake round under there, it will appear there is not. This is what I do for all the photos I take. But, if I am making a cake for a friend or bringing to a party, I use a larger round.
If you don’t have a cake round, you can use parchment paper below your cake in the same way as a cake round! I also do this at home as well, and it works just great. It also makes your cake look a little rustic having it on a piece of parchment paper. Or, you can use a fancy cake spinner (like I'm using in these photos) and you can frost your cake right onto it!
Popular Size Cake Rounds
- 6-inch Cake Rounds: Use for 6-inch cakes if you want no cake round to show.
- 8-inch Cake Rounds: Use for 6-inch cakes if you want to gift the cake or make it easy to move around.
- 9-inch Cake Rounds: Use for 8-inch cakes you want to gift or make it easy to move around. You can also use this for 9-inch cakes you are photographing or don’t want to see the cake round on.
- 10-inch Cake Rounds: You can use for 8-inch or 9-inch cakes if you want to gift or make it easy to move around.
Pro Baker's Tips for How to Crumb Coat a Cake
- Make sure cake layers are cooled completely.
- If you need to trim off domed cake tops, do this before chilling your cake layers as it will be asier.
- I recommend using a serrated knife to trim cake layers.
- Do not freeze cake layer for too long as this can freeze the frosting when applying, making it difficult.
- Frozen cakes can also cause air bubbles to form in the layers when defrosting. You just want it chilled, not completely frozen.
- Use as little frosting as possible on the crumb coat.
- Rinse your spatula after the crumb coat so you don't get crumbs in the finished cake.
How to Crumb Coat a Cake
- Have your cake layers baked, cooled, and trimmed (if needed). Chill them for about 10 minutes in the freezer.
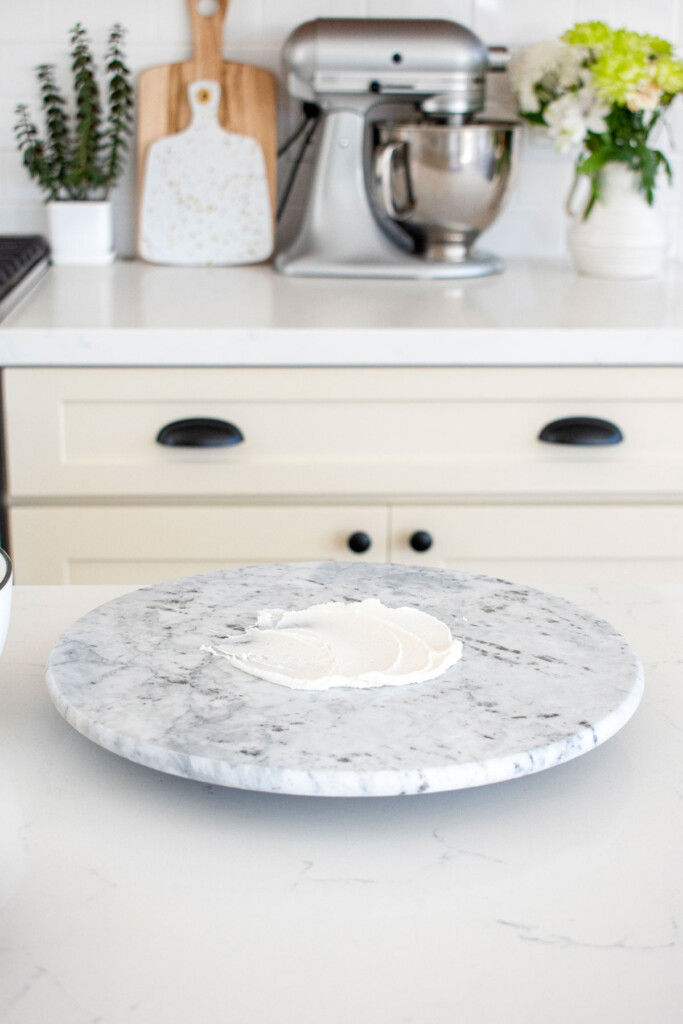
- If you are using a cake round, tape it down using my method I show in the video. Once the cake round is taped down add a dollop of frosting onto the round. Or, just add the frosting onto the spinner if not using a round.
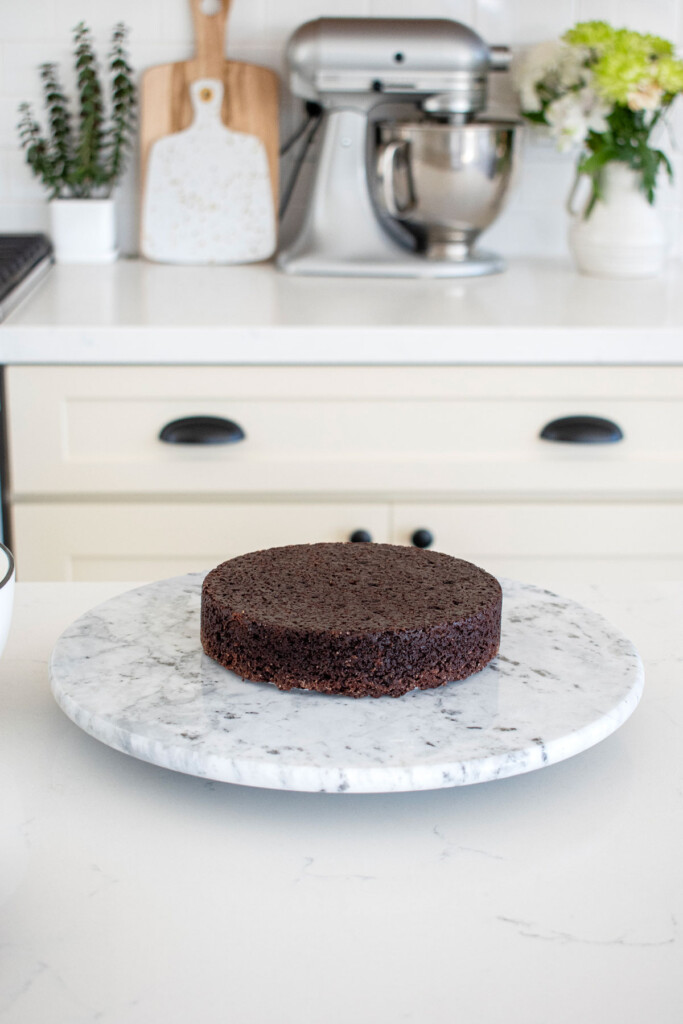
- Place the first cake layer bottom side down on the frosting so it sticks.
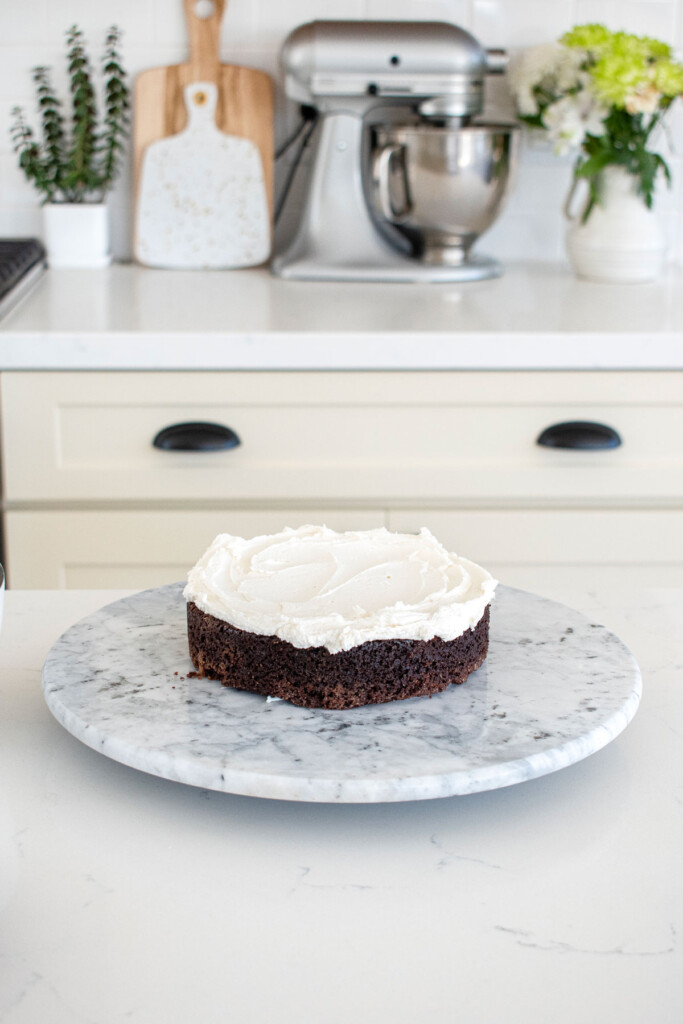
- Add frosting onto the cake layer and spread it out evenly.
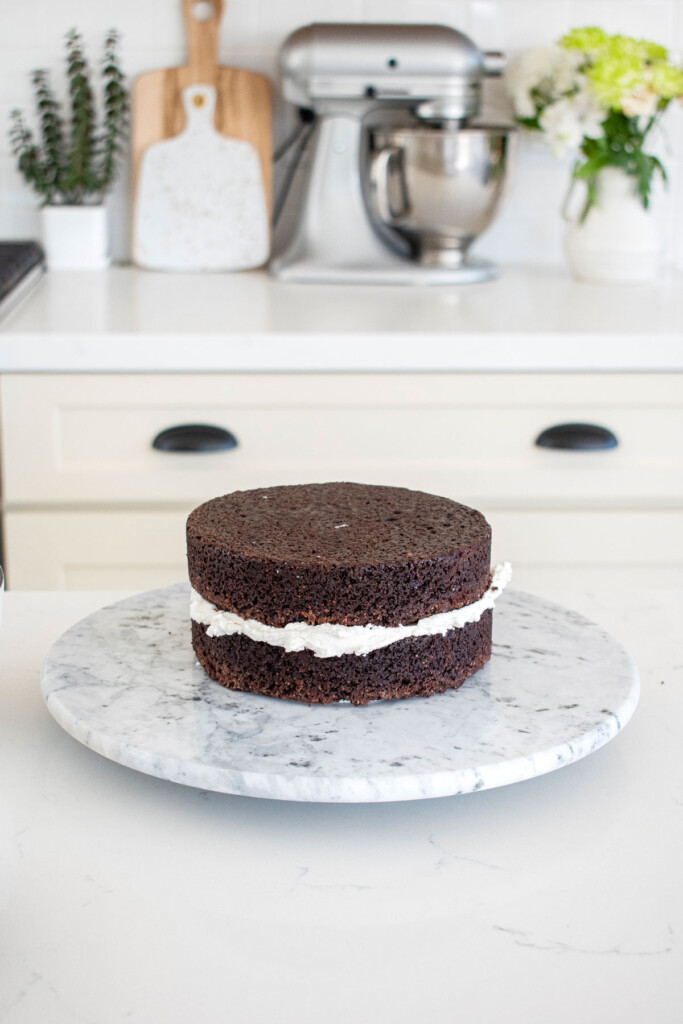
- Top with the second cake layer, bottom side up.
- Add more frosting on top and spread it out evenly.
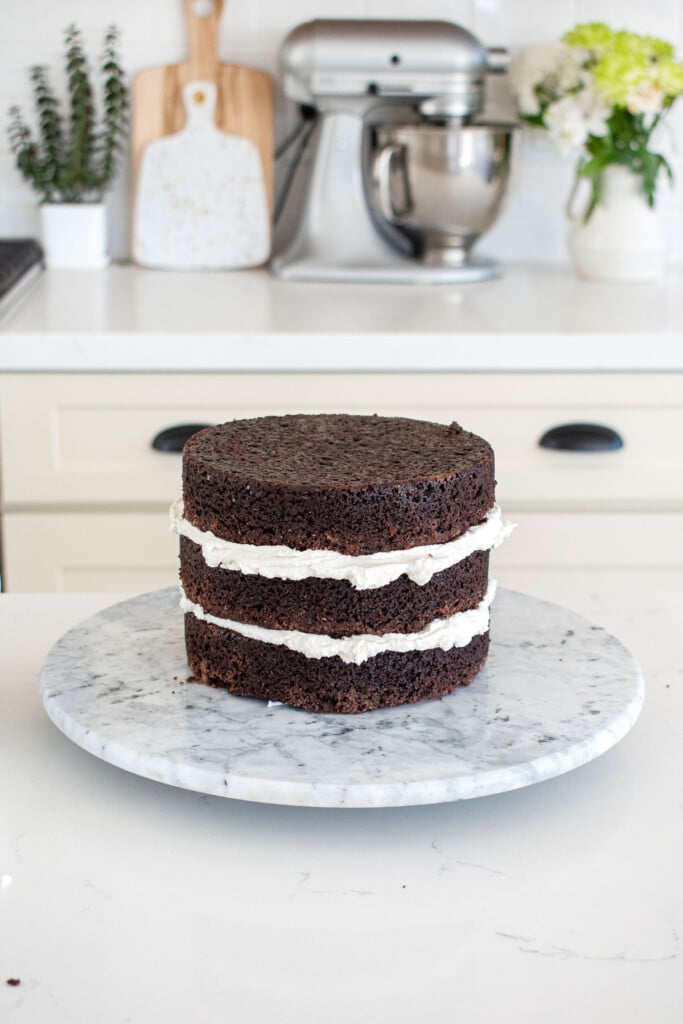
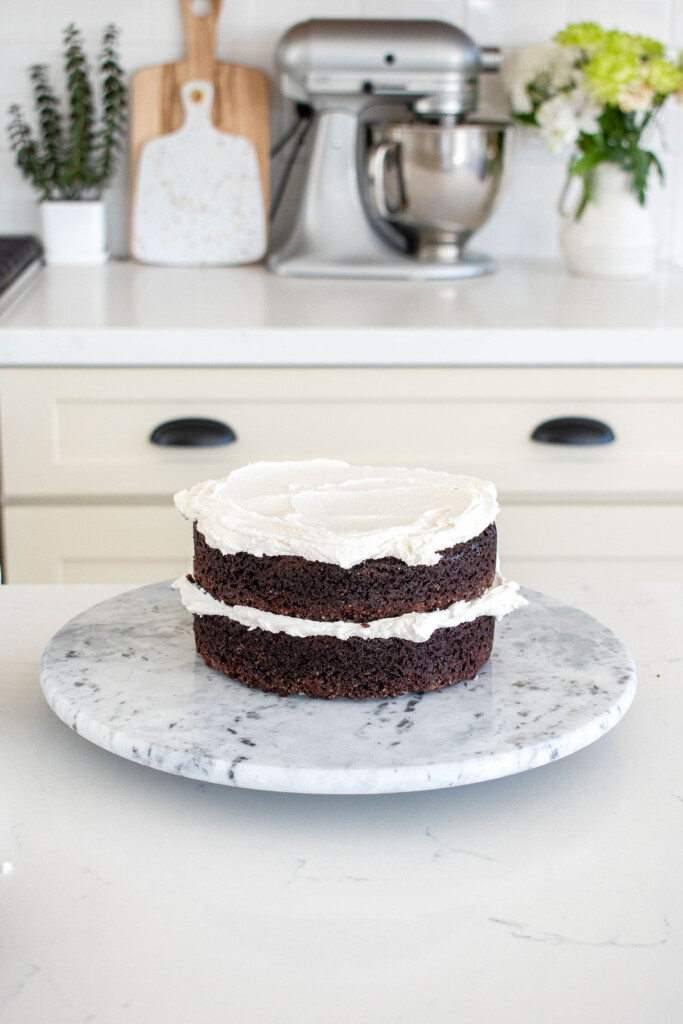
- Add the last cake layer, bottom side up.
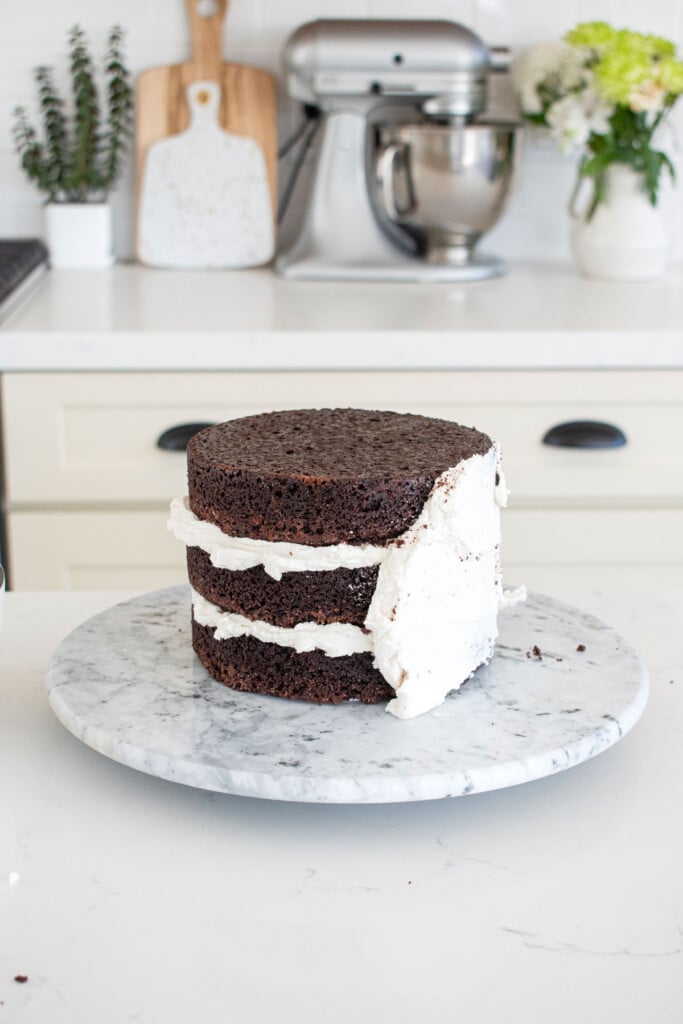
- Add frosting onto the sides of the cake. and begin to scrape it off.
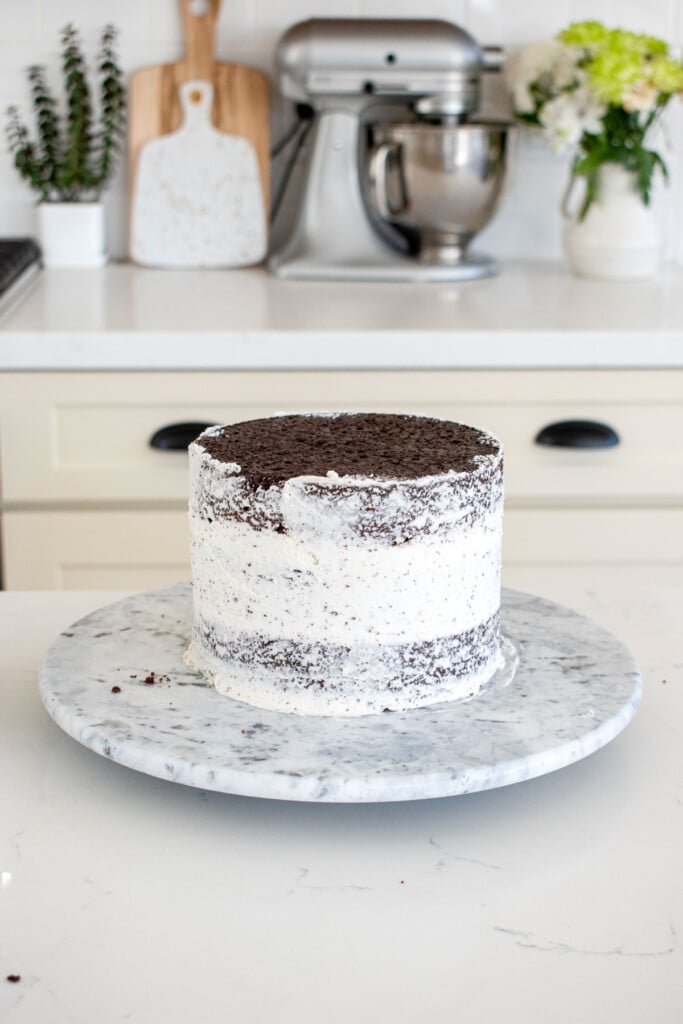
- Continue spreading a small amount of frosting around the cake until it's entirely covered. You want to use as little frosting as possible to coat the cake.

- Finish it off by adding frosting onto the top of the cake and spread around just to cover the top of the cake.
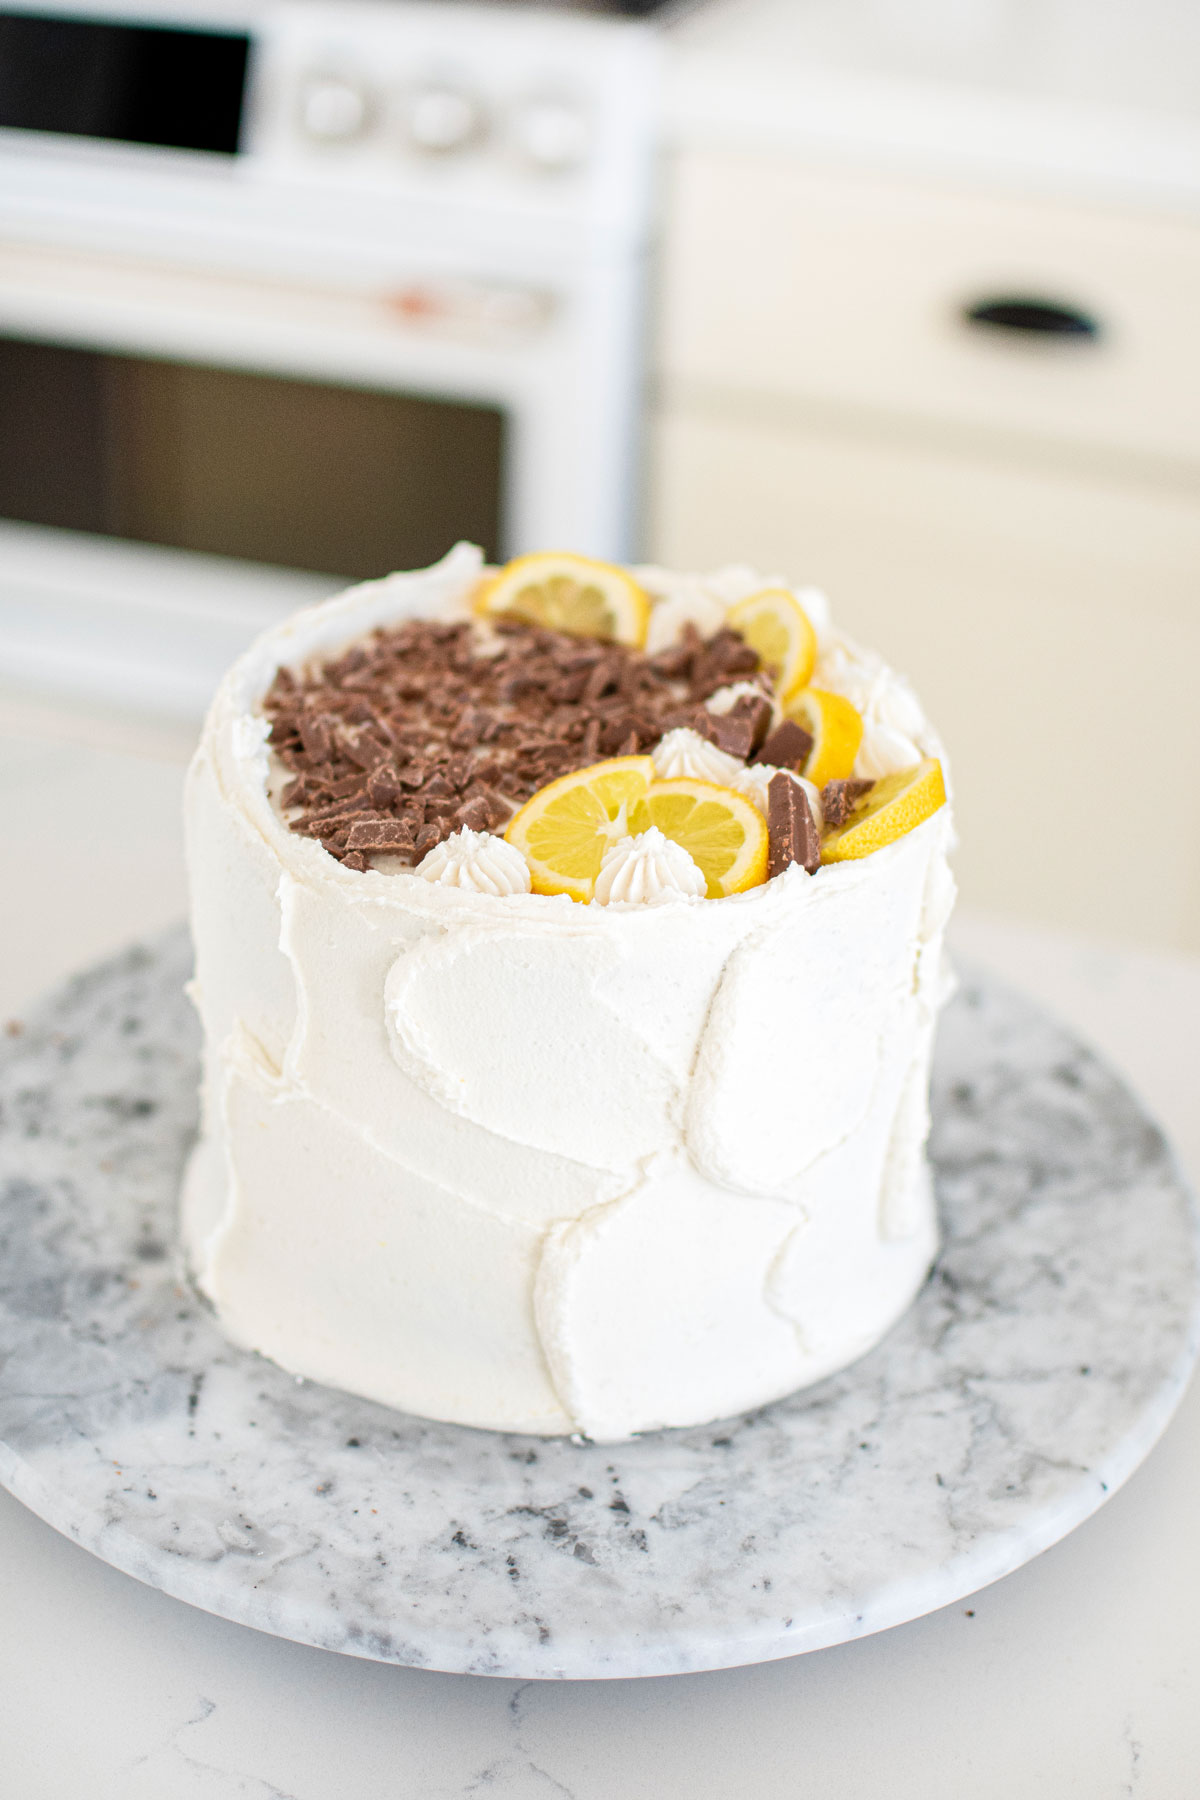
- Once the crumb coat is added, place the cake in the fridge to chill for a few minutes. This helps set the frosting and hold in those crumbs. Then finish frosting the cake with the remaining frosting however you like.
Video Tutorial


The Bake Shop
Visit The Bake Shop for foodie inspired tees, sweatshirts, and accessories. Find my favorite kitchen tools (with discounts!) in the Kitchen Shop. And shop our collection of food inspired dog accessories too!

Leave a Reply