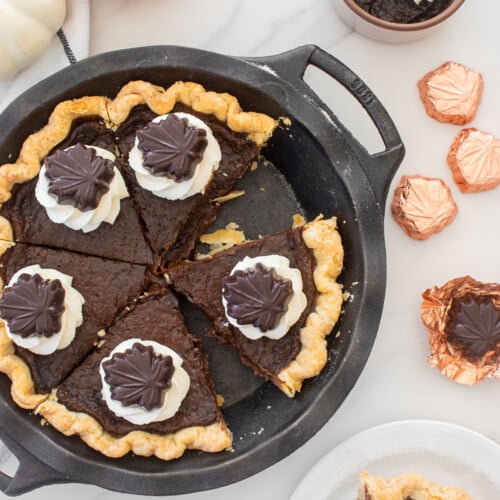
Chocolate Pumpkin Pie Without Eggs
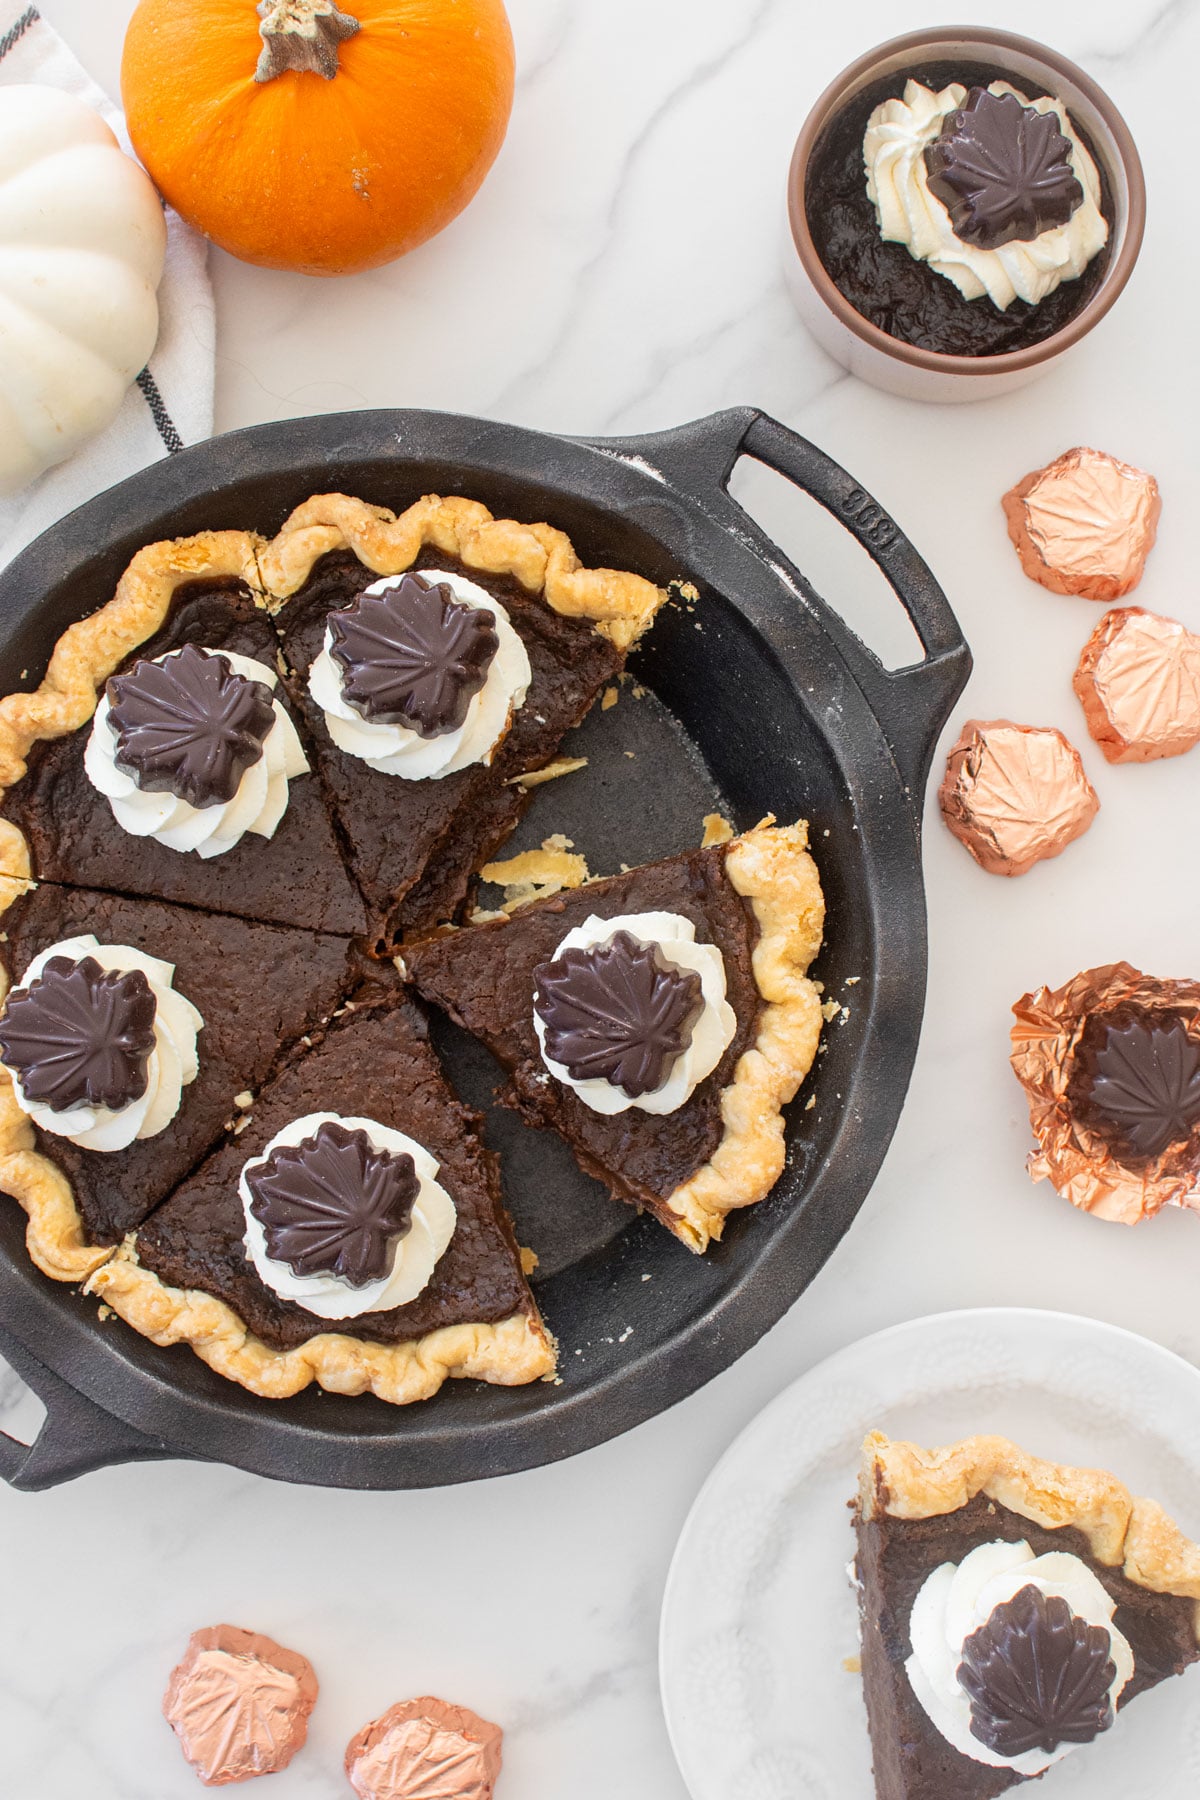
Indulge in a Chocolate Pumpkin Pie without Eggs this Thanksgiving. Rich, creamy, and lightly spiced, this easy pumpkin pie uses hot chocolate mix to achieve a light chocolate flavor that pairs so well with cozy spices. It’s topped with homemade whipped cream and chocolate leaves for a festive fall pie everyone will love!
If you are looking for more eggless pie recipes, be sure to check out some of my other favorites like Brown Butter Apple Pie Without Eggs, Lattice Spiced Apple Pie, Sourdough Apple Pie, Pumpkin Spice Pop Tarts With Pie Crust, or Eggless Sourdough Pumpkin Pie.
A Quick Look At The Recipe
- Recipe Name: Chocolate Pumpkin Pie without Eggs
- Ready In: 1 hour 35 minutes
- Makes: 9-inch pie (8 servings)
- Main Ingredients: salted butter, all purpose flour, pumpkin puree, hot chocolate mix
- Flavor Profile: rich chocolate with cozy fall spices
- Dietary Info: eggless
- Difficulty: Medium
- Eggless Pie: No eggs needed to enjoy delicious homemade chocolate pumpkin pie with a flaky crust!
Summarize & Save This Content On
Why You’ll Love This Recipe
- Eggless Pie: No eggs needed to enjoy delicious homemade chocolate pumpkin pie!
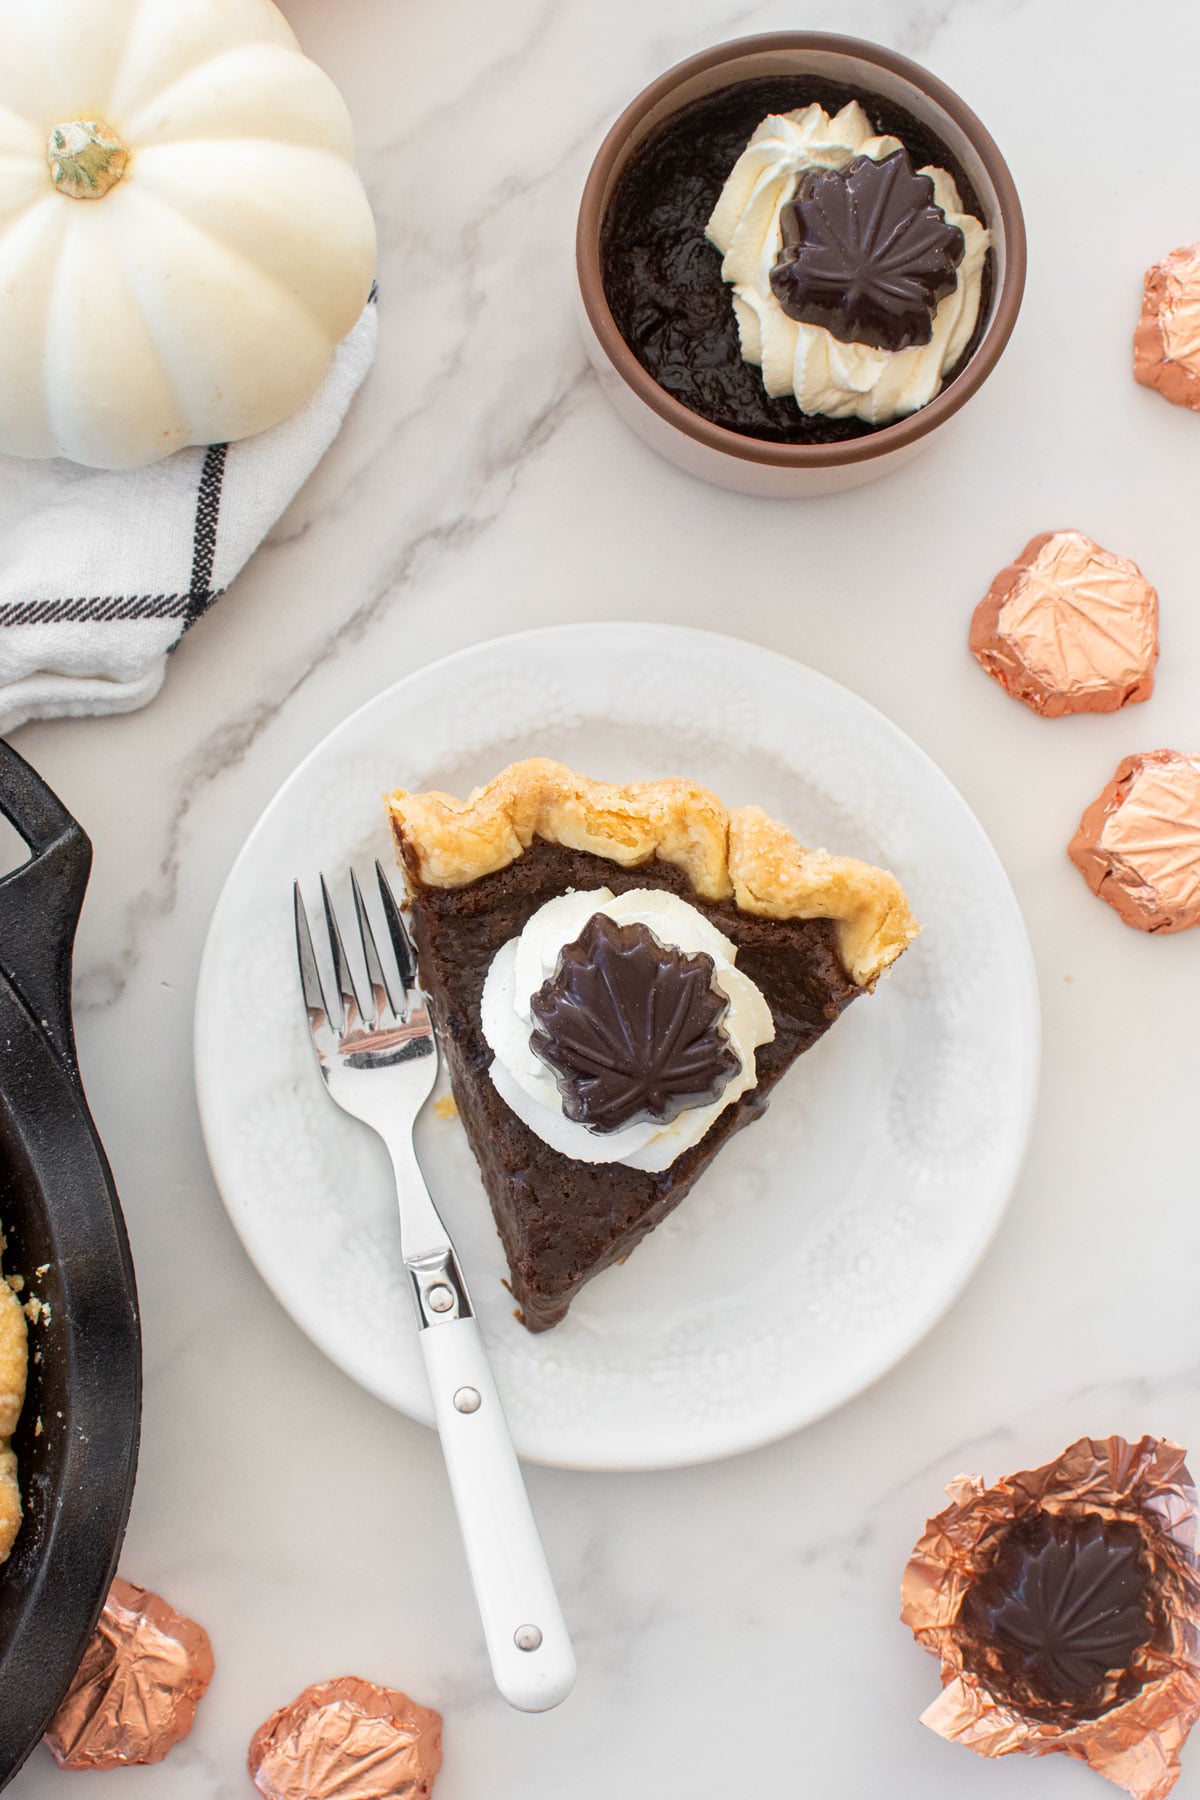
- Festive: I’m using organic chocolate leaves a festive fall touch on top of the whipped cream. This makes decorating easy and so fun!
- Chocolate Lovers: This is a must-make for all the chocolate lovers. If you are a fan of Double Chocolate Pumpkin Cookies or Pumpkin Spice Chocolate Zucchini Cake Without Eggs, you’ll love this pie as it combines smooth dark chocolate with cozy pumpkin spice in a creamy filling!
- Make Ahead: Pumpkin pie from scratch is best when it’s made the day before, so the filling has time to set properly. This makes it a wonderful make ahead pie, perfect for Thanksgiving as you can plan ahead and have this done before turkey day.
- Gluten Free Friendly: While this pie not gluten free, I have tips for making a couple mini pies with just the filling (that are gluten free). This is perfect if you have just one or two gluten free guests coming to Thanksgiving and you don't need to make an entire gluten-free pie crust.
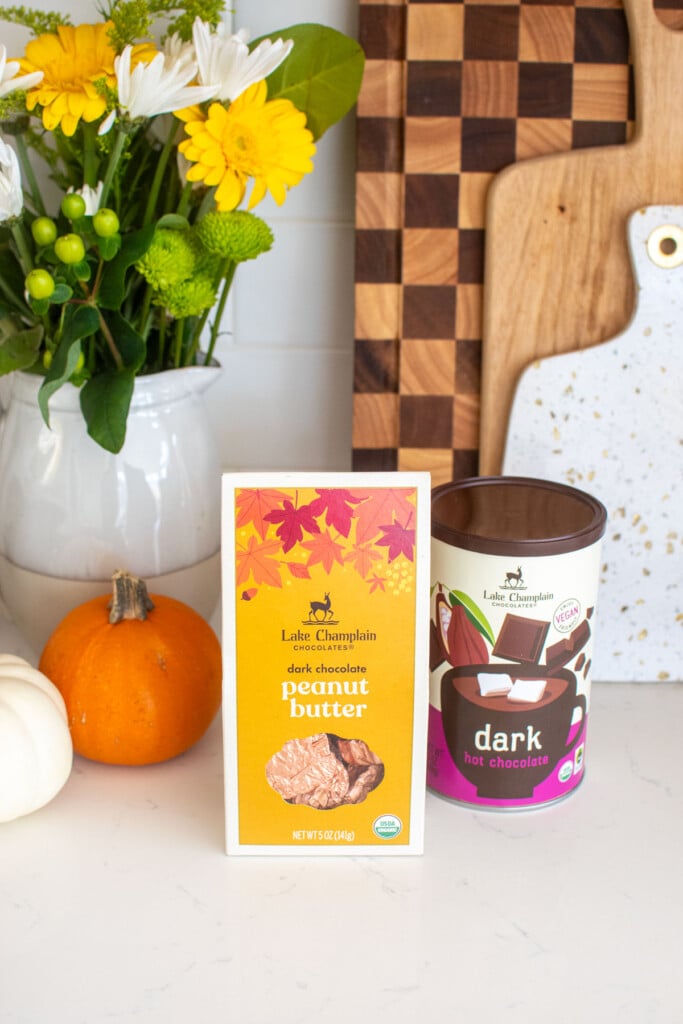
I’m partnering with my friends at Lake Champlain Chocolates to create this ultimate Chocolate Pumpkin Pie without Eggs for your Thanksgiving menu this year. You all know I’m a huge fan of Lake Champlain as they not only make organic chocolates, but they always make adorable and festive organic holiday chocolates, which is so hard to find if you care about organic ingredients! And, they do it so well!
I’m using their Organic Dark Hot Chocolate Mix for the chocolate element in this eggless pumpkin pie recipe. But, my favorite part is their new Organic Dark Chocolate Peanut Butter Leaves which I add on top of the whipped cream. These are so fun and festive for fall, giving this pie so much decoration with minimal effort! Not only that, but these candies are so insanely good! It’s like a little treat on top of the main treat, which I am here for! You can find them in grocery stores like Whole Foods or online too.
If you love Lake Champlain Chocolates as much as I do, check out some of my other recipes using their amazing organic chocolates! Try more festive fall recipes like Maple Spice Cake With Brown Sugar Frosting, Brown Butter Pumpkin Cookies With Caramel, Hot Chocolate Sweet Rolls, or Maple Caramel Dark Chocolate Gingerbread Cookie Bars.
Ingredients
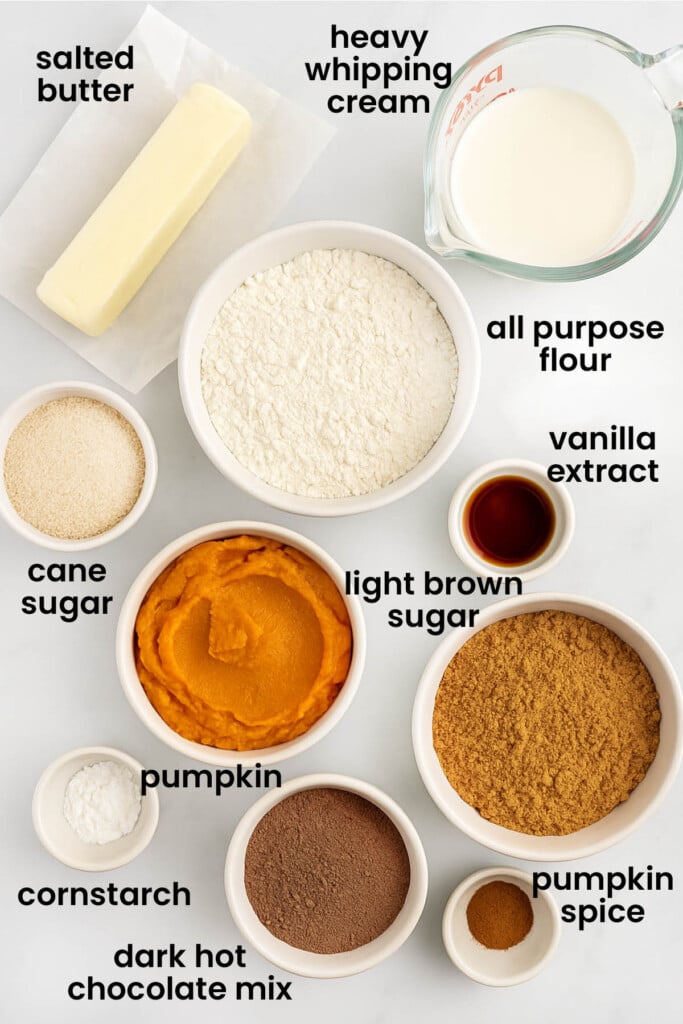
- Butter: I use an all butter pie crust here, so butter is key. I use salted butter, but if you only have unsalted, you can use that too. Just add a pinch of salt. Make sure your butter is cold from the fridge. Cold butter is what creates a buttery, flaky pie crust!
- Brown Sugar: I use Homemade Light Brown Sugar for a rich flavor. This is my top trick for a more flavorful pumpkin pie and what we did at my bakery.
- Pumpkin Puree: I use organic canned pumpkin puree for the filling. Just be sure to use a pure pumpkin puree (not a pumpkin pie filling). If you have fresh pumpkin puree such as homemade pumpkin puree, that also works too!
- Pumpkin Spice: I'm using my Homemade Pumpkin Pie Spice Mix, which is a mix of cinnamon, ginger, cloves and nutmeg. But store bought also works too.
- Cornstarch: I use organic cornstarch to thicken this pumpkin pie since we're not using eggs. If you are avoiding corn or don't want to use cornstarch, you can use tapioca starch, potato starch, or arrowroot starch in its place.
- Hot Chocolate Mix: I use Lake Champlain Organic Dark Hot Chocolate Mix as the chocolate component of this pie. It works perfectly for a rich chocolate flavor!
- Chocolate Leaves: I decorate the top of this pumpkin pie with Lake Champlain Organic Dark Chocolate Peanut Butter Leaves. These festive candies make the perfect fall touch, giving this pie decoration with minimal effort! Plus, they are so good!
*For a full list of ingredients and measurements, visit the recipe card below.
Baker’s Tips for Chocolate Pumpkin Pie Without Eggs
- Always weigh ingredients for the best results.
- If you are new to making pie, check out my my post How to Make Pie Crust in a Mixer and How to Parbake a Pie Crust for more tips if you are new to pie baking.
- Use a 9-inch pie dish that conducts heat well for the best buttery, flaky pie crust. I recommend cast iron, aluminum or stainless steel. You can read more about this in my post The Best Nontoxic Pie Pans to Bake With.
- You can mix up the filling with just a whisk or a hand mixer, either works. Just be sure you don’t whip it for an extended period of time as you don’t want to incorporate air into the heavy cream, just need to mix until combined.
- The pie will be a little jiggly when it comes out of the oven, that’s okay. If it looks very wet still, bake a few more minutes. But it should be slightly jiggly.
- Be sure to let this pumpkin pie cool completely before slicing as the filling has to set.
- I recommend making this the day before you plan to serve it. This will ensure the pie cools and has proper time to set. Just allow it to cool on the counter overnight.
How to Make Chocolate Pumpkin Pie Without Eggs
- To make the crust: In the bowl of a stand mixer fitted with the paddle attachment, add the flour and cane sugar.

- Cut the cold butter into small cubes and add to the flour.
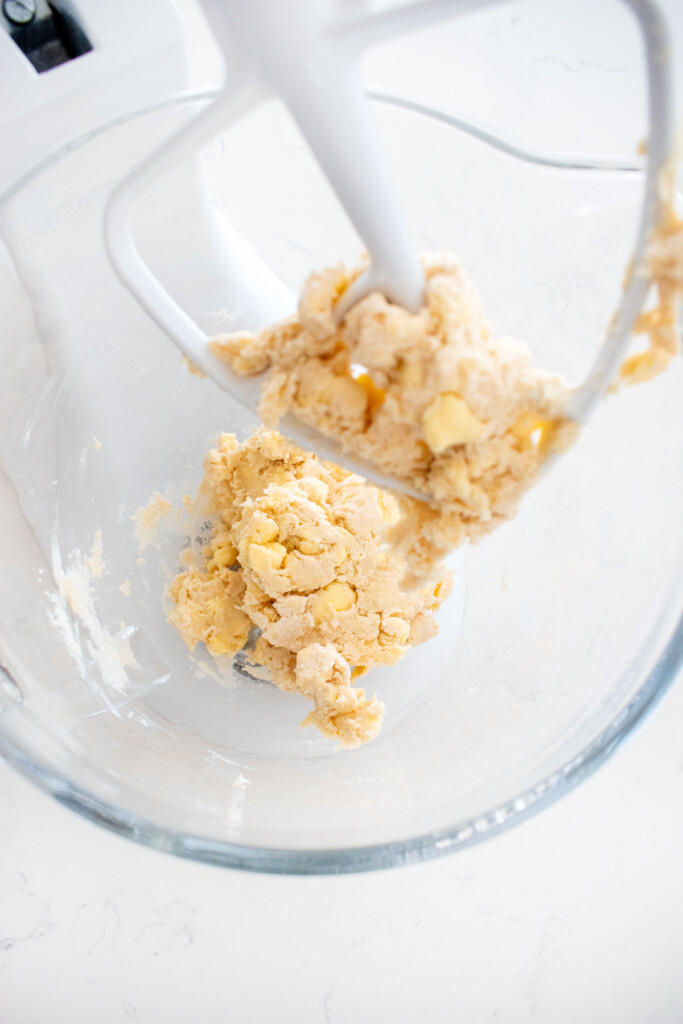
- Mix on low until the butter looks like wet sand (flour has coated butter completely). Immediately add in all the water. Continue to mix until the dough comes together, but do not overmix. You can mix by hand if you see dry bits of flour.
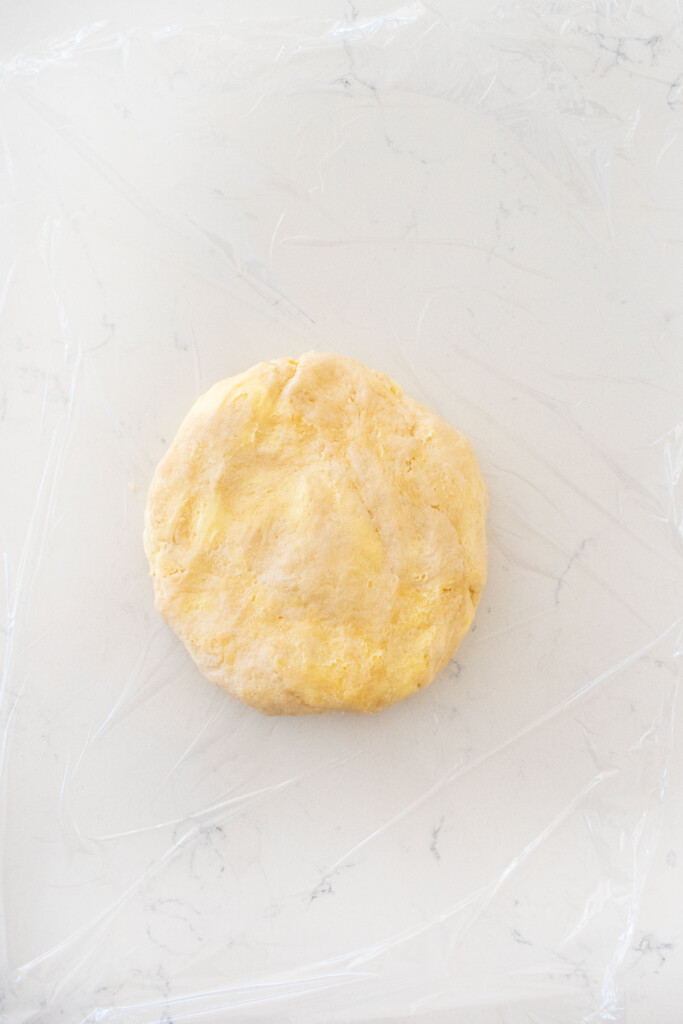
- Form the dough into a round disk and wrap in plastic wrap. Refrigerate for at least 4 hours or overnight.
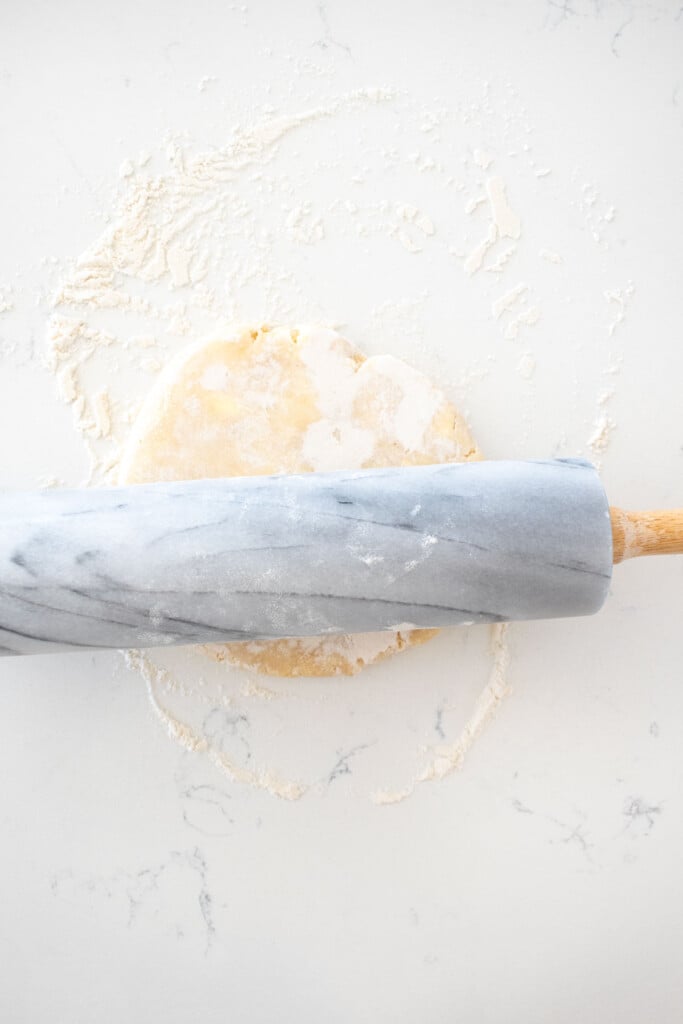
- Preheat the oven to 350°F. On a floured surface roll out the pie crust to about ¼-inch thick. Ensure it’s just larger than your 9-inch pie pan.
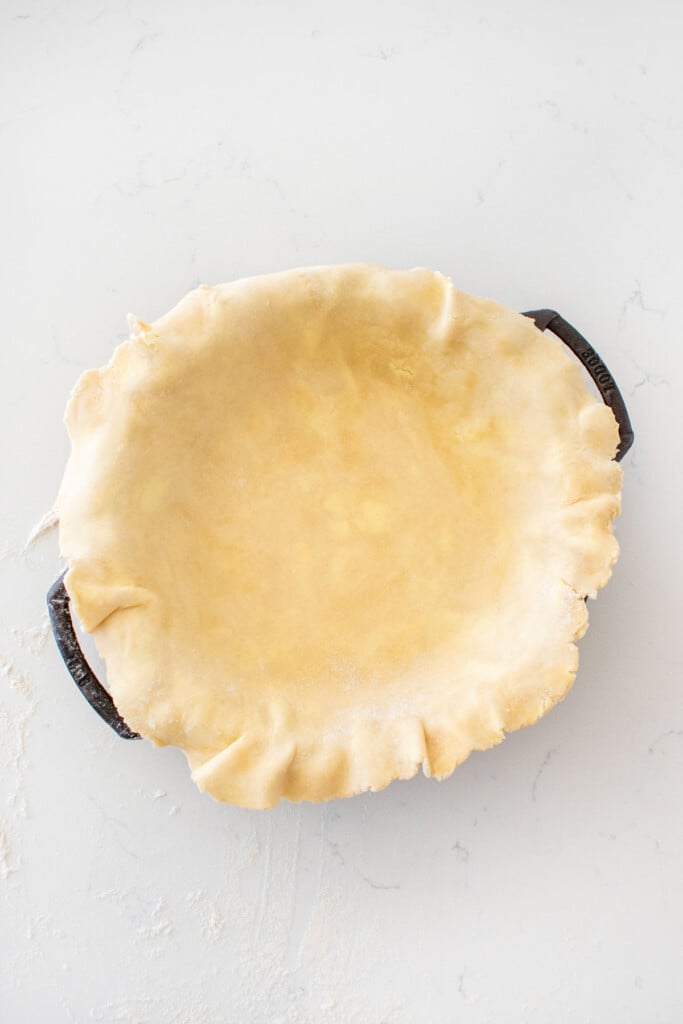
- Place the pie crust into the pie pan and lightly press against the sides and bottom.
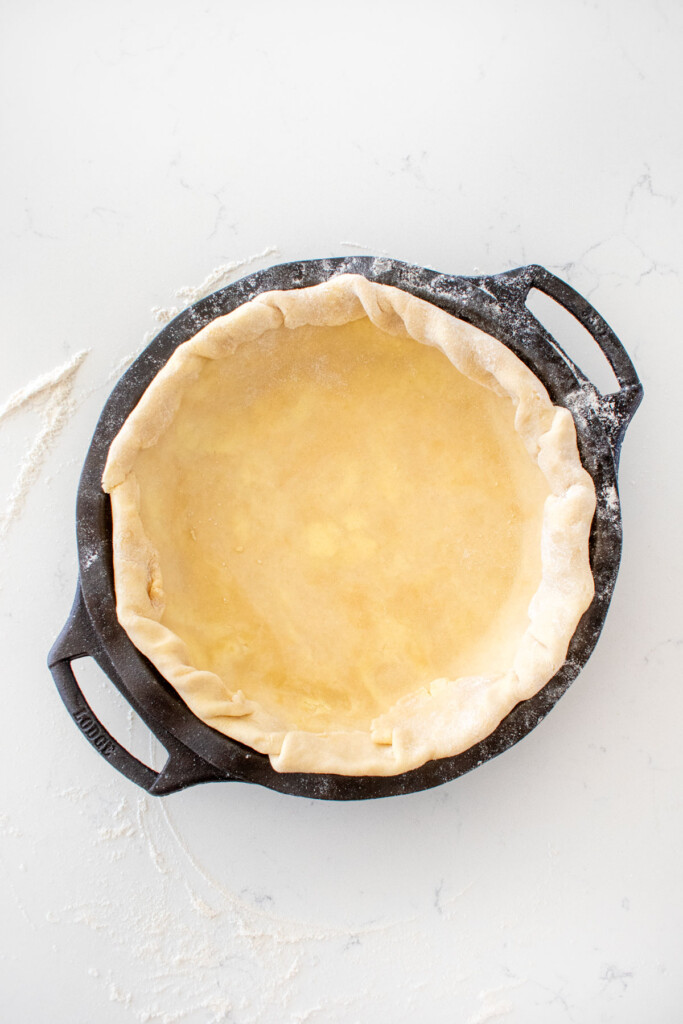
- Roll the excess pie crust into the middle of the pie pan so it’s even with the edge of the pan.
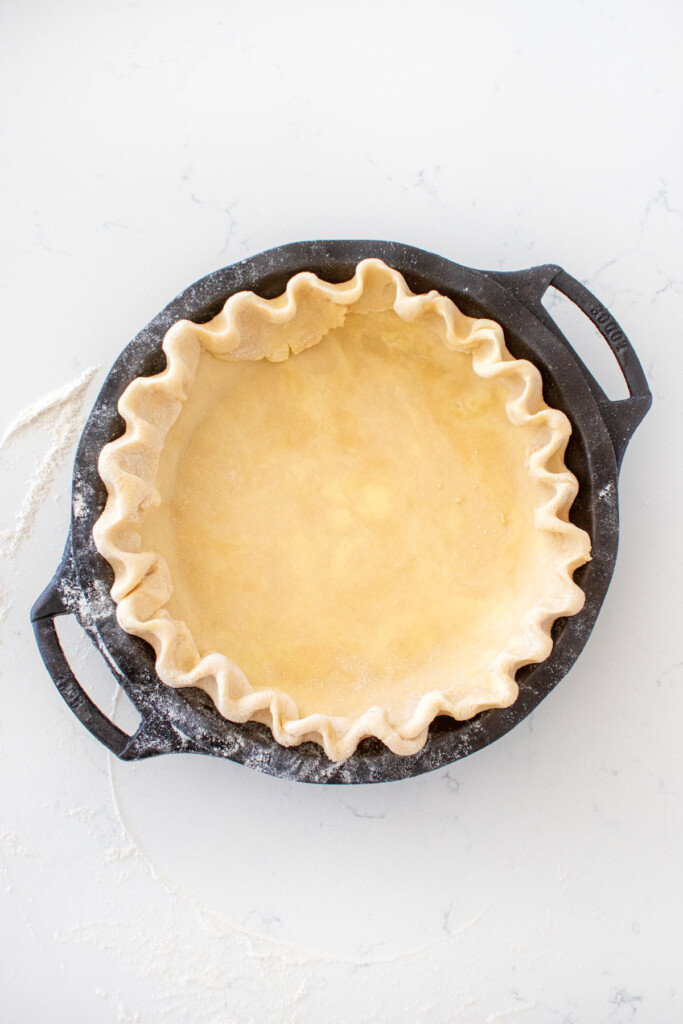
- Using your pointer finger of one hand and your thumb and pointer of the other, “flute” the pie crust.
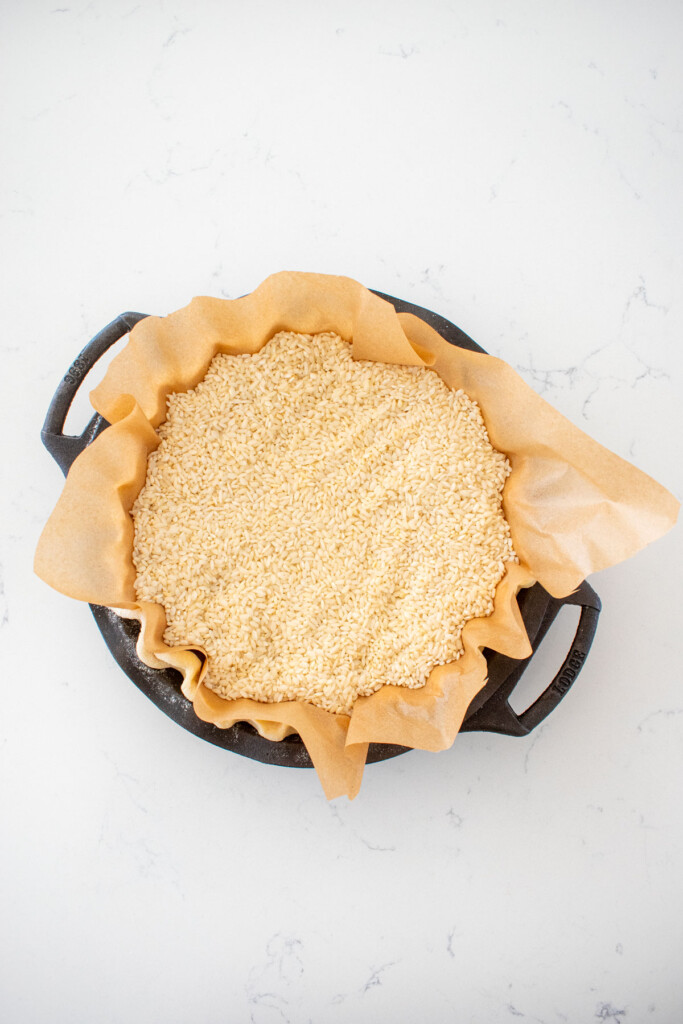
- Place a piece of parchment paper inside the pie crust and add pie weights. (You don’t need fancy pie weights, you can use rice, quinoa, dried chickpeas or beans!)
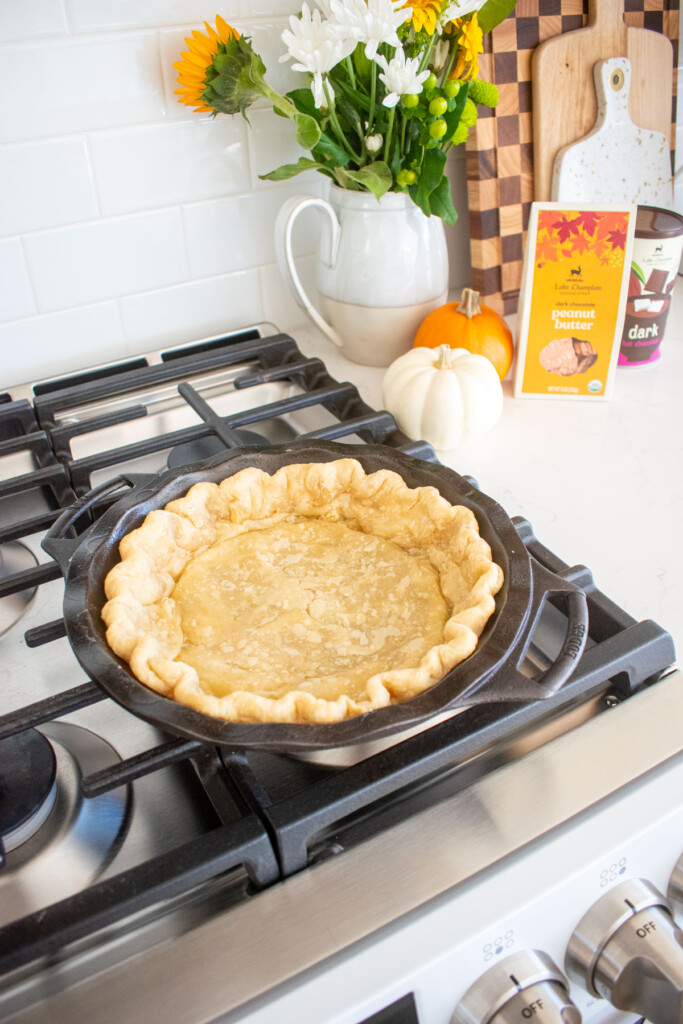
- Bake for 20 minutes. Remove the parchment paper and weights and bake again for another 5 minutes.
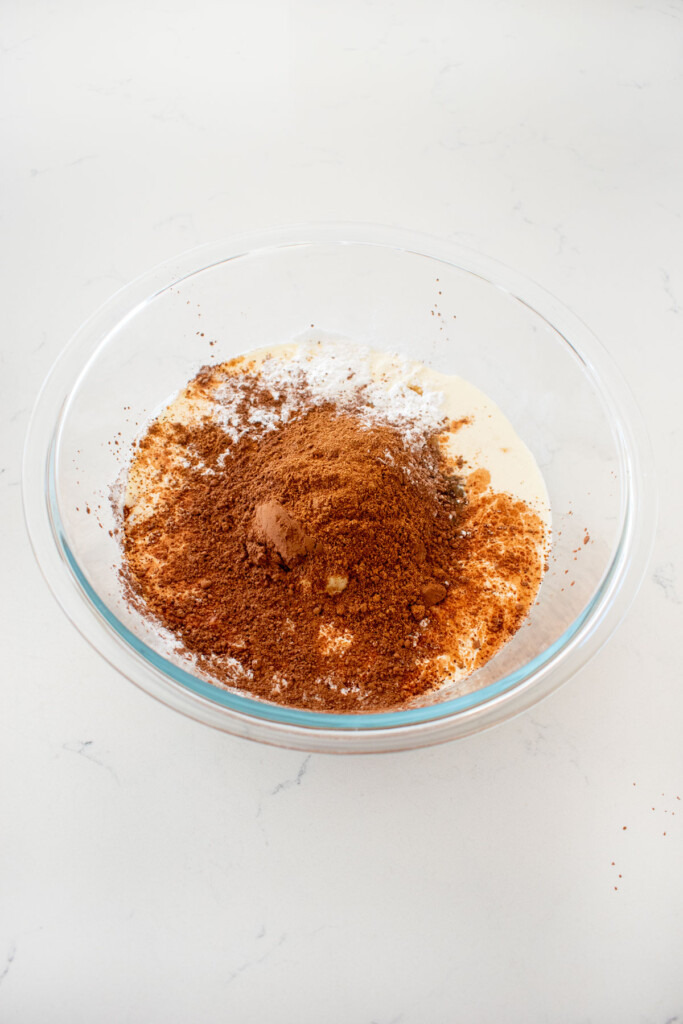
- To make the filling: In a large mixing bowl, add the pumpkin puree, light brown sugar, 1 cup of heavy whipping cream, hot chocolate mix, and pumpkin spice.
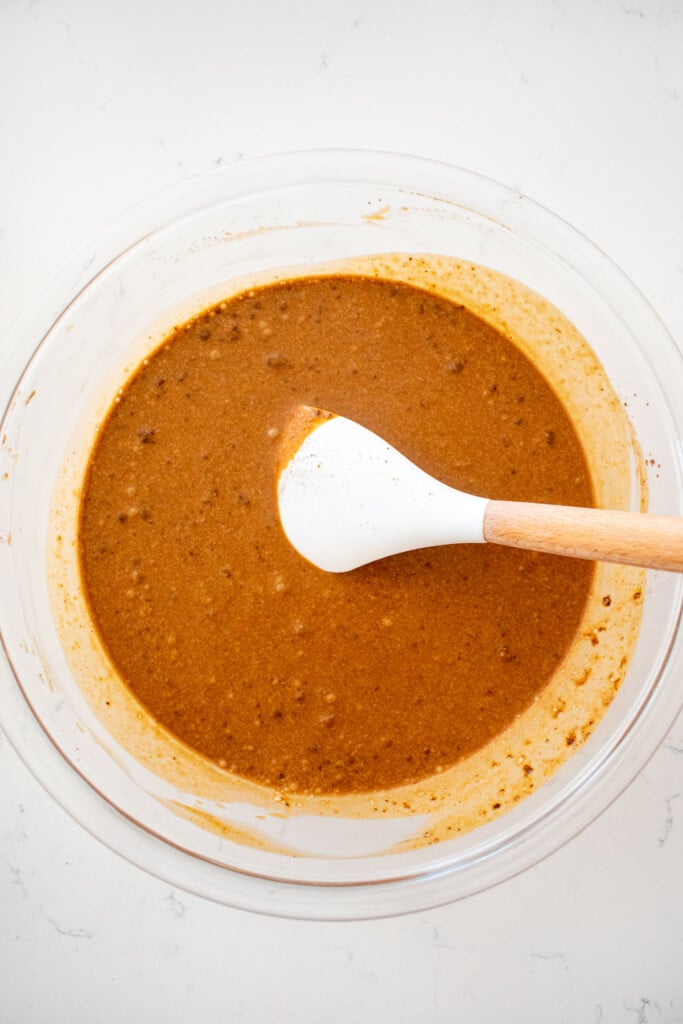
- Mix together using a hand mixer or just a whisk until completely combined.
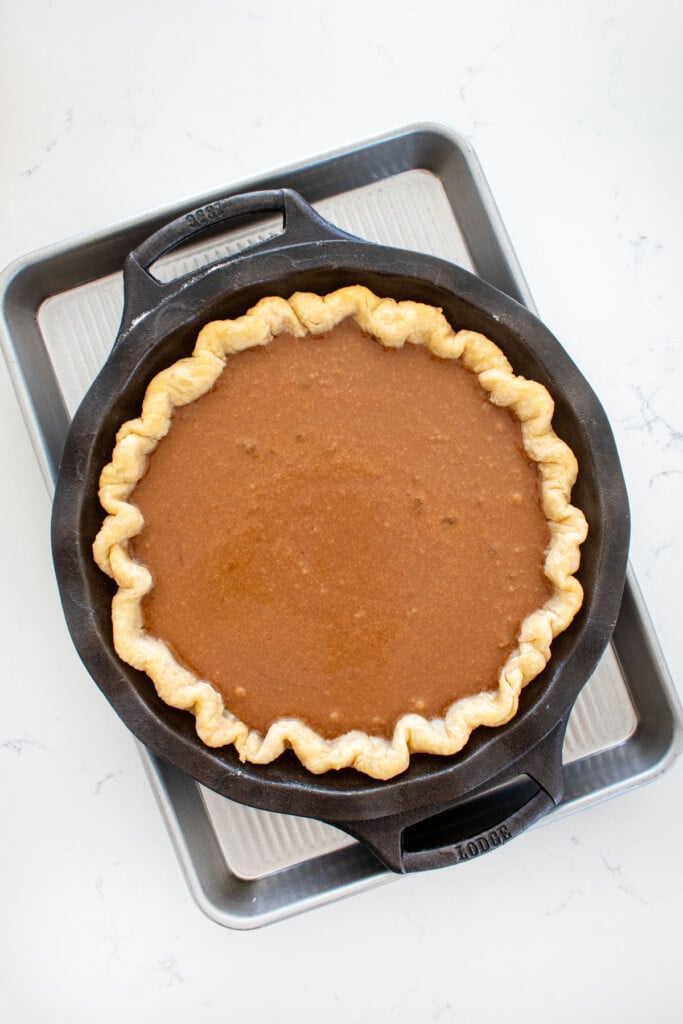
- Transfer the filling to the pie crust, be careful not to overfill the pie. The filling stop right below the top of the pie crust.
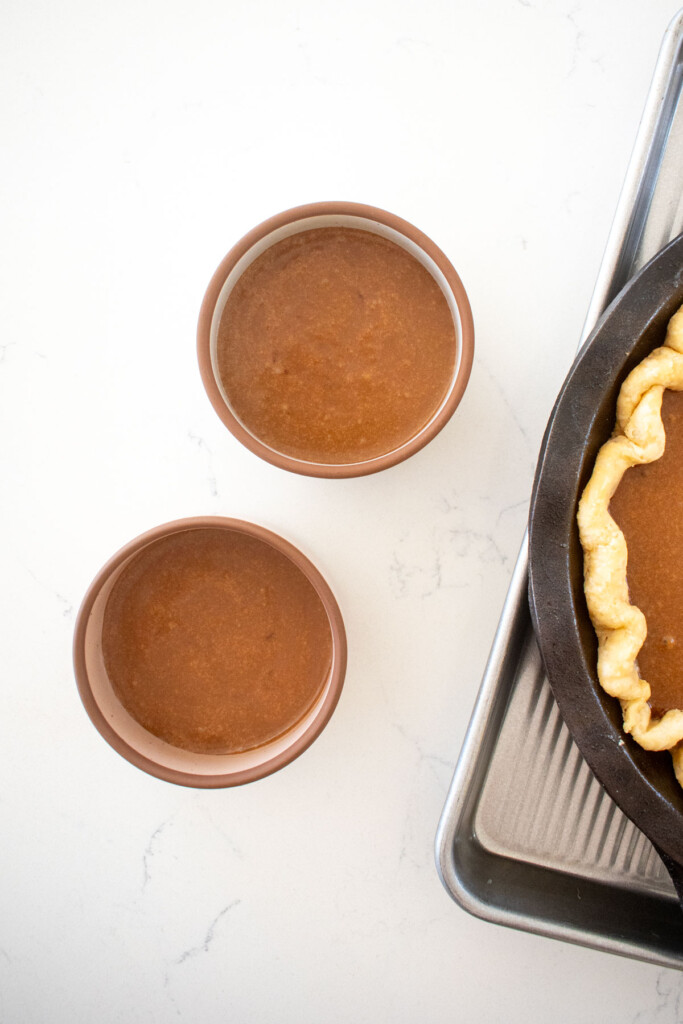
- If you have extra filling, add it into a couple ramekins and bake alongside your pie. This makes a perfect mini pumpkin pie that’s naturally gluten free if you have a gluten free guest!
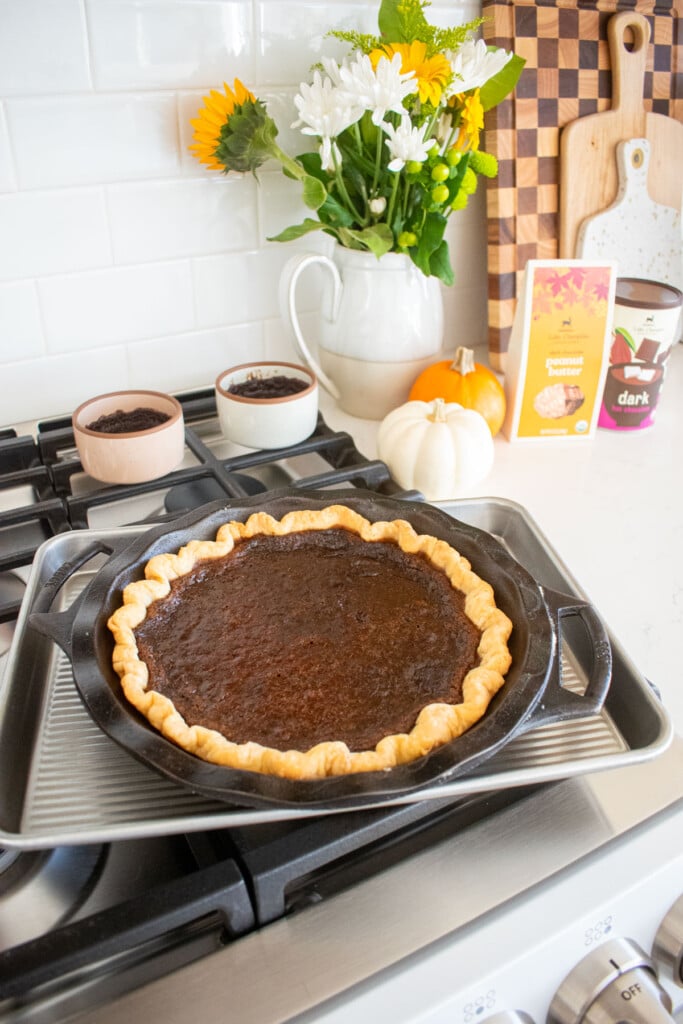
- Bake for 35 to 40 minutes. It will look a little jiggly in the middle, that’s okay. Be sure to let the pie rest and set for at least 6 hours, or even overnight before slicing.
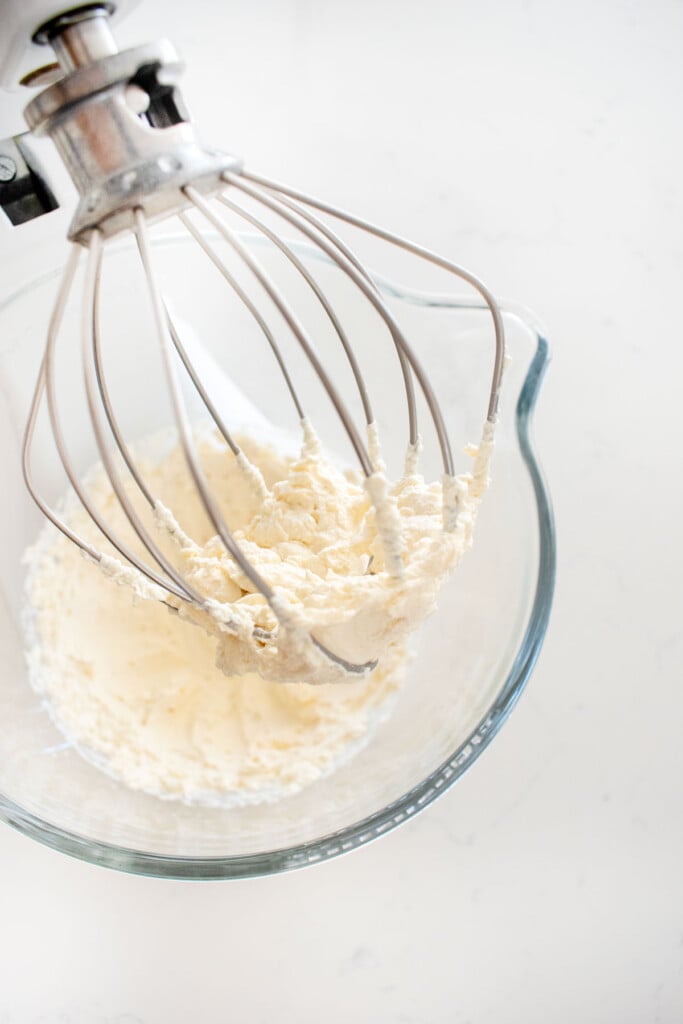
- Right before serving, make the whipped cream. In the bowl of a stand mixer with the whisk attachment (or using a hand mixer) add the 1 cup of heavy whipping cream, cane sugar, and vanilla extract. Mix starting on low to avoid splattering. Then slowly increase the speed as the mixture begins to thicken. Continue to whisk until stiff peaks form.

- Transfer the whipped cream to a piping bag with Ateco tip #827. Pipe dollops of whipped cream on top of the pie for each slice (or anywhere you like!). Top with Lake Champlain Organic Dark Chocolate Peanut Butter Leaves.
Recipe FAQ’s
This tastes just like it sounds, a mash up of chocolate pie and cozy spiced pumpkin pie. If you like chocolate pudding and pumpkin pie, you will love this chocolate pumpkin pie!
No, I don't think so because it just combines a rich cocoa flavor with the cozy spices of pumpkin. It just has the addition of chocolate!
I use cornstarch to thicken and help set this pumpkin pie without eggs.
No, because hot chocolate mix is a mix of cocoa and sugar. So, using just cocoa powder will give you more cocoa and not enough sugar. You can use any kind of hot cocoa mix you have on hand, but don't substitute for regular cocoa powder.
Yes, absolutely either works!
First, using cold butter in your pie crust. Then be sure to partially bake the pie crust, this is key for pumpkin pie. Because pumpkin pie filling is a liquid, the crust needs to be partially baked to ensure the crust is not soggy and that it doesn’t sink into the pie. Also, the pumpkin pie should be a little jiggly when coming out of the oven. Then, it needs to set completely before slicing (at least 6 hours or overnight).
You need to partially bake the pie crust for pumpkin pie because the filling is a liquid. When you have a liquid filling in pie, the crust needs to be partially baked for two reasons. First, it will ensure that the pie crust doesn’t sink into the pie as it bakes in the oven (because the liquid isn’t enough weight to hold up the raw crust as it bakes). Second, the crust needs to be partially baked before the liquid goes in to ensure the bottom of the crust isn't soggy. So, we are par-baking, which means partially baking the pie crust. This is different than blind baking because we're not fully baking the crust because the filling also needs to bake too, which is why we par bake. Blind baking is when you bake the crust fully, so you can add an already cooked filling (like pudding or custard) into the pie crust.
If you have a gluten-free pie crust recipe that you like, you can use that in place of the pie crust recipe I use. Or, you can use my trick and make these in ramekins for a gluten free pumpkin pie (no crust!).
While traditional pumpkin pie usually has eggs and cream in the the filling and does need to be refrigerated, this eggless chocolate pumpkin pie is free of both eggs and cream. So, it doesn't have to be stored in the refrigerator unless there is whipped cream on top of it.
The best way to store this pumpkin pie is in a cool, dry place. If it has whipped cream on it, then you need to store it in the fridge.
Yes, you can freeze it if you need to. Make sure the pie has cooled completely, even overnight is best as you never want to wrap a warm pie. Then, wrap it in plastic wrap twice to prevent freezer burn. Then wrap it in foil and freeze for up to 1 month.
Thanksgiving Menu Inspiration
- If you’re hosting, try fall inspired cocktails like Sparkling Apple Cider Bourbon or Holiday Punch With Vodka.
- Try Slow Cooker Turkey for an intimate gathering or Roasted Herb Butter Turkey if you are cooking a larger bird.
- Add favorite side dishes like Bone Broth Mashed Potatoes and Roasted Cinnamon Sweet Potatoes With Pecans.
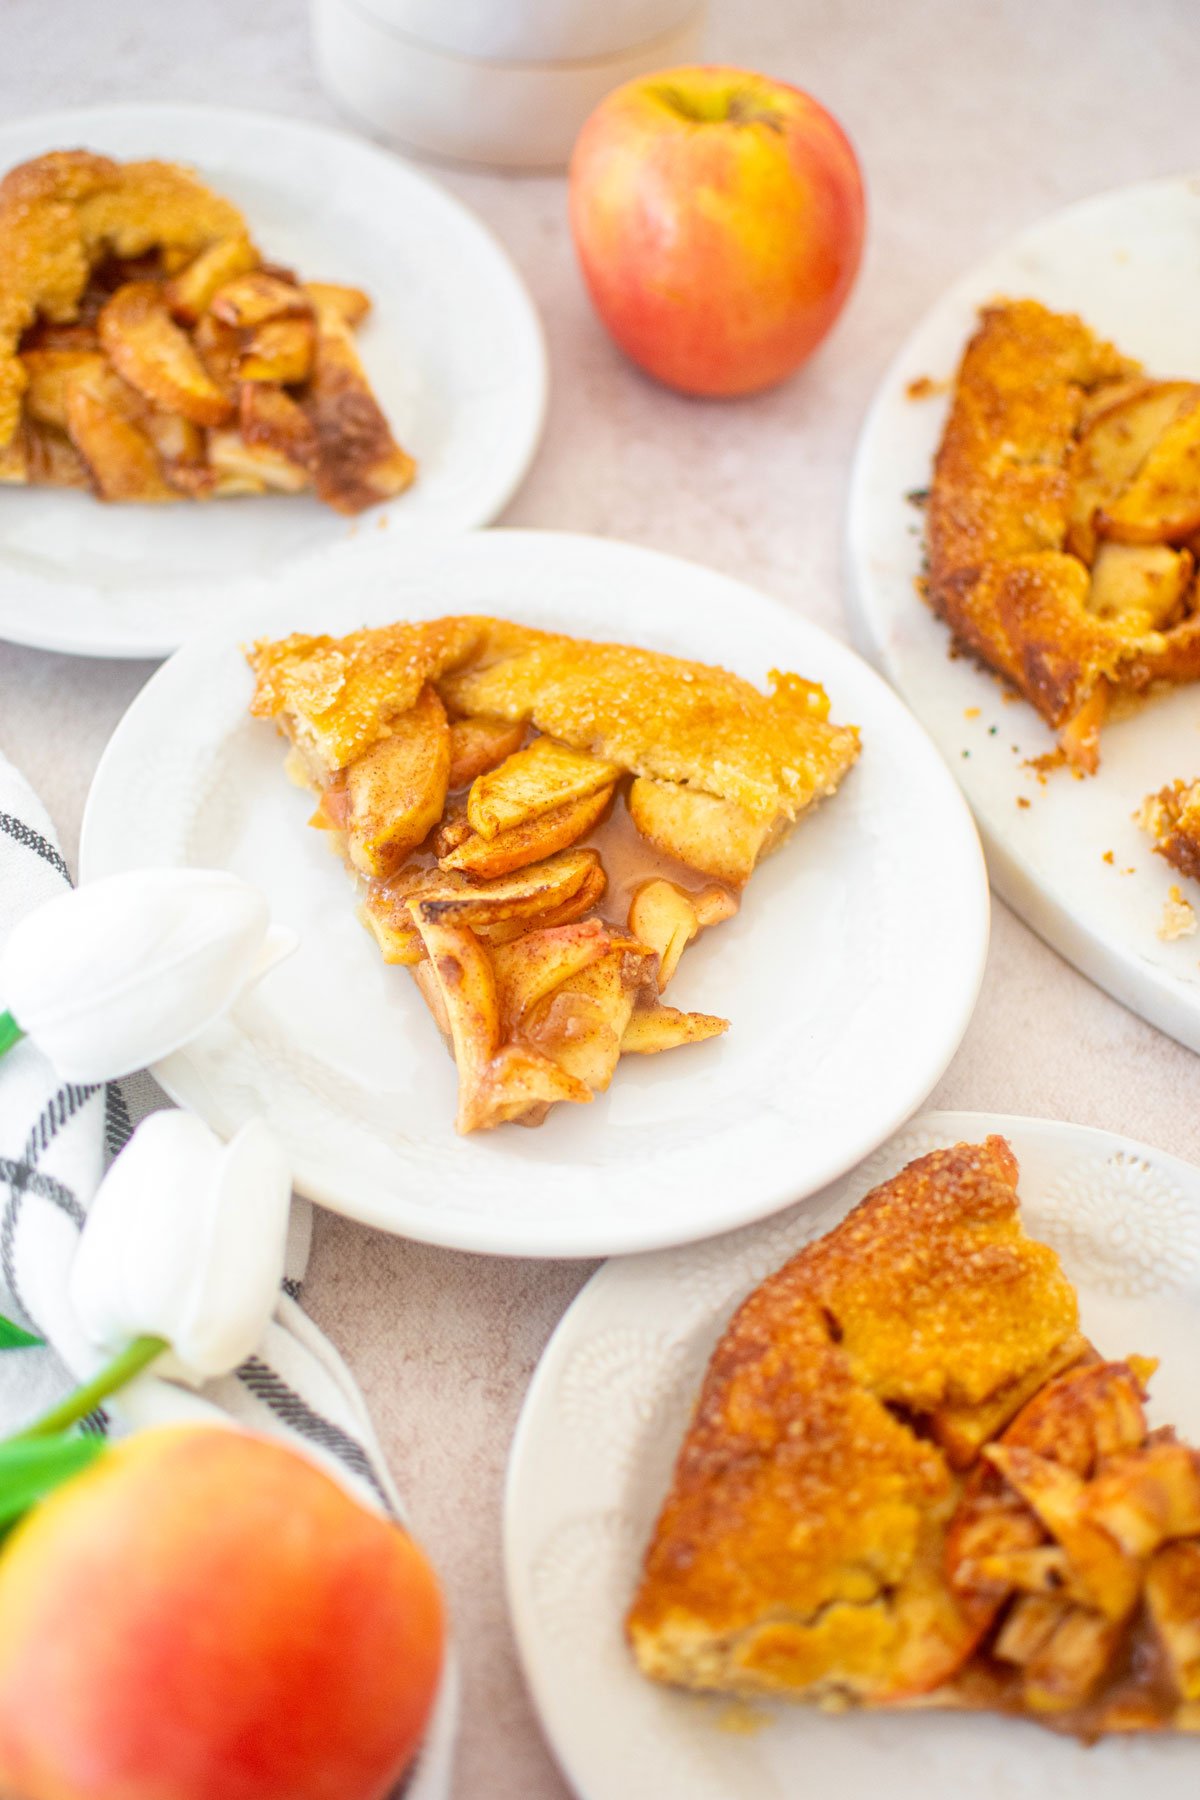
- If you have a larger party, make sure to have apple pie as well as this pumpkin pie for variety! Try Caramel Apple Pie and Vanilla Bean Apple Pie.
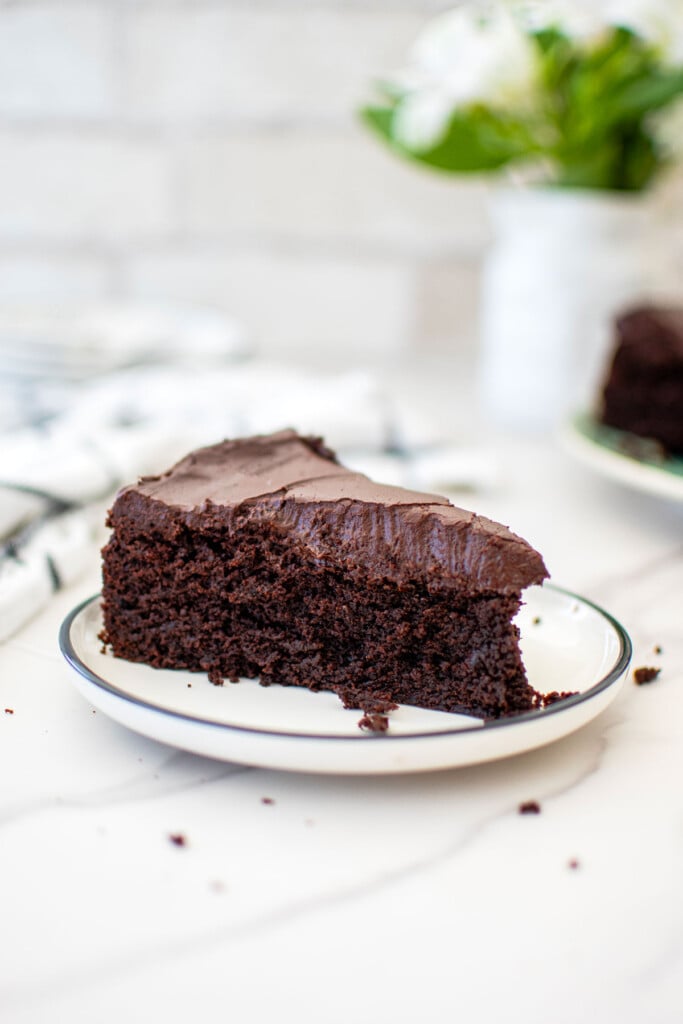
More Chocolate Recipes to Love


Loved it? Tell us!
Thanks a waffle lot for stopping by 🧇 If you loved this recipe, sprinkle some love by leaving a ⭐⭐⭐⭐⭐ review — it inspires others to try this recipe and helps me organically reach dog loving foodies like you! I personally read and appreciate every message!
Also, be sure to subscribe to our YouTube channel and join John John and me in the kitchen for step by step recipe videos! And subscribe to our newsletter for new and seasonal recipes!
Chocolate Pumpkin Pie Without Eggs
Equipment
- Digital Food Scale
- Stand Mixer
- 9" Pie Pan
- Rolling Pin
- Parchment Paper
- Pie Weights
- Mixing Bowl
Ingredients
Crust
- 127 grams all purpose flour
- 113 grams salted butter (cold)
- ½ teaspoon cane sugar
- ¼ cup cold water
Filling
- 284 grams pumpkin puree
- 170 grams light brown sugar
- 1 cup heavy whipping cream
- 3 tablespoons cornstarch
- 3 tablespoons Lake Champlain Organic Dark Hot Chocolate Mix
- 2 teaspoons pumpkin spice
Whipped Cream
- 1 cup heavy whipping cream
- 1 ½ teaspoons cane sugar
- 1 teaspoon vanilla extract
Topping
- 8 Lake Champlain Organic Chocolate Peanut Butter Leaves
Instructions
- To make the crust: In the bowl of a stand mixer fitted with the paddle attachment, add the flour and cane sugar.
- Cut the cold butter into small cubes and add to the flour.
- Mix on low until the butter looks like wet sand (flour has coated butter completely). Immediately add in all the water.
- Continue to mix until the dough comes together, but do not overmix. You can mix by hand if you see dry bits of flour.
- Form the dough into a round disk and wrap in plastic wrap. Refrigerate for at least 4 hours or overnight.
- Preheat the oven to 350°F.
- On a floured surface roll out the pie crust to about ¼-inch thick. Ensure it’s just larger than your 9-inch pie pan.
- Place the pie crust into the pie pan and lightly press against the sides and bottom.
- Roll the excess pie crust into the middle of the pie pan so it’s even with the edge of the pan.
- Using your pointer finger of one hand and your thumb and pointer of the other, “flute” the pie crust.
- Place a piece of parchment paper inside the pie crust and add pie weights. (You don’t need fancy pie weights, you can use rice, quinoa, dried chickpeas or beans!)
- Bake for 20 minutes. Remove the parchment paper and weights and bake again for another 5 minutes.
- To make the filling: In a large mixing bowl, add the pumpkin puree, light brown sugar, 1 cup of heavy whipping cream, hot chocolate mix, and pumpkin spice. Mix together using a hand mixer or just a whisk until completely combined.
- Transfer the filling to the pie crust, be careful not to overfill the pie. The filling stop right below the top of the pie crust. If you have extra filling, add it into a couple ramekins and bake alongside your pie. This makes a perfect mini pumpkin pie that’s naturally gluten free if you have a gluten free guest!
- Bake for 35 to 40 minutes. It will look a little jiggly in the middle, that’s okay. Be sure to let the pie rest and set for at least 6 hours, or even overnight before slicing.
- Right before serving, make the whipped cream. In the bowl of a stand mixer with the whisk attachment (or using a hand mixer) add the 1 cup of heavy whipping cream, cane sugar, and vanilla extract. Mix starting on low to avoid splattering.
- Then slowly increase the speed as the mixture begins to thicken. Continue to whisk until stiff peaks form.
- Transfer the whipped cream to a piping bag with Ateco tip #827.
- Pipe dollops of whipped cream on top of the pie for each slice (or anywhere you like!). Top with Lake Champlain Organic Dark Chocolate Peanut Butter Leaves.
- Store extra pie in an airtight container in the fridge.
Video

Notes
- Always weigh ingredients for the best results.
- If you are new to making pie, check out my my post How to Make Pie Crust in a Mixer and How to Parbake a Pie Crust for more tips if you are new to pie baking.
- Use a 9-inch pie dish that conducts heat well for the best buttery, flaky pie crust. I recommend cast iron, aluminum or stainless steel. You can read more about this in my post The Best Nontoxic Pie Pans to Bake With.
- You can mix up the filling with just a whisk or a hand mixer, either works. Just be sure you don’t whip it for an extended period of time as you don’t want to incorporate air into the heavy cream, just need to mix until combined.
- The pie will be a little jiggly when it comes out of the oven, that’s okay. If it looks very wet still, bake a few more minutes. But it should be slightly jiggly.
- Be sure to let this pumpkin pie cool completely before slicing as the filling has to set.
- I recommend making this the day before you plan to serve it. This will ensure the pie cools and has proper time to set. Just allow it to cool on the counter overnight.
- High Altitude — Follow the recipe as noted.
Nutrition
The Bake Shop
Visit The Bake Shop for foodie inspired tees, sweatshirts, and accessories. Find my favorite kitchen tools (with discounts!) in the Kitchen Shop. And shop our collection of food inspired dog accessories too!


The perfect mash up of pumpkin spice and chocolate! This is such a fun twist on a classic fall pie that is sure to be a stand out at your Thanksgiving table!