American Flag Cream Pie with Graham Cracker Crust
Make a festive American Flag Cream Pie with graham cracker crust. This patriotic pie is a delicious creamy dreamy vanilla custard pie inside a graham cracker crust with homemade whipped cream and fresh berries!
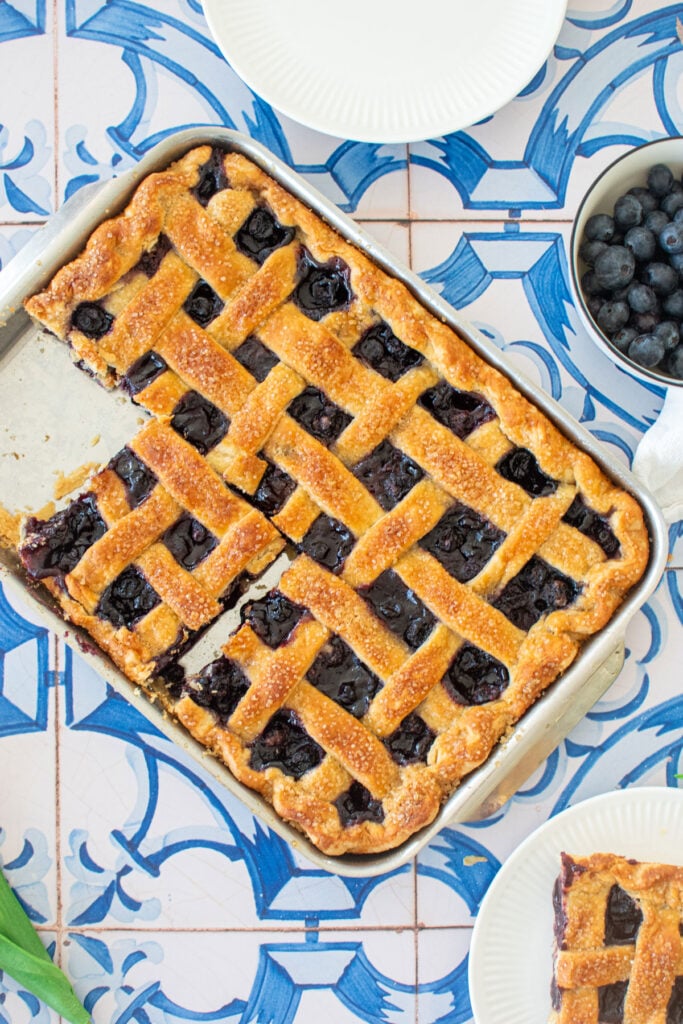
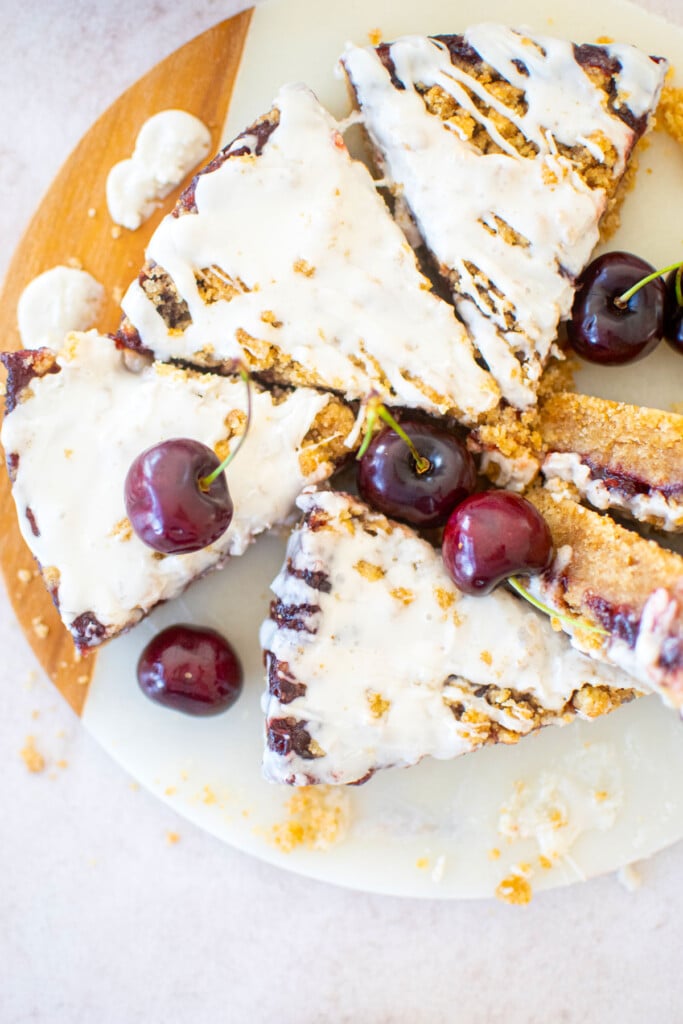
If you’re looking for more 4th of July desserts, be sure to check out some of my other favorites like Chocolate Berry Flag Cake, Blueberry Slab Pie, Healthy Homemade Cherry Frozen Yogurt, Cherry Pie Bars, or Olive Oil Brownie Ice Cream Sandwiches.

A Quick Look At The Recipe
- Recipe Name: American Flag Cream Pie with Graham Cracker Crust
- Ready In: 4 hours 25 minutes
- Makes: 9-inch pie, serves about 8
- Main Ingredients: butter, graham crackers, eggs, heavy cream, cane sugar
- Flavor Profile: lightly sweet vanilla with juicy blueberries and strawberries
- Difficulty: Medium
- Why You’ll Love It: Festive cool dessert that will be devoured!
Summarize & Save This Content On
Why You’ll Love This Organic Patriotic Pie
- Festive AF: This American Flag Custard Pie is so festive. I use organic blueberries and strawberries to create an American flag design on top of the homemade whipped cream. I have a full tutorial in my video below, it’s so easy!
- No Artificial Colors: I use organic strawberries and blueberries for the red and blue. If you want to use raspberries or cherries (be sure to pit them) you could also do that too. That makes this patriotic pie free of artificial colors!
- Homemade Custard Pie: This vanilla custard pie with homemade graham cracker crust was a best seller at my bakery for over a decade! This vanilla custard is creamy, dreamy, and velvety smooth. So, I know it will be a huge hit anytime you make it! People will be begging you for more!
- Make Ahead: You can make this homemade custard pie ahead of time if you need to. If you’re planning a BBQ this is a great patriotic pie to serve that can easily be made ahead. I have specific instructions below!
Jump to:
- A Quick Look At The Recipe
- Why You’ll Love This Organic Patriotic Pie
- Ingredients
- Baker’s Tips for American Flag Cream Pie with Graham Cracker Crust
- How to Make an American Flag Cream Pie with Graham Cracker Crust
- Make Ahead and Storage Instructions
- Recipe FAQ’s
- Fourth of July Party Menu Ideas
- More Summer Pie Recipes
- American Flag Cream Pie with Graham Cracker Crust
- The Bake Shop
Ingredients

- Milk: Make sure to use whole milk as you want all the fat for flavor and texture in this homemade custard pie. So don’t use low fat milk!
- Egg Yolks: You’ll only need the egg yolks for the old fashioned custard, as egg yolks are a natural thickener. Make sure to avoid getting any egg whites in the yolks as they can make your custard airy.
- Heavy Whipping Cream: You’ll need organic heavy whipping cream to make the homemade whipped cream for folding into the custard and for the topping.
- Vanilla Extract: Make sure to use a high quality vanilla extract, my favorite is Simply Organic.
- Butter: I use organic salted butter, both inside the graham cracker crust and also inside the custard. If you want to use unsalted, you can, you’ll just want to add a little salt (1/4 teaspoon per 113 grams).
- Strawberries: I use organic strawberries for the red stripes in this flag pie. Raspberries or red mulberries would also work! And even cherries will work too, just be sure to pit them.
*For a full list of ingredients and measurements, visit the recipe card below.
Baker’s Tips for American Flag Cream Pie with Graham Cracker Crust
- Always weigh ingredients for the best results.
- You can make the graham cracker crust a day or two in advance if you need to. If doing so, you should just leave it out on the counter.
- Make sure your butter is soft when making the graham cracker crust.
- Make sure you don’t get any egg whites in the egg yolks. Egg whites can make your custard airy instead of thick and creamy.
- If you don’t have a drink thermometer, just ensure the milk is lukewarm. Do not let it boil as it can burn, and transfer burnt flavor into the custard.
- Make sure to fold the whipped cream into the custard so it doesn’t break. This helps the old fashioned custard become light and smooth, while also being rich and creamy.
- If you want to add fresh blueberries or strawberries into the custard, you could also fold them in during the whipped cream step as well.
- Try making this with a chocolate crust, and learn How to Make Chocolate Graham Cracker Crust From Scratch!

How to Make an American Flag Cream Pie with Graham Cracker Crust
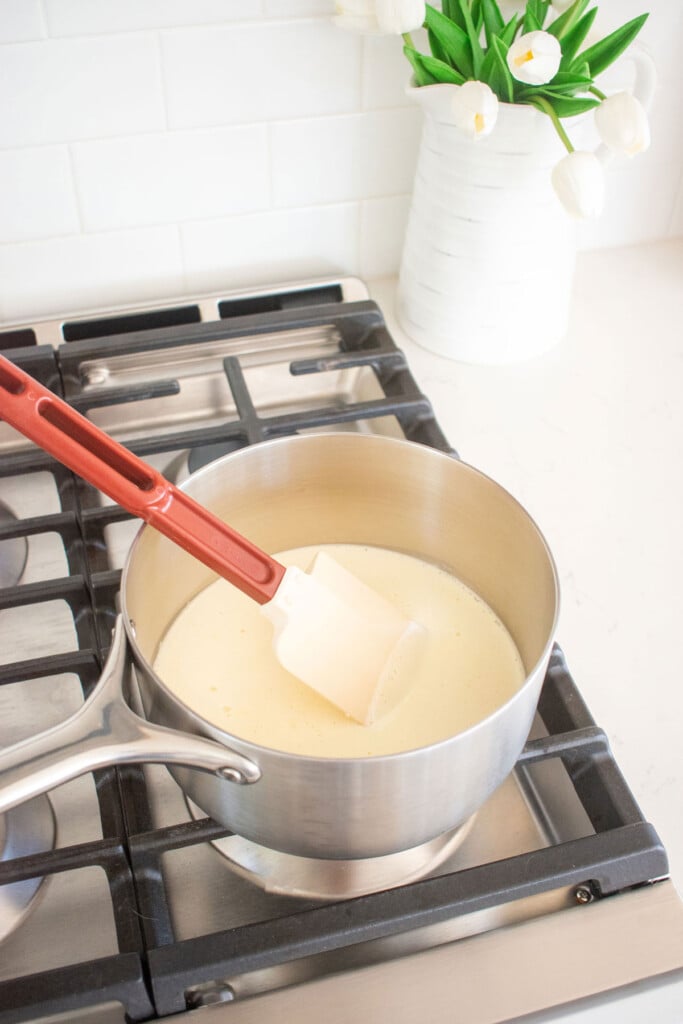
- Add the milk to a small pot and put over medium heat. Allow the milk mixture to heat until 140°F on a drink thermometer. Remove from the heat. While the milk is heating, continue on to the next steps, but keep an eye on the milk.
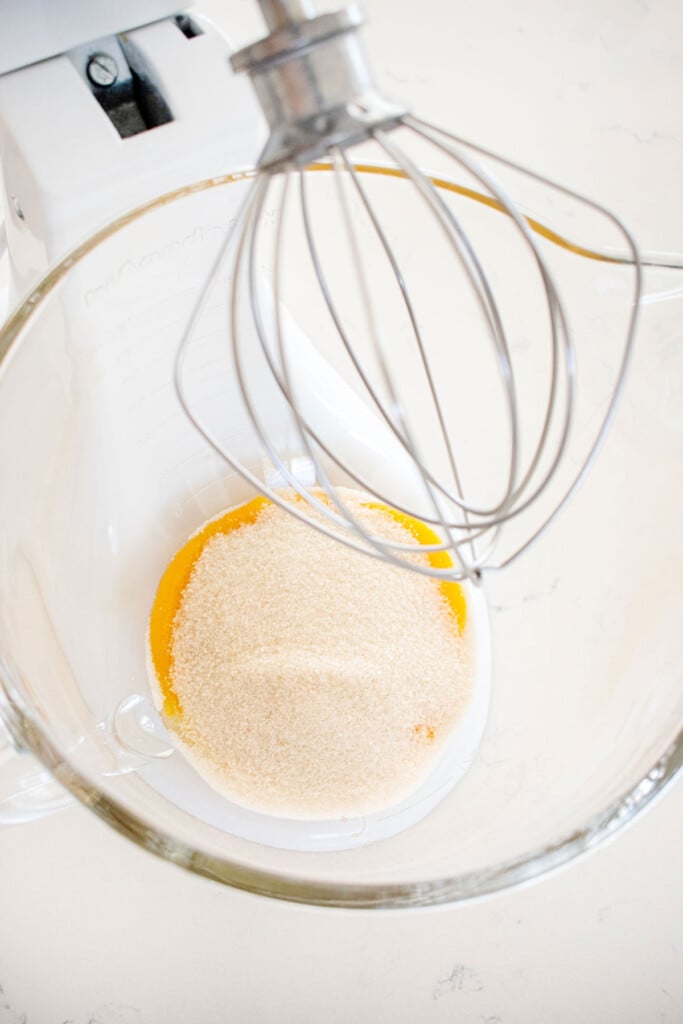
- In the bowl of a stand mixer fitted with the whisk attachment, add the egg yolks and 226 grams cane sugar.

- Whisk on low for 2 to 3 minutes or until lightened in color. Add the flour and whisk to combine completely.

- Once the milk has heated, turn the mixer on low and slowly add in the warm milk into the egg mixture. Once completely combined, stop the mixer.
- In a clean 3-quart pot (if using same pot as milk, be sure to wash!), transfer the egg mixture.

- Put over medium heat and stir with a high heat spatula. Make sure to to stir and scrape down the pot the entire time. The mixture will begin to bubble, as it thickens, then it will begin to thicken. Be sure to continue stirring to avoid clumps or burning the custard. If you see any small clumps, stir vigorously to smooth them out.
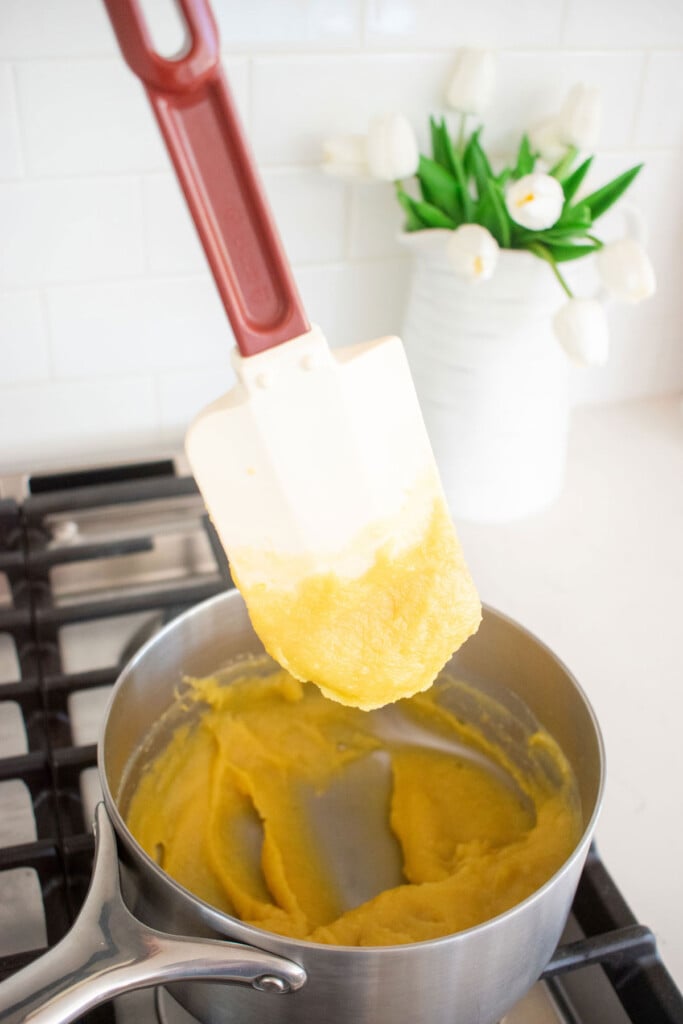
- Once the custard coats the spatula and does not drip off when you lift it from the pot. Then it’s ready. You can also check this by scraping the custard in the center of the pot and ensuring that it doesn’t run back in. We just want a thick custard.

- Remove from the heat and add in the 57 grams of salted butter. Stir to combine completely until smooth.

- Last, add in the 1 teaspoon of vanilla extract. Transfer the custard to the fridge and let it chill for at least 4 hours or overnight.

- Preheat the oven to 350°F. Add half the graham crackers into a food processor. Next, add in the 113 grams butter and 57 grams cane sugar. Then add the remaining half of graham crackers on top. This trick will help you mix evenly (as opposed to dumping all ingredients in!).

- Process on high and shake the food processor until you have a uniform mixture. It helps to shake the food processor (watch the video!).

- Grease a 9-inch pie pan with the butter wrapper. Then transfer the graham cracker crust into the pie pan. Press it into the sides of the pie pan first, then into the middle to create the graham cracker crust. Bake for 5 minutes. Allow the crust to cool completely before assembling the pie.
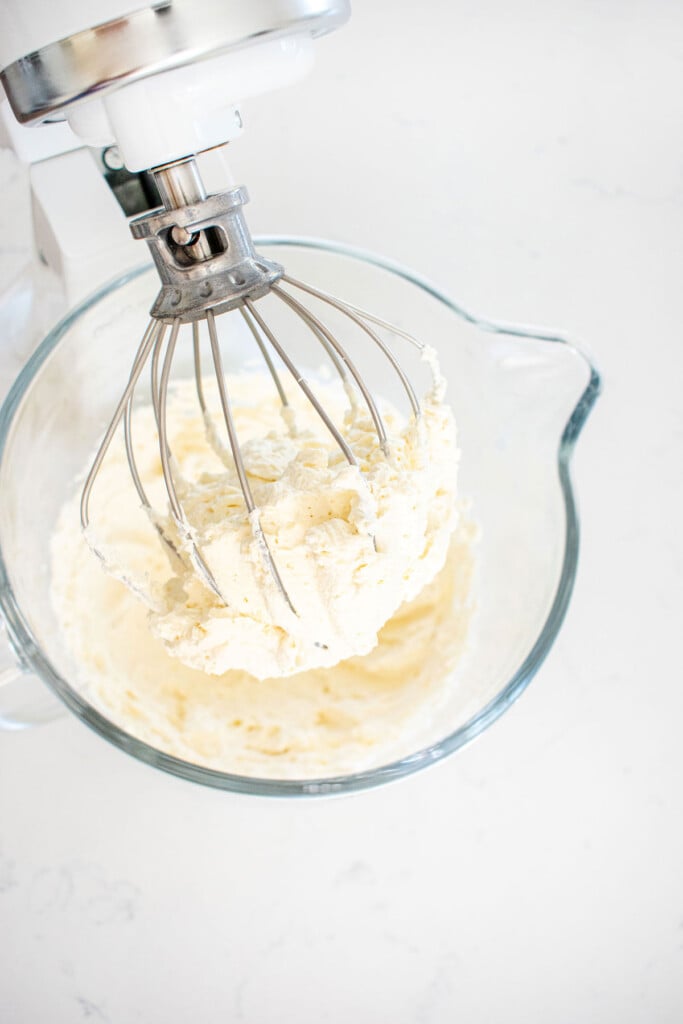
- In the bowl of a stand mixer fitted with the whisk attachment, add the heavy whipping cream, 1 tablespoon of cane sugar, and 1 teaspoon of vanilla extract. Mix on low, to avoid splattering, then gradually increase the speed as the mixture thickens. Continue to increase until you are at full speed. Whisk until stiff peaks form.

- Divide the whipped cream in half (weighing 8 ounces each). Set aside one half for the topping of the pie. Remove the custard from the fridge. Add in half (4 ounces) of the remaining whipped cream into the custard and fold to combine.

- Then add in the remaining 4 ounces and fold to combine completely.

- Ensuring there are no ribbons of whipped cream remaining and you have a smooth vanilla custard.

- Transfer the custard to the graham cracker crust and spread it out evenly.

- Add the remaining 8 ounces of whipped cream on top and spread it out evenly. I like to leave a boarder of crust, custard, and then whipped cream so it’s nice and thick in the middle.

- To make the American flag design: You can use a butter knife to draw out the blue part of the flag and also draw the lines. (See photo or video).

- Add blueberries in the top left corner. Then add strawberry slices for stripes going across the rest of the pie. Serve immediately or store in the fridge (making sure to cover with plastic wrap completely so it doesn’t dry out) until ready to serve.
Make Ahead and Storage Instructions
- Make the homemade graham cracker crust a day or two in advance if you need to!
- If you plan to make this American Flag Cream Pie ahead of time that’s okay. I recommend making it the day before, as it is best when it’s fresh. You’ll just want to cover the entire pie with plastic wrap, so the whipped cream and custard don’t dry out. You’ll also need to store it in the fridge.
- If you need to make this more than one day in advance, you can also freeze this for a couple weeks. Just be sure to cover completely in plastic wrap here too.
- If you have leftover pie, it’s best stored in an airtight container in the fridge. I like to just cut the slices and place in a Tupperware. If you don’t have a Tupperware, wrap tightly in plastic wrap.

Recipe FAQ’s
Cream pie, like we're making here, is made by making a custard on the stovetop and putting it into an already baked pie crust. Custard pie is a liquid custard, typically made with eggs, and is baked in the oven in a pie crust. A pumpkin pie is custard pie.
If you are using unsalted butter in the pie crust, add 1/4 teaspoon of salt. If you’re using unsalted butter in the custard, add 1/8 teaspoon of salt.
Yes, you can make the graham cracker crust ahead of time. You can make it up to 2 days in advance.
You can, but store-bought graham cracker crust is usually quite small compared to what I make here. It also doesn't even compare as far as taste goes.
You can make the custard itself a few days in advance and leave it in the fridge (covered). Then, put the pie together (folding in whipped cream) on the day of your party. The custard itself (without the added whipped cream) will last longer alone, up to 5 days in the fridge.
If you don't stir the custard consistently, then lumps can form. Be sure to stir consistently to avoid this. If you notice clumps forming, stir vigorously and fast to try to smooth them out. Another reason this can happen is if your heat is too high, so you can adjust if needed as all stoves are a little different.
When the custard is done it will be a bright yellow and thick consistency. You want to ensure the custard doesn't drip off the spatula and it looks thick. You can also use the spatula test, which I explain and show in the video. This is where you run the spatula through the center of the pot and if the custard doesn't run back into the opening right away then you know it's thick.
I use blueberries for the blue part of the flag and strawberries for the stripes. You can use other red fruits like raspberries or cherries (remove pits) for the stripes as well.
I don't recommend this because you'll need to thaw the berries. When you thaw them, they will loose moisture and deflate a little bit. So, they won't look very pretty on top of a pie like this. Frozen berries are best used for pies that are being cooked, like blueberry or strawberry pie as the way they look doesn't matter as much.
Homemade whipped cream has no stabilizers in it, so it will start to deflate as soon as it's made. To help prevent it from deflating, be sure to keep it cold and store it in the fridge.
Yes, you do need to store this in the refrigerator. Because cream pie is made up of custard and homemade whipped cream, it shouldn’t be left out. If you are serving this at a party, you can leave it out during the dessert hour while people grab slices. But, this isn’t a pie you can leave out all day, especially in the heat! It needs to be stored in the fridge.
Yes, you can freeze this cream pie after it’s fully put together. To do this, just wrap the entire pie dish in plastic wrap (this is important so it doesn’t dry out), you can even double wrap it. Then you can store in the freezer for up to 1 month. You can thaw it by transferring to the fridge and allowing it to thaw for 24 hours.
Yes, this is a delicious pie that you can make for any occasion without the flag! You can simply leave the berries off for a creamy vanilla cream pie. Or, you can also add any kind of fresh berries on top of the whipped cream in the center for a beautiful finish.
Fourth of July Party Menu Ideas
Check out some of my other favorite recipes for your Fourth of July party!
- Try Organic Turkey Burgers With Grilled Onions or Avocado Lettuce Wrap Burgers
- Organic Chicago Style Hot Dogs With Sauerkraut are always a crowd pleaser!
- Organic Dill Dip With Sour Cream is a favorite appetizer!
- No campfire needed for these Bakery Style Chocolate S’mores Cookies With Fluff
- This Chocolate Berry Flag Cake with Whipped Cream Frosting is another festive dessert that uses fresh berries.
- Eggless Strawberry Shortcake is a popular summer recipe!
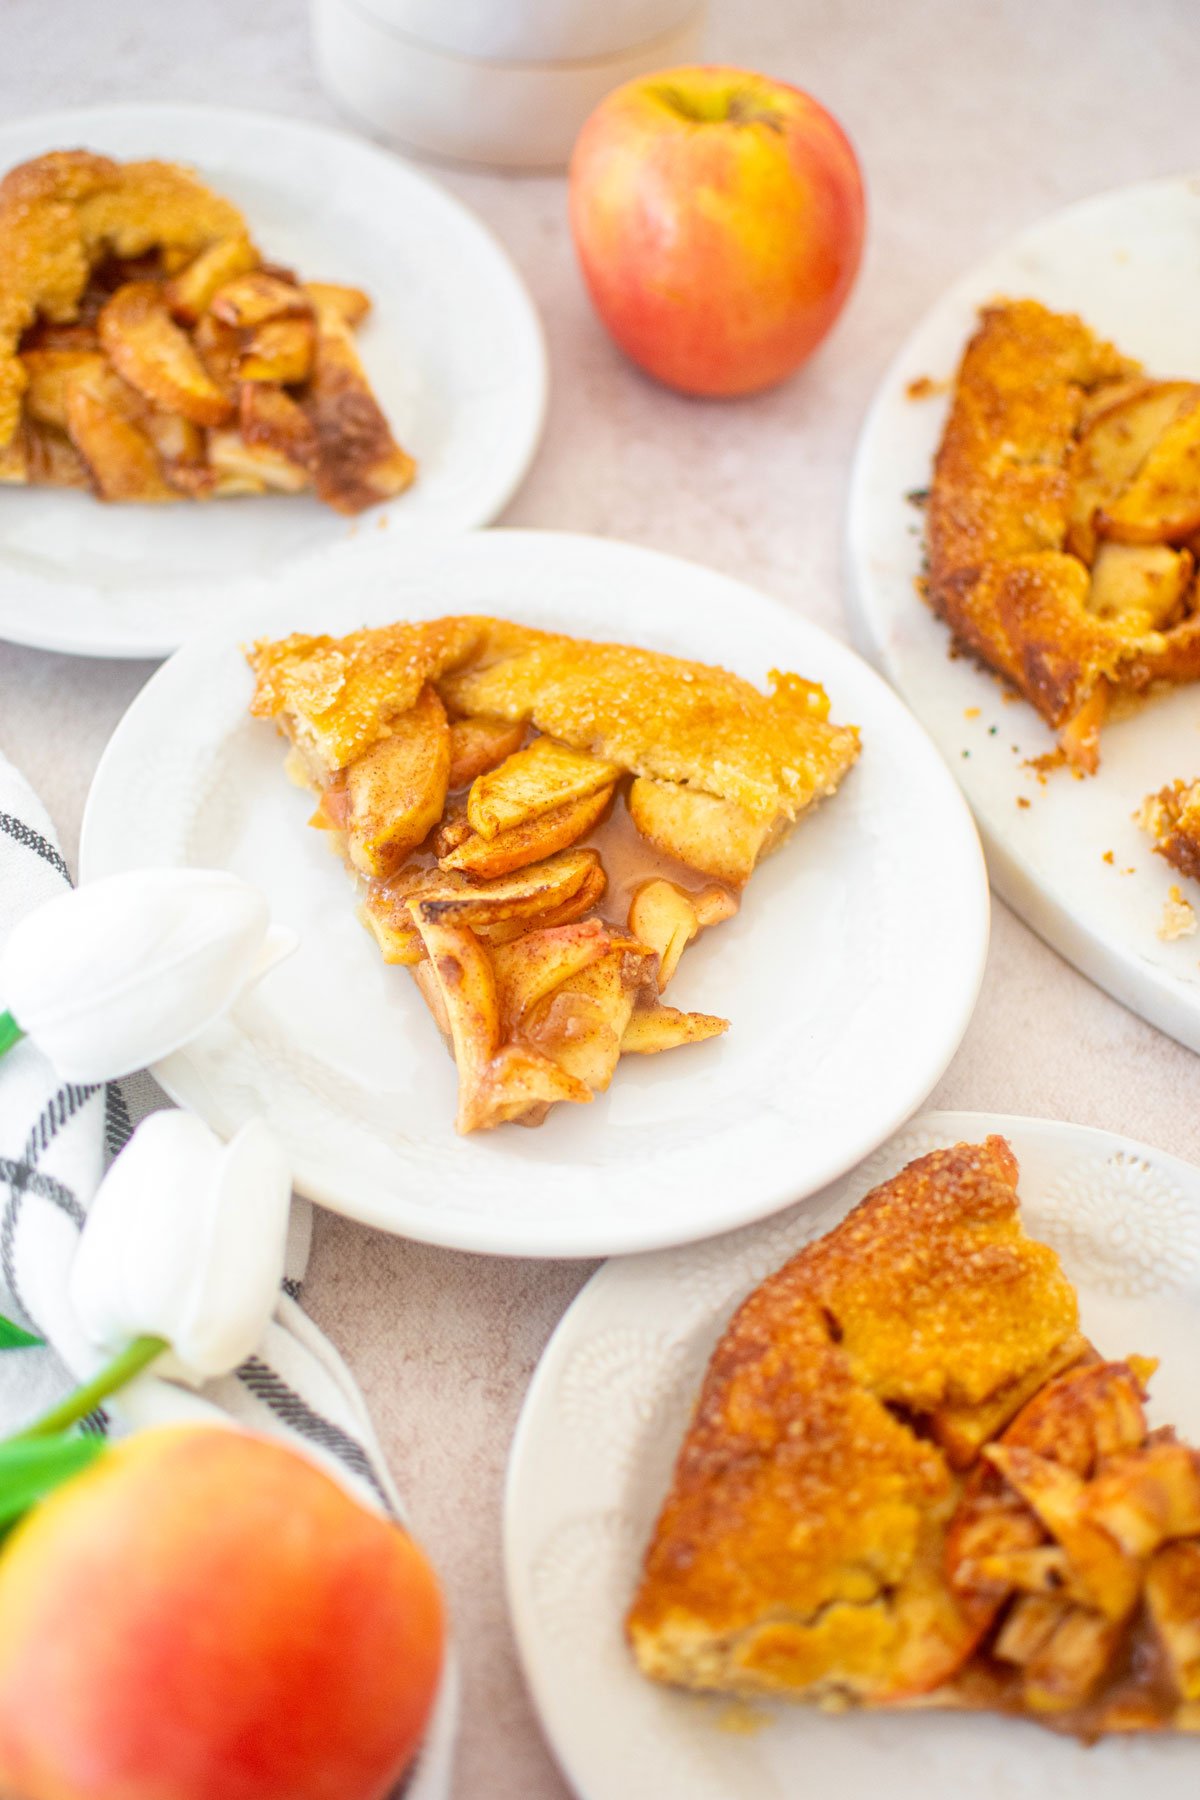
- Try classic fruit pie recipes like Apple Berry Pie, Honey Lemon Apple Pie or Orange Blossom Honey Apple Pie.

More Summer Pie Recipes


Loved it? Tell us!
Thanks a waffle lot for stopping by 🧇 If you loved this recipe, sprinkle some love by leaving a ⭐⭐⭐⭐⭐ review — it inspires others to try this recipe and helps me organically reach dog loving foodies like you! I personally read and appreciate every message!
Also, be sure to subscribe to our YouTube channel and join John John and me in the kitchen for step by step recipe videos! And subscribe to our newsletter for new and seasonal recipes!

American Flag Cream Pie with Graham Cracker Crust
Equipment
- Digital Food Scale
- 3-Quart Stainless Steel Pot
- Stand Mixer
- High Heat Spatula
- Mixing Bowl
- Food Processor
- 9-Inch Pie Pan
Ingredients
Custard
- 1 cup milk
- 3 large egg yolks
- 226 grams cane sugar
- 57 grams all purpose flour
- 57 grams salted butter
- 1 teaspoon vanilla extract
Crust
- 204 grams honey graham crackers
- 113 grams salted butter
- 57 grams cane sugar
Topping
- 2 cups heavy whipping cream
- 1 tablespoon cane sugar
- 1 teaspoon vanilla extract
- ¼ cup blueberries
- ½ cup sliced strawberries
Instructions
- To make the custard: Add the milk to a small pot and put over medium heat. Allow the milk mixture to heat until 140°F on a drink thermometer. Remove from the heat. While the milk is heating, continue on to the next steps, but keep an eye on the milk.
- In the bowl of a stand mixer fitted with the whisk attachment, add the egg yolks and 226 grams cane sugar. Whisk on low for 2 to 3 minutes or until lightened in color. Add the flour and whisk to combine completely.
- Once the milk has heated, turn the mixer on low and slowly add in the warm milk into the egg mixture. Once completely combined, stop the mixer.
- In a clean 3-quart pot (if using same pot as milk, be sure to wash!), transfer the egg mixture.
- Put over medium heat and stir with a high heat spatula. Make sure to stir and scrape down the pot the entire time. The mixture will begin to bubble, as it thickens, then it will begin to thicken. Be sure to continue stirring to avoid clumps or burning the custard. If you see any small clumps, stir vigorously to smooth them out.
- Once the custard coats the spatula and does not drip off when you lift it from the pot, then it’s ready. You can also check this by scraping the custard in the center of the pot and ensuring that it doesn’t run back in. We just want a thick custard.
- Remove from the heat and add in the 57 grams of salted butter. Stir to combine completely until smooth.
- Last, add in the 1 teaspoon of vanilla extract.
- Transfer the custard to the fridge and let it chill for at least 4 hours or overnight.
- To make the crust: Preheat the oven to 350°F.
- Add half the graham crackers into a food processor. Next, add in the 113 grams butter and 57 grams cane sugar. Then add the remaining half of graham crackers on top. This trick will help you mix evenly (as opposed to dumping all ingredients in!).
- Process on high and shake the food processor until you have a uniform mixture. It helps to shake the food processor (watch the video!).
- Grease a 9-inch pie pan with the butter wrapper. Then transfer the graham cracker crust into the pie pan.
- Press it into the sides of the pie pan first, then into the middle to create the graham cracker crust.
- Bake for 5 minutes. Allow the crust to cool completely before assembling the pie.
- To make the topping: In the bowl of a stand mixer fitted with the whisk attachment, add the heavy whipping cream, 1 tablespoon of cane sugar, and 1 teaspoon of vanilla extract.
- Mix on low, to avoid splattering, then gradually increase the speed as the mixture thickens. Continue to increase until you are at full speed. Whisk until stiff peaks form.
- Divide the whipped cream in half (weighing 8 ounces each). Set aside one half for the topping of the pie.
- Remove the custard from the fridge. Add in half (4 ounces) of the remaining whipped cream into the custard and fold to combine. Then add in the remaining 4 ounces and fold to combine completely, ensuring there are no ribbons of whipped cream.
- Transfer the custard to the graham cracker crust and spread it out evenly.
- Add the remaining 8 ounces of whipped cream on top and spread it out evenly. I like to leave a boarder of crust, custard, and then whipped cream so it’s nice and thick in the middle.
- To make the American flag design: You can use a butter knife to draw out the blue part of the flag and also draw the lines. (See photo or video).
- Add blueberries in the top left corner. Then add strawberry slices for stripes going across the rest of the pie.
- Serve immediately or store in the fridge (making sure to cover with plastic wrap completely so it doesn’t dry out) until ready to serve.
Video

Notes
- Always weigh ingredients for the best results.
- You can make the graham cracker crust a day or two in advance if you need to. If doing so, you should just leave it out on the counter.
- Make sure your butter is soft when making the graham cracker crust.
- Make sure you don’t get any egg whites in the egg yolks. Egg whites can make your custard airy instead of thick and creamy.
- If you don’t have a drink thermometer, just ensure the milk is lukewarm. Do not let it boil as it can burn, and transfer burnt flavor into the custard.
- Make sure to fold the whipped cream into the custard so it doesn’t break. This helps the old fashioned custard become light and smooth, while also being rich and creamy.
- If you want to add fresh blueberries or strawberries into the custard, you could also fold them in during the whipped cream step as well.
- Try making this with a chocolate crust, and learn How to Make Chocolate Graham Cracker Crust From Scratch!
- High Altitude — Follow the recipe as noted.
Nutrition
The Bake Shop
Visit The Bake Shop for foodie inspired tees, sweatshirts, and accessories. Find my favorite kitchen tools (with discounts!) in the Kitchen Shop. And shop our collection of food inspired dog accessories too!


Love how festive this is with no artificial colors!
Unbelievably moist and delicious. Perfect consistency and flavor.