How to Spiral a Buttercream Cake
If you make layer cakes frequently, you may be wanting to take your decorating skills to the next level. While cake is good no matter how it’s frosted, frosting a beautiful cake just makes you feel good! So today I’m going to explain how spiral a buttercream cake. I use this technique all the time, as it’s one of my favorite ways to frost a cake. I think it’s one of the easiest but also makes it look the prettiest. So double bang for your buck, which is why I do it all the time!
If you're looking for more cake baking tutorials, check out some of my others like How to Crumb Coat a Cake, Best Salted Butter for Baking, How to Make a Flower Cake With Buttercream, or How to Make a Naked Cake.
In This Baking Guide
- Learn how to spiral a buttercream cake
- Apply this technique to any buttercream cake
- Simple and timeless design
- Full step by step video tutorial
Summarize & Save This Content On
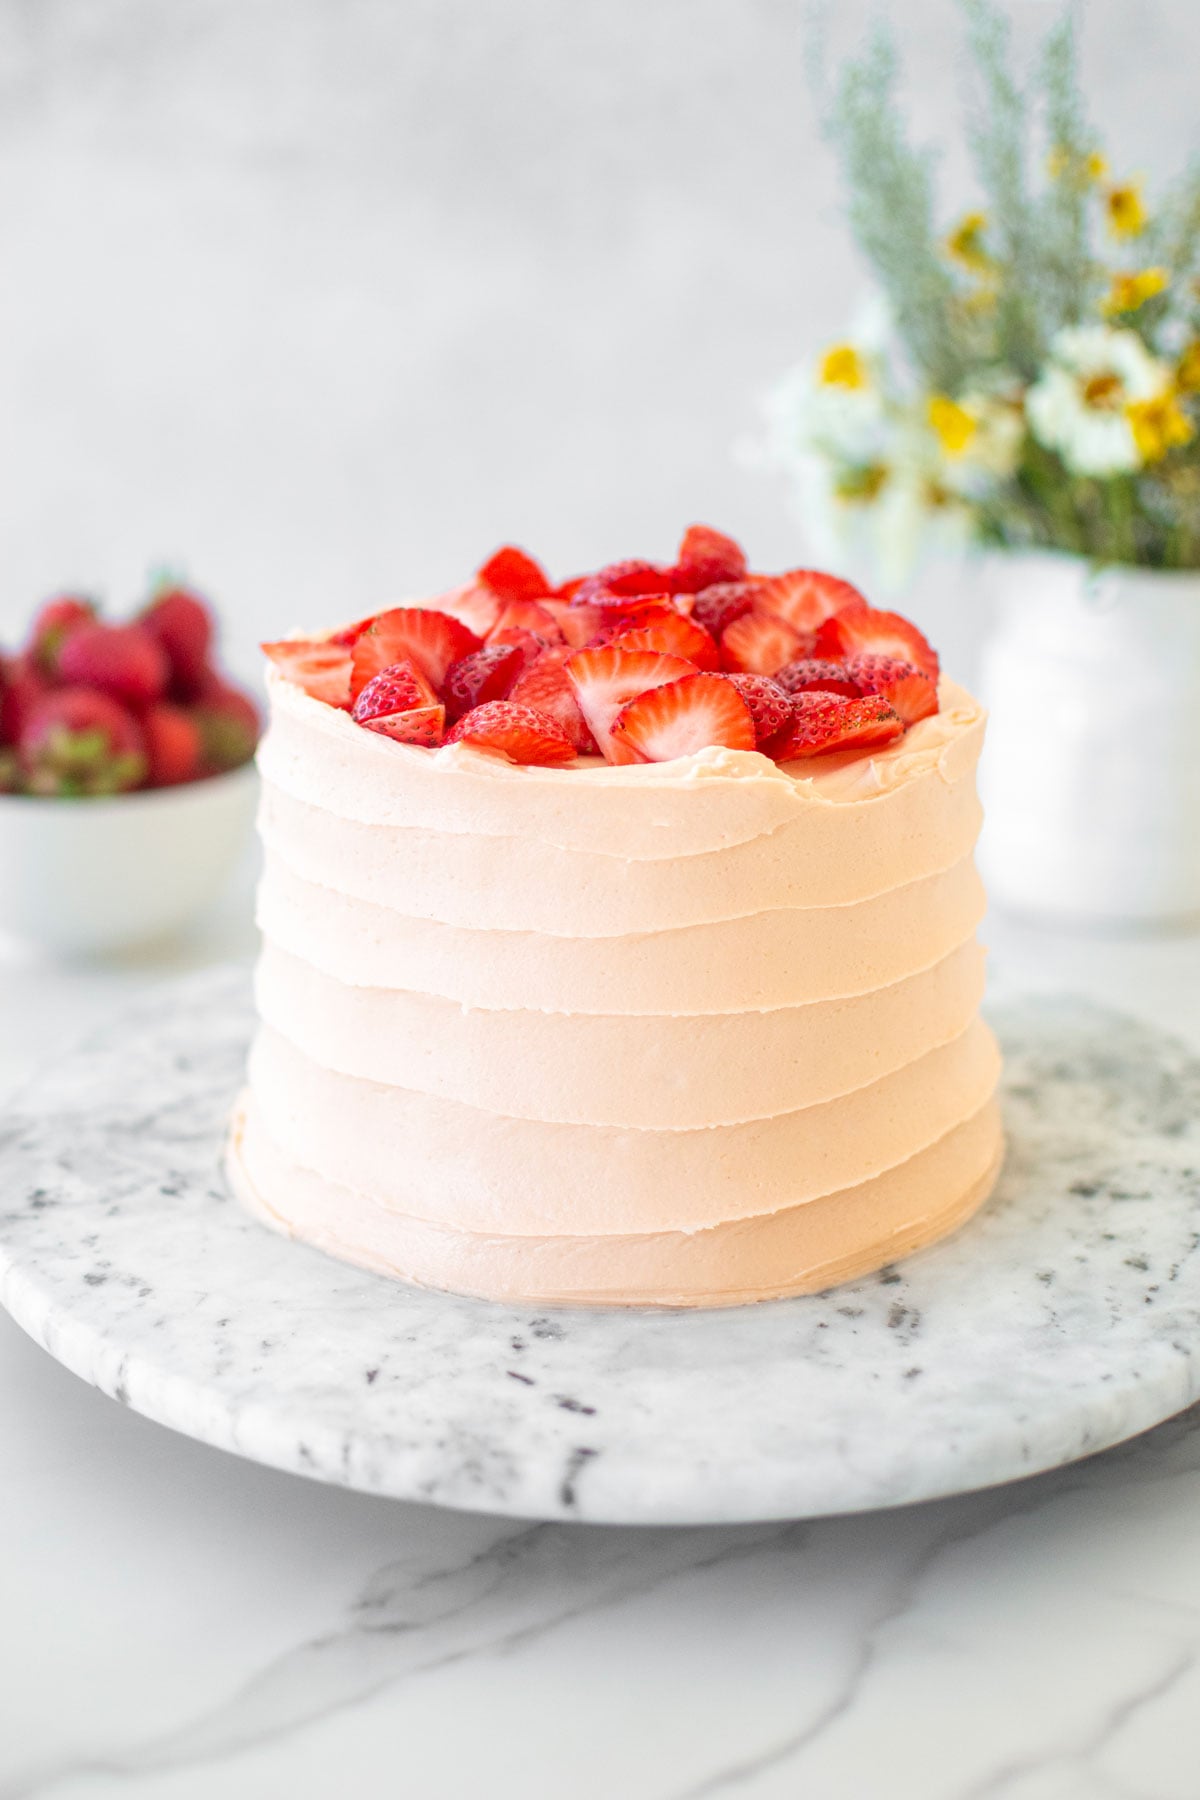
In this post I'm going to share how to spiral a buttercream cake. This simple technique can be applied to any layer cake recipe that you like. I love using this spiral technique because it's simple, rustic, but a little bit elevated!
Once you become proficient in this technique it's really quite simple! I think it looks good for almost any layer cake. Plus, I leave a rustic edge on top which makes the top great for filling with fresh fruit, Homemade True Caramel, Gingerbread Caramel Sauce, Homemade Caramel Sauce with Bone Broth, Homemade Chocolate Ganache, fruit compote or even Homemade Organic Lemon Curd With Egg Yolks!
What is a spiral cake design?
I call this technique the spiral cake design. This was one of the most popular cake designs when I owned my bake shop. This technique can be used with any buttercream frosting like Caramel Buttercream Frosting, Strawberry Buttercream with Fresh or Freeze Dried Strawberries, Vanilla Bean Buttercream Frosting, Honey Buttercream Frosting, or even Easy Homemade Cream Cheese Frosting.
This simple technique just uses a cake spatula to create a spiral design up the sides of the cake for a simple texture that is both rustic and elegant at the same time! You can even use this for chocolate ganache frostings such as Peanut Butter Caramel Chocolate Ganache Frosting.
Tools Needed
- Cake Turntable: You'll need a cake turntable (or also called a cake spinner) in order to decorate this spiral buttercream cake. You can use a marble turntable, like I have here or even a plastic one, any kind you like is just fine.
- Cake Round: This part is optional, but if you plan to move your cake from the spinner, you want to first place it on a cake round to ensure you can easily move it off. Depending on the size of your cake, you want to get a cake round that is 2-inches larger than your cake. So, if you have a 6-inch layer cake, you'll want an 8-inch cake round.
- Cake Spatula: You'll need a cake spatula or offset spatula (your choice!).
Baker's Tips for How to Spiral a Buttercream Cake
- If your frosting seems to stiff, then add a little water or milk to it. You want the frosting to be incredibly soft, smooth, and easy to work with. If it's too thick, then it won't spiral easily.
- If you are adding caramel sauce or chocolate ganache on top of your cakes I advise leaving the raw edge so it holds the sauce on top of the cake only. I don’t like the way it looks when sauces are dripping down a spiral cake as it just falls off the texture. I feel these dessert sauces are better on a smooth or textured cake as they look more appetizing if you want the drips down the sides. But that’s just my personal opinion!
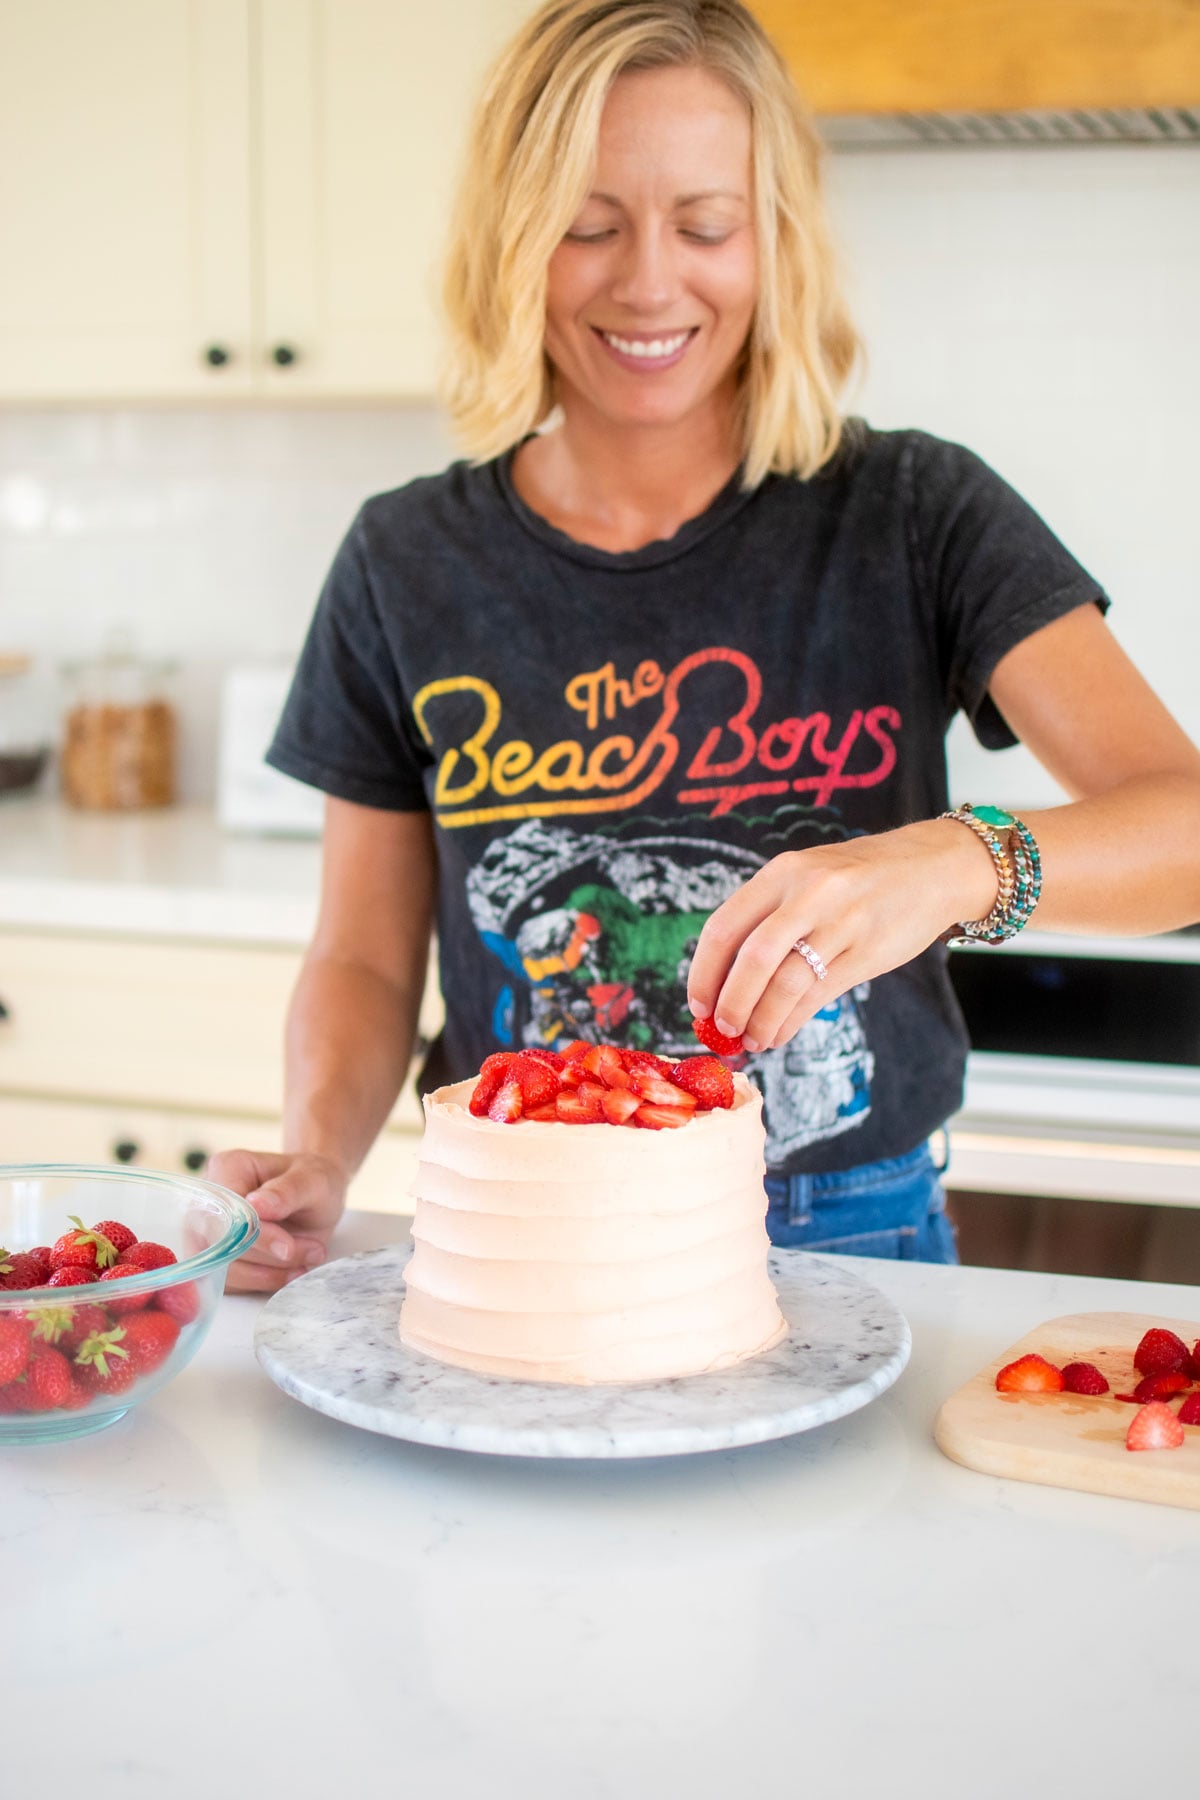
- Sprinkles, chocolate chips, fresh fruit or flowers are all amazing toppings for spiral design cakes!
How to Spiral a Buttercream Cake
There's a video at the bottom that shows you exactly what I'm explaining in these steps. Be sure to watch the video and read the steps to get the full tutorial on how to spiral a buttercream cake!
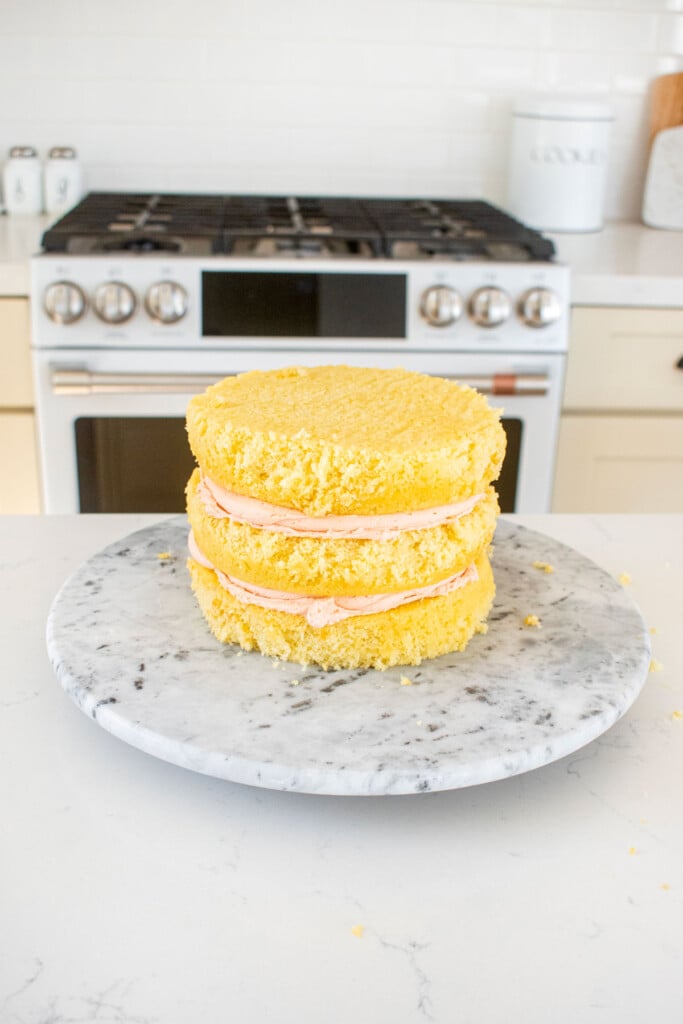
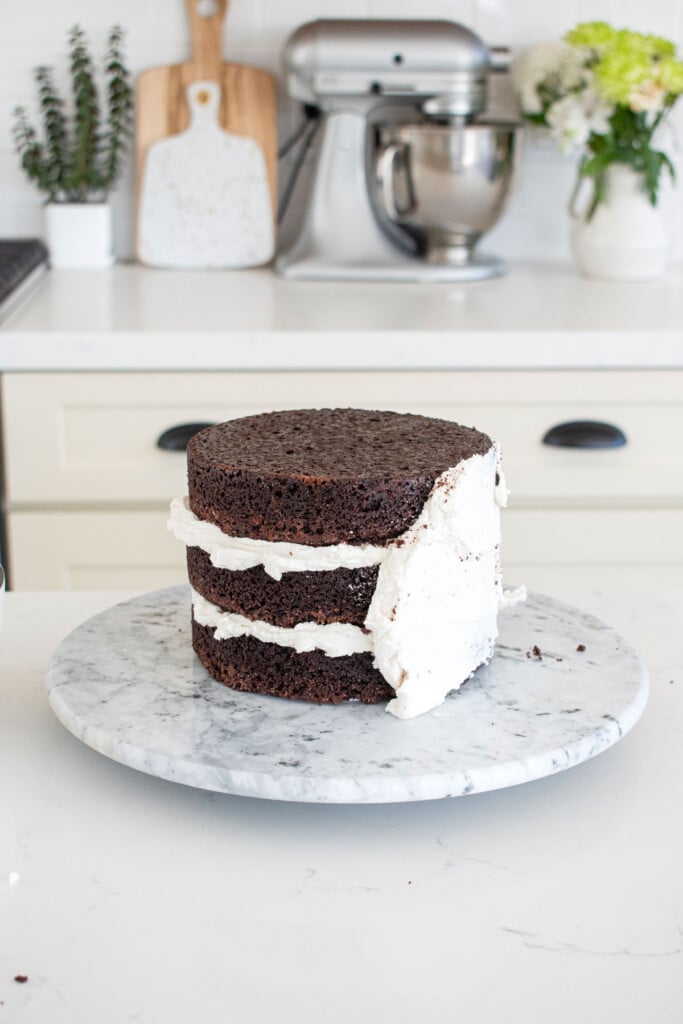
- You can apply this spiral technique to any cake! The first thing you’ll need to do is bake your cake, let it cool, make your frosting, and crumb coat your cake.
- If you need more help to crumb coat your cake, visit my tutorial How to Crumb Coat a Cake. Once the cake has been crumb coated, then it’s time to begin frosting your cake with the spiral technique.

- Make sure your remaining frosting isn’t dried out. American buttercream will dry out as it sits out, it’s one of the great things about it as it hardens. But whenever frosting a cake you don’t want it to be dry as you won't get a smooth finish. So if you crumb coated your cake, and it sits in the fridge for a few minutes to chill, and now it’s ready, chances are your frosting has dried. To soften your frosting back up, you can add a little liquid. This can be milk, water, coconut milk, heavy whipping cream – any of these will work! You can use the liquid that the recipe called for or you can just use water. Only add 1 to 2 teaspoons and whip it again real good with your mixer. Having a frosting that is smooth and easy to work with is key for finishing beautiful cakes. It should not be so stiff that it’s not sticky. You want a combination of stiff (so it holds on the cake) and sticky because it has to stick to the cake as well.
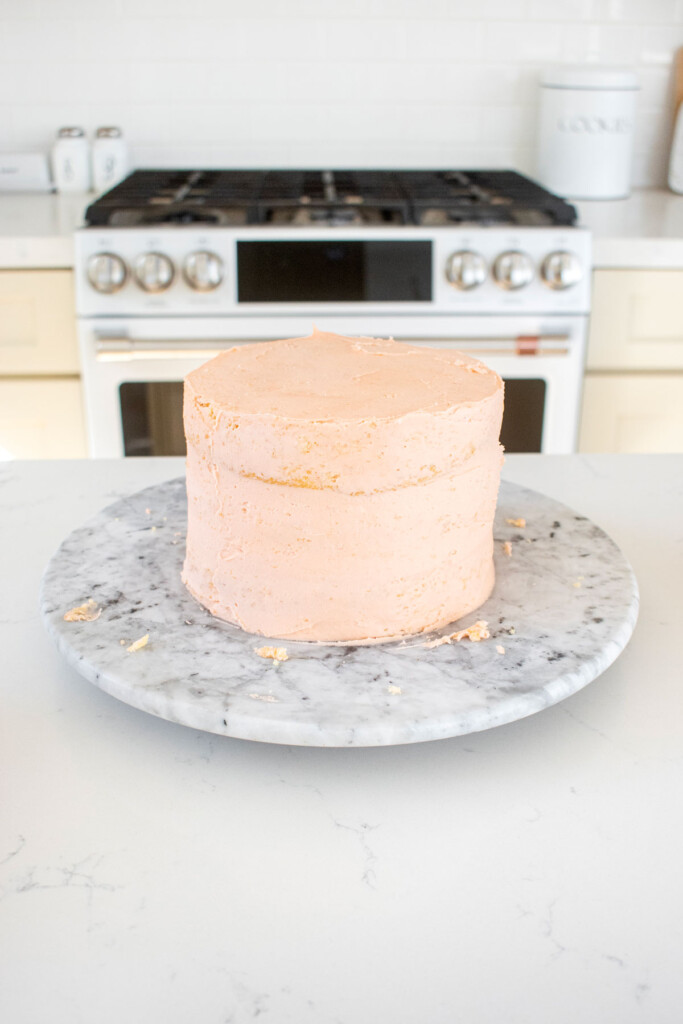
- When your crumb coated cake and frosting are ready, I start by adding all of the remaining frosting onto the top of the cake. I use a straight sided spatula, because that’s my favorite, but some people prefer an offset spatula. Either of these will work, whichever you like best is what you should use! I spread the frosting around the top and let it start to creep down the sides of the cake. Then I frost the sides of the cake, making sure the sides and top all have an even coating if frosting. I also make sure the top is smooth, or looks how I want it to now, because whenever I spiral a cake I just do the sides. I like to leave the top smooth. But, you can also spiral the top with the same technique, so that’s totally up to you! And if you plan to spiral the top, you don’t need to make it look perfect now, just be sure it’s evenly coated.
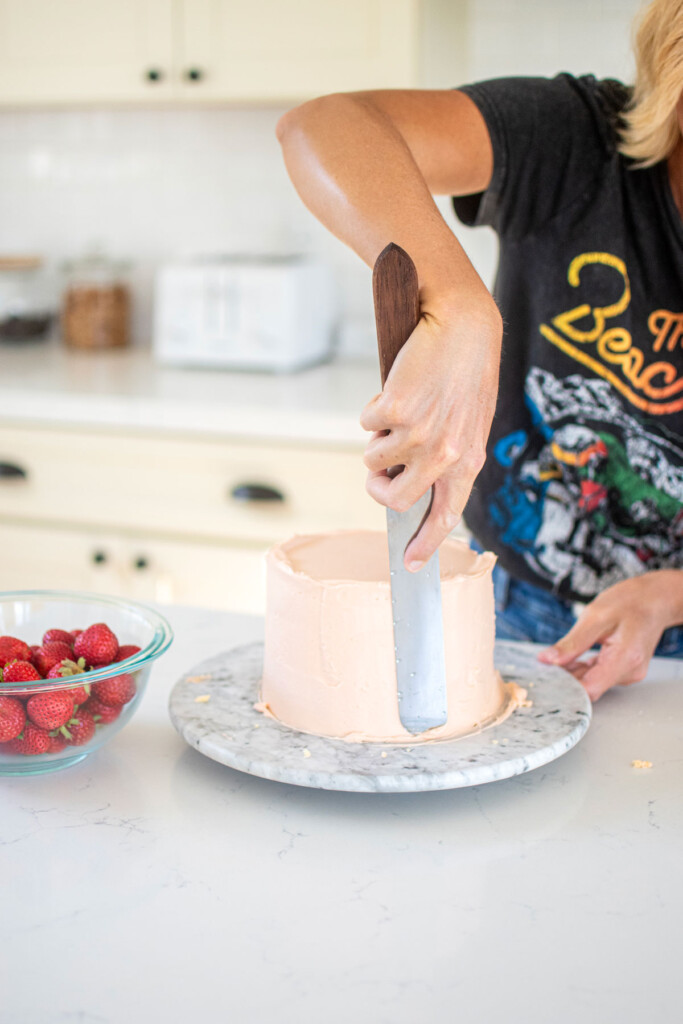
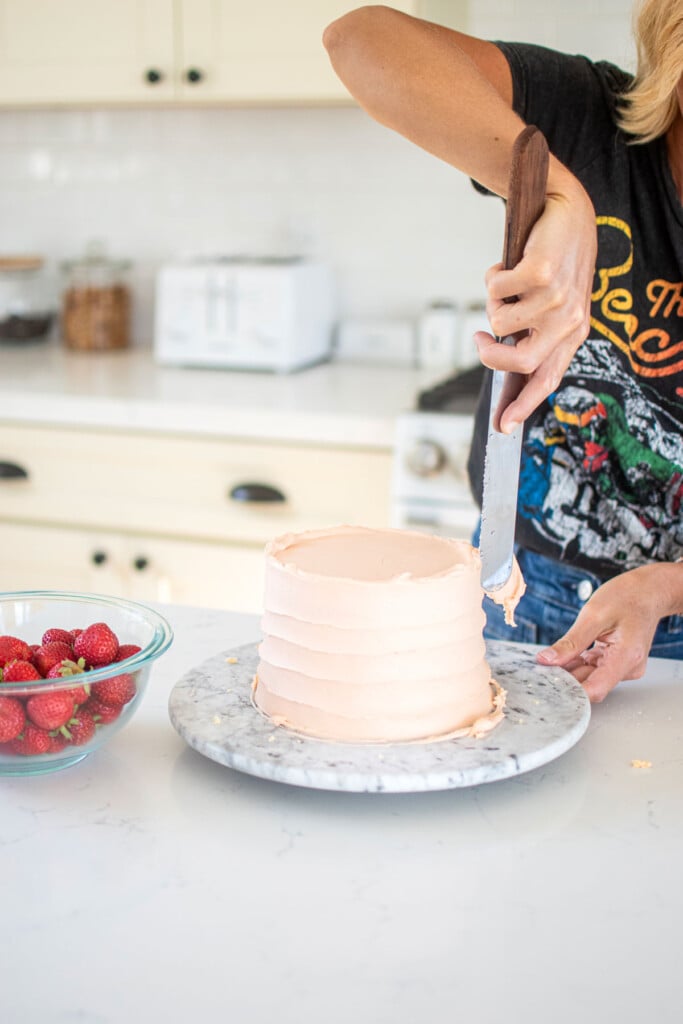
- Once all the frosting is on the cake and even, then it’s time to start spiraling! I run my spatula under hot water to remove all excess frosting, but also to get it hot. This trick helps tremendously as the warm spatula will smooth the buttercream as you work, while also making it glide really easily! You can use this trick anytime on any buttercream cake!
- To start the spiral, point your spatula tip side down on the very bottom of the cake. Press with a firm, but gentle amount of pressure into the frosting. The key to a perfect spiral cake all lies in the pressure and your ability to keep it even throughout this process! As you press into the cake, keep the spatula in the same spot while also spinning the cake spinner.
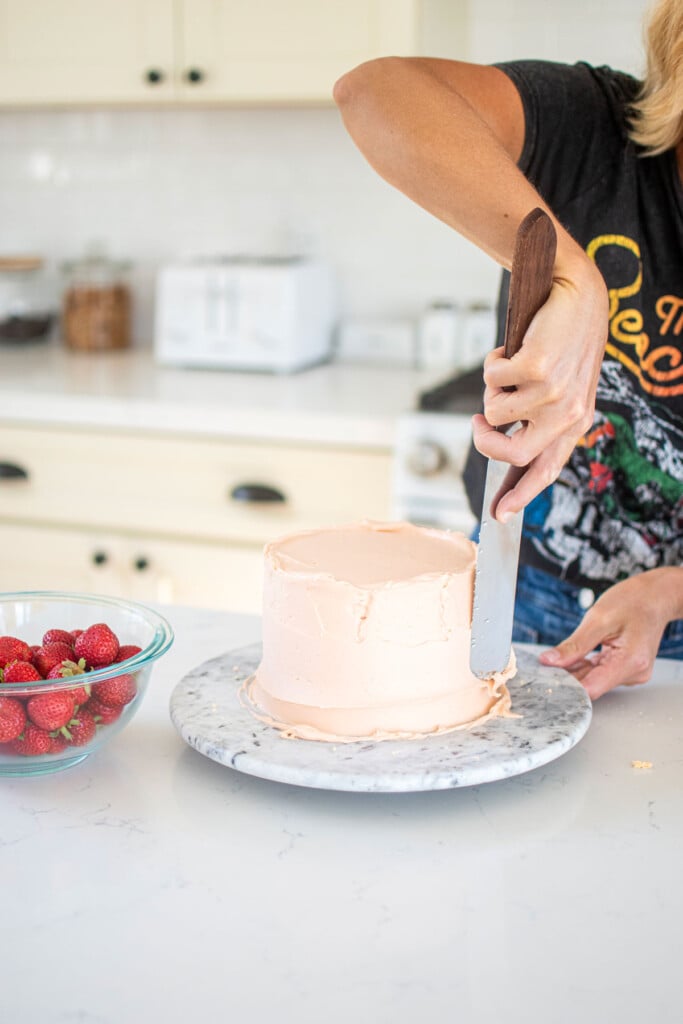
- Once you get back to the starting point on the cake, you slightly lift up the spatula a small amount, while also keeping it firmly pressed into the frosting. How much you move it up will depend on how big or how small your spirals will look!
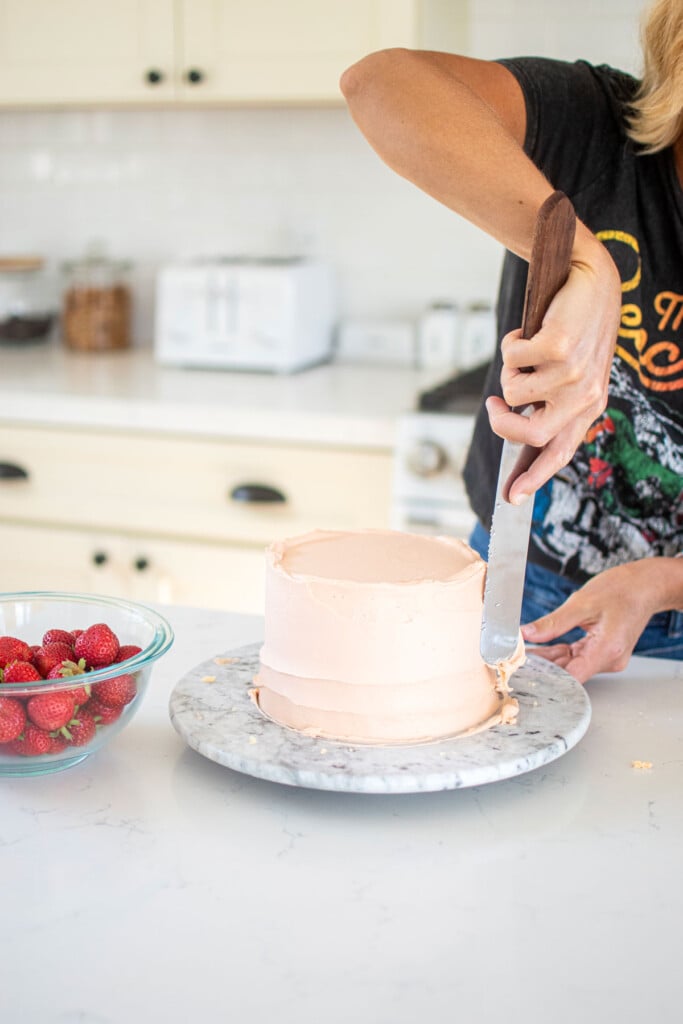
- As you lift it upwards, while still keeping the same amount of pressure into the frosting, continue to turn the cake spinner for another complete circle. This process gets repeated until you are at the top of the cake.
- This part goes really quickly, but the pressure, movement, and technique is what creates the spiral design. If you don’t like how your cake looks, or if you notice a bare spot where cake is showing through, you can just smooth and even out the frosting and try again! I only recommend doing this a couple times though, as your buttercream will start to dry out.
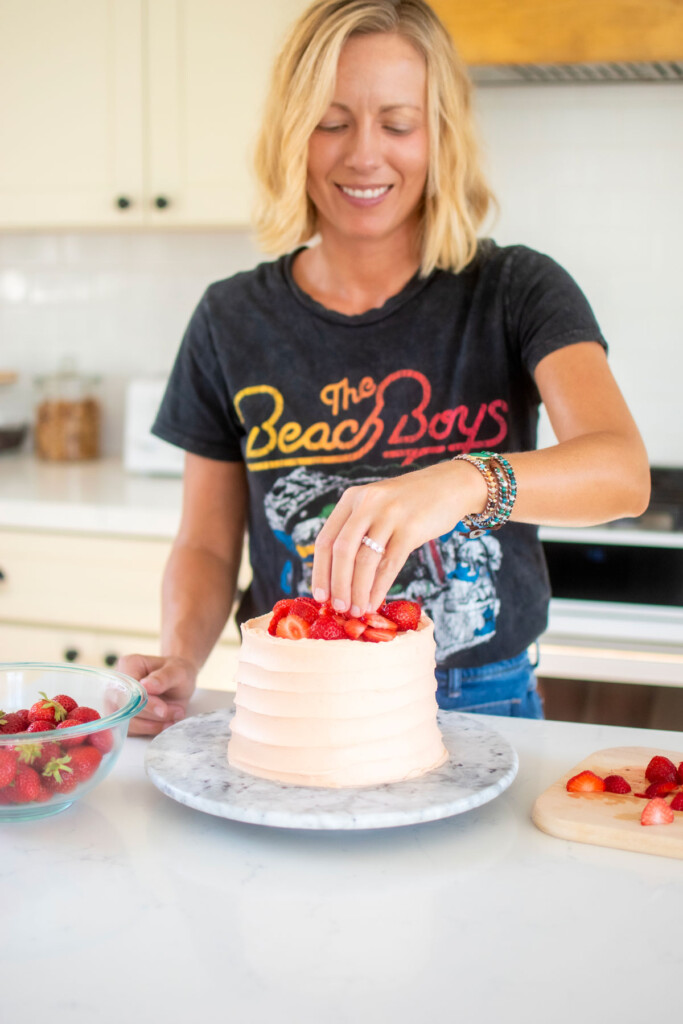
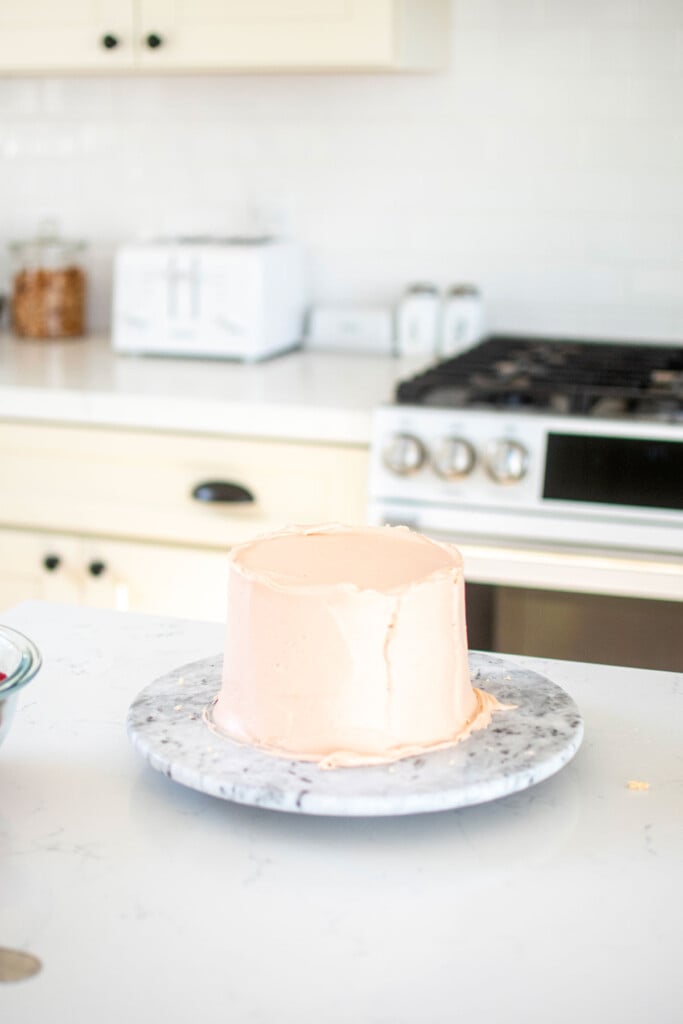
- If you’re leaving your top smooth and your edge raw (like I do) then you’re done! I prefer my cakes to look a little more rustic, so that’s why I leave the top with a little texture and a rustic edge. But if you want to smooth the top edge or even spiral the top, then you would do that now. Otherwise, you can top it with any toppings you like (such as fresh fruit, caramel sauce, or chocolate ganache).
To Smooth the Edges
To smooth the edges, run your cake spatula under hot water again to remove the frosting from it and get it warm. Using the top of your spatula, pull the frosting edges into the middle. Do this all the way around until the edges are smooth and even. Then run your spatula under hot water again, and smooth over the entire top of the cake.
To Spiral the Top
To spiral the top of the cake as well, run your cake spatula under hot water again to remove the frosting from it and get it warm. Using the top of your spatula, pull the frosting edges into the middle. Do this all the way around until the edges are smooth and even.
Then run your spatula under hot water again to clean it. Starting on the outer edge of the cake with the top point of your spatula (just like we did at the bottom with the spiral) press into the frosting just enough to create an indent. Keep that pressure as you turn the cake spinner while following that same circle around the cake. When you get back to the starting point, move into the cake just a little bit. The amount you move in will dictate how large or small the spirals are, just like on the sides! Continue this process until you’re done in the center of the cake!
Watch the Video

More Baking Tutorials


The Bake Shop
Visit The Bake Shop for foodie inspired tees, sweatshirts, and accessories. Find my favorite kitchen tools (with discounts!) in the Kitchen Shop. And shop our collection of food inspired dog accessories too!


Leave a Reply