How to Make a Naked Cake
If you are getting into cake baking, you may be wondering how to make a naked cake. You may see them on Pinterest, and they may all look a little different depending on who actually makes them. So in this post I am going to share with you a few different styles of naked cakes, and give you some tips and tricks on how to make a naked cake.
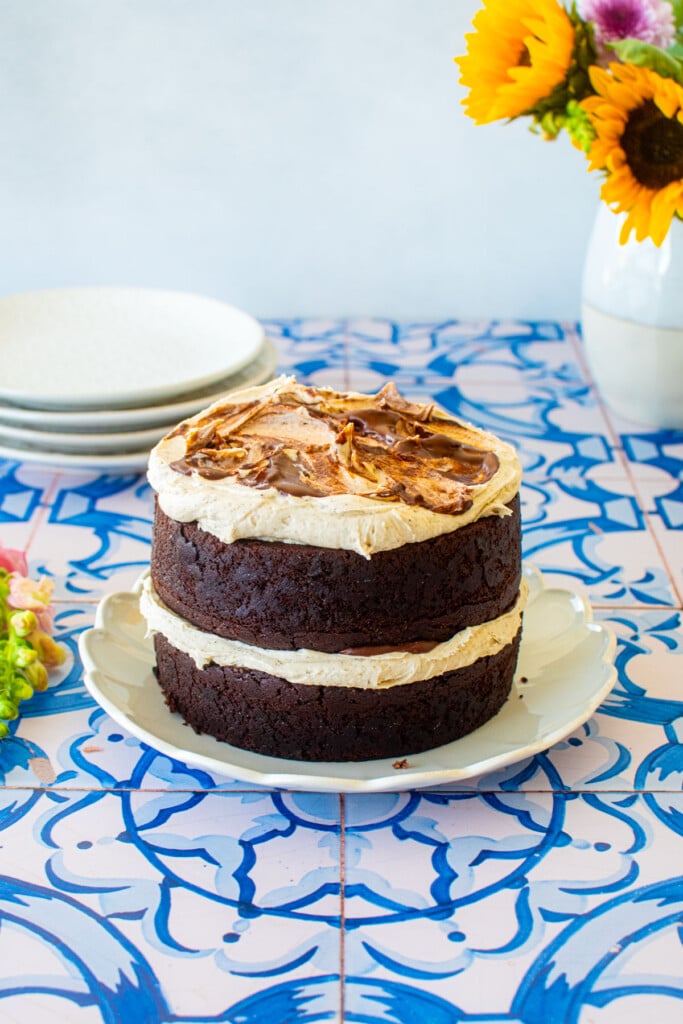
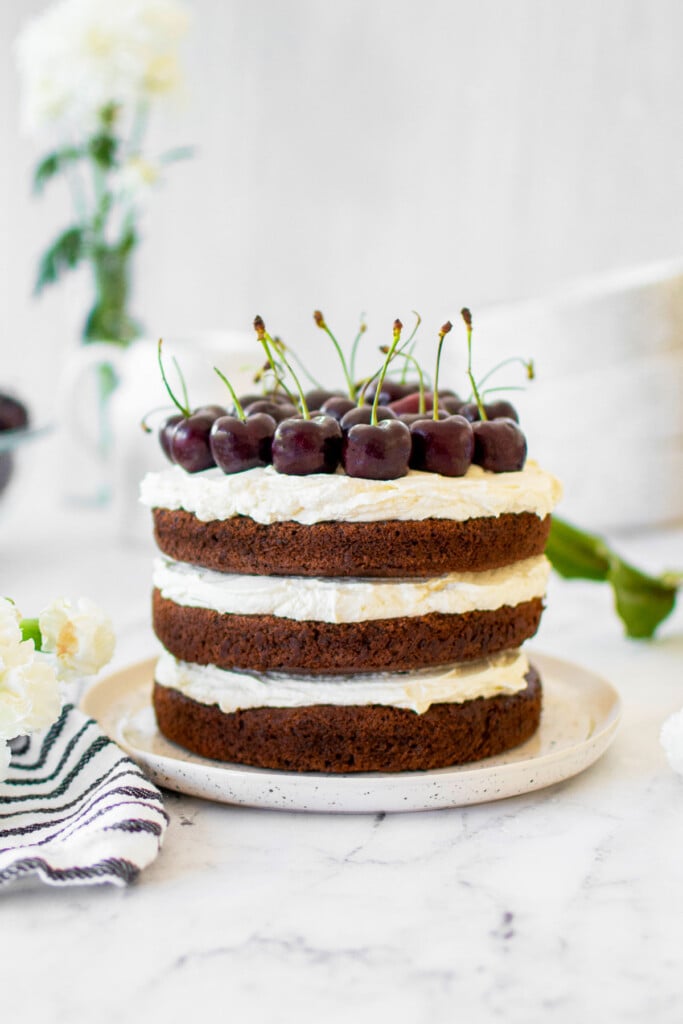
If you're looking for naked cake recipes, be sure to check out some of my favorites here like Banana Bread Semi Naked Cake, Orange Ginger Carrot Cake, Chocolate Cherry Whipped Cream Cake, Eggless Birthday Cake With Cream Cheese Frosting, or Simple Naked Birthday Cake.
In This Baking Guide
- How to Make a Naked Cake
- 3 different kinds of naked cakes
- Tips for making naked cakes
- Step by step photos for making a naked cake
- Naked cake recipes to try
Summarize & Save This Content On
What is a Naked Cake?
A naked cake is a layer cake that has the cake layers exposed (in some way), meaning frosting doesn't completely cover the cake like a traditional layer cake. There are many different styles of naked cakes and while they all kinda have the same name, they can look very different!
Don't worry, I got you covered if you are looking to learn how to make a naked cake. And not just one kind, but multiple different kinds of naked cakes! I get the allure of naked cakes as they just look so effortless and chic. And, many people think that naked cakes use less frosting, but I am here to tell you right now that is so untrue! You actually sometimes use more frosting than a completely covered cake! I know, crazy right?!

Three Different Types of Naked Cakes
I am sharing three different types of naked cakes today — what I call a Rustic Naked Cake, a Classic Naked Cake, and Semi-Naked Cake. Learn how to make all three! Additionally, I am sharing recipe links to some of my favorite naked cakes.
I am starting with the easiest and then going on to the more difficult style. Whenever making naked cakes, just remember — do not get discouraged. This style of cake takes just as much practice as traditional layer cakes and can even sometimes feel harder. During my time as a bakery owner, I taught many people how to make naked cakes and it just takes patience. But, practice just means more cake for you to eat — so that's not a bad thing!
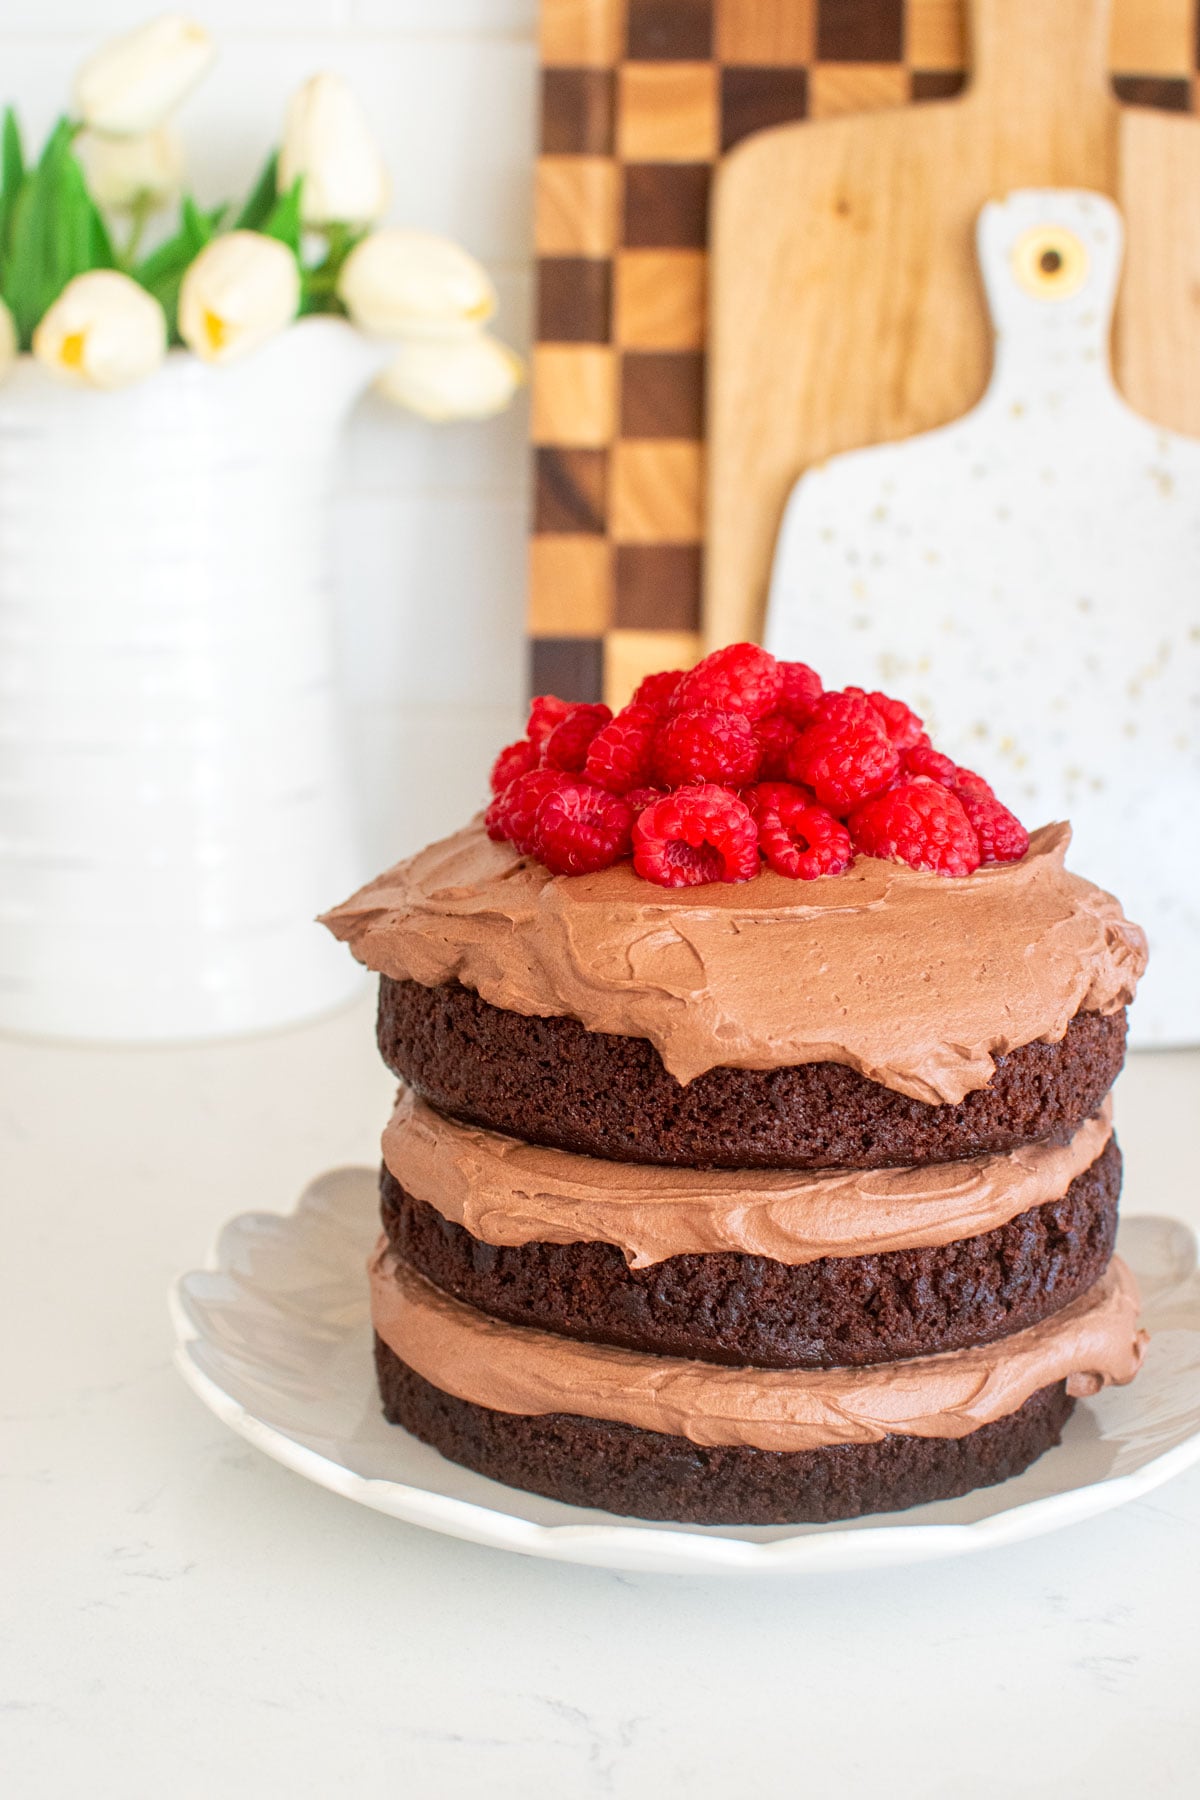
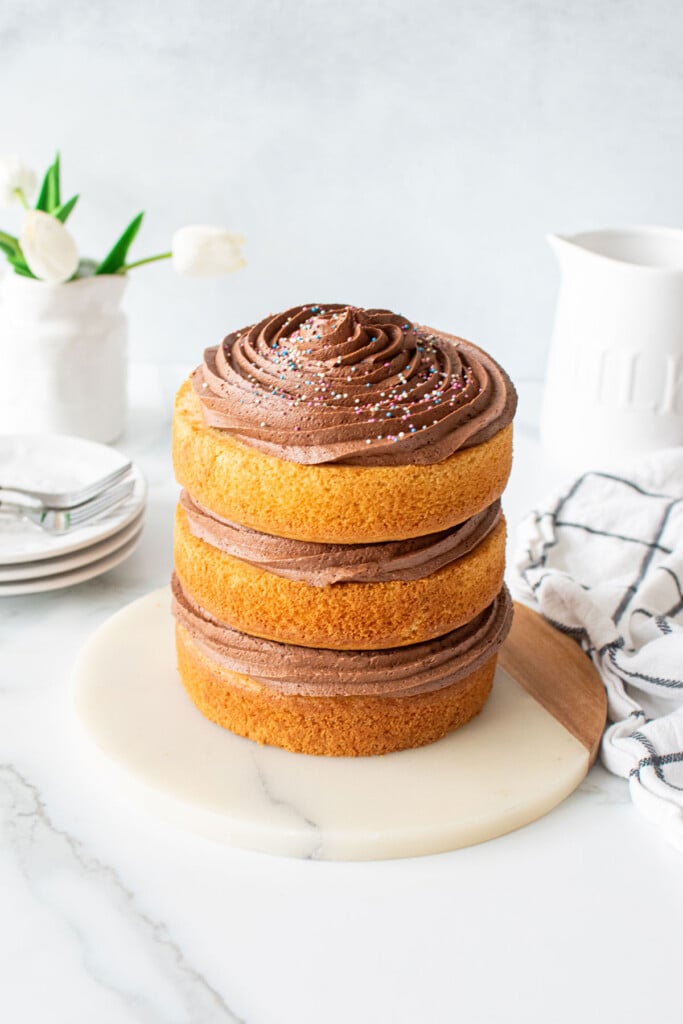
How to Make a Rustic Naked Cake
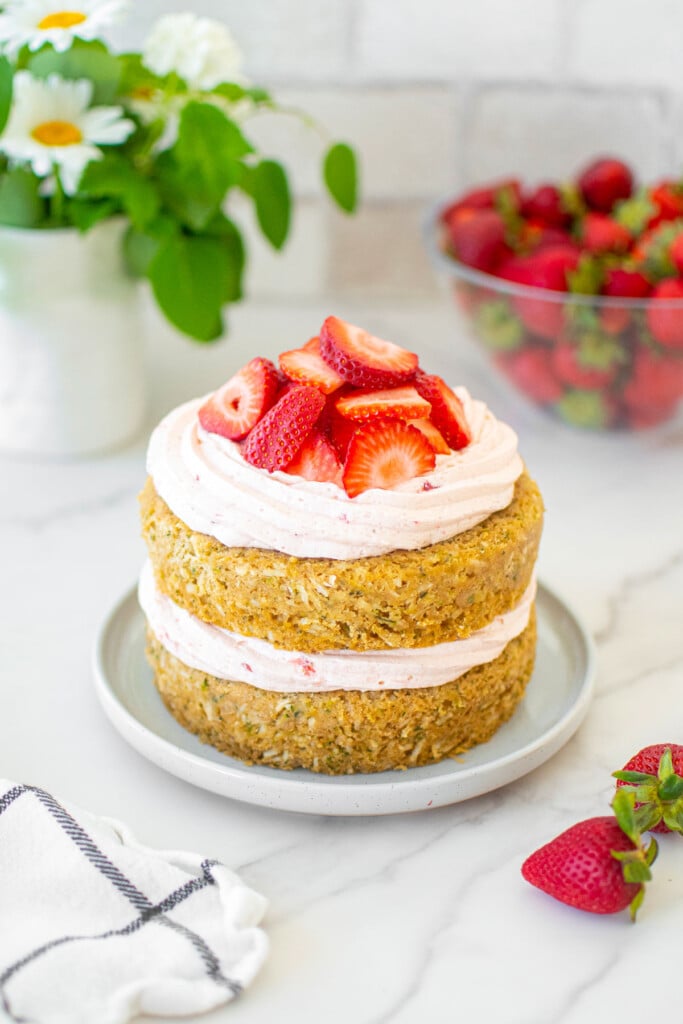
The first style of naked cake I call a Rustic Naked Cake. This is the easiest kind of naked cake to make! So, if you are just starting out then I would recommend starting with this style of naked cake.
Cake Layers
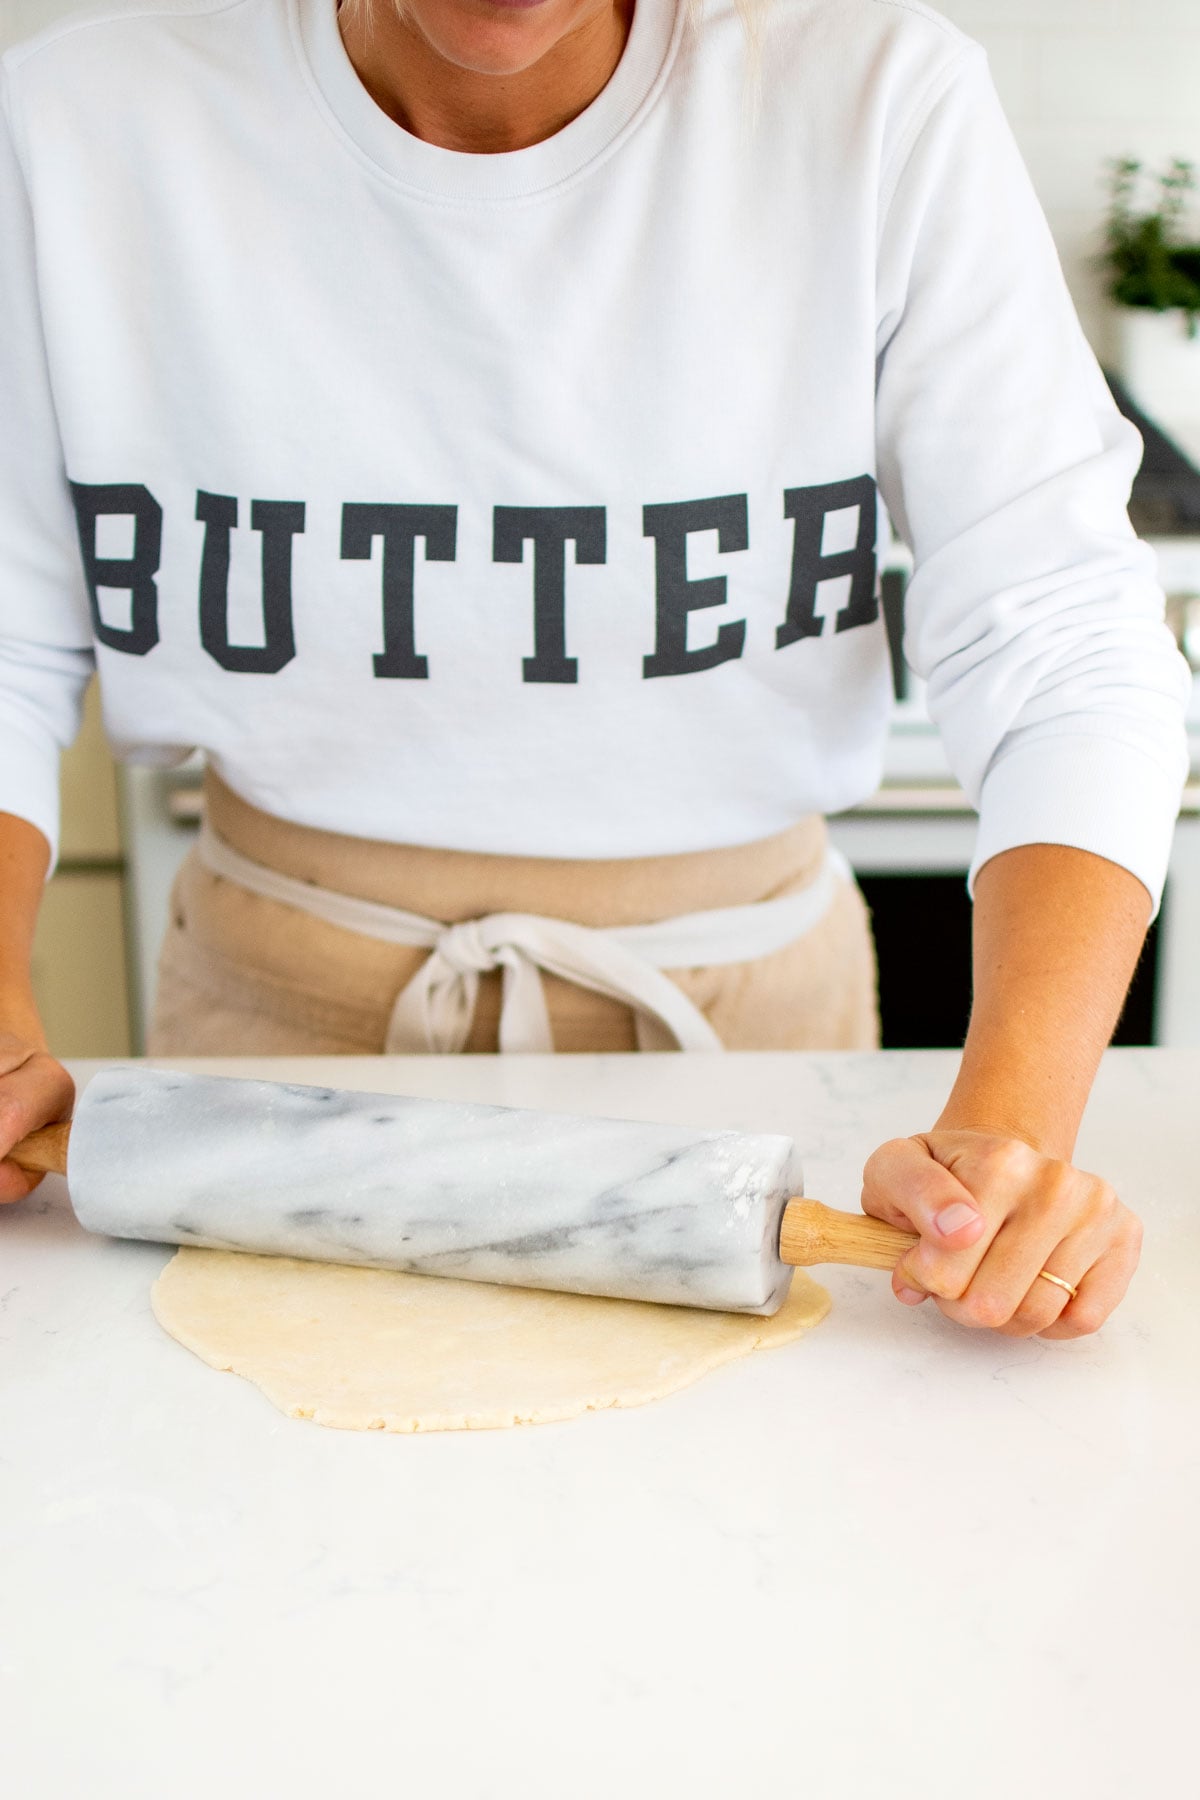
For this Rustic Naked Cake, make sure that you have flat cake layers. Some types of cake will bake flat on their own, but if your cake is domed then you can trim it with a bread knife. It's best to trim the cake when it's chilled in the freezer so it cuts easily and it doesn't break. You can place your cake layers in the freezer for 15 minutes, then trim the dome off the cake. Or, you can also bake your cakes using cake strips to prevent doming.
Frosting
You can make almost any kind of frosting for this style of naked cake. I frequently use American buttercream like my Vanilla Bean Buttercream Frosting, homemade whipped cream frosting, or even just plain homemade organic whipped cream! All of them would be delicious and hold up well.
Tools
All you need is a spatula for this! No piping bag needed. That makes this style of naked cake incredibly easy! It's also why I call it rustic as it's more freeform. You can use a cake spatula, offset spatula, or even just a rubber spatula.
To Assemble
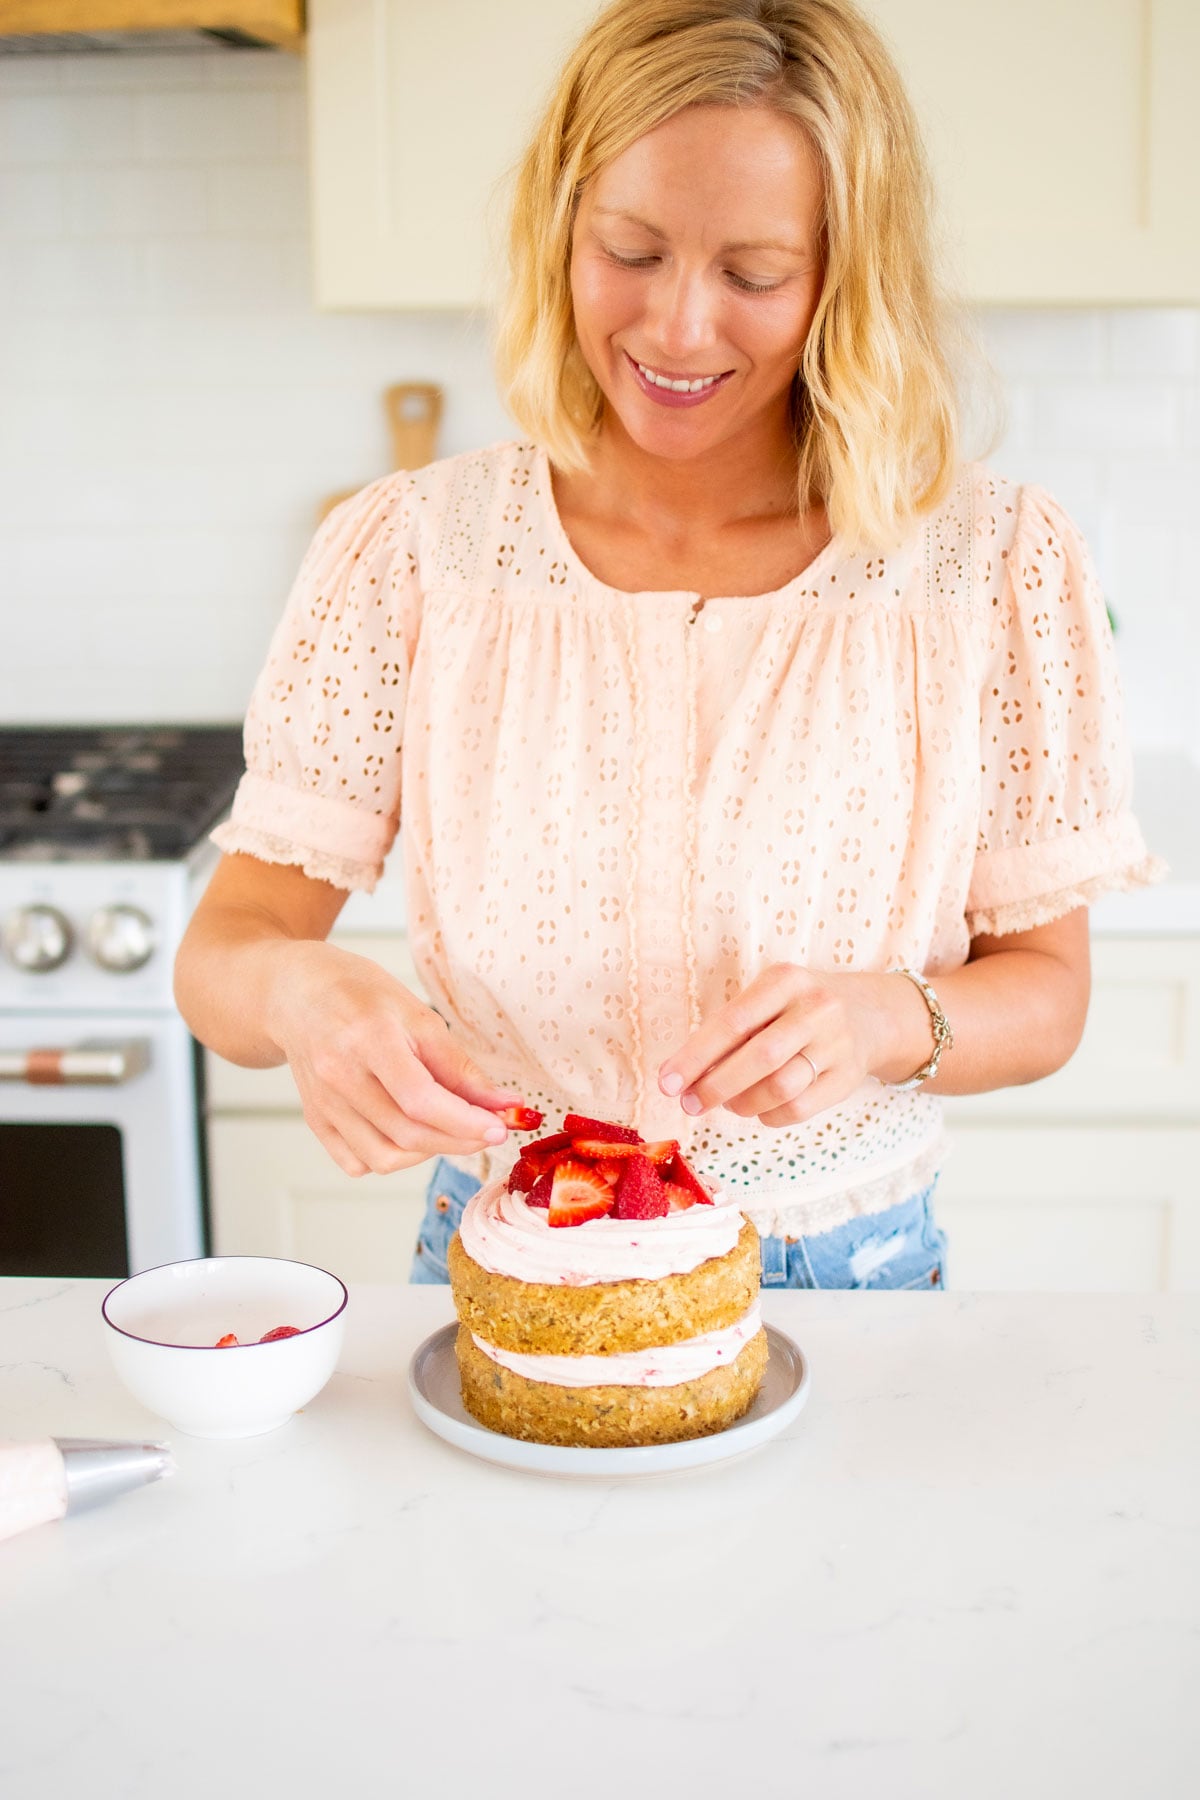
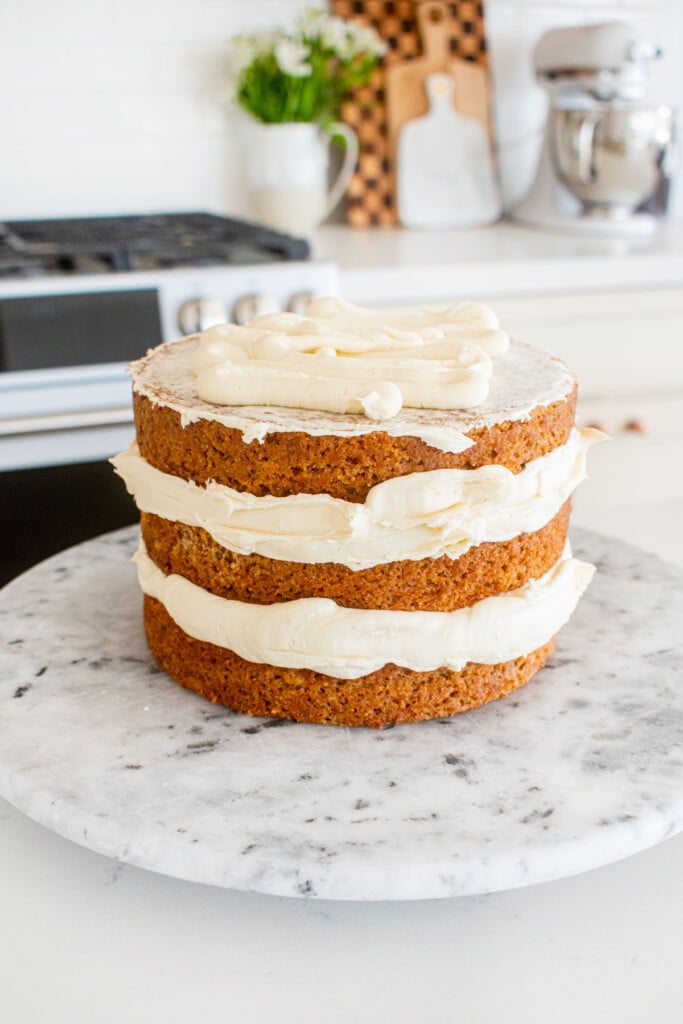
- Make sure you have your cake layers and frosting ready. Place your first cake layer on a cake stand with the bottom side down. I always place the bottom side down with my first cake layer no matter what kind of cake I'm making. This provides a truly flat bottom for the cake to sit on, no matter where it is. This makes it stand up straight! Then place a generous amount of frosting (to be exact, one third of the frosting if you have three layers or half of the frosting if you have two layers) and spread evenly.

- Top with the second cake layer with the bottom side up. You always want to have the bottom side up on the top layers, and especially the final layer, as that is always the perfectly flat side of the cake, so it helps make the cake look even and straight.
- Then repeat the process with the remaining frosting and cake layers, making sure you place the cakes bottom side up. It's that simple!
Baker's Tips
The biggest tip is don’t skimp on the frosting. If you don’t have enough frosting, this style of naked cake can look lackluster. So just make sure you generously put enough frosting on each layer. You can weigh your frosting and then divide it by two or three, depending on how many layers you have. This will ensure you get equal amounts on each layer.
I also think that this type of naked cake looks best when there's a topping. Otherwise, they can look lackluster. Try topping this style of naked cake with fresh berries like strawberries, blackberries, raspberries, or blueberries. You can even do banana slices, peaches, or other fruits. You could also decorate with Green Tea French Macarons or meringues.
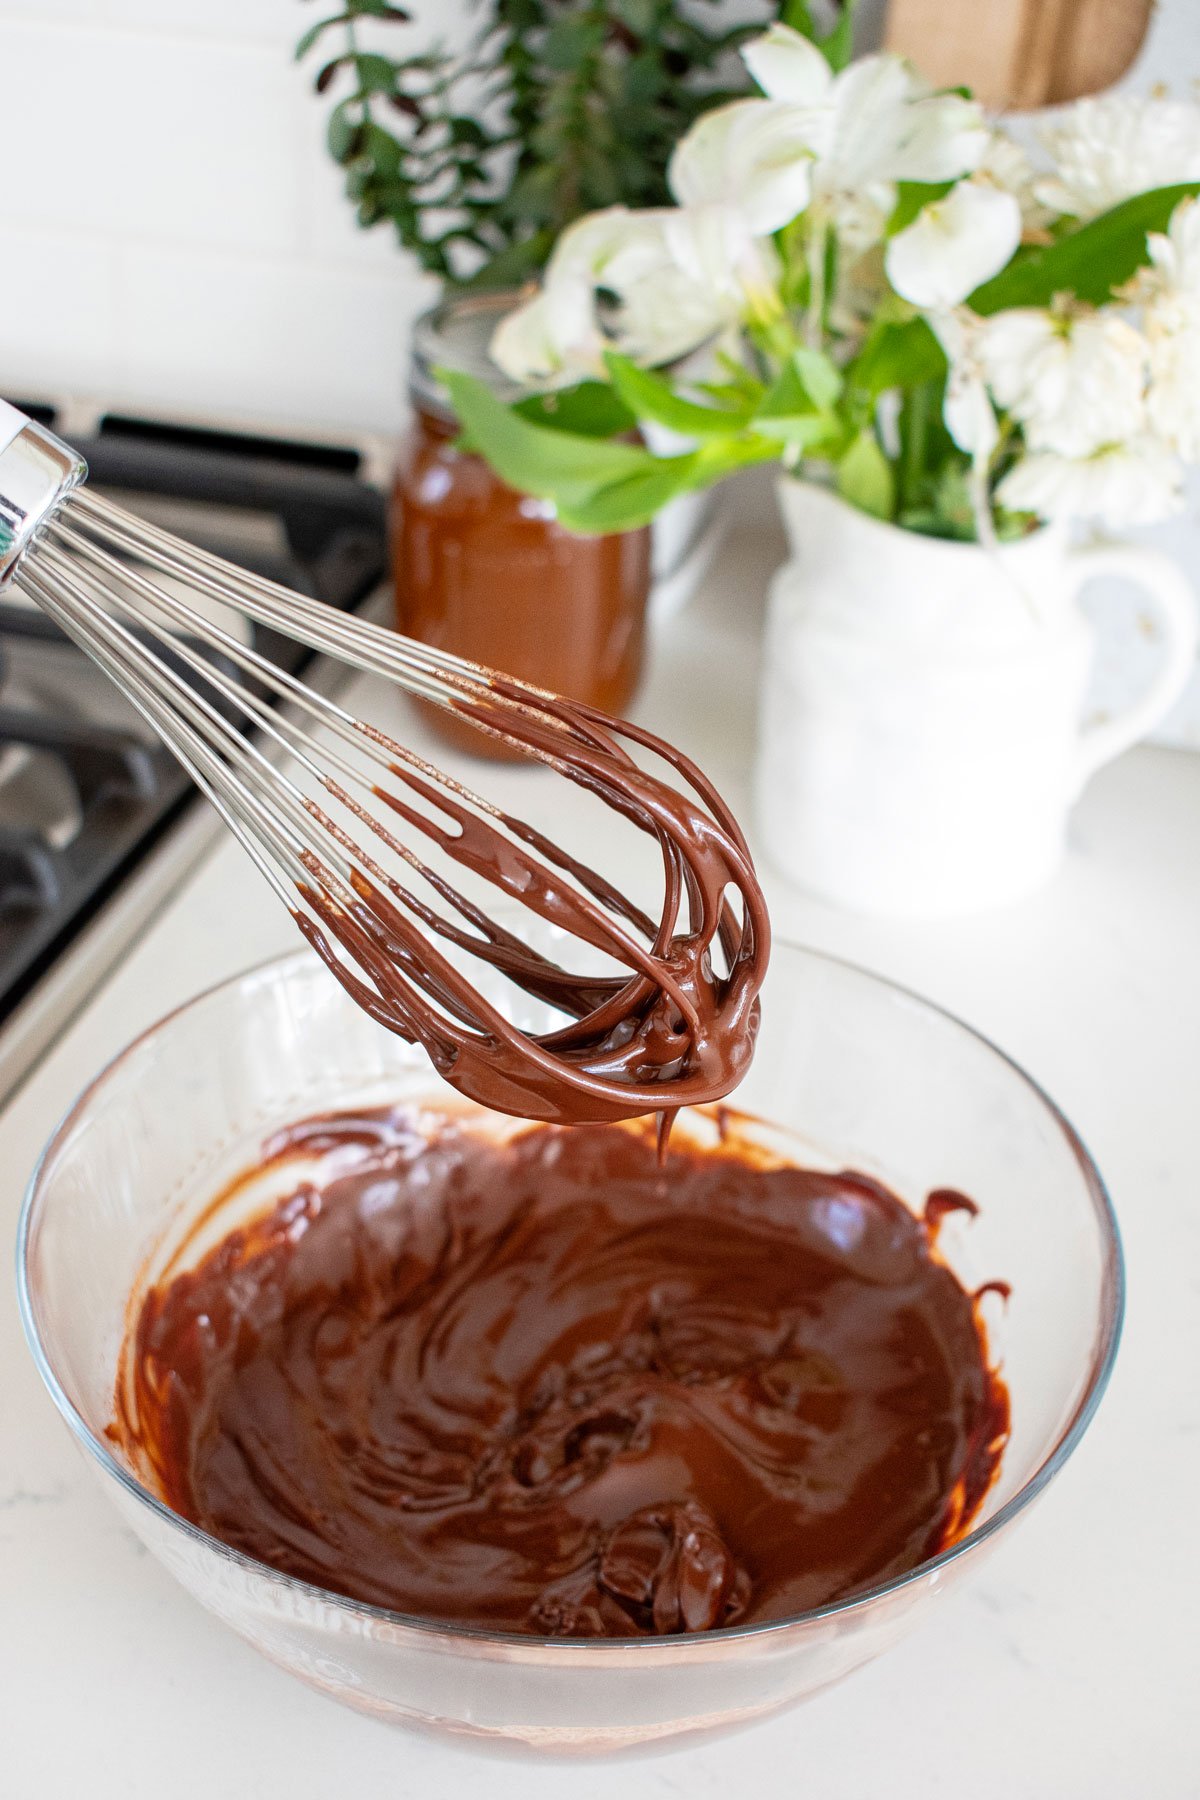
I also love adding a dessert sauce on top, try it with Vegan Dark Chocolate Ganache Sauce, Homemade True Caramel, Gingerbread Caramel Sauce, Homemade Caramel Sauce with Bone Broth, Homemade Chocolate Ganache, Brown Butter Butterscotch Sauce, or even a swirl or drizzle of Homemade Blueberry Syrup.
I named this style the Rustic Naked cake, as this doesn't have to be perfect and the frosting is spread in a rustic way on each layer making this cake very easy to assemble. Try some of my favorite recipes using this Rustic Naked Cake style, you can also apply this technique to different cake flavors that you like!
Video Tutorial

Rustic Naked Cake Recipes


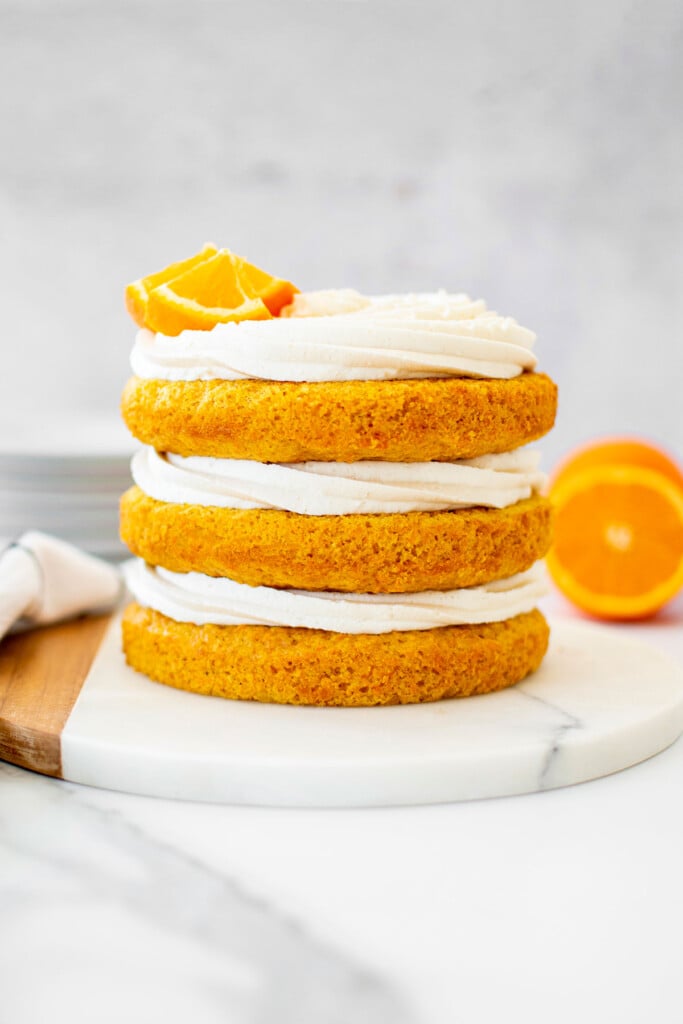
How to Make a Classic Naked Cake
This Classic Naked Cake is also fairly easy to make and it looks amazing. I named this the Classic Naked Cake as it's just classic and chic.
Cake Layers
With this style of naked cake it is very important that you have perfectly flat cake layers too. If your cake is domed then you can trim it with a bread knife. It's best to trim the cake when it's chilled in the freezer so it cuts easily and it doesn't break. You can place your cake layers in the freezer for 15 minutes, then trim the dome off the cake. Or, you can also bake your cakes using cake strips to prevent doming.
Frosting
You want to use a frosting that will hold its shape well. I prefer to use American buttercream here. This actually uses much more frosting than you may think! Try recipes like Caramel Buttercream Frosting, Strawberry Buttercream with Fresh or Freeze Dried Strawberries, or Honey Buttercream Frosting.
Tools
You will need a piping bag and a decorating tip for this style of naked cake. I use Ateco tip #827 often but you can also use #846 or #864. You can even use a piping bag with no tip for a smooth looking frosting instead.
To Assemble

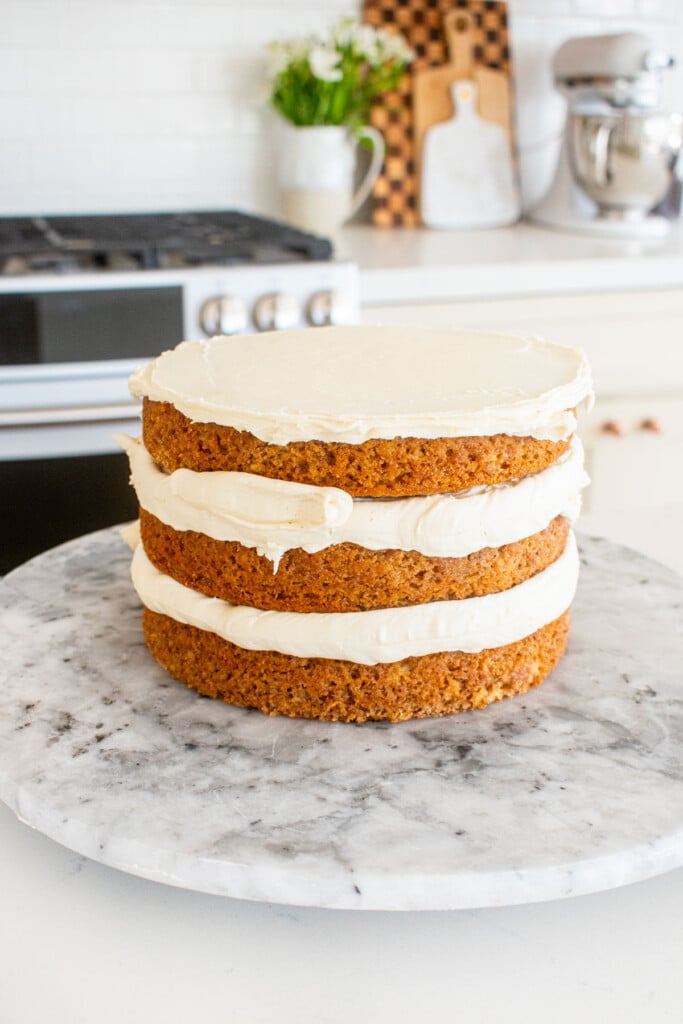
- You should have your cake layers and frosting ready. The frosting should be in your piping bag with whatever decorating tip you are using. Place your first cake layer on a cake stand or spinner bottom side down, so it sits flat.

- Then starting at the outer edge of the cake, pipe a spiral going into the middle of the cake. You want to start at the outer edge of the cake (and not the middle) as you want to focus your efforts here as this is what you will see. So, you want to make sure the frosting is completely flush with the edge of the cake.
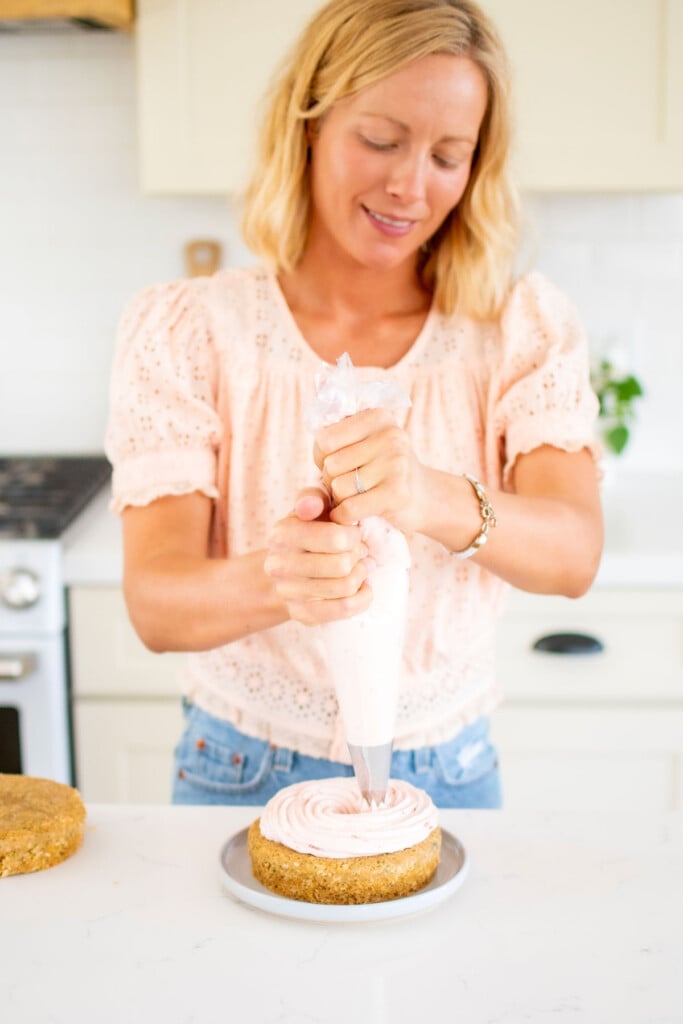
- The middle you will not see. So, that's why I always start on the outer edge to get that first circle exactly where I want it. Then you can just continue to pipe into the center, which does not have to be perfect at all! And if you have a gap or something on your spiral into the middle, just smooth it out with your cake spatula, or add a dollop of frosting there as no one will see it!

- Then top with your second cake layer (bottom side up).

- Repeat that process again with the spiral of frosting, starting at the outer edge and working your way into the middle. Do this one more time with the third layer (if you have a third layer).
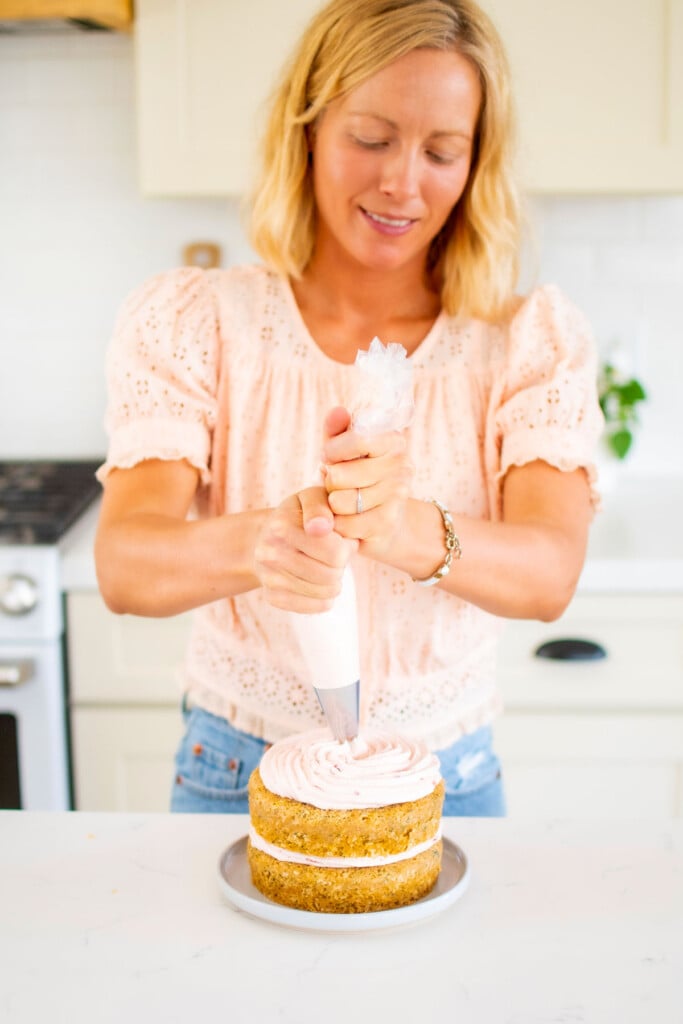
- For the top layer, you want to focus more effort on the piping of the top of the cake as you will see the middle since it’s the top! I still start on the outer edge and then work my way in.
- If you're topping your cake with something like fresh fruit, then finish with that on top of the cake.
Baker's Tips
If you have any problems piping the top, you can always smooth the middle with a cake spatula. This gives it a little more rustic look, but if your spiral is not perfect then it really helps hide that! And it still looks good to have the spiral design on the outer edge, even if it's smooth in the middle. You can also add fresh fruit, flowers, or nuts to the top of this cake to hid imperfections in your spiral while you are still learning.
You can also take liberties with the piping on this style cake. For example, you don’t have to pipe a spiral. Instead, you could pipe rosettes on each layer. Or you could pipe dollops of frosting as well. Additionally, you could can even pipe a big shell boarder too! I use this technique on my Pumpkin Pie Cake with Whipped Cream Frosting. This style of cake is very flexible to make it look different.
Try some of my favorite recipes using the Classic Naked Cake style.
Classic Naked Cake Recipes


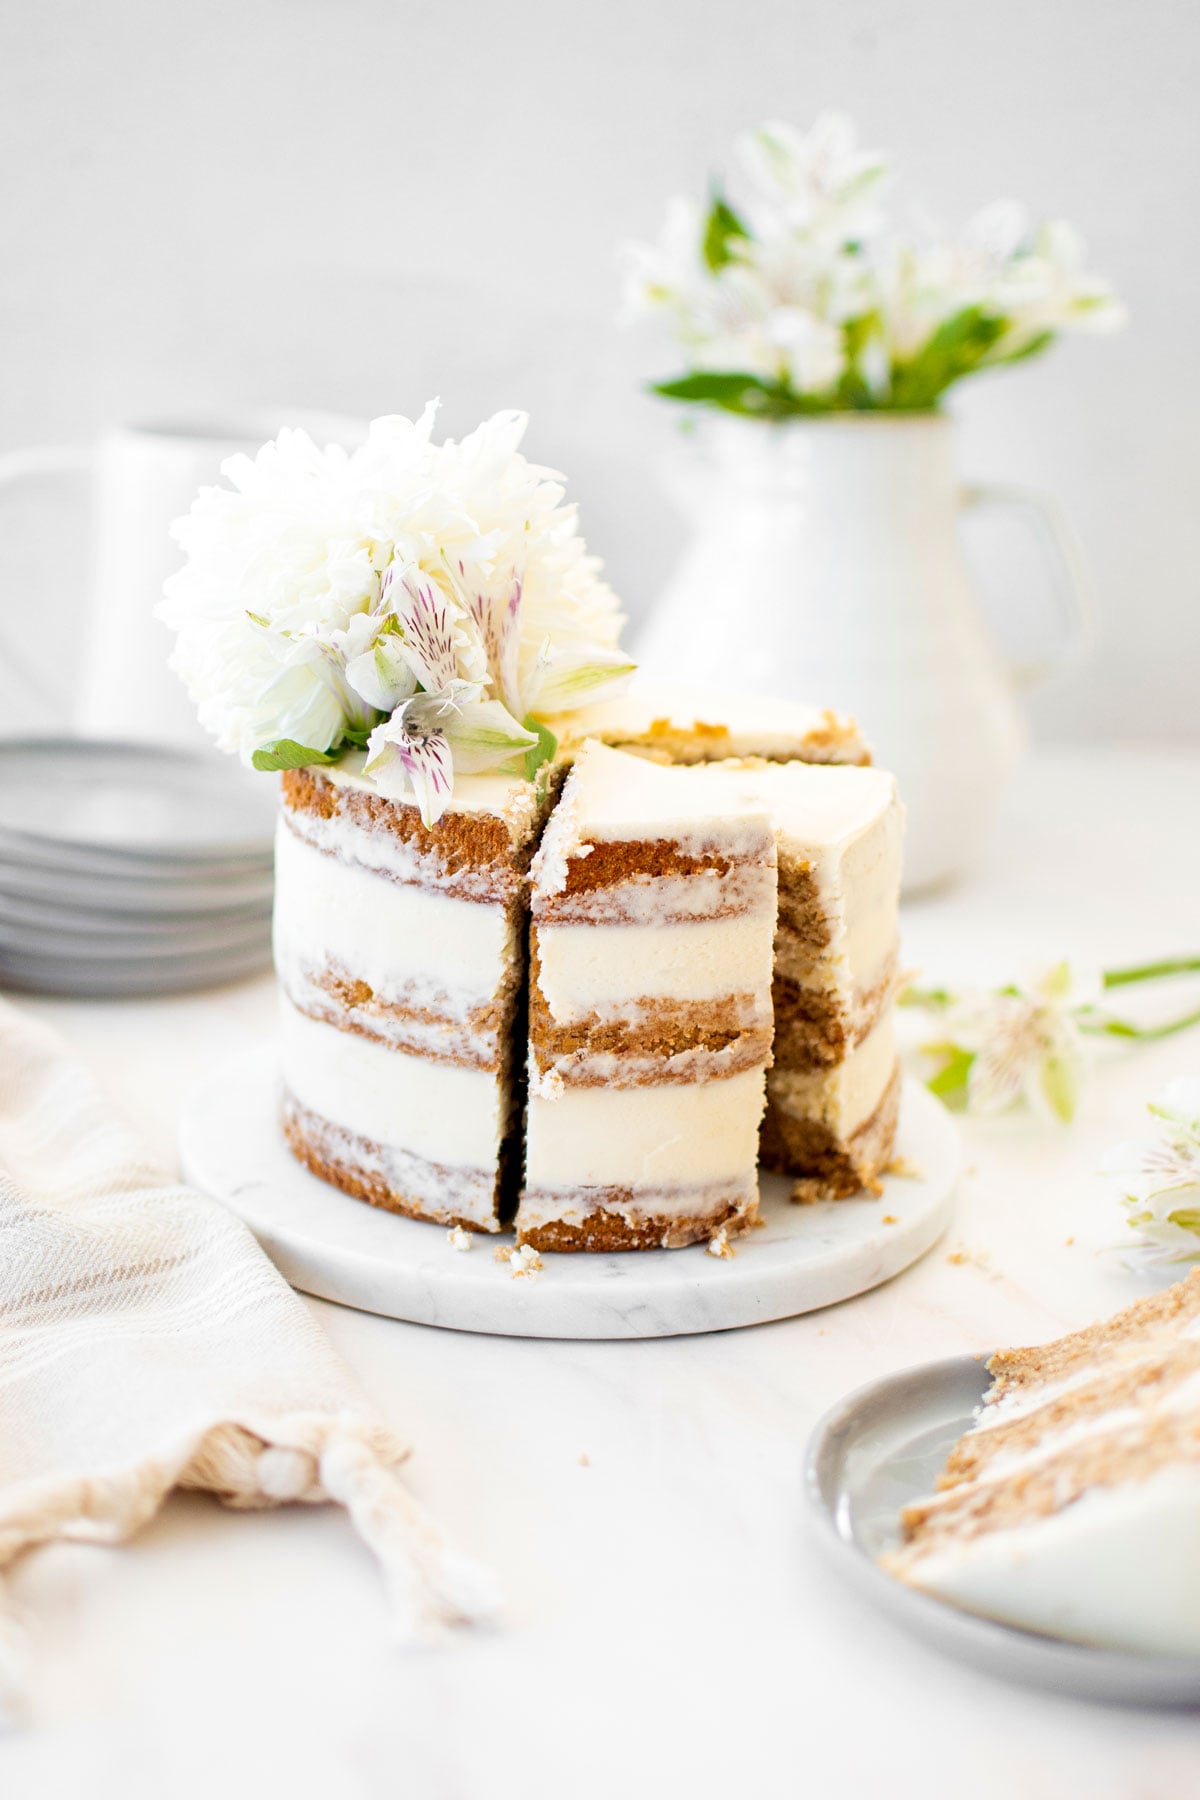
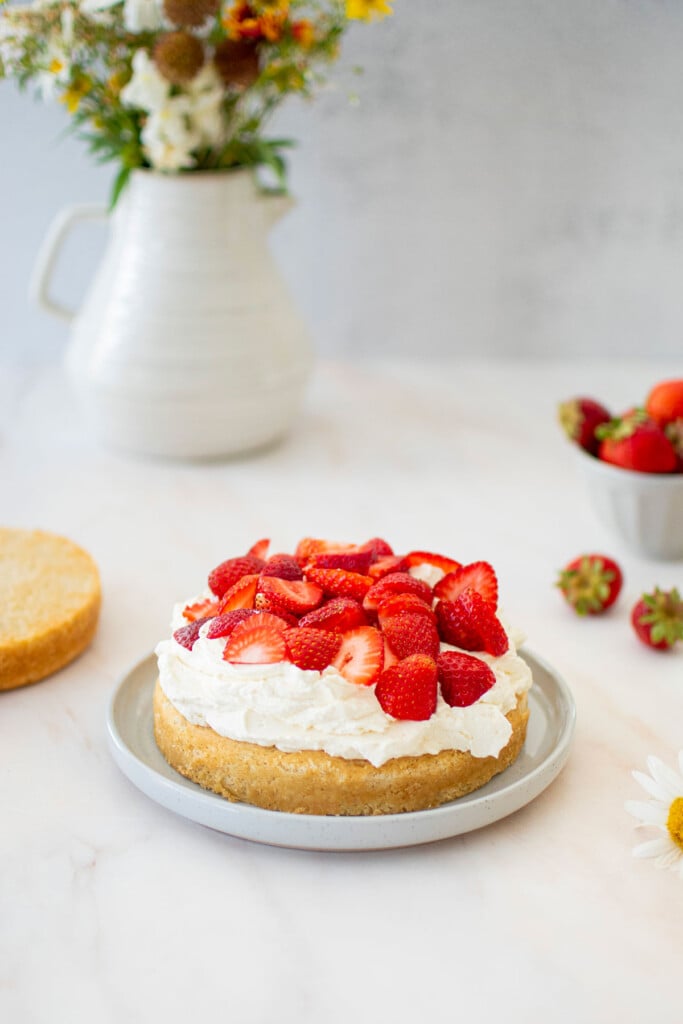
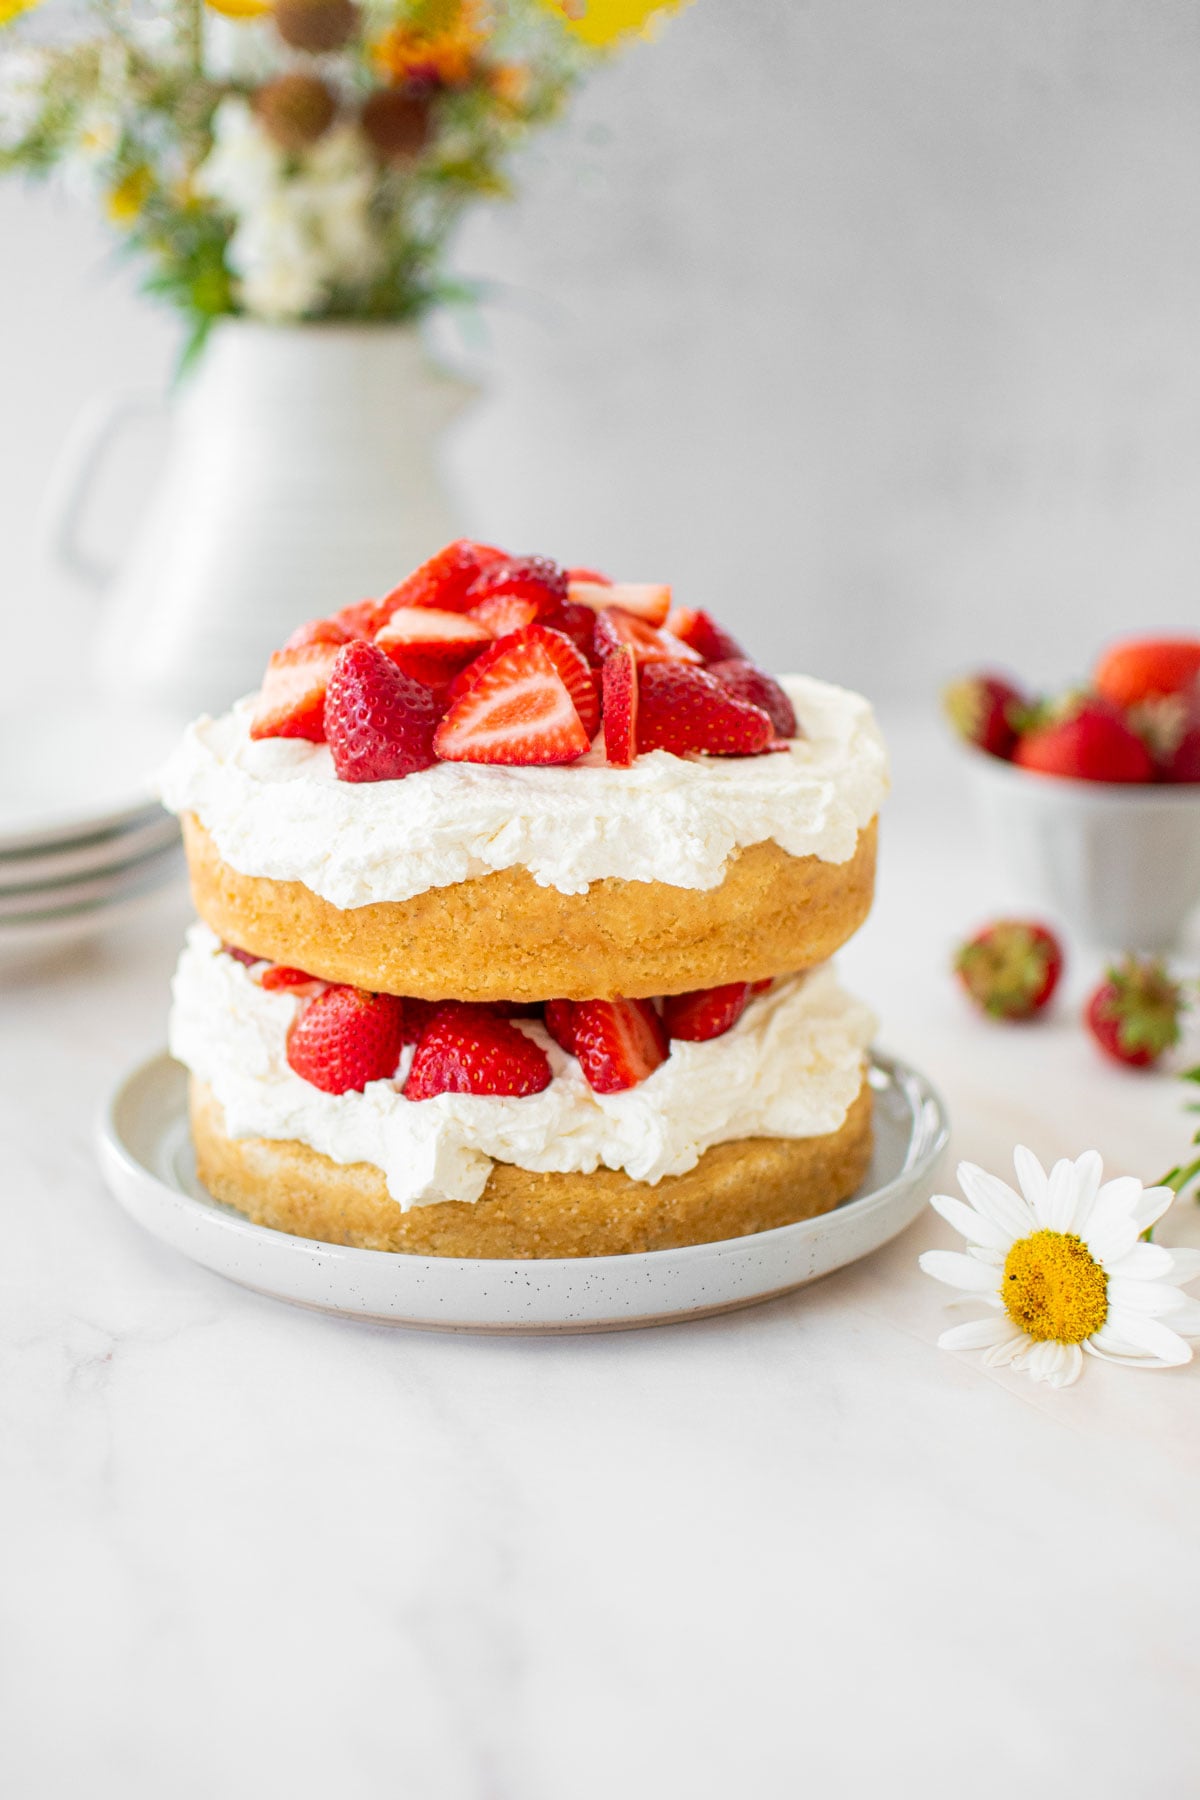
How to Make a Semi-Naked Cake
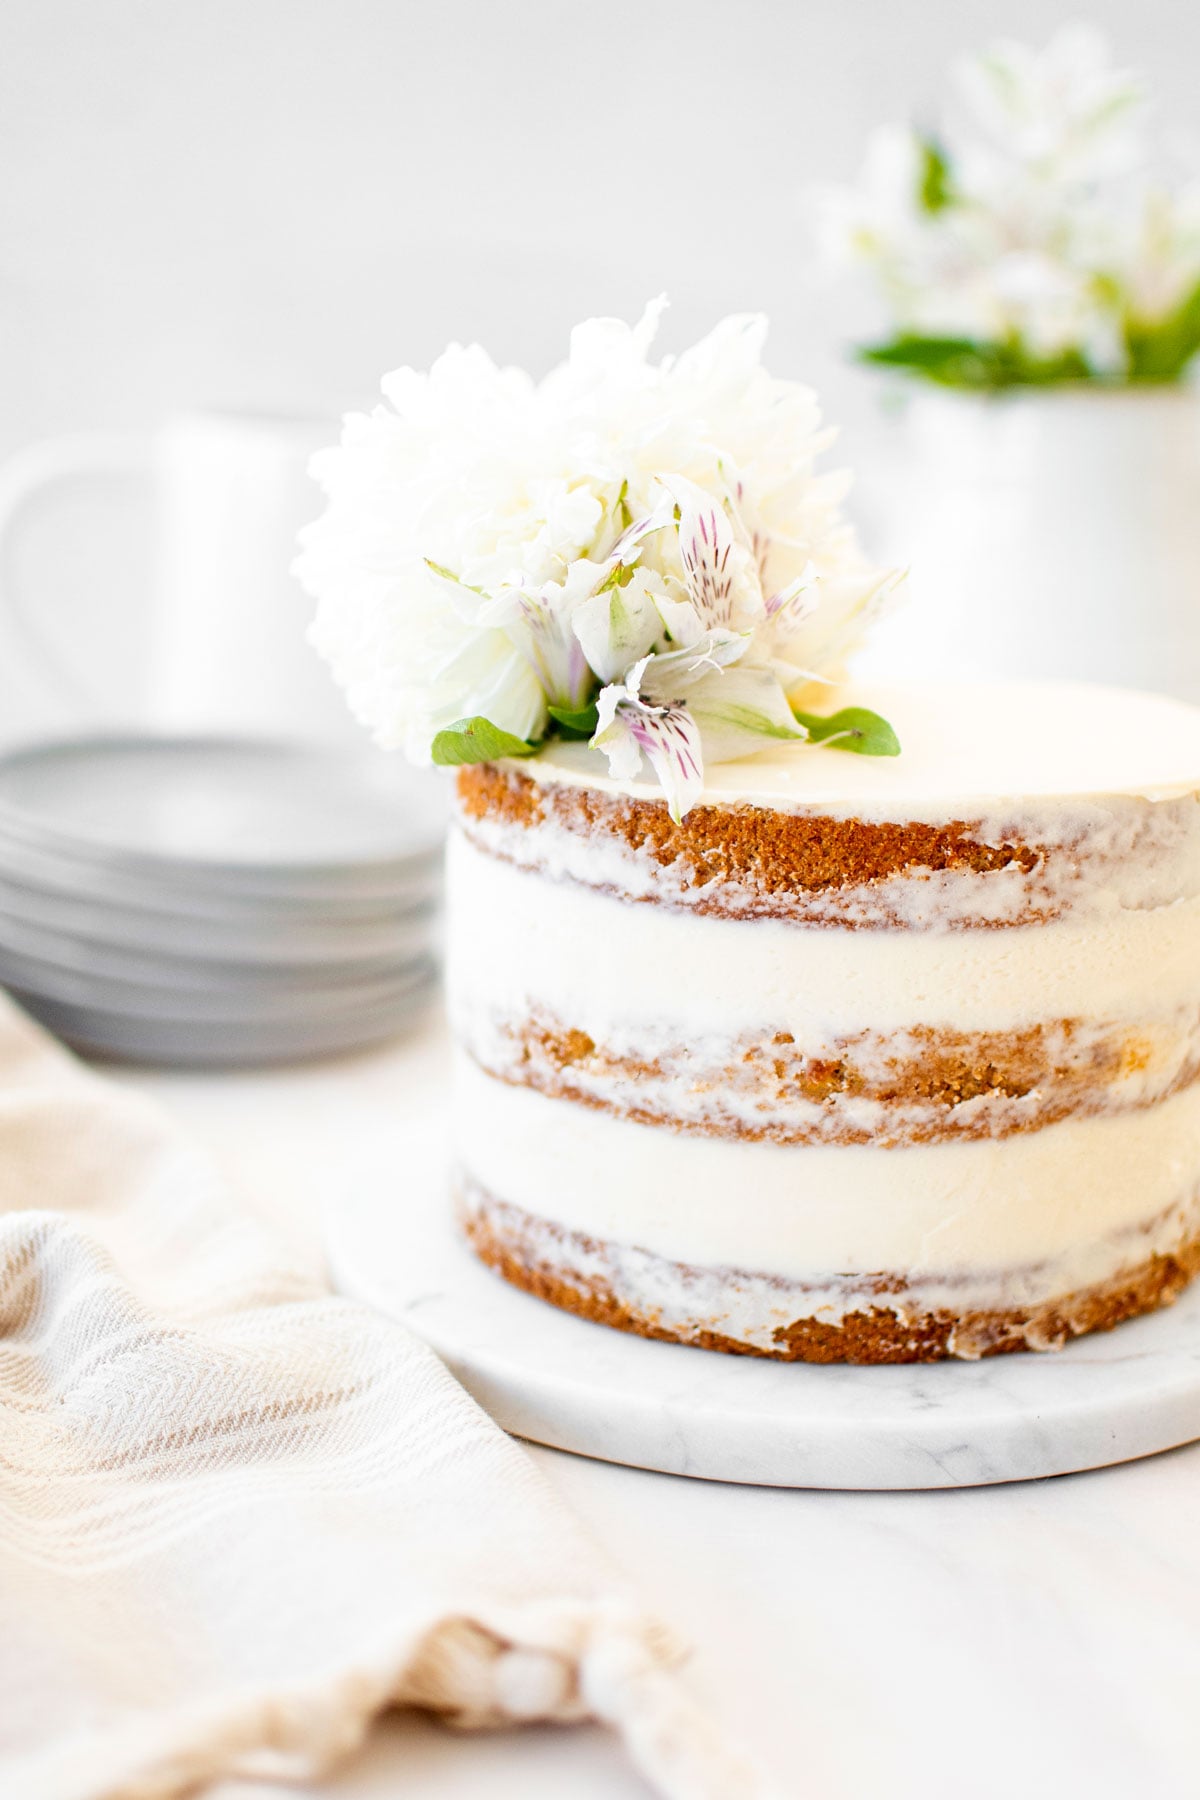
This type of naked cake is probably the one you see on Pinterest all the time! This is usually what people want for their wedding or for a special occasion. And this is also the style of naked cake that just looks the most chic, in my opinion.
This Semi-Naked Cake just looks completely effortless — yet it is actually the most difficult to make!
Contrast
With this type of naked cake, it is especially important to make sure you have contrasting cake and frosting. Otherwise, you will not see a contrast and it will look very lackluster. The contrast is what makes this style of naked cake look so amazing! So choose flavors that will compliment each other — a darker cake with lighter frosting, or a lighter cake with darker frosting.
If you choose chocolate cake and chocolate frosting it can sometimes also just look like you crumb coated your cake and and it's not done. There is a very fine line between crumb coating and making a true Semi-Naked Cake. So, that is why this type of naked cake can be challenging. It can also be challenging because you think it's so easy, so you can easily get frustrated when it doesn't come out as you want.
Cake Layers
For the Semi-Naked Cake it is so helpful to have domed cake layers. So if you normally use cake strips on your cakes to help them bake flat, do not use the strips and they will bake more domed. And do not trim them! The more domed the better!
You can use flat cake layers here too, but using a domed cake will give you a taller semi naked cake with larger frosting layers. This brings more style to the cake! If you use completely flat cake layers, then you rely on frosting alone to create these large portions of contrast, which can all look the same size. This is why I prefer a domed cake. But, both will work.
Frosting
I recommend using American buttercream for this kind of baked cake. There is a lot of frosting needed for this cake and it needs to be able to hold the weight of the other cake layers. Do not use whipped cream frosting as that won’t hold here.
Tools
You will need to have a cake turntable for this style of cake and cake spatula. I prefer to use a straight cake spatula but you can use angled if you prefer. That is just a personal preference. You will also need a piping bag. And, I like to use a bench scraper too, but if you don't have it then you can use your cake spatula here.
To Assemble
Make sure to have your cake layers and frosting made first. I like to chill cake layers in the freezer for about 15 to 20 minutes before beginning.

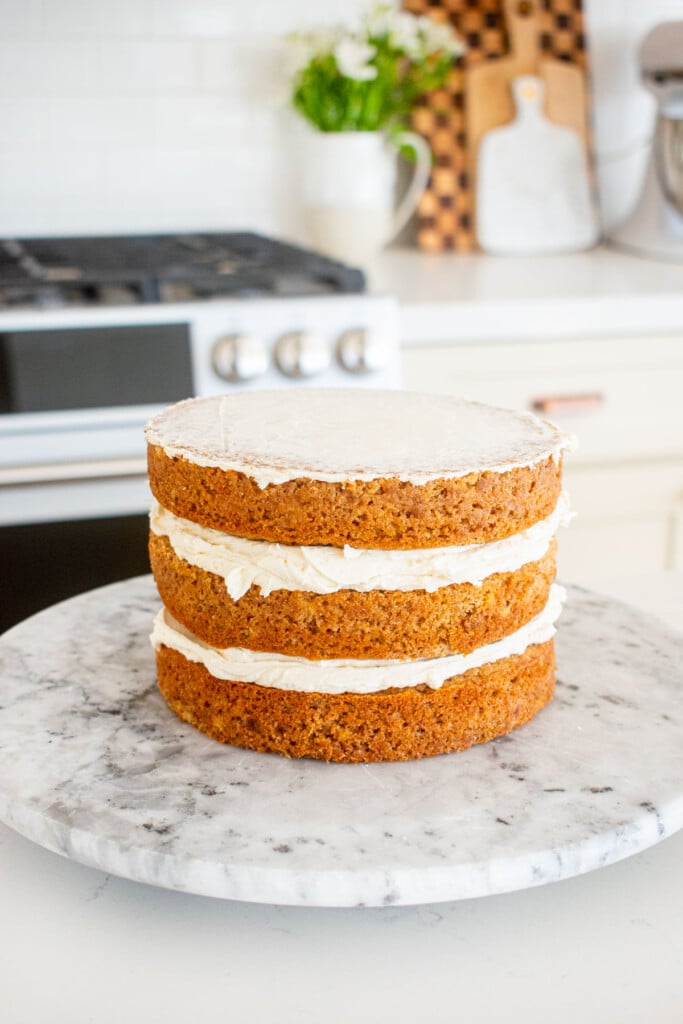
- Remove the cakes from the cake pans. Place a dollop of frosting onto your cake turntable, cake plate, or cake board and place the first cake layer bottom side down (this ensures it's flush with what you're serving it on). Using a cake spatula, add about a third of the frosting and spread it out evenly. Top with the second cake layer, bottom side up (this helps the cake look straight). Add another third of frosting, spread evenly. Top with the last cake layer (bottom side up).
- Add a small amount of frosting on top to crumb coat the top of the cake.
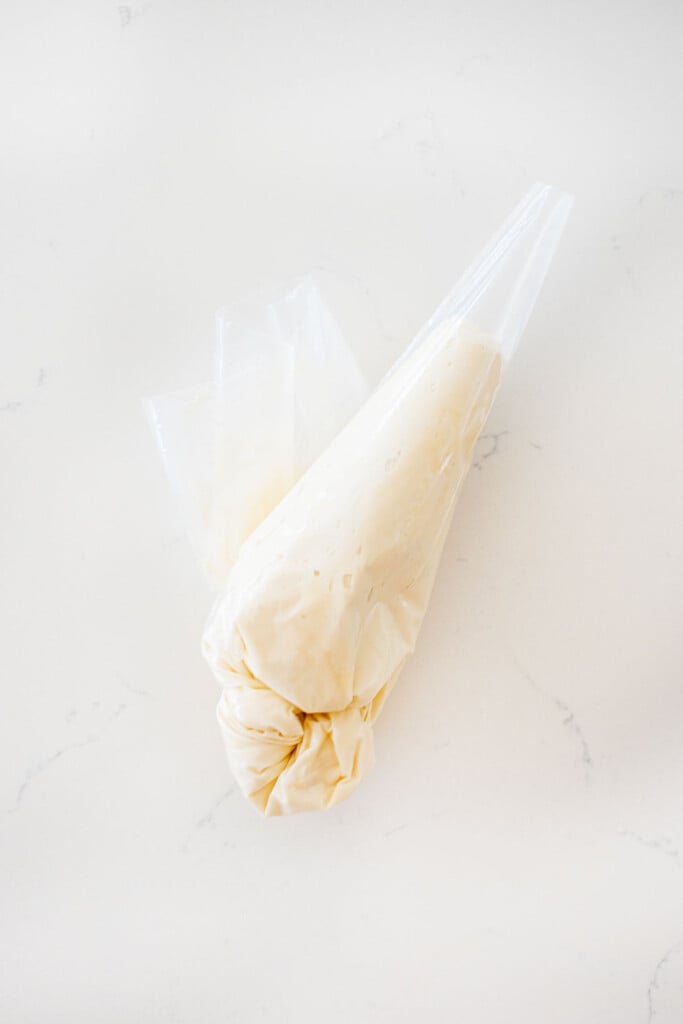
- Transfer the remaining frosting to a piping bag and cut a small hole.
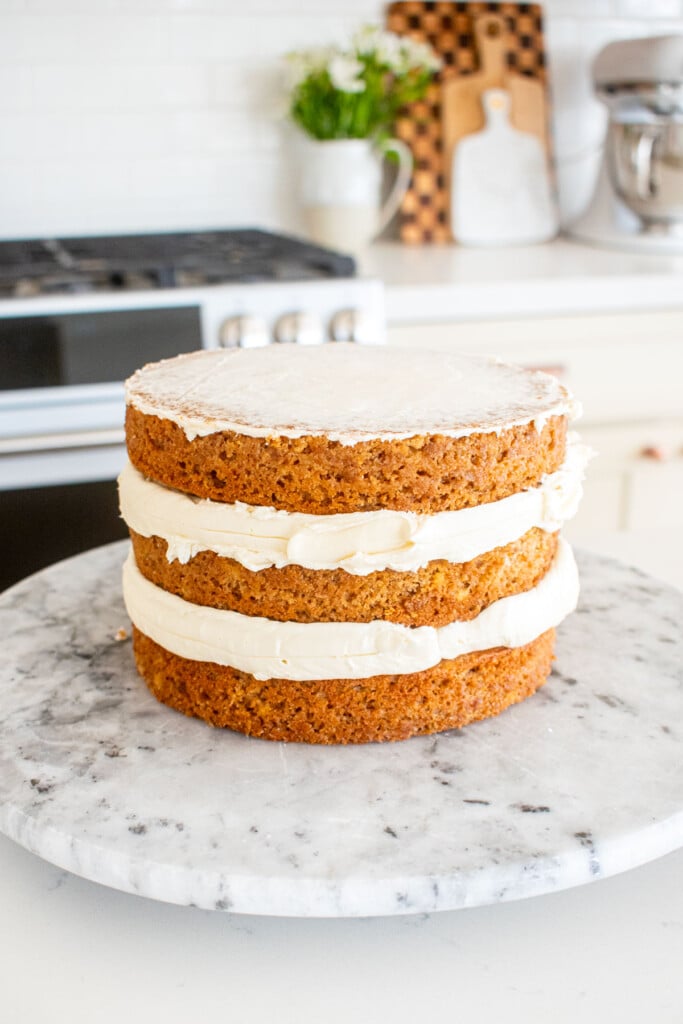
- Using the piping bag, pipe frosting and fill in the gaps in the frosting layers so the frosting is bulging out of the frosting layers. (Compare this photo with photo 2 above).
- Add remaining frosting on top.
- Using a cake spatula (tip: run it under hot water to help smooth the frosting), smooth the top of the cake.

- Using a bench scraper, or your cake spatula again, smooth the sides of the cake. The trick here is to only go around the cake once or twice to remove excess frosting from the frosting layers. You don't want to completely coat the cake in frosting, as then it will just look crumb coated. So, don't do this more than once or twice!
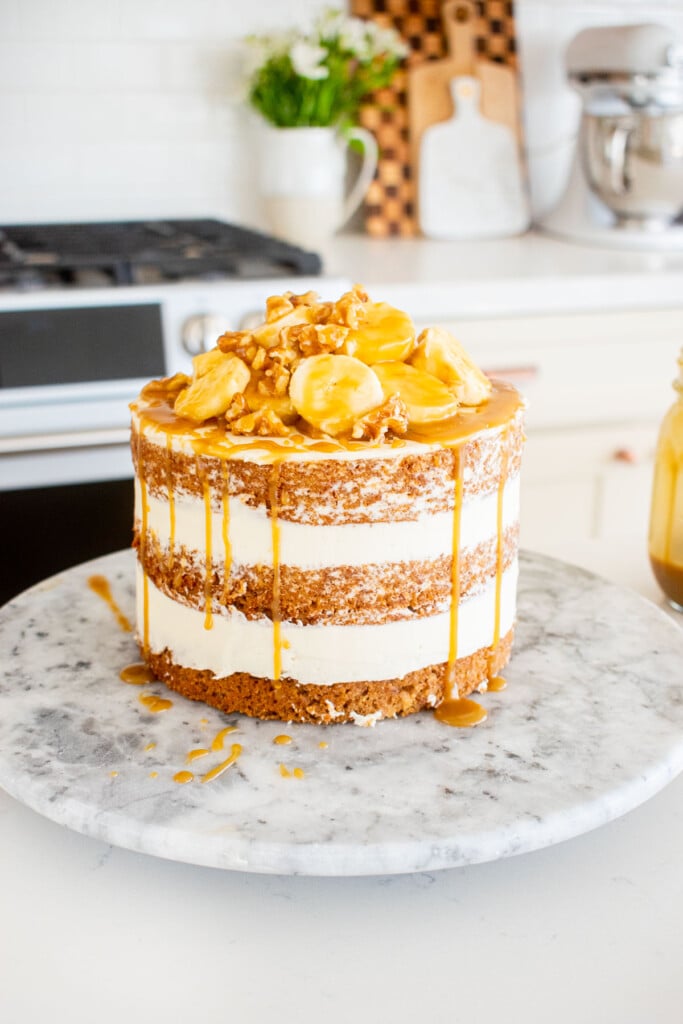
- This kind of naked cake looks best with something on top, or else it just looks unfinished, in my opinion. You can add fresh flowers, berries, fruit slices, caramel sauce, butterscotch sauce, or chocolate ganache!
Baker's Tips
The biggest tip I can give you is don't keep messing with it. This is a first run and done type of cake, you can't keep going back and doing it again and again, otherwise your whole cake will be covered in frosting and it won't look like it's supposed to.
So, you gotta get it right the first time and that is part of the challenge! You also have to know when to stop, and as a cake decorator — I know that can be challenging too! But, practice makes perfect here once you can master this one, it will become really easy I promise! Go around once or twice with the bench scraper, that's it!
I use the Semi-Naked Cake style for my Banana Bread Semi Naked Cake below!
Video Tutorial


Tips for Making the Best Naked Cakes
You must make a layer cake.
In order to make a naked caked, you must have a layer cake recipe where there are multiple layers of cake. This can be 2 layers, 3 layers, or even 4 layers. Depending on how tall you want it to look or what recipe you are using, that can vary. There is no right or wrong amount of layers.
I prefer to make them with 2 or 3 layers (depending on the kind of naked cake) as I think that is the right amount of cake to eat. For rustic and classic naked cakes 2 or 3 layers is fine, but for semi naked cakes I feel you need at least 3.
Almost any recipe can be used to make a naked cake.
I say almost any recipe, and not any recipe because in order to make the Semi-Naked Cake look good you have to have contrast between the cake color and the frosting color. This type of naked cake, which is most popular for a naked wedding cake I think, doesn't look great when the frosting and cake color are very similar – such as chocolate cake and chocolate frosting. This type of naked cake looks much better when there is contrast between the cake and frosting.
Think a gingerbread cake with vanilla frosting or a chocolate cake with coconut frosting. Both of these would be examples of flavor profiles that would work great for a Semi Naked Cake. If you do have chocolate cake and chocolate frosting, then stick to the Rustic Naked Cake or the Classic Naked Cake.
You'll need a piping bag.
A piping bag is going to be essential for making two kinds of naked cakes, the Semi Naked Cake and the Classic Naked Cake. Trust me, you will want to to have one!
Naked cake layers can be flat or domed.
Depending on what style of naked cake you are making, you may want domed cake layers, or flat cake layers. So you can make a naked cake with any kind of cake layers, it just depends on what style you are making.
If you need flat layers, you can add cake strips onto the cake pans with the cake batter before going into the oven to help them bake flat. If you don't have cake strips, you can easily trim cake layers using a cake leveler or a bread knife.
Butter and flour the sides of your cake pans.
Whenever making any kind of naked cake, make sure to butter and flour the sides of your cake pan. This is something that even I forgot to do sometimes! When making a traditional layer cake, the sides get covered, so they don't have to look perfect. So if your cake sticks a little bit to the sides of the pan, it's no big deal to go around the pan with a butter knife and cut it free.
But, when making a naked cake, the sides do have to look perfect. So, buttering and flouring the sides of the cake pans will really help the cake bake away from the sides of the pan just enough to avoid it sticking completely. Then the cake removes from the pan easily and make the sides look better!
Chill Cake Layers
Before assembling any kind of naked cake, it helps to have cake layers chilled as opposed to room temperature. This ensures they are firm and don't break when you're placing them on frosting or pressing against them, like with the semi naked cake technique. I like to chill in the freezer or refrigerator for at least 15 to 20 minutes beforehand.
Make a Tiered Naked Cake
If you want to make a tiered naked cake, such as for a wedding, you can use any of these techniques to do that. If doing so, you'll need to bake different sizes for each tier. The popular sizes we made at my bakery were 6-inch, 9-inch cake pans, and 12-inch. So, if doing a 2 tiered cake you can do 6-inch and 9-inch. If doing a three tier, you can do all three sizes.
You'll need to have a cake board or cake round for each of the cake sizes too. You'll also want to ensure that the cake round is the exact size of the cake for the tiers being stacked and 2-inches larger for the tier on the bottom.
For example, you'll need a 6-inch cake round and a 9-inch cake round if doing a 3 tiered cake so the cake board is hidden underneath those cake layers. For the bottom cake round, you want it to be larger than the cake so you can easily move it. If you're only doing a two tier, you can use a 6-inch cake round for the top and a 10 or 11-inch cake board for the bottom 9-inch cake.
Always store a naked cake in a cake dome.
Because the cake is exposed and not covered completely in frosting, that means air can get to it. And air dries out cake! If you are in a dry climate, it's even worse!
No matter where you live, any cake that is exposed to air will start to dry out. So, if you are making a naked cake ahead of time, then be sure to have a cake dome to store it in.
The Takeaway
I hope this helps you guys understand the different types of naked cakes. I also hope it helps you learn and practice how to make the different types of naked cakes! It can be difficult to see a cake and then not know how to execute it, and I hope that I have explained each type well enough that you can feel comfortable to practice making naked cakes.
The bottom line is naked cakes are really fun to make and they look amazing! But, there are many different styles of naked cakes. They also require much more skill than you may think! If you have any questions about naked cakes, please don't hesitate to email me at hello@mimisorganiceats.com I am happy to help!
More Naked Cake Recipes

The Bake Shop
Visit The Bake Shop for foodie inspired tees, sweatshirts, and accessories. Find my favorite kitchen tools (with discounts!) in the Kitchen Shop. And shop our collection of food inspired dog accessories too!


Thank you so much Mimi! I’m going to do my son and future daughter in laws wedding cake in May. I did wedding cakes years ago but never a naked cake and your article is going to be a tremendous help to me! They requested the semi-naked cake and your advice about leaving the dome makes sense. My only fear is that the cake may shift a little but I’m thinking that dowel rods should prevent that. Their cake will be2 tiers 14 and 10 and I’m not sure if I will do 2 or 3 layers on each tier yet:
Hi Lisa! Oh that’s so much fun, and that will be so special that you made it! I’ve many hundreds of 2 and 3 tier cakes, for 2 tier I’d always do 6-inch and 9-inch, and they were always 3 layers. I never used dowel rods, never needed them! But they don’t hurt if you’re nervous! Make sure to tag me on Instagram when you make the cake, I can’t wait to see!