Homemade Peanut Butter Oreos
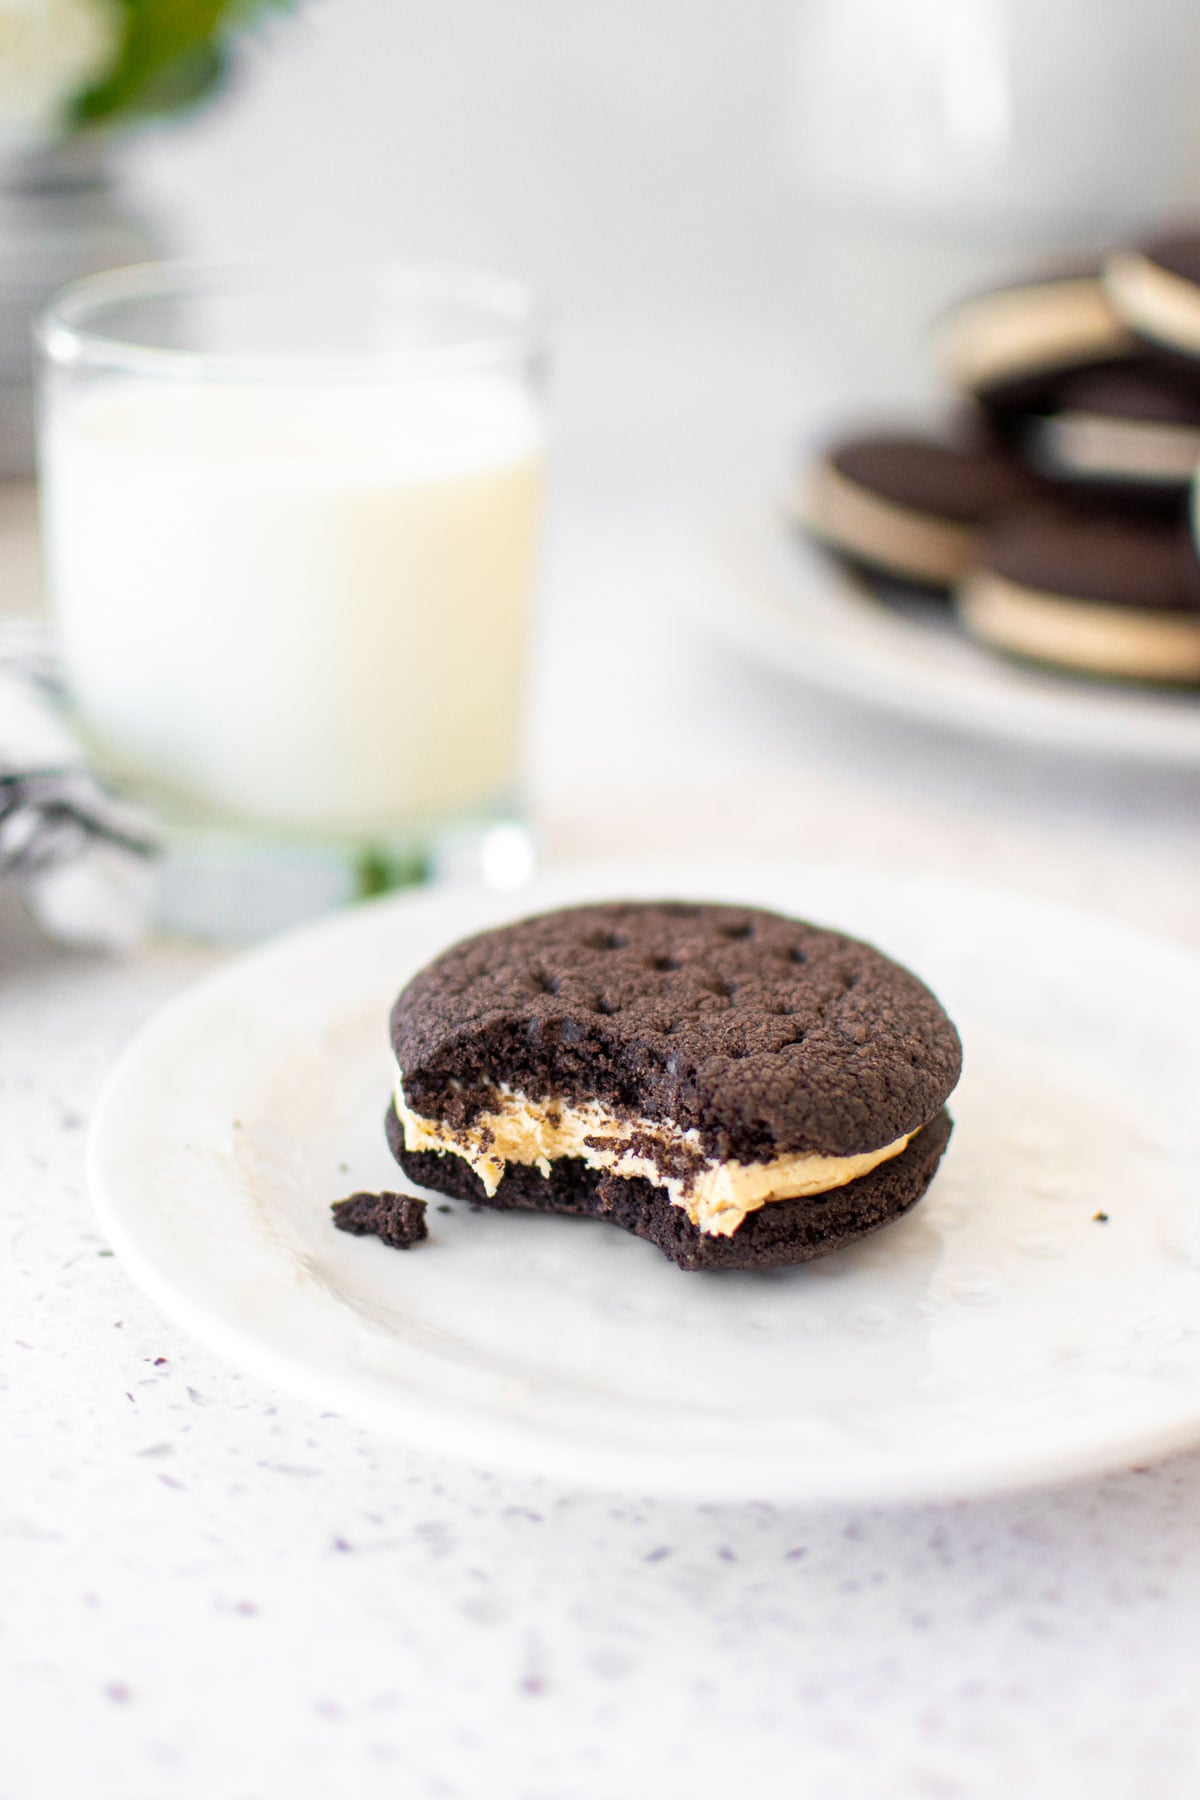
Bigger and better than any store bought cookie, these Homemade Peanut Butter Oreos are Oreos made with black cocoa powder and filled with a creamy peanut butter filling!
If you love Oreos, then check out more Oreo desserts made better like Homemade Vanilla Oreo Cookies, Vegan Oreo Chocolate Chip Cookies, or Caramel Chocolate Oreo Icebox Cake.
A Quick Look At The Recipe
- Recipe Name: Homemade Peanut Butter Oreos
- Ready In: 35 minutes
- Makes: 18 sandwich cookies
- Main Ingredients: salted butter, all purpose flour, black cocoa, peanut butter
- Flavor Profile: rich chocolate and creamy peanut butter
- Dietary Info: eggless, no seed oils, gluten free swap available
- Difficulty: Medium
- Why You’ll Love It: Big, nostalgic, and crafted with organic ingredients
Summarize & Save This Content On
Why You'll Love This Recipe
- Nostalgic: While Oreos are incredibly nostalgic, they really have terrible ingredients, so it's best to make your own! These Homemade Peanut Butter Oreos are made with black cocoa powder for a dark, delicious, and nostalgic cookie that's filled with sweet, salty, and creamy peanut butter filling.
- Chocolate + PB: There is nothing better than the combination of peanut butter and chocolate. This recipe takes classic Oreos up a notch with the addition of peanut butter filling.
- Bigger: While I'm not usually for bigger desserts, in this case it's totally warranted. These Homemade Chocolate Peanut Butter Oreos are bigger than the store bought! That makes them even better because you really just need one to satisfy your craving.
- Egg-Free: These homemade Oreo cookies are free of eggs, making them easy and allergy friendly.
- Avoid Harmful Ingredients: Making your own homemade Oreos allows you to avoid harmful ingredients. The store bought version contains enriched flour, soy lecithin, seed oils, and artificial flavors (to name a few!). These specific ingredients are ones I'm always avoiding so making this recipe with organic ingredients is so much better!
History of the Oreo
The Oreo cookie was introduced by Nabisco in 1912. And it became a beloved pantry staple in households worldwide. Over the decades, Oreo has launched countless flavor variations, including the Peanut Butter Oreo, which made its debut in 2003 (probably because of the Parent Trap movie if we're being honest!). This flavor offers a delightful twist on the original, combining the classic chocolate wafer cookies with a creamy peanut butter filling.
Better Than Store Bought
While store-bought Peanut Butter Oreos are convenient and nostalgic, these Homemade Peanut Butter Oreos take the experience to a new level. They are so much better than store bought because you can use mindful organic ingredients!
Skip the enriched flour, artificial flavor, soy lecithin, and seed oils that are in the packaged version! Making homemade Oreos is not only fun, but you have the ability to control every ingredient, which results in a treat that’s both satisfying and better for you.
If you love to bake cookies and other nostalgic favorites with better organic ingredients, then check out some of my other twists on popular desserts! The Chocolate Covered Peanut Butter Cookies (Homemade Tagalongs) and Healthy Chocolate Peanut Butter Cups are more chocolate peanut butter faves. While Homemade Vanilla Oreo Cookies and Soft Sugar Cookies With Pink Frosting will satisfy a craving for vanilla nostalgia!
Ingredients

- Butter: I use organic salted butter, but unsalted is okay so long as you add in 1/2 teaspoon of salt. Check out Best Salted Butter for Baking for more info on butter types.
- Powdered Sugar: I use organic powdered sugar in these shortbread cookies for a tender, delicate crumb. You also need this for the filling!
- Vanilla Bean: I love using Lafaza Organic Ground Vanilla Bean paired with chocolate as it provides great depth of flavor! If you don't have this, you can substitute vanilla extract too.
- Black Cocoa Powder: I use organic black cocoa powder for the signature black color and rich cocoa flavor.
- Peanut Butter: My favorite organic peanut butter is Costco Kirkland Organic Peanut Butter! It seriously has the best flavor and you can believe me because I tested over 10 organic peanut butters when opening my bakery and did taste tests with all my friends and this one won every time! So, skip the Jif and the Skippy, because while those may be nostalgic like these cookies, they now are made using seed oils, added sugars, flavors and other ingredients you simply do not need.
*For a full list of ingredients and measurements, visit the recipe card below.
Baker's Tips
- Weigh Ingredients: Always use a digital food scale for the best results!
- Use Soft Butter: Make sure you are using soft butter. This recipe really requires soft butter to make the best shortbread cookies. I prefer to leave butter out on the counter and let it soften naturally overnight. But, if you must microwave it, be sure to only microwave it for 10 seconds at a time, in multiple intervals so you don’t melt portions of the butter.
- Sift: Always sift your powdered sugar and cocoa. Both of these ingredients can clump easily and you should sift them before using in any recipe. This will make sure the cookies and filling have a really smooth texture.
- Allow Cookies to Cool: Make sure your cookies cool completely before filling them. If you fill the cookies when they are hot or even warm, the filling will melt into the cookies and they can become soggy and they will not have the right texture.
- Whip Filling: Make sure to whip the filling for at least a couple minutes. Whipping your filling will put air into it and will make it really delicious and creamy, just like traditional Oreos! I use my stand mixer for ease but a hand mixer is also fine if you prefer.
- Gluten Free — Replace the organic flour with 212 grams (1 ⅓ cups) gluten free flour blend and 28 grams (¼ cup plus 1 tablespoon) organic coconut flour.
- High Altitude — Bake at 350°F for 13 to 17 minutes or until dry around the edges.
How to Make Homemade Peanut Butter Oreos

- Preheat the oven to 350°F. Line 2 cookie sheets with parchment paper. To make the dough: In the bowl of a stand mixer fitted with the paddle attachment, add the butter and powdered sugar.

- Mix on low until combined and you don’t see powdered sugar anymore, there will still be a few chunks of butter but that is okay because it’s very soft.

- Add the dry ingredients: flour, cocoa, and vanilla bean into the butter mixture and mix on low until combined and smooth. The dough should feel like play dough in your hands.
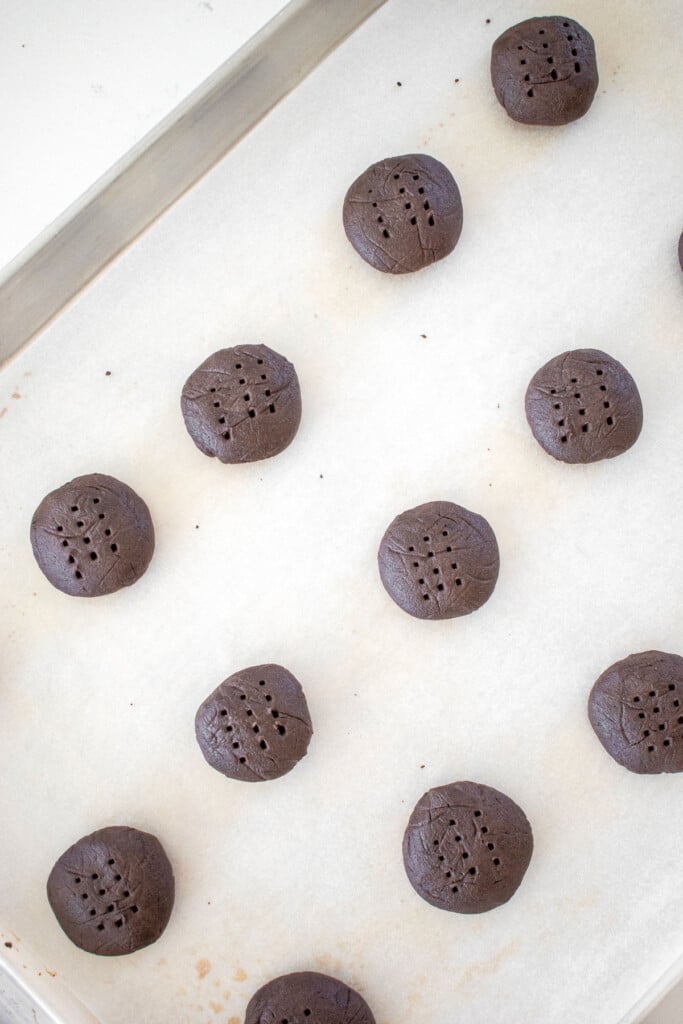
- Using your hands, form the dough into 30 balls and place them on the prepared cookie sheets. Flatten them so they are about 1-inch in diameter. Poke the dough with a fork three times in the middle.
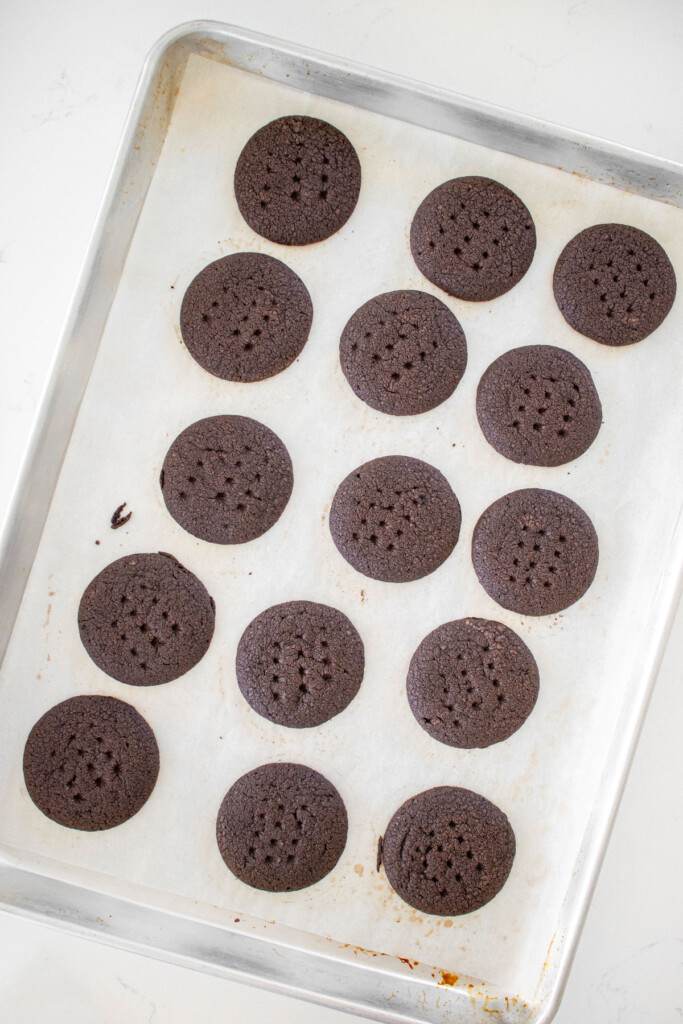
- Bake for 15 to 18 minutes until they are dry around the edges. Allow to cool completely on the cookie sheets. (If you're baking at high altitude, be sure to check the Notes at the bottom of the recipe for high altitude baking instructions).

- To make the filling: In the bowl of a stand mixer fitted with the paddle attachment, add the butter, powdered sugar, peanut butter, and milk, and mix on low until combined. Speed mixer up to high for 1 minute or until light and fluffy. Put in a piping bag with no tip.

- Turn over every other cookie so they are all paired. Pipe a dollop of filling onto each cookie.

- Sandwich them together.

Recipe FAQ's
Yes, but even better because we're using organic ingredients so you really get more flavor in every bite.
Yes, if you prefer, you can use unsalted butter. If so, just add ¼ teaspoon fine sea salt per ½ cup of butter in the cookies and filling.
Black cocoa powder has been treated with alkali to neutralize acidity, even more so than Dutch cocoa powder, which is why it's even darker (almost black) compared to Dutch cocoa. So, it's generally a little bit sweeter as well and it provides that almost black color of traditional Oreos without food coloring. You can use Dutch cocoa powder if you need to, but the color won't be as dark and the flavor will be a little less sweet.
You can use vanilla extract in its place, but double the amount. So use 1 teaspoon of vanilla extract.
You can use a cookie scoop if you need to in order to get them even, but I apologize as I do not know what size scoop as I don't use cookie scoops often (I'd guess 2 tablespoons though). But, my trick is just dividing the dough into equal portions with my hands. So, divide the dough in half, then you know one half goes on one cookie sheet and one on the other, then form into 15 cookie dough balls per sheet. Or, you can also weigh the dough, which should weigh 623 grams, divide it by 30 (how many cookies) and you get 20.7 grams (so about 20 or 21 grams) is what you can weigh each dough ball out to for perfectly portioned cookies.
You definitely can, you'll just need to bake them less depending on how much smaller you make them.
If you used melted butter, this can cause cookie spread and also small holes on the edges and a less than ideal texture. The butter should be soft (like you would use to spread onto fresh bread easily), it should not be melted in any way. This can also happen if you measured incorrectly, not enough dry ingredients like flour and cocoa. Be sure to use a digital food scale for the best results and accurate measuring every time.
Inaccurate measuring, too much flour or cocoa. Always use a digital food scale to ensure you are measuring correctly. This is my top tool for perfect cookies every time!
Under baking can cause this. Be sure to bake until the cookies are dry and the edges look crispy. It can be challenging to tell with dark chocolate cookies, like these, so you can always do a test cookie and let it cool completely before baking the rest as all ovens are a bit different.
About 1 to 2 tablespoons, you want to fill the cookie dough so you get a nice peanut butter cream filled center.
Incorrect measuring, too thin means too much liquid or wet ingredients (peanut butter or milk) and not enough dry (powdered sugar). If the filling is too thick, it means not enough peanut butter or milk. So, if your filling is too wet, sift in more powdered sugar and mix until you get the right consistency. If it's too thick, ad a small amount of milk (do 1 teaspoon at a time) and mix until you get the right consistency.
Because the filling has milk, these should be stored in the fridge. If you don't want to keep them in the fridge you can use water in place of milk in the filling.
Yes, you can freeze these in an airtight container for up to 3 months. Just thaw and enjoy!
Ways to Enjoy Homemade Peanut Butter Oreos
- Enjoy with a big glass of milk for a nostalgic treat!
- Cozy up with a warm drink like Coconut Hot Chocolate or Caramel Hot Cocoa (these were a popular pairing at my bakery!)
- You can use inside homemade ice cream, try adding into Salted Caramel No Churn Ice Cream.
- Enjoy for an afternoon treat with Iced Blueberry Latte or Creamy Vegan Chocolate Smoothie With Almond Butter.


More Chocolate Peanut Butter Desserts


Loved it? Tell us!
Thanks a waffle lot for stopping by 🧇 If you loved this recipe, sprinkle some love by leaving a ⭐⭐⭐⭐⭐ review — it inspires others to try this recipe and helps me organically reach dog loving foodies like you! I personally read and appreciate every message!
Also, be sure to subscribe to our YouTube channel and join John John and me in the kitchen for step by step recipe videos! And subscribe to our newsletter for new and seasonal recipes!

Homemade Peanut Butter Oreos
Equipment
- Digital Food Scale
- Stand Mixer
- Half Sheet Pan
- Parchment Paper Sheets
Ingredients
Dough
- 226 grams salted butter (softened)
- 142 grams powdered sugar (sifted)
- 212 grams all purpose flour
- 43 grams black cocoa powder (sifted)
- ½ teaspoon ground vanilla bean
Filling
- 170 grams salted butter (softened)
- 284 grams powdered sugar (sifted)
- 57 grams peanut butter
- 2 tablespoons milk
Instructions
- Preheat the oven to 350°F. Line 2 cookie sheets with parchment paper.
- To make the dough: In the bowl of a stand mixer fitted with the paddle attachment, add the butter and powdered sugar. Mix on low until combined and you don’t see powdered sugar anymore, there will still be a few chunks of butter but that is okay because it’s very soft.
- Add the dry ingredients: flour, cocoa, and vanilla bean into the butter mixture and mix on low until combined and smooth. The dough should feel like play dough in your hands.
- Using your hands, form the dough into 30 balls and place them on the prepared cookie sheets. Flatten them so they are about 1-inch in diameter. Poke the dough with a fork three times in the middle.
- Bake for 15 to 18 minutes until they are dry around the edges. Allow to cool completely on the cookie sheets.
- To make the filling: In the bowl of a stand mixer fitted with the paddle attachment, add the butter, powdered sugar, peanut butter, and milk, and mix on low until combined. Speed mixer up to high for 1 minute or until light and fluffy. Put in a piping bag with no tip.
- Turn over every other cookie so they are all paired. Pipe a dollop of filling onto each cookie and sandwich them together.
- Store in the fridge for up to a week.
Notes
- Weigh Ingredients: Always use a digital food scale for the best results!
- Use Soft Butter: Make sure you are using soft butter. This recipe really requires soft butter to make the best shortbread cookies. I prefer to leave butter out on the counter and let it soften naturally overnight. But, if you must microwave it, be sure to only microwave it for 10 seconds at a time, in multiple intervals so you don’t melt portions of the butter.
- Sift: Always sift your powdered sugar and cocoa. Both of these ingredients can clump easily and you should sift them before using in any recipe. This will make sure the cookies and filling have a really smooth texture.
- Allow Cookies to Cool: Make sure your cookies cool completely before filling them. If you fill the cookies when they are hot or even warm, the filling will melt into the cookies and they can become soggy and they will not have the right texture.
- Whip Filling: Make sure to whip the filling for at least a couple minutes. Whipping your filling will put air into it and will make it really delicious and creamy, just like traditional Oreos! I use my stand mixer for ease but a hand mixer is also fine if you prefer.
- Gluten Free — Replace the organic flour with 212 grams (1 ⅓ cups) gluten free flour blend and 28 grams (¼ cup plus 1 tablespoon) organic coconut flour.
- High Altitude — Bake at 350°F for 13 to 17 minutes or until dry around the edges.
Nutrition
The Bake Shop
Visit The Bake Shop for foodie inspired tees, sweatshirts, and accessories. Find my favorite kitchen tools (with discounts!) in the Kitchen Shop. And shop our collection of food inspired dog accessories too!

A family favorite with that super creamy peanut butter filling, so delicious 😋