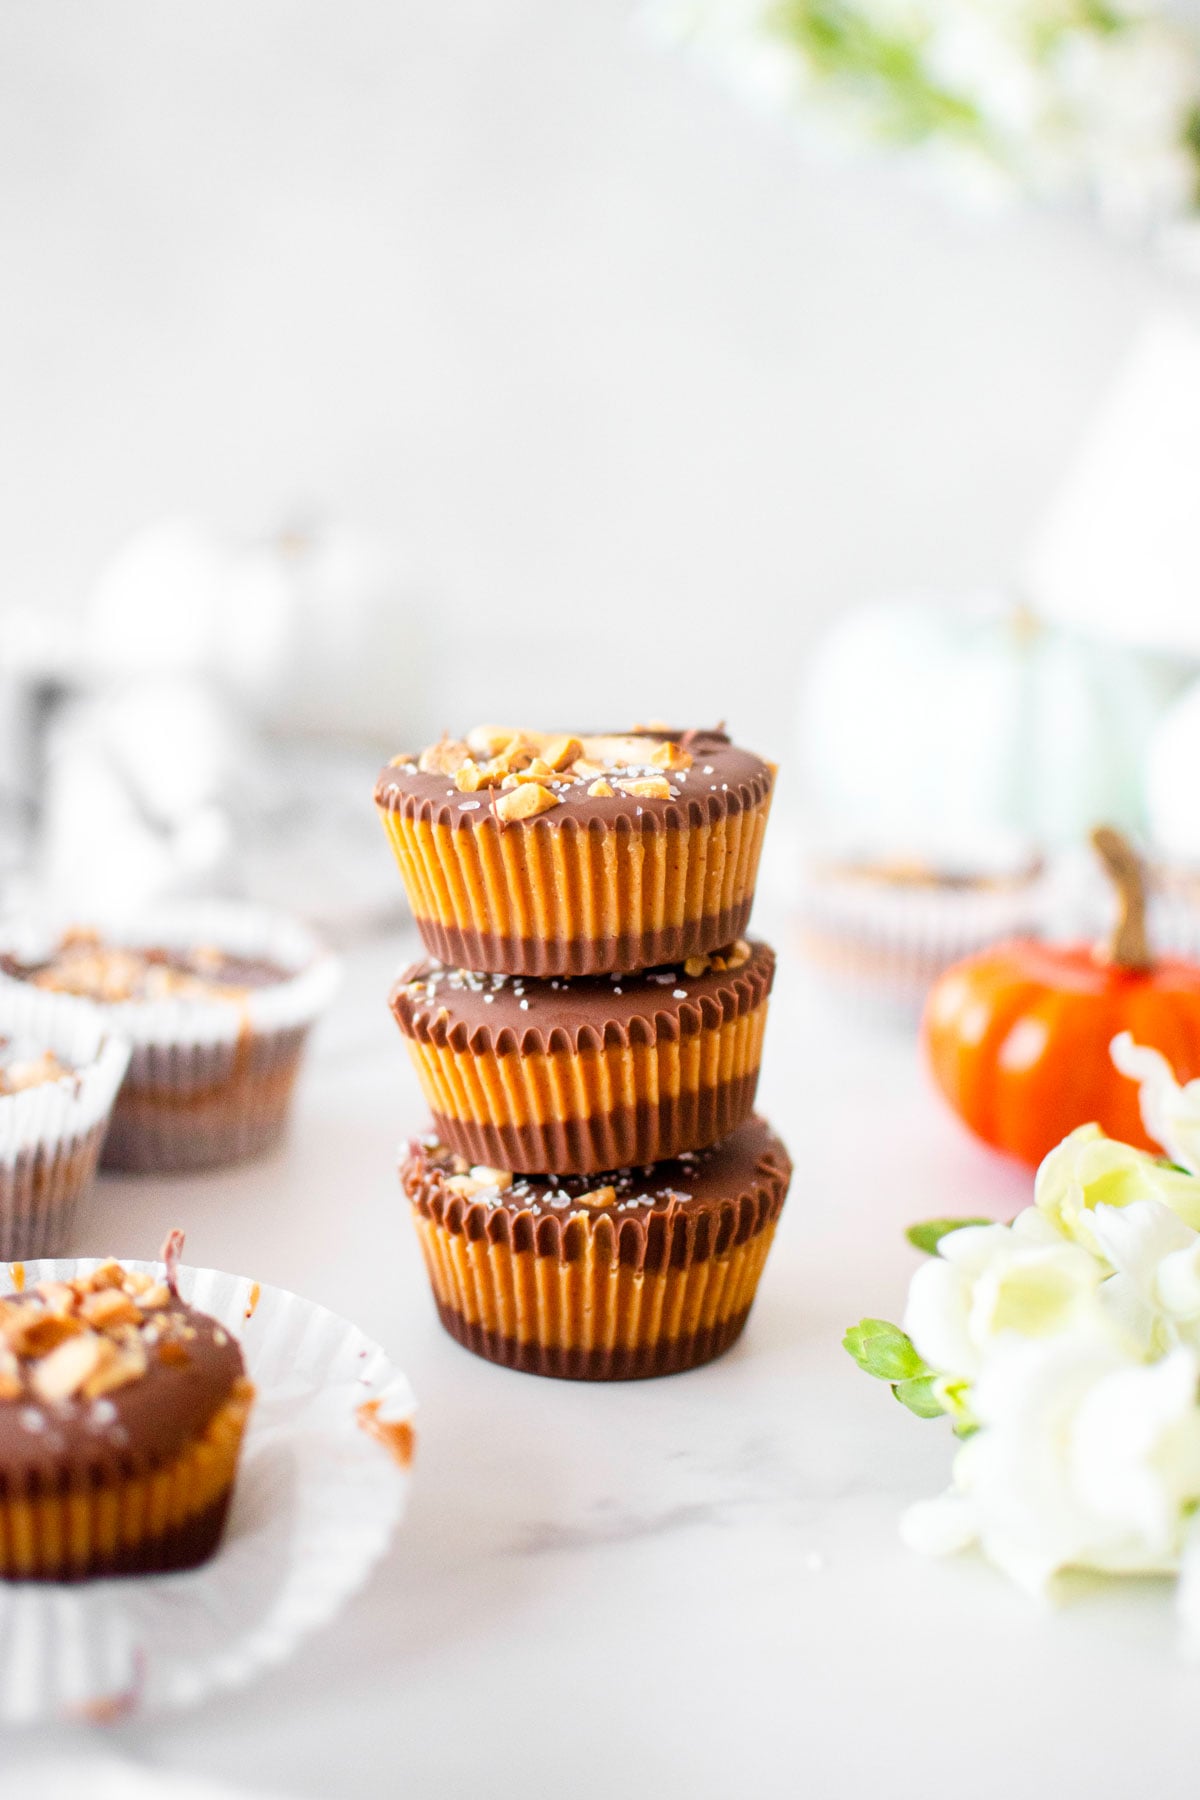
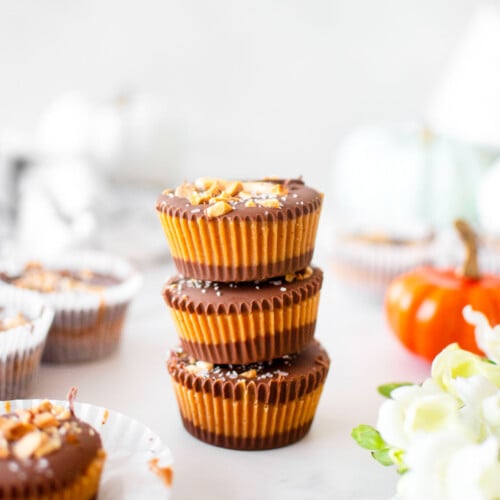
Healthy Chocolate Peanut Butter Cups
If you love peanut butter cups, you'll love this recipe for Healthy Chocolate Peanut Butter Cups! All the goodness of chocolate and peanut butter, but made without refined sugar.
If you're looking for more homemade candy recipes, check out Homemade Chewy Chocolate Caramel Candy, Dark Chocolate Raspberry Truffles With Cream Cheese, Strawberry Chocolate Bars, Honey Sesame Dark Chocolate Bark, or Salted Almond Dark Chocolate Bars.
A Quick Look At The Recipe
- Recipe Name: Healthy Chocolate Peanut Butter Cups
- Ready In: 45 minutes
- Makes: 12 peanut butter cups
- Main Ingredients: milk chocolate, peanut butter, maple syrup
- Flavor Profile: creamy peanut butter with smooth milk chocolate
- Dietary Info: eggless, gluten free, no seed oils, vegan swap available
- Difficulty: Easy!
- Why You’ll Love It: refined sugar free peanut butter cups
Summarize & Save This Content On
Why You'll Love This Recipe
- No Refined Sugar: This is a healthier option for peanut butter cups compared to the store-bought version as there's no refined sugar, just maple syrup. Plus, this recipe is made with organic ingredients so you can feel good about indulging!
- Nostalgic: Peanut butter cups are incredibly nostalgic were always a favorite Halloween candy of mine. And these will definitely take you down memory lane and make you feel like a kid again!
- Easy: I love this recipe for homemade healthy peanut butter cups because it's so easy! This just requires 6 ingredients and it comes together in under 30 minutes.
- Healthier Treat: This is a twist on a classic, offering a little bit “better for you” ingredients but tastes just as good, just like Homemade Caramel Sauce with Bone Broth!
Ingredients

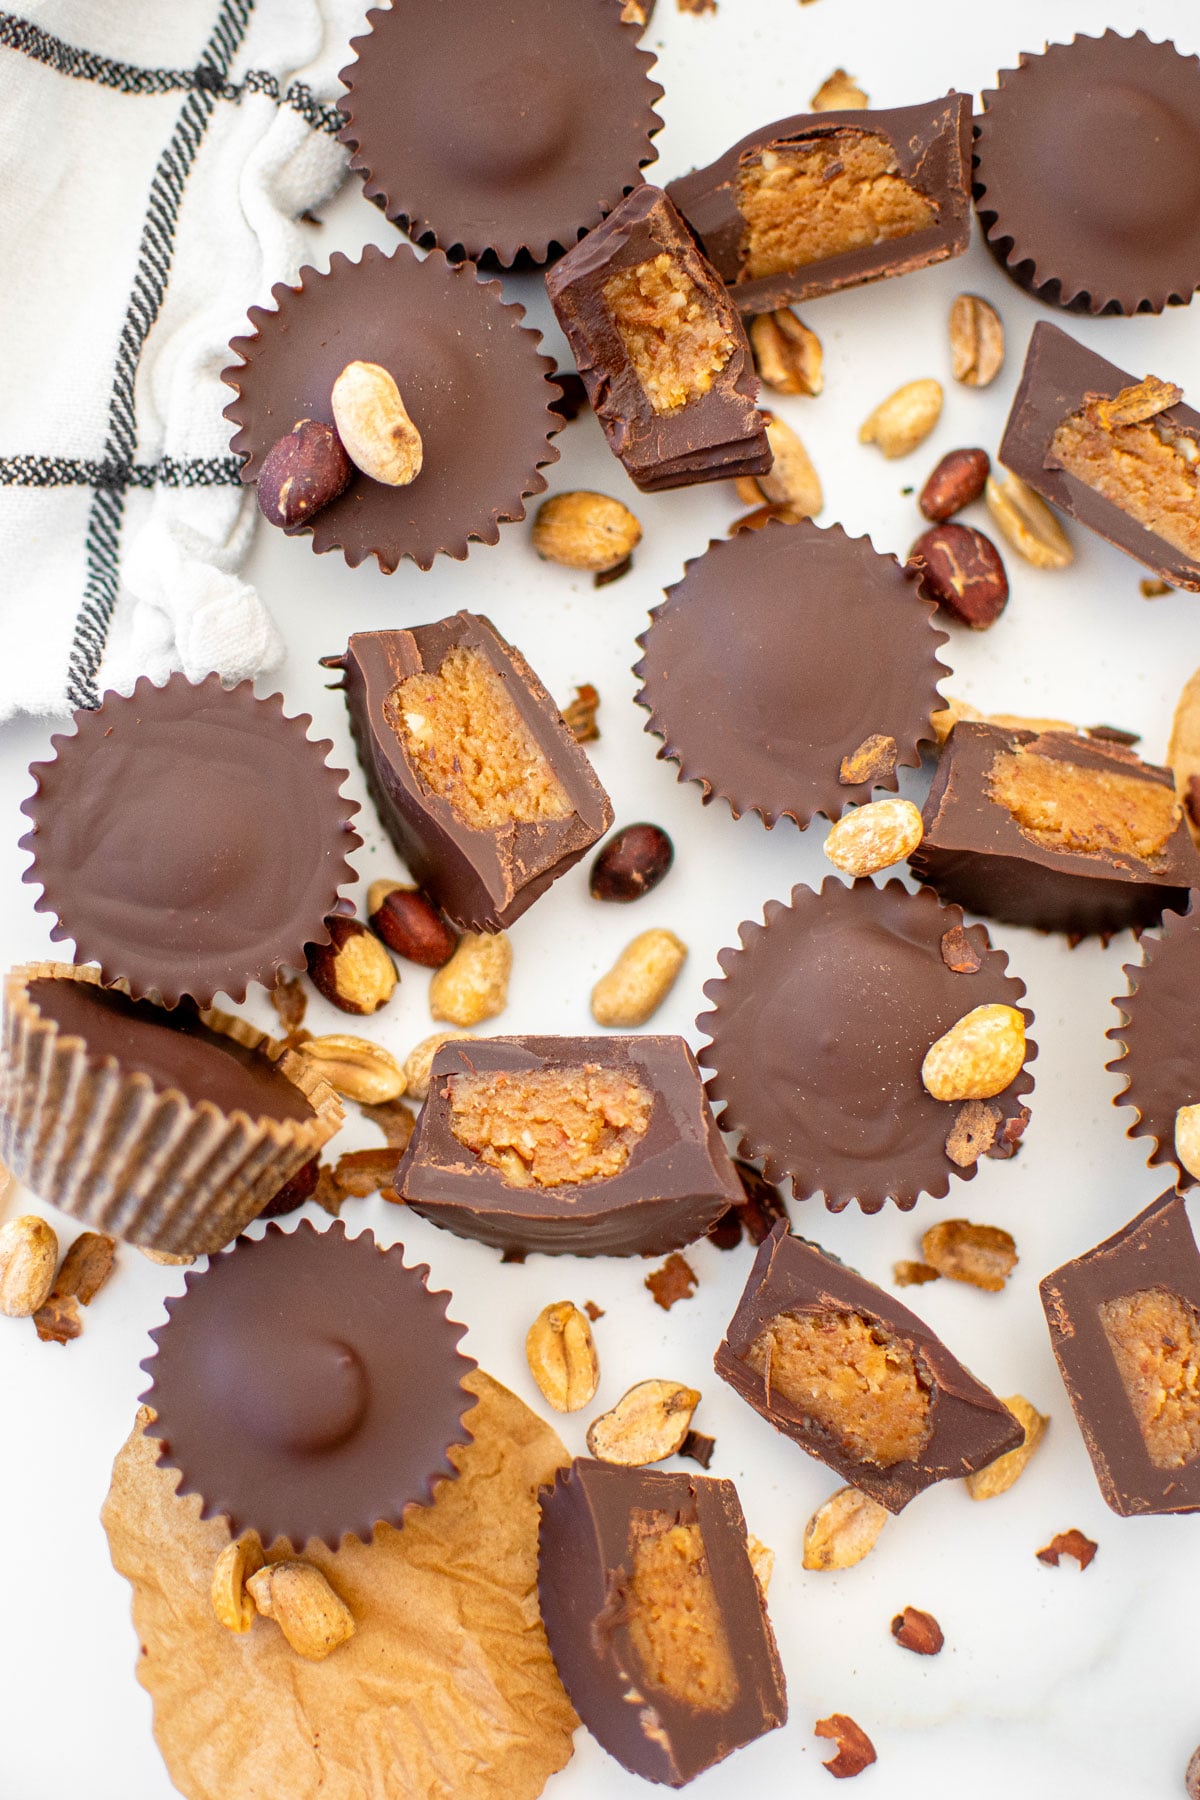
- Milk Chocolate: I use organic milk chocolate like classic peanut butter cups. But you can also use white chocolate or dark chocolate if you want to make these dairy-free or into vegan peanut butter cups.
- Coconut Oil: I use bit of coconut oil is used in the milk chocolate to help soften it a little bit. This makes it easier to eat them right out of the fridge as they are best kept in the fridge because of the softer filling.
- Peanut Butter: I use creamy organic and natural peanut butter. But, if you want to make these with a different nut butter, you can also use cashew butter, almond butter, pistachio butter, or walnut butter. You can even make these with tahini or sunflower butter if you prefer.
- Maple Syrup: I use organic pure maple syrup as a sweetener making these free of added sugar.
- Peanuts: Organic roasted and salted peanuts are used for a topping. This is optional, but I love the texture it adds and makes them a little more elevated than just plain Reese's cups.
- Flaky Sea Salt: This is totally optional, but if you know me then you know I'm obsessed with sweet and salty desserts. So, I add a little bit of flaky sea salt on top!
*For a full list of ingredients and measurements, visit the recipe card below.
Baker's Tips
- Always use a digital food scale for the best results.
- I use organic milk chocolate for a classic flavor, but you can use dark chocolate if you prefer! They are also vegan if you use dark chocolate.
- You can easily make these minis just by using a mini cupcake pan or mini muffin pan instead.
- Store in the fridge as the filling is soft, so they are best kept chilled. You can take one out for a few minutes before eating.
How to Make Healthy Chocolate Peanut Butter Cups

- Line a cupcake pan with liners. To make the chocolate coating: In a large bowl, add the milk chocolate and coconut oil into a heatproof bowl. Using a double boiler, heat until melted. Remove from heat. (Alternatively, microwave in a microwave safe bowl for 30 second intervals, stirring between each interval).

- I like to transfer this to a pyrex measuring cup so it's easy to pour.

- Fill the cupcake liners one-third full with chocolate. Place the tray in the freezer.

- To make the filling: In a large mixing bowl, add the melted coconut oil, maple syrup, and peanut butter.
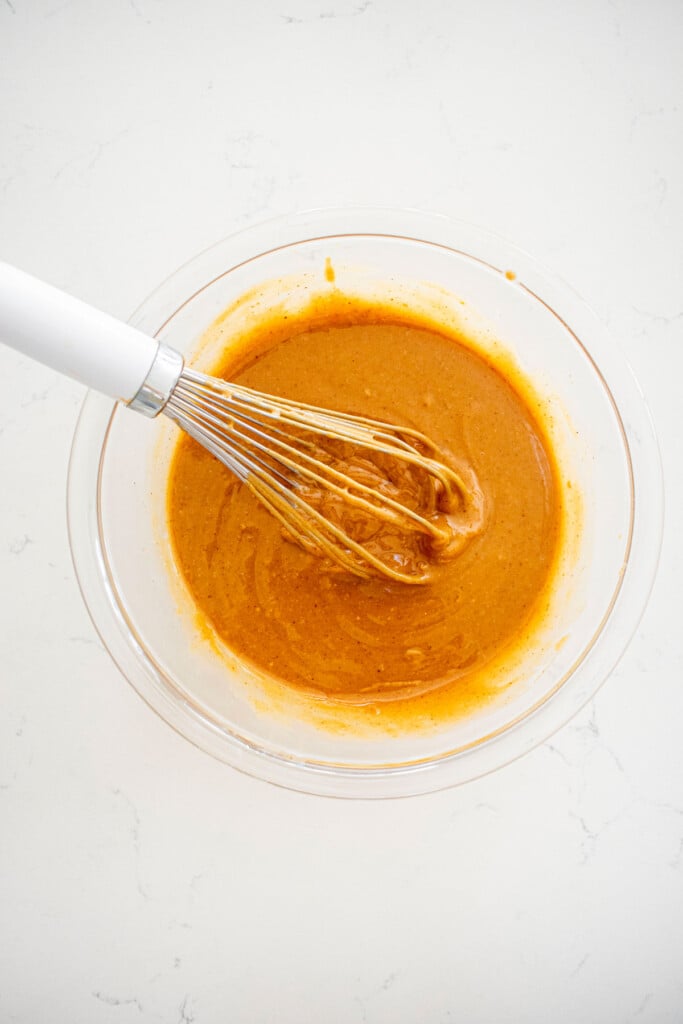
- Whisk together until smooth.

- Remove the cupcake pan from the freezer. Spoon the peanut butter filling into the cups and spread to the sides. Place the cupcake pan back in the freezer to set the filling for a few minutes.

- Remove the cupcake pan from the freezer and add the remaining chocolate on top of the peanut butter to fill the top of each cup. Top with chopped peanuts.

- Add flaky sea salt on top of the chocolate (optional). Place back in the freezer to harden, for at least 30 minutes. Transfer to the fridge.

Healthy Chocolate Peanut Butter Cups FAQ's
These taste very similar to Reese's Peanut Butter Cups, but are homemade peanut butter cups without all the crap and with less sugar. The filing in this recipe is a bit more soft than traditional peanut butter cups.
Yes! There is no refined sugar, just pure organic maple syrup. Plus, this recipe doesn't have ingredients like soy, seed oils, or TBHQ that can be found in store-bought versions.
Yes, feel free to use honey if you prefer!
Yes! I always use organic natural peanut butter in all my recipes.
Make sure to chop chocolate into small pieces. This is going to ensure that it melts quickly, evenly, and this can help prevent burning. Also, only do 30 second intervals at a time, and stir between each one. This will help distribute heat evenly and also help prevent burning.
I add a little coconut oil into the milk chocolate. This helps soften it so it's easy to bite into it.
Yes, if you prefer to make these into a mini version, you can do that. It will make 24 minis and you can use a mini cupcake pan, and mini cupcake liners. Just use the same ratios of chocolate to filling!
These do not have to be refrigerated, but it’s best if they are stored in the fridge if you aren’t eating them. Because the filling is made with coconut oil, it can melt if it's too warm, same with the chocolate. So, they will stay better in the refrigerator. I like to stash them in an airtight container. Just remove them for 10 or so minutes before you want to eat one as they are best at room temperature.
These will last for up to 2 weeks in the fridge. You can also freeze them for up to 3 months.
Yes, store in an airtight container and freeze for up to 3 months. Just thaw in the fridge and they are ready to enjoy.
Better Than Store Bought
These Healthy Chocolate Peanut Butter Cups are so much better than the packaged variety. With only 6 organic ingredients, you'll feel good about indulging in these!
Most packaged store bought candy can have seed oils, high fructose corn syrup, soy, TBHQ, artificial flavors and more. But, you can easily skip these when you make homemade candy instead!
Try some of my other favorite nostalgic candies that are so much better than store bought. Indulge in Vegan Snickers Bars, Homemade Twix Bars, Homemade Crunch Bars, Chocolate Covered Raisin Clusters, and Vegan Dark Chocolate Mini Peanut Butter Cups!

More Chocolate Peanut Butter Desserts


Loved it? Tell us!
Thanks a waffle lot for stopping by 🧇 If you loved this recipe, sprinkle some love by leaving a ⭐⭐⭐⭐⭐ review — it inspires others to try this recipe and helps me organically reach dog loving foodies like you! I personally read and appreciate every message!
Also, be sure to subscribe to our YouTube channel and join John John and me in the kitchen for step by step recipe videos! And subscribe to our newsletter for new and seasonal recipes!
Healthy Chocolate Peanut Butter Cups
Equipment
- Digital Food Scale
- Heatproof Mixing Bowl
- Cupcake Pan
- Whisk
- Cutting Board
- Sharp Knife
Ingredients
Chocolate Coating
- 454 grams milk chocolate chunks
- 28 grams coconut oil
Filling
- 57 grams coconut oil (melted)
- 113 grams maple syrup
- 284 grams peanut butter
Topping
- roasted & salted peanuts
- flaky sea salt
Instructions
- Line a cupcake pan with liners.
- To make the chocolate coating: In a large bowl, add the milk chocolate and coconut oil into a heatproof bowl. Using a double boiler, heat until melted. Remove from heat. (Alternatively, microwave in a microwave safe bowl for 30 second intervals, stirring between each interval).
- Fill the cupcake liners one-third full with chocolate. Place the tray in the freezer.
- To make the filling: In a large mixing bowl, add the melted coconut oil, maple syrup, and peanut butter and whisk together until smooth.
- Remove the cupcake pan from the freezer. Spoon the peanut butter filling into the cups and spread to the sides. Place the cupcake pan back in the freezer to set the filling for a few minutes.
- Remove the cupcake pan from the freezer and add the remaining chocolate on top of the peanut butter to fill the top of each cup. Add flaky sea salt on top of the chocolate (optional).
- Place back in the freezer to harden, for at least 30 minutes. Transfer to the fridge.
- Store in the fridge for up to 2 weeks.
Video

Notes
- Always use a digital food scale for the best results.
- I use organic milk chocolate for a classic flavor, but you can use dark chocolate if you prefer! They are also vegan if you use dark chocolate.
- You can easily make these minis just by using a mini cupcake pan or mini muffin pan instead.
- Store in the fridge as the filling is soft, so they are best kept chilled. You can take one out for a few minutes before eating.
- High Altitude — Follow the recipe as noted.
Nutrition
The Bake Shop
Visit The Bake Shop for foodie inspired tees, sweatshirts, and accessories. Find my favorite kitchen tools (with discounts!) in the Kitchen Shop. And shop our collection of food inspired dog accessories too!

Decadently delicious!
thank you so much!
So good! Made my night
thank you so much!