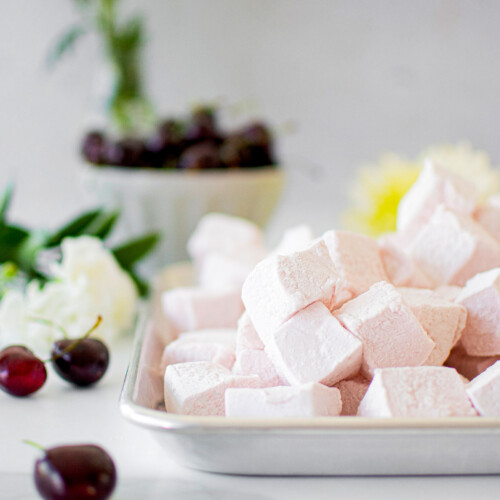
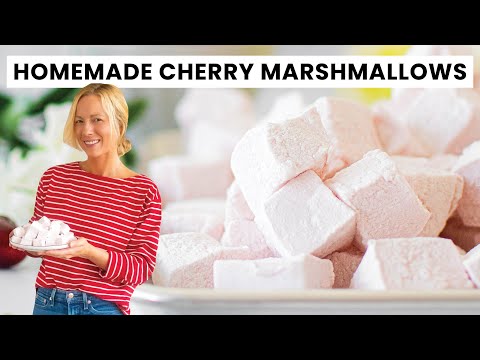
Homemade Cherry Marshmallows
These Homemade Cherry Marshmallows without a thermometer are sweet, fruity, made with organic ingredients, and no artificial colors! Use these Cherry Marshmallows on top of cakes, cupcakes, or add into a hot chocolate.
If you love making homemade marshmallows as much as I do, be sure to check out some of my other favorite recipes like Homeamde Chocolate Marshmallows Without Eggs, Homemade Marshmallows Without Eggs, or Pumpkin Spice Marshmallows Without Corn Syrup.

A Quick Look At The Recipe
- Recipe Name: Homemade Cherry Marshmallows
- Ready In: 1 day
- Makes: 24 large marshmallows or 96 mini marshmallows
- Main Ingredients: cane sugar, gelatin, corn syrup, cherry extract
- Flavor Profile: sweet cherry
- Dietary Info: eggless, gluten free, dairy free, no seed oils
- Difficulty: Easy!
- Why You’ll Love It: fluffy homemade cherry marshmallows without eggs
Summarize & Save This Content On
Why You'll Love This Recipe
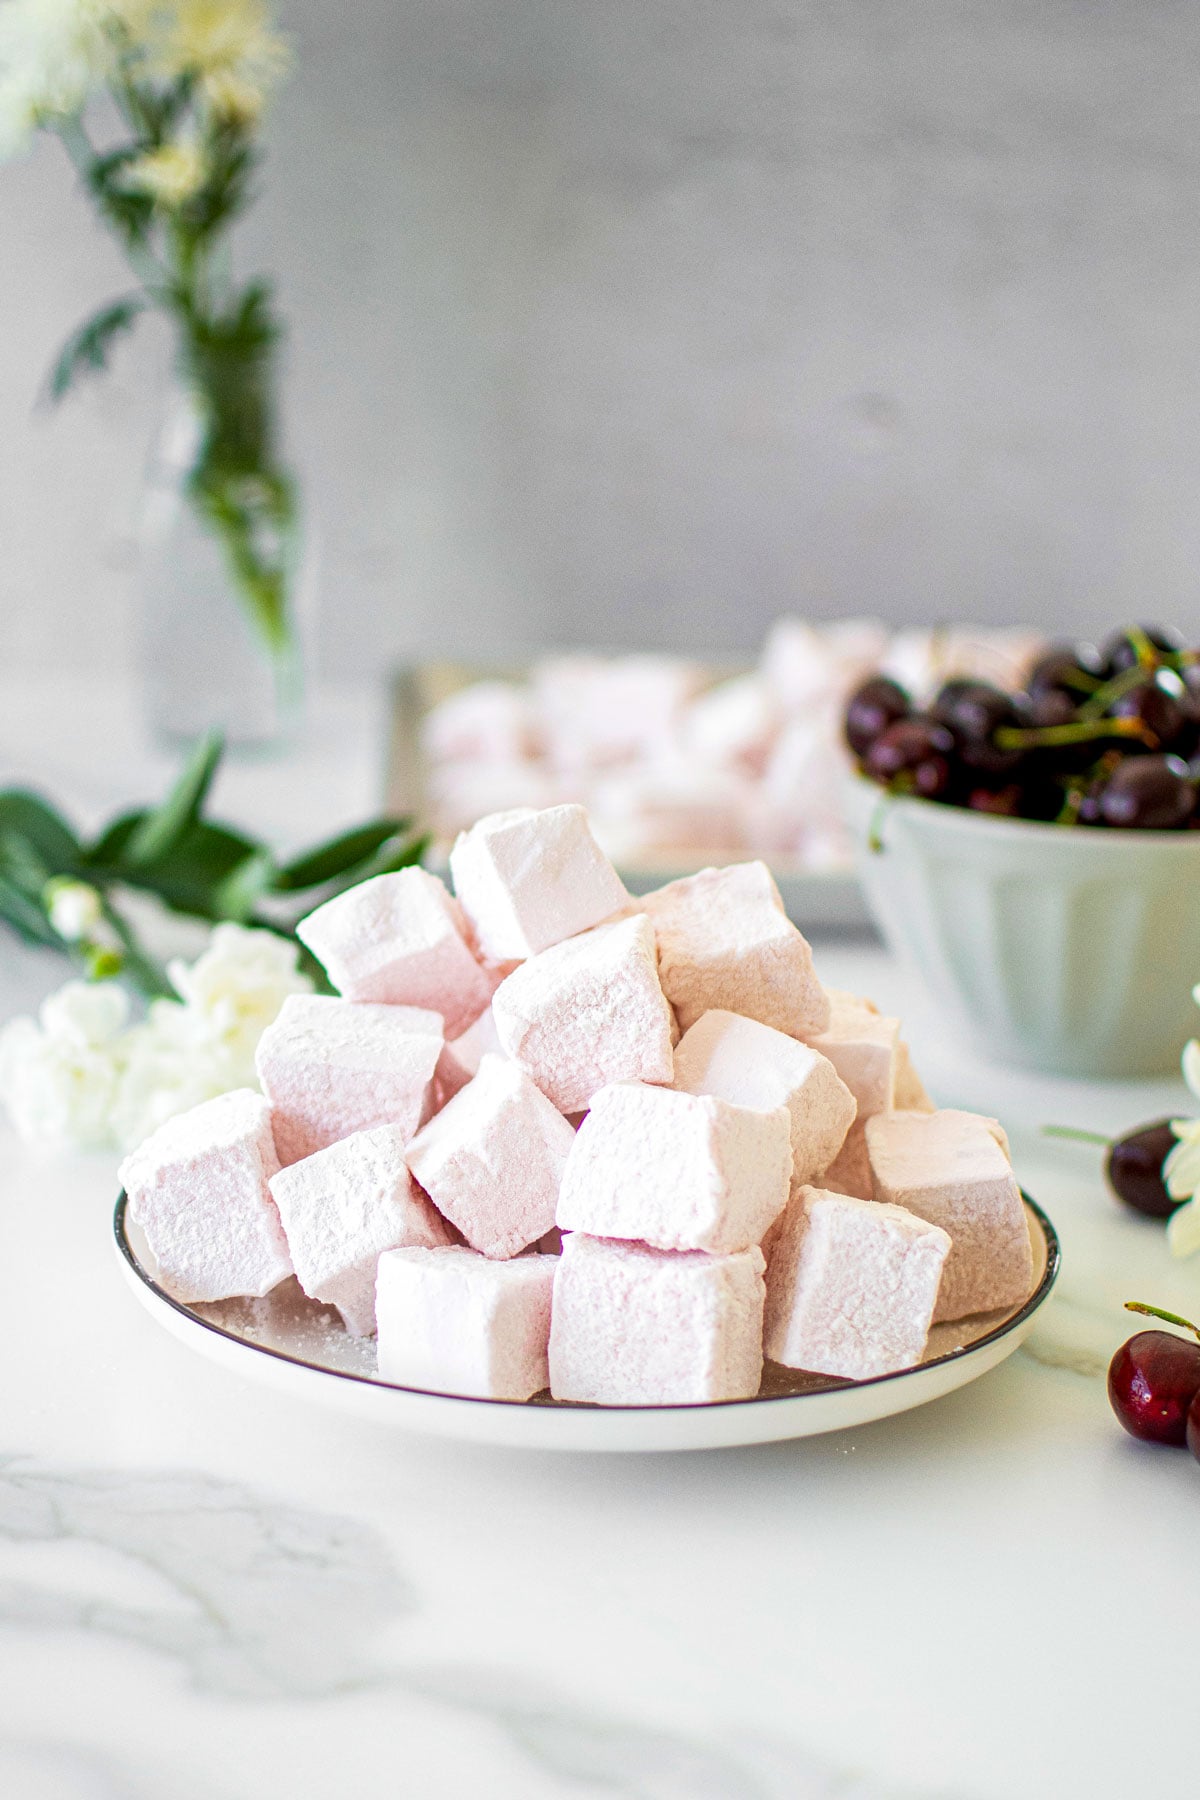
- Soft & Cloud Like: Elevate your marshmallow game with these Homemade Cherry Marshmallows. They are a delightful homemade candy that is so much better than store-bought varieties. These homemade marshmallows are light, cloud like pillowy puffs of sugary deliciousness, and so squishy! When you make your own organic marshmallows you get the freshest marshmallows that are insanely soft.
- No Candy Thermometer: You do not need a thermometer to make these gourmet bakery style marshmallows. Instead, I use a boiling technique so you can just use visual clues that the sugar mixture is ready, making them super easy to make at home!
- Fruity Sweet: These artisanal marshmallows are a bold twist on the classic vanilla, perfect for sipping alongside a cup of tea or hot cocoa, or for sharing as a unique and thoughtful gift!
- Eggless: These Cherry Marshmallows are naturally eggless! While many homemade marshmallows are made with egg whites, these homemade marshmallows are completely eggless!
- Organic: While traditional store bought marshmallows can have artificial flavors and colors, these are made with organic ingredients and plant based dyes.
These gourmet cherry marshmallows were a popular menu item at my bakery for over a decade. When I sold my bake shop, I think we were shipping 100 boxes of these a day!
And, it's no wonder they were so popular as they are light, cloud like, squishy, free of artificial colors and perfect for hot cocoa! Try them inside Coconut Hot Chocolate, Creamy Dark Hot Chocolate With Homemade Whipped Cream, or Bone Broth Hot Cocoa.
Ingredients
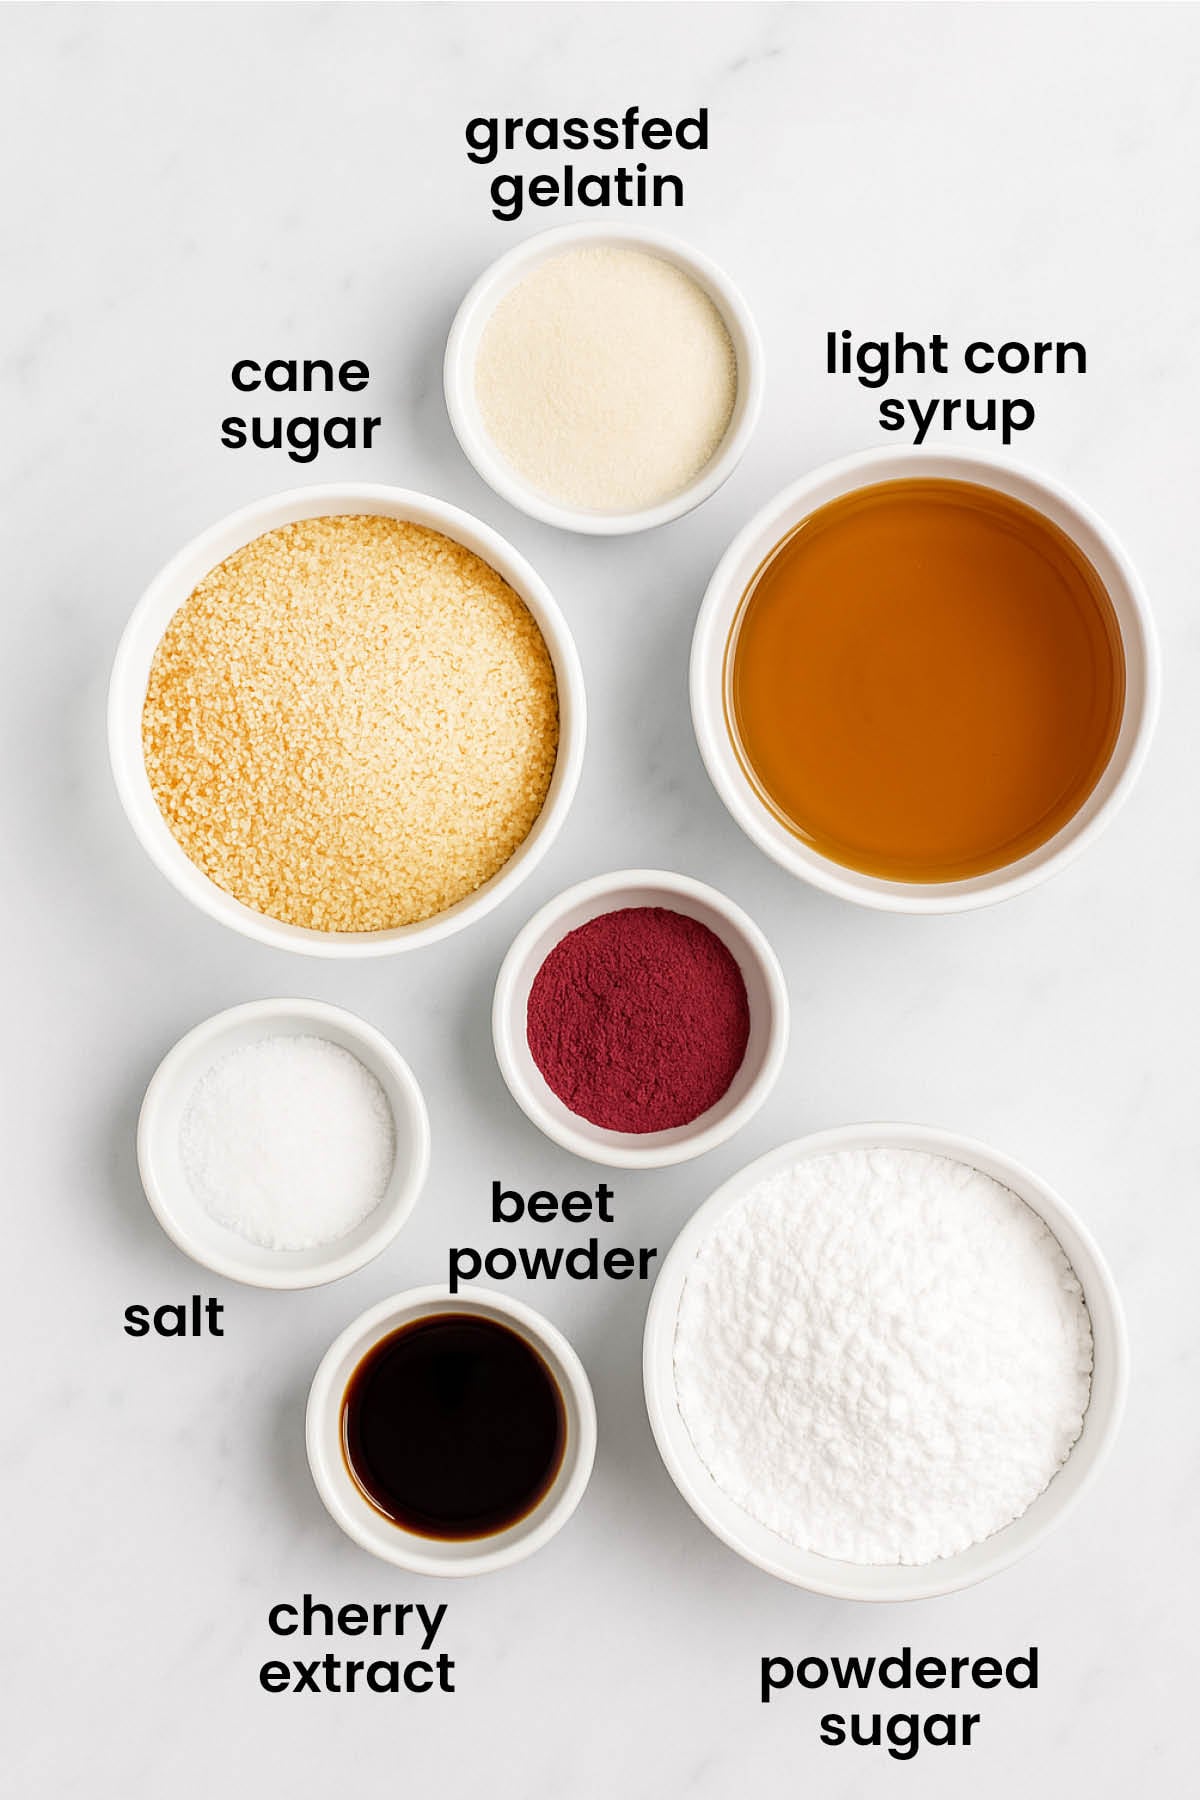
- Gelatin: I use grassfed gelatin. This is what gives these homemade marshmallows their squishy texture.
- Corn Syrup: I use organic light corn syrup in these organic marshmallows. If you don't want to use corn syrup, you can use honey in its place. You'll get a little honey flavor, but that would be delicious with this cherry dessert! But, if you had these at my bakery, we used Wholesome Organic Light Corn Syrup, if you are trying to make them taste identical.
- Pink Dye: I use organic beet powder to color these naturally pink!
- Cherry Extract: I use organic cherry extract to give these homemade marshmallows a sweet cherry flavor.
- Cooking Spray: I think that homemade marshmallows come out of the baking pan best when I grease it with cooking spray. You can use an organic olive oil cooking spray, or even avocado oil or canola oil.
- Powdered Sugar: I use organic powdered sugar to coat these Cherry Marshmallows while they are being cut so they don't stick to each other. And, the remaining powdered sugar gets coated on the sides so they can form a natural “shell”. This allows them to be stored without sticking.
*For a full list of ingredients and measurements, visit the recipe card below.
Baker's Tips for Homemade Cherry Marshmallows
- Always weigh ingredients for the best results.
- When you add the cold water to the gelatin, stir it up immediately. This will prevent any clumps from forming. I do not bloom gelatin in the traditional way (which is just sprinkling gelatin on top of cold water and not touching it). This way is so much better and prevents any clumps from forming. I have taught so many people how to make marshmallows when I owned my bakery, and I found this method far exceeds the traditional method of blooming to reduce clumps.
- If you don't want to use corn syrup, you can use raw honey in its place. It will give these a little honey flavor though.
- It is very important to whisk the marshmallows until they are fairly stiff. If they are runny and fall off the whisk immediately, then they need more whisking! They should feel fluffy like a spreadable fluff consistency.
- Coloring them is totally optional. I love making them pastel, and I use organic beet powder to do that.
- If you want larger marshmallows, you can leave them at 24 large squares.
How to Make Homemade Cherry Marshmallows
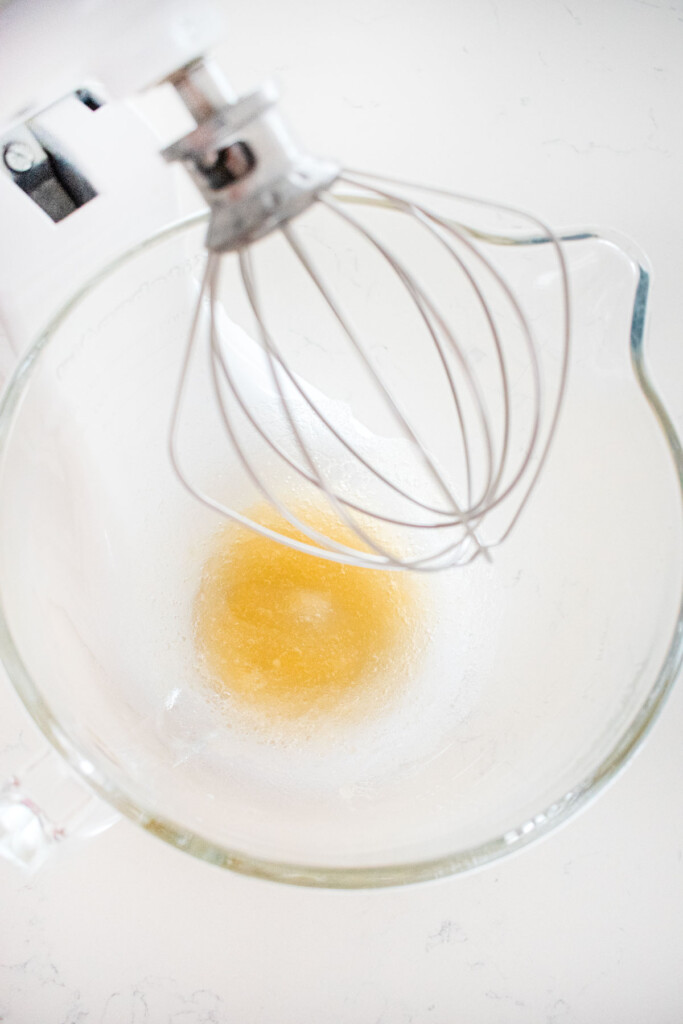
- In the bowl of a stand mixer fitted with the whisk attachment, add ½ cup of the cold water and gelatin. Immediately stir together with a spoon so it doesn’t clump. Set aside.
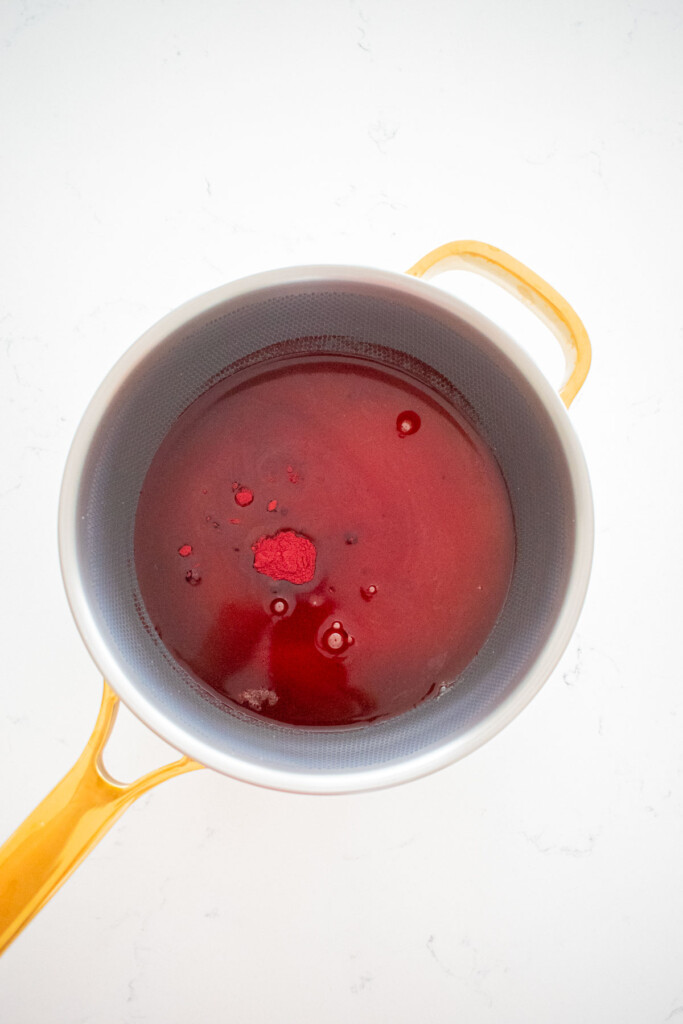
- In a medium saucepan, add the cane sugar, corn syrup, the ½ cup warm water, sea salt, and beet powder.
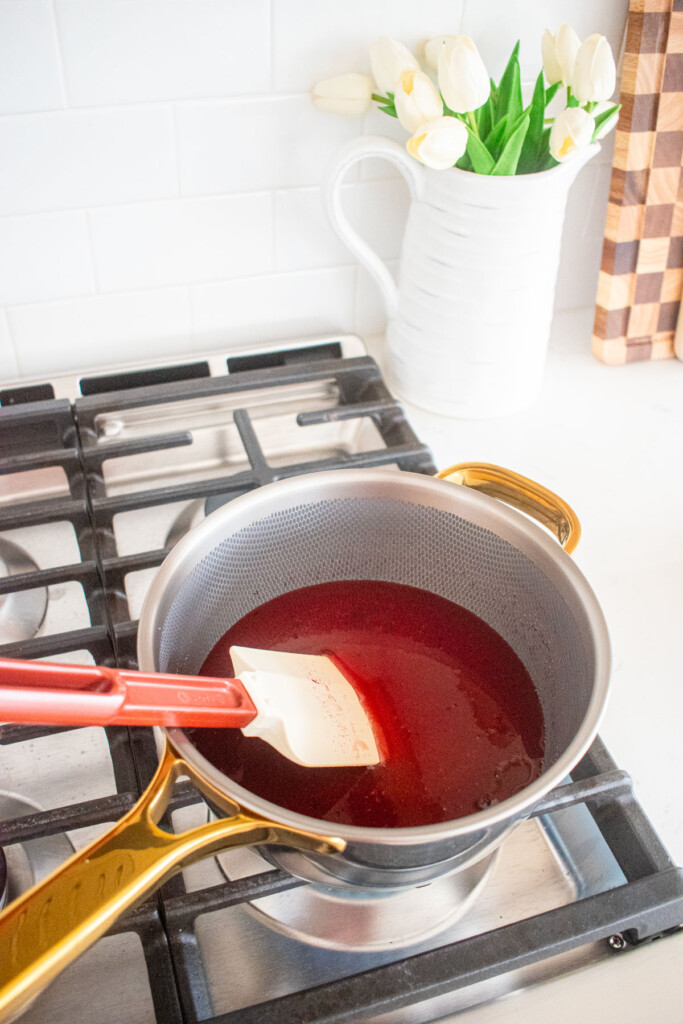
- Put over medium/high heat and stir with a high heat spatula until all the sugar has dissolved and you have a liquid.
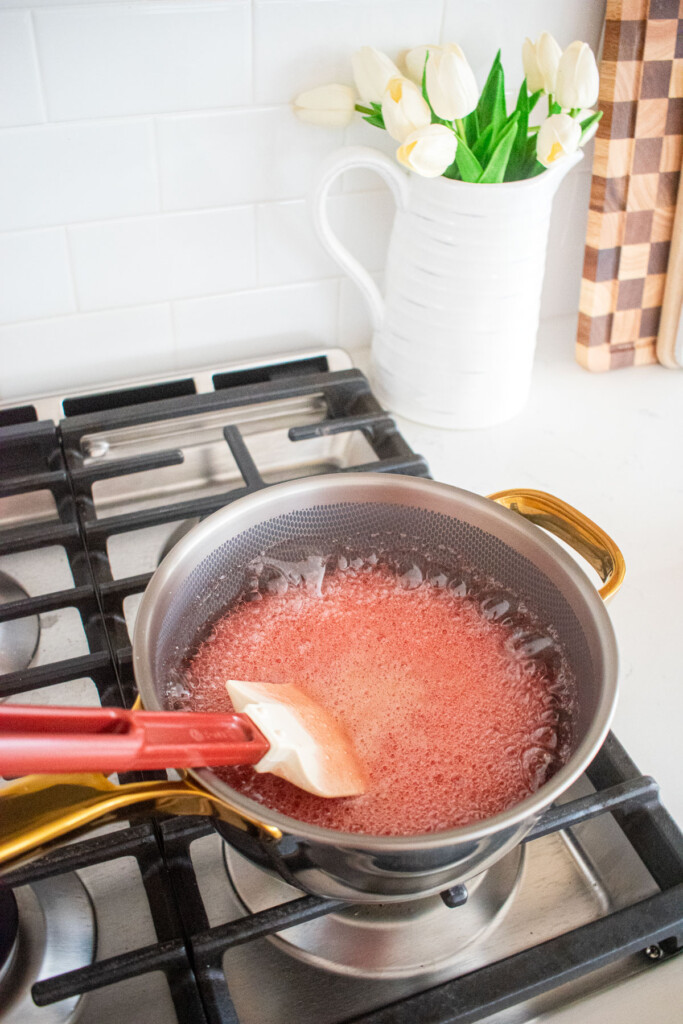
- Periodically stir the sugar mixture until it starts to boil, bubble and rise up. Remove from the heat and pour directly over the gelatin in the mixing bowl.
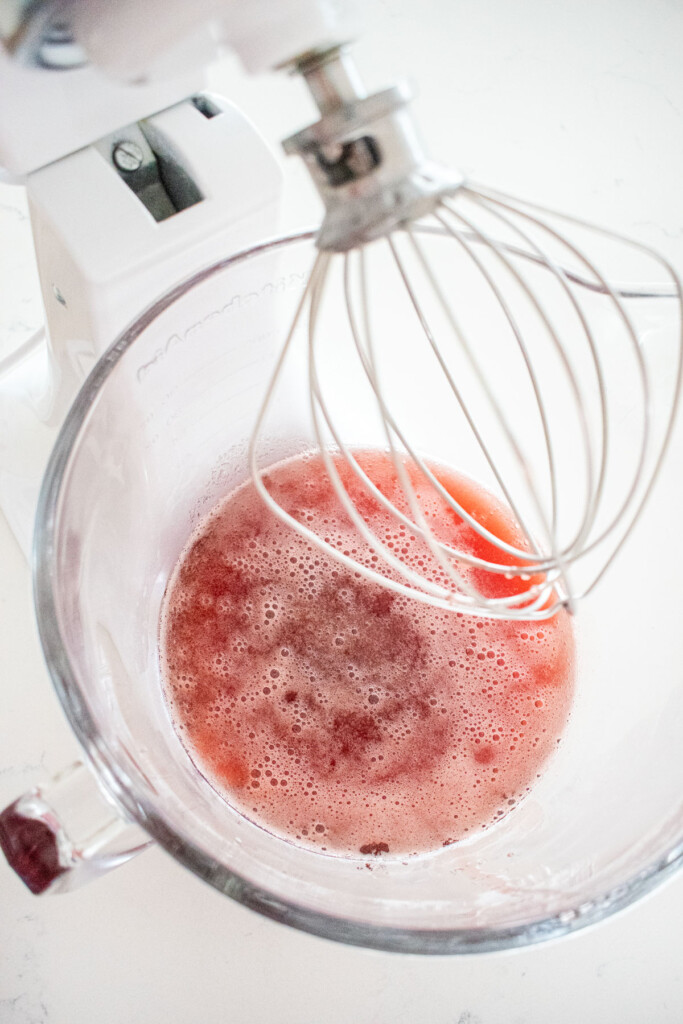
- Start mixing on low and gradually increase the speed as the mixture starts to thicken. It will start out as an opaque color and slowly it will start to lighten in color as it thickens. Keep increasing the speed until you are at full speed.
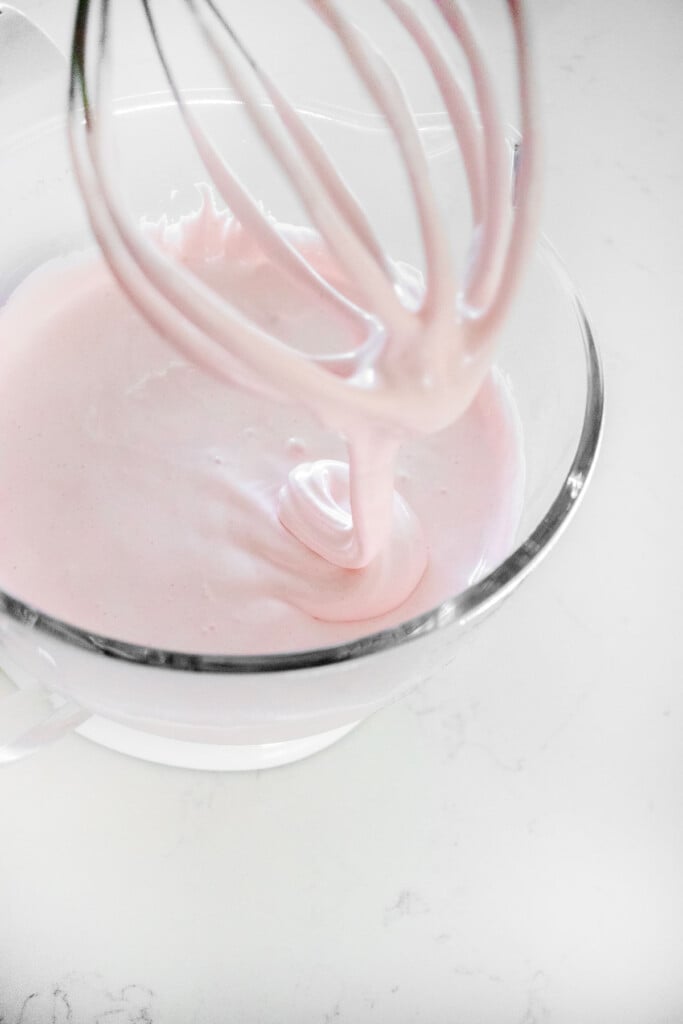
- Continue mixing on high until the mixture is a thick consistency and resembles marshmallow fluff. It should be sticky and hold its shape for a short period of time. The entire mixing time should be about 10 to 15 minutes. Last, add in the cherry extract and whisk to combine completely.
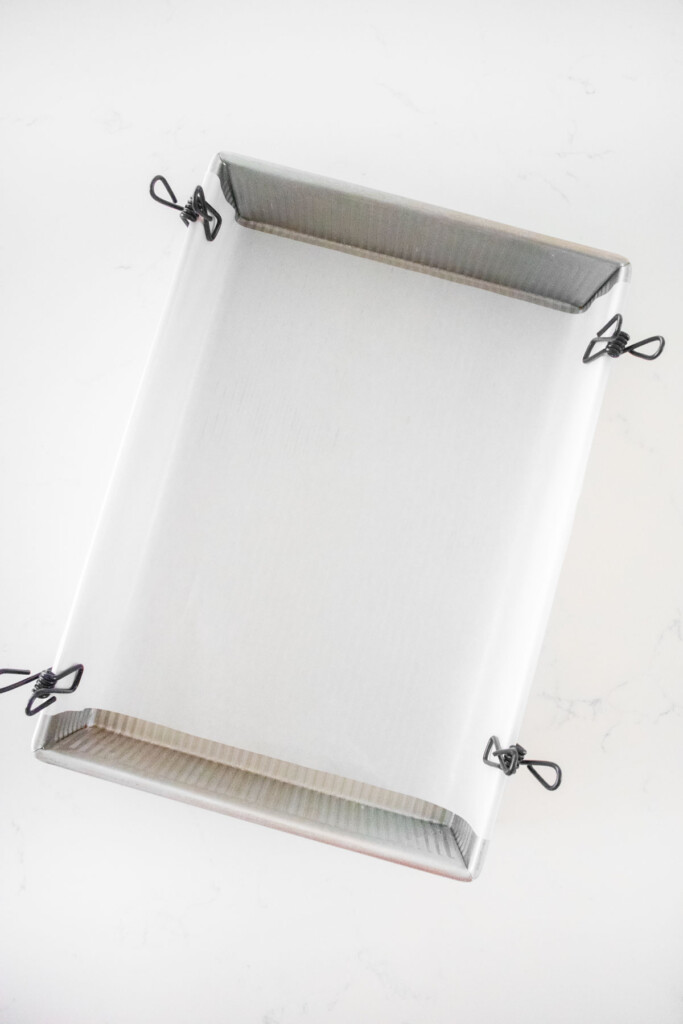
- Place a piece of parchment paper in a 9 x13-inch pan. Let the parchment fold over the dish on two sides, but make sure the other sides are cut to fit the dish exactly, otherwise the corners of the marshmallows will not be perfectly square. You can use binder clips to hold it in place. Grease the prepared parchment paper and two additional sides of the baking dish with olive oil spray.
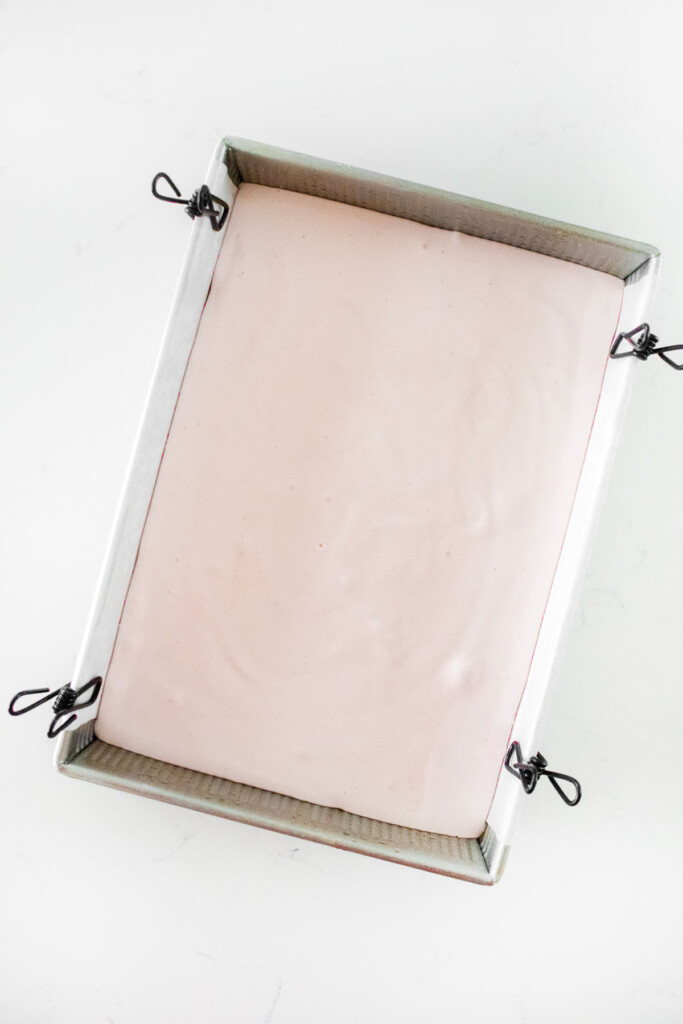
- Immediately pour the marshmallow mixture into the pan. Let the marshmallow set overnight.
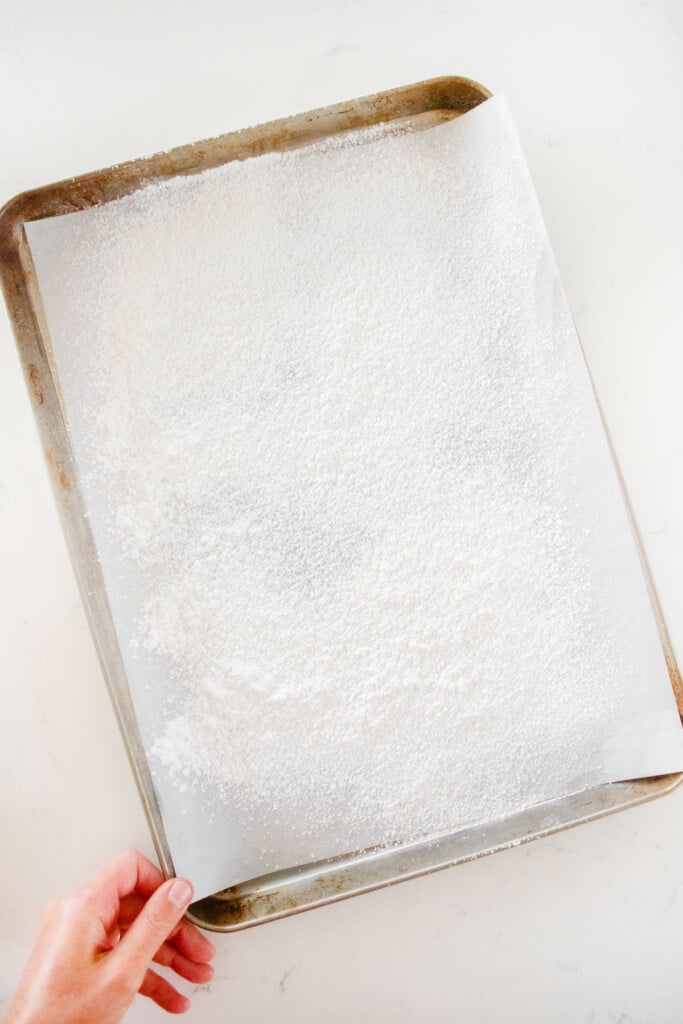
- On a baking sheet with parchment paper, or a work surface, sift a generous amount of powdered sugar. Slowly pull at the ends of the marshmallow that are not against the parchment paper so it’s not stuck to the pan.
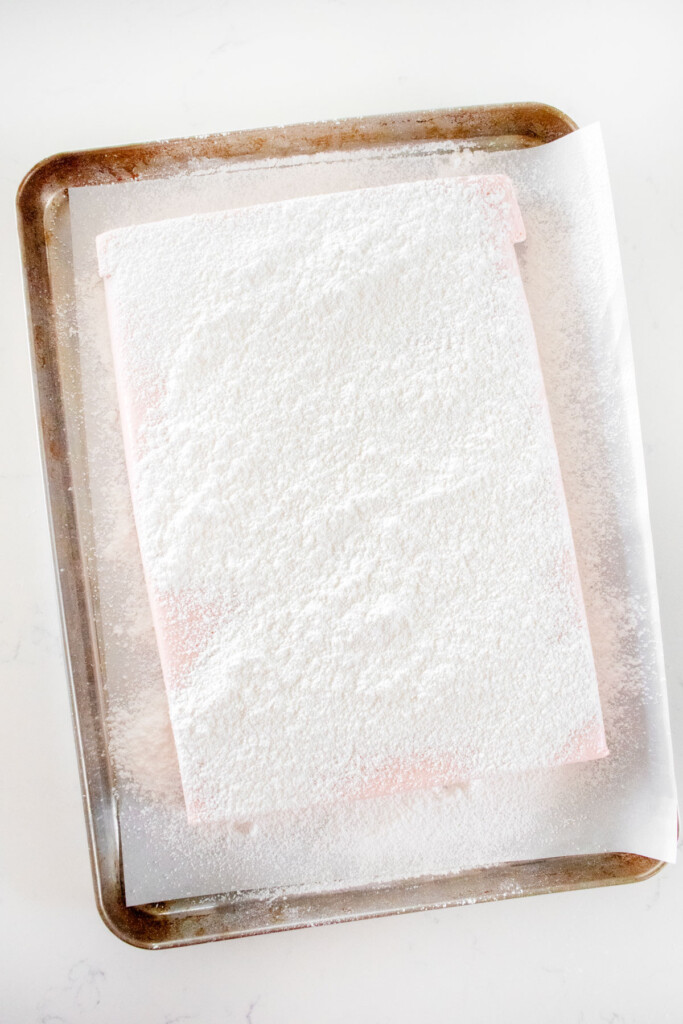
- Lift the entire marshmallow out of the pan and turn it upside down onto the powdered sugar. Sift more powdered sugar on top.
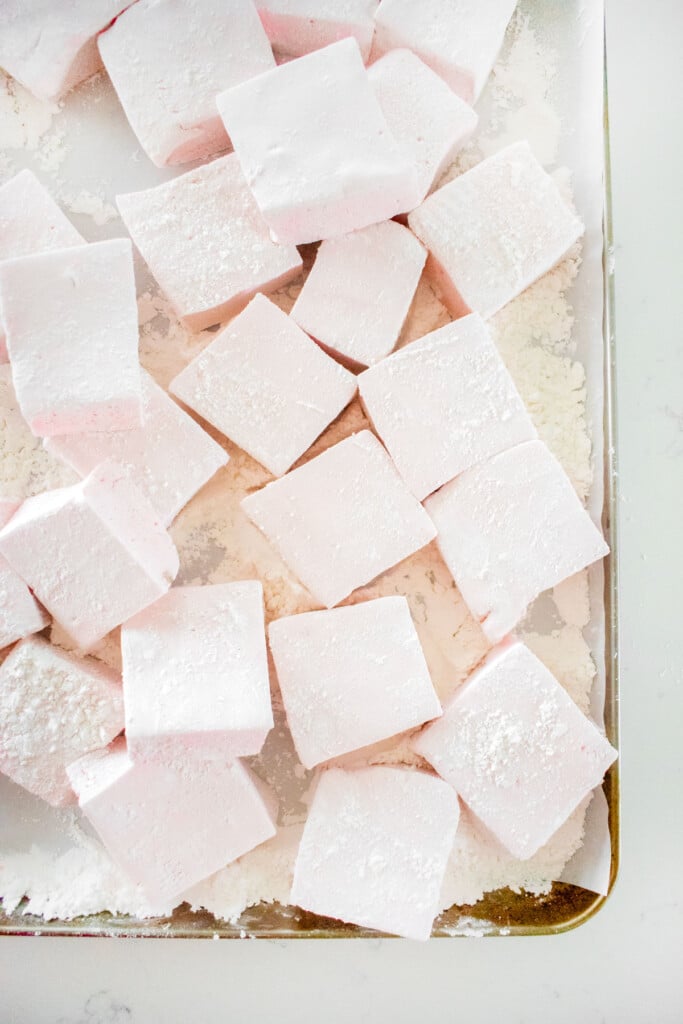
- Using a pizza cutter (this is a great trick, but a sharp knife will do as well), cut into 24 squares (six by four). You can leave as large marshmallows or cut each square into four pieces for mini marshmallows.

- If you want mini marshmallows, cut each square into 4. Roll each side in the powdered sugar to keep from sticking together.
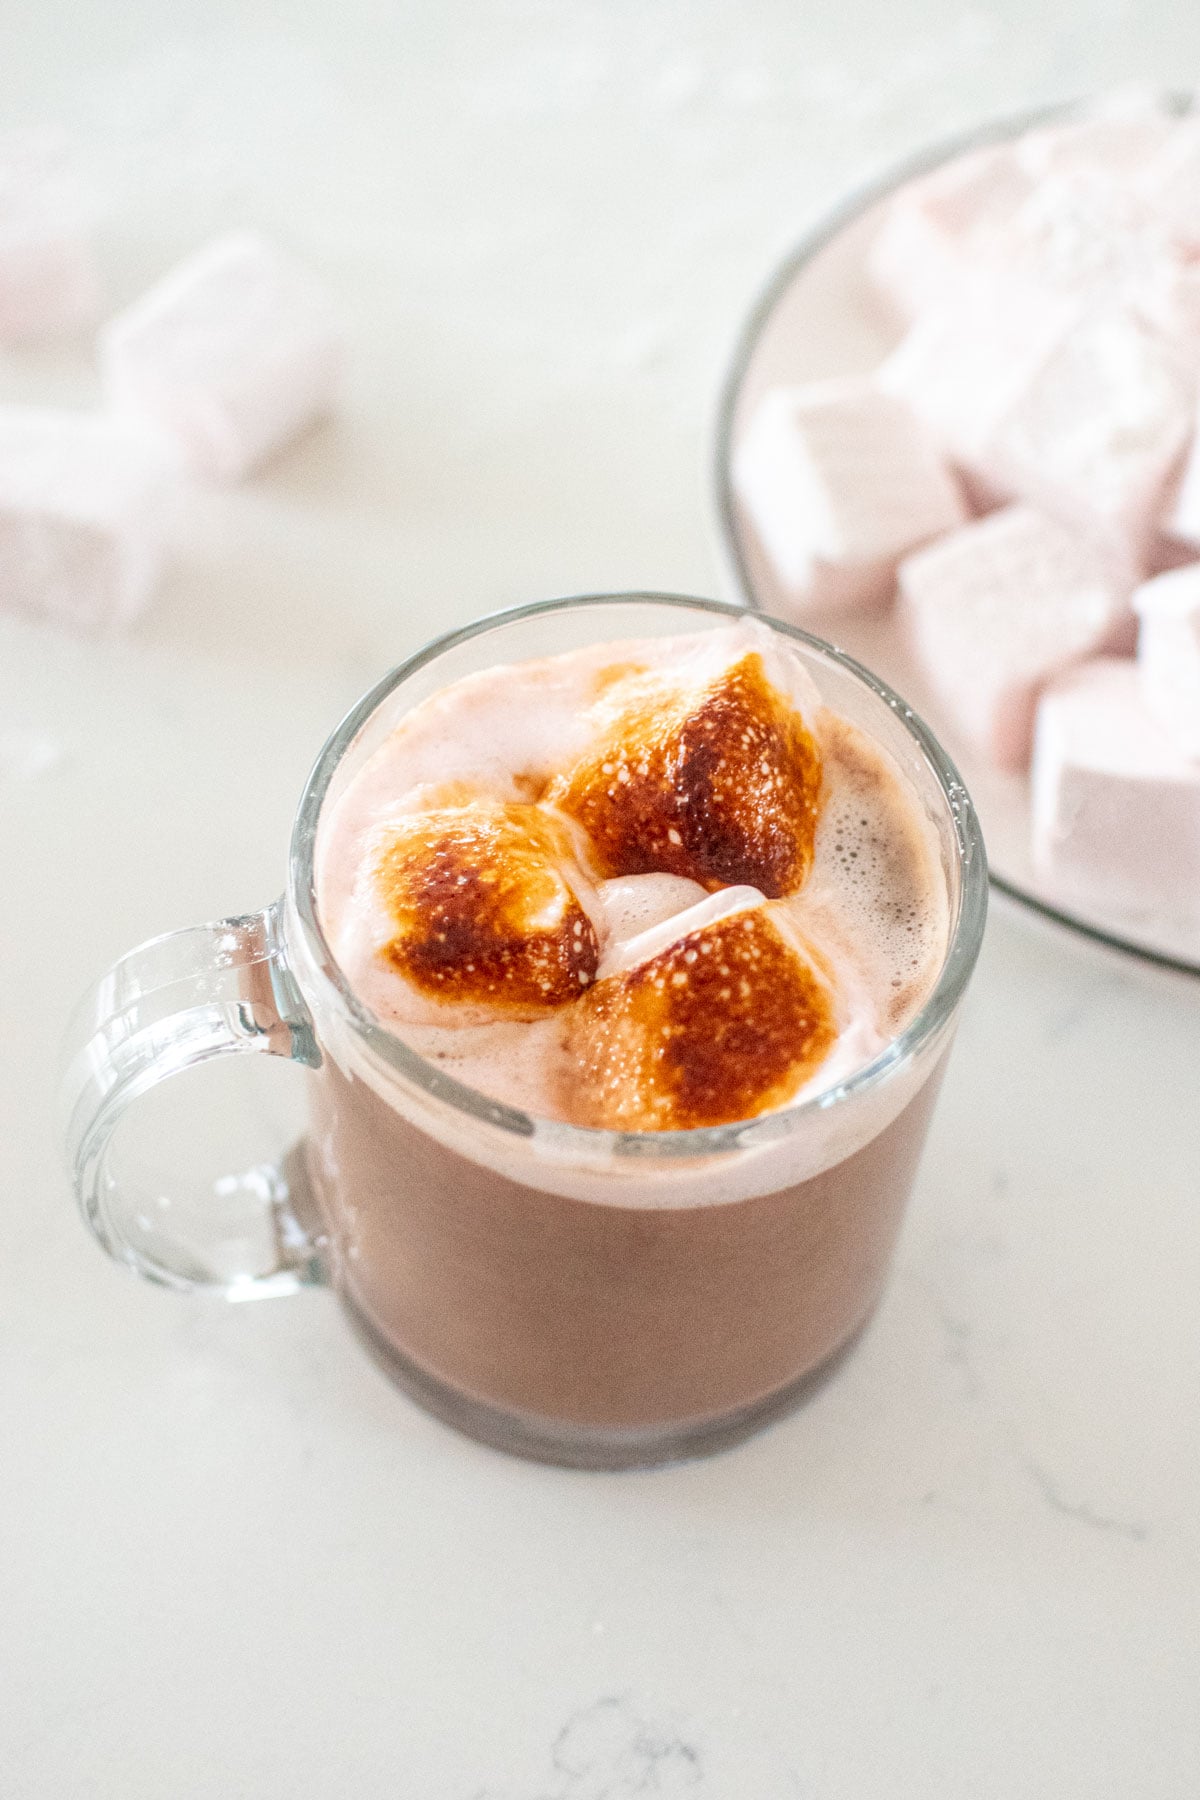
- Allow them to sit out overnight before storing so the powdered sugar can form to the sides and they won’t stick together. Enjoy marshmallows in hot chocolate, s'mores, add into cookie boxes or just eat as a sweet treat!
Recipe FAQ's
No, if you want to skip the dye you totally can! This is optional, but it makes these a beautiful pastel pink.
No, this will add too much moisture into the marshmallows (and not enough flavor). This is why the extract is best for flavoring these.
When the sugar mixture boils and bubbles it will start to rise (like it's going to boil over and out of the pot) that's when it's ready to be removed from the heat. It's very easy to see it!
When the marshmallow mixture is fluff-like and it doesn't sink right back into itself right away then it's done. Watch the video for signs I show, as this is most helpful. I always say if you can take the whisk and write the first letter of your name in the fluff and you can still see it (it doesn't melt right back in) then it's ready. I show this in the video!
If your marshmallows are too soft or sticky then they were not whipped enough or they didn't set long enough. The video really helps you see the visual signs that the marshmallows are whipped to before transferring to the pan. And, you want to make sure your marshmallows it overnight before cutting.
The most common reason marshmallows didn't set properly is under whipping them. If you don't whip them enough, they won't be thick and squishy. Make sure to watch the video and look at the visual signs that I show there, that will help you know when your mallows are ready.
Yes, if you want to leave them larger, then just stop cutting them after you have cut into 24 marshmallows and you have big squares!
No, because these marshmallows are eggless and we're using a cherry extract for flavor, they do not need to be refrigerated. Store then in an airtight container at room temperature (like your pantry) for up to 2 weeks.
Homemade marshmallows are best stored in an airtight container at room temperature. These do not last as long as store bought mallows and are best eaten within a week or two of making!
More Better Than Store Bought Candy
If you love making better than store bought candy at home, try some of my other favorite recipes! Make Homemade Chewy Chocolate Caramel Candy, Salted Almond Dark Chocolate Bars, Homemade Crunch Bars, Chocolate Covered Raisin Clusters, Healthy Almond Joy Bars, Vegan Dark Chocolate Mini Peanut Butter Cups, or Homemade Twix Bars for more indulgence without guilt!
More Cherry Recipes


Loved it? Tell us!
Thanks a waffle lot for stopping by 🧇 If you loved this recipe, sprinkle some love by leaving a ⭐⭐⭐⭐⭐ review — it inspires others to try this recipe and helps me organically reach dog loving foodies like you! I personally read and appreciate every message!
Also, be sure to subscribe to our YouTube channel and join John John and me in the kitchen for step by step recipe videos! And subscribe to our newsletter for new and seasonal recipes!
Homemade Cherry Marshmallows
Equipment
- Digital Food Scale
- Stand Mixer
- 9×13-inch Baking Pan
- Parchment Paper Sheets
Ingredients
- ½ cup cold water
- 22 grams grassfed gelatin
- 454 grams cane sugar
- 312 grams light corn syrup
- ½ cup warm water
- ½ teaspoon fine sea salt
- ½ teaspoon beet powder
- 1 teaspoon cherry extract
- olive oil cooking spray
- powdered sugar (for dusting)
Instructions
- In the bowl of a stand mixer fitted with the whisk attachment, add ½ cup of the cold water and gelatin. Immediately stir together with a spoon so it doesn’t clump. Set aside.
- In a medium saucepan, add the cane sugar, corn syrup, the ½ cup warm water, sea salt, and beet powder. Put over medium/high heat and stir with a high heat spatula until all the sugar has dissolved and you have a liquid.
- Periodically stir the sugar mixture until it starts to boil, bubble and rise up. Remove from the heat and pour directly over the gelatin in the mixing bowl.
- Start mixing on low and gradually increase the speed as the mixture starts to thicken. It will start out as an opaque color and slowly it will start to lighten in color as it thickens. Keep increasing the speed until you are at full speed.
- Continue mixing on high until the mixture is a thick consistency and resembles marshmallow fluff. It should be sticky and hold its shape for a short period of time. The entire mixing time should be about 10 to 15 minutes. Last, add in the cherry extract and whisk to combine completely.
- Place a piece of parchment paper in a 9 x13-inch pan. Let the parchment fold over the dish on two sides, but make sure the other sides are cut to fit the dish exactly, otherwise the corners of the marshmallows will not be perfectly square. You can use binder clips to hold it in place.
- Grease the prepared parchment paper and two additional sides of the baking dish with olive oil spray. Immediately pour the marshmallow mixture into the pan. Let the marshmallow set overnight.
- On a baking sheet with parchment paper, or a work surface, sift a generous amount of powdered sugar. Slowly pull at the ends of the marshmallow that are not against the parchment paper so it’s not stuck to the pan. Lift the entire marshmallow out of the pan and turn it upside down onto the powdered sugar. Sift more powdered sugar on top.
- Using a pizza cutter (this is a great trick, but a sharp knife will do as well), cut into 24 squares (six by four). You can leave as large marshmallows or cut each square into four pieces for mini marshmallows.
- If you want mini marshmallows, cut each square into 4. Roll each side in the powdered sugar to keep from sticking together. Allow them to sit out overnight before storing so the powdered sugar can form to the sides and they won’t stick together.
- Allow them to sit out overnight before storing so the powdered sugar can form to the sides and they won’t stick together.
- Store in an airtight container for up to 2 weeks.
Video
Notes
- Always weigh ingredients for the best results.
- When you add the cold water to the gelatin, stir it up immediately. This will prevent any clumps from forming. I do not bloom gelatin in the traditional way (which is just sprinkling gelatin on top of cold water and not touching it). This way is so much better and prevents any clumps from forming. I have taught so many people how to make marshmallows when I owned my bakery, and I found this method far exceeds the traditional method of blooming to reduce clumps.
- If you don't want to use corn syrup, you can use raw honey in its place. It will give these a little honey flavor though.
- It is very important to whisk the marshmallows until they are fairly stiff. If they are runny and fall off the whisk immediately, then they need more whisking! They should feel fluffy like a spreadable fluff consistency.
- Coloring them is totally optional. I love making them pastel, and I use organic beet powder to do that.
- If you want larger marshmallows, you can leave them at 24 large squares.
- High Altitude — Follow the recipe as noted.
Nutrition
The Bake Shop
Visit The Bake Shop for foodie inspired tees, sweatshirts, and accessories. Find my favorite kitchen tools (with discounts!) in the Kitchen Shop. And shop our collection of food inspired dog accessories too!

These marshmallows are so cute and colorful without artificial colors, I love them!
I’ve never binged eaten marshmallows before , so good 🤪
Adorably pink and fluffy without dyes or chemicals. The perfect holiday treat.
So delicious, and spectacular in the hot chocolate 😋😋