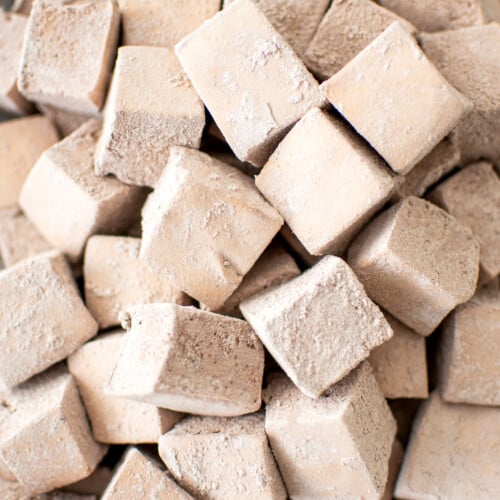
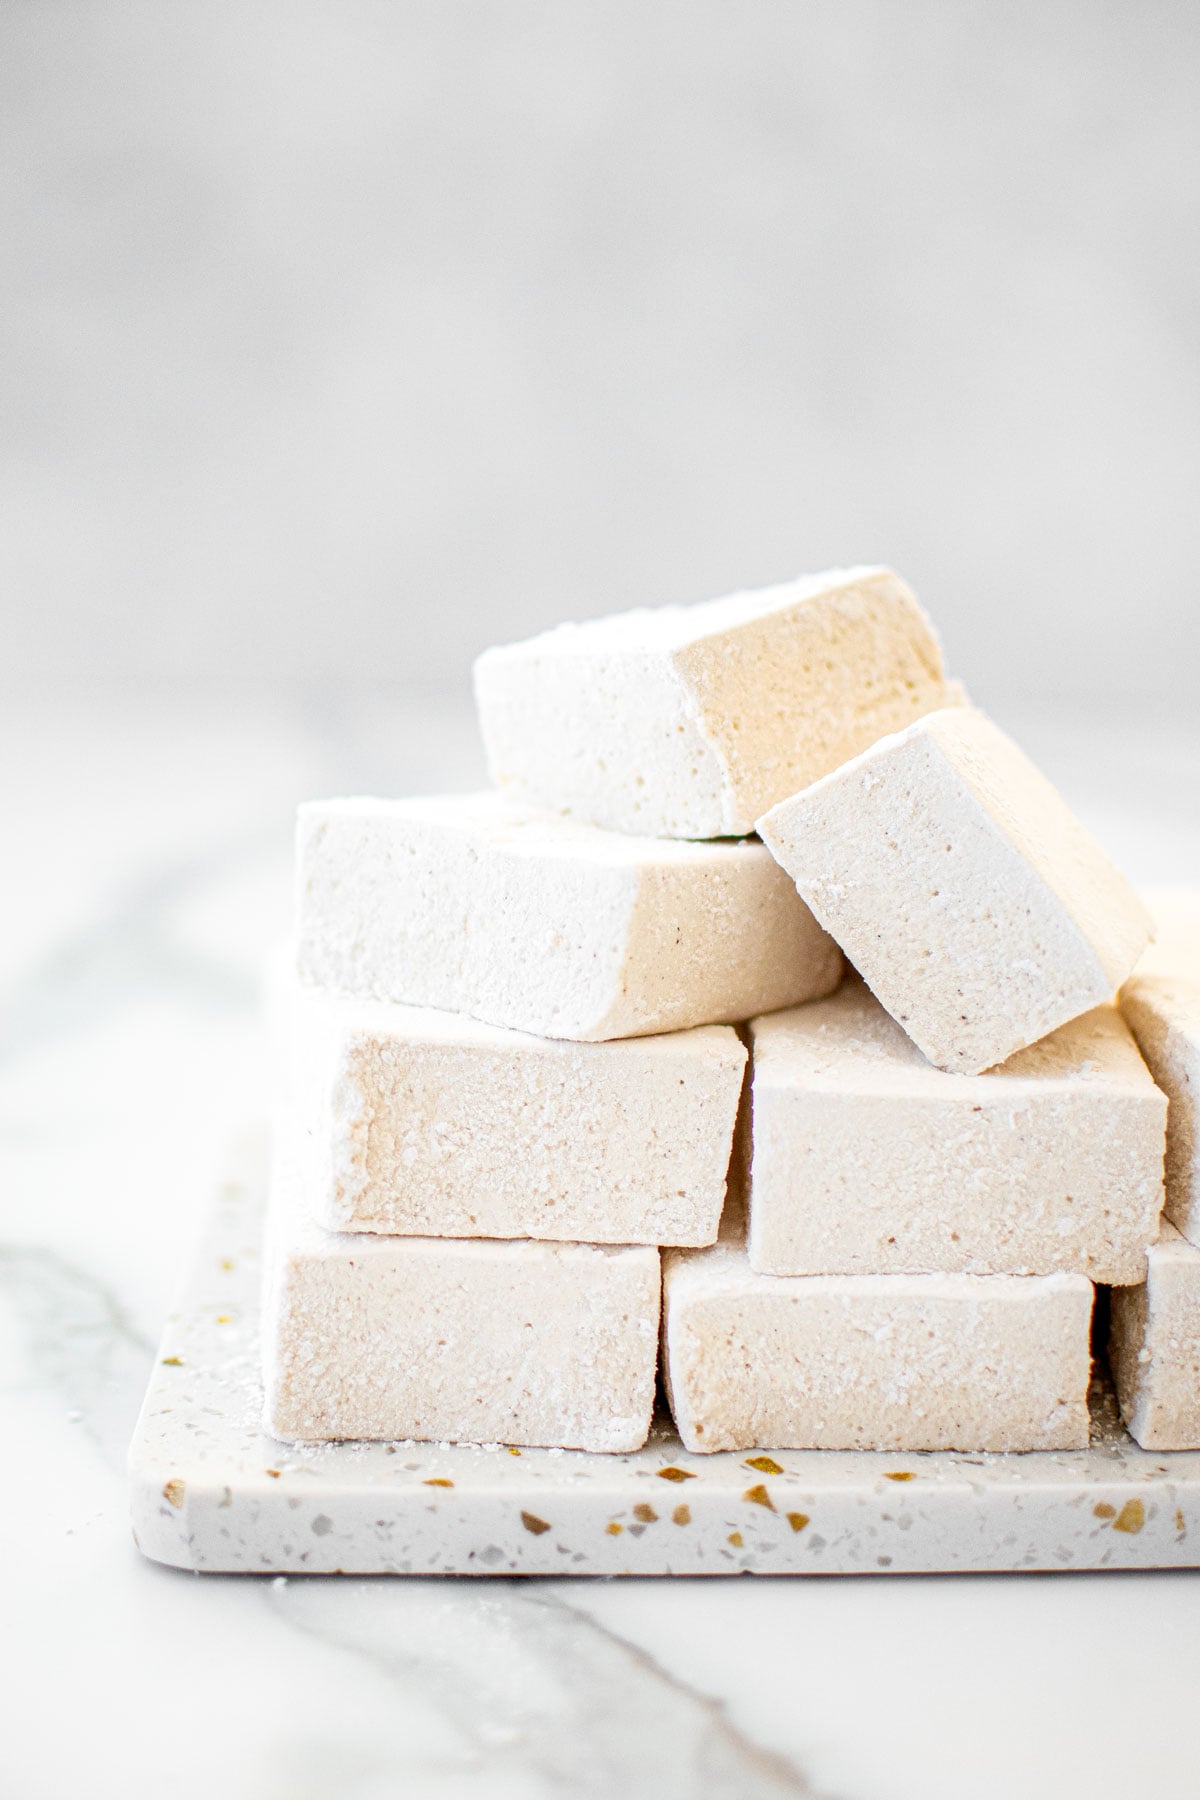
Homemade Chocolate Marshmallows Without Eggs
This recipe for Homemade Chocolate Marshmallows Without Eggs will make you never want to buy store bought marshmallows again! This homemade marshmallow recipe uses simple organic ingredients, making these an indulgence that is totally worth it!
If you are a marshmallow fan, be sure to check out some of my other homemade marshmallow recipes like Homemade Cherry Marshmallows, Pumpkin Spice Marshmallows Without Corn Syrup, or Homemade Marshmallows Without Eggs.

A Quick Look At The Recipe
- Recipe Name: Homemade Chocolate Marshmallows Without Eggs
- Ready In: 24 hours
- Makes: 24 large marshmallows or 96 mini marshmallows
- Main Ingredients: cane sugar, gelatin, Dutch cocoa powder, powdered sugar
- Flavor Profile: deep cocoa flavor and a melt-in-your-mouth texture
- Dietary Info: eggless, gluten free, no seed oils, dairy free
- Difficulty: Easy!
- Why You’ll Love It: homemade chocolate marshmallows perfect for hot cocoa
Summarize & Save This Content On
Why You'll Love This Recipe
- Homemade: I love making homemade marshmallows because they are so much better than store bought! With homemade marshmallows you can avoid artificial flavors and colors as well as other unnecessary ingredients.
- Organic Ingredients: This recipe for homemade marshmallows is made with completely organic ingredients!
- Chocolate Marshmallows: This is a take on classic marshmallows with the addition of chocolate! I love this lightly sweetened chocolate marshmallow version as it brings both chocolate and marshmallows together in one amazing dessert.
- No Candy Thermometer: You don't need a candy thermometer to make these marshmallows!
- Better Than Store Bought: While traditional store-bought marshmallows have artificial flavors and food coloring, this recipe is made with organic ingredients and nothing suspect. You can even replace the corn syrup with honey, if you prefer. These organic marshmallows are so much better than store bought and will make you feel like a kid again. And, if you've ever felt un-American because you were never a fan of mallows, these can change your mind!
Ingredients

- Cane Sugar: Organic cane sugar is the basis of homemade marshmallows! Marshmallows are basically just sugar. But, if you make them yourself, then you don't have to worry about unnecessary additives like the store bought ones have.
- Light Corn Syrup: I use Wholesome Organic Light Corn Syrup, which is a necessary ingredient for marshmallows. Corn syrup can get a bad rap, but if you use organic corn syrup then its guaranteed to be Non GMO, and corn syrup has properties that regular sugar does not have. If you do not have corn syrup, you can also substitute it for honey as well, but the marshmallows will have a honey flavor to them. So, depending on your preference, either works!
- Dutch Cocoa Powder: I use Organic Dutch Cocoa Powder, I always prefer to use Dutch cocoa instead of natural, as it's sweeter. But, if you have natural you can use that in its place as well. I also mix cocoa powder with powdered sugar after the marshmallows get cut, this helps coat the sides so they do not stick to each other, while also providing a richer chocolate flavor. I use this in place of cornstarch, which many recipes call for, as it tastes so much better!
- Grass-fed Gelatin: Gelatin is a crucial ingredient for marshmallows as it is what makes them hold their shape. I buy grassfed gelatin for the highest quality.
*For a full list of ingredients and measurements, visit the recipe card below.
Baker's Tips
- Always weigh ingredients for the best results!
- You really need a stand mixer (like KitchenAid) for this recipe as they need to whip for so long.
- When you add the cold water to the gelatin, stir it up immediately. This will prevent any clumps from forming. I do not bloom gelatin in the traditional way (which is to sprinkle gelatin on top of cold water and not touch it). I have taught so many people how to make marshmallows when I owned my bakery, and I found this method far exceeds the traditional method of blooming to reduce clumps.
- Feel free to use honey in place of corn syrup (same exact weight measurement). This will give a slightly honey flavor to these chocolate marshmallows (which I love), but if you don't want that then stick with corn syrup.
- You can cut these into large mallows or mini marshmallows, either works. I love using a pizza cutter for cutting, it makes it so easy and it's really fun.
- Make sure to coat the marshmallows in the powdered sugar and cocoa mixture so they don't stick together.
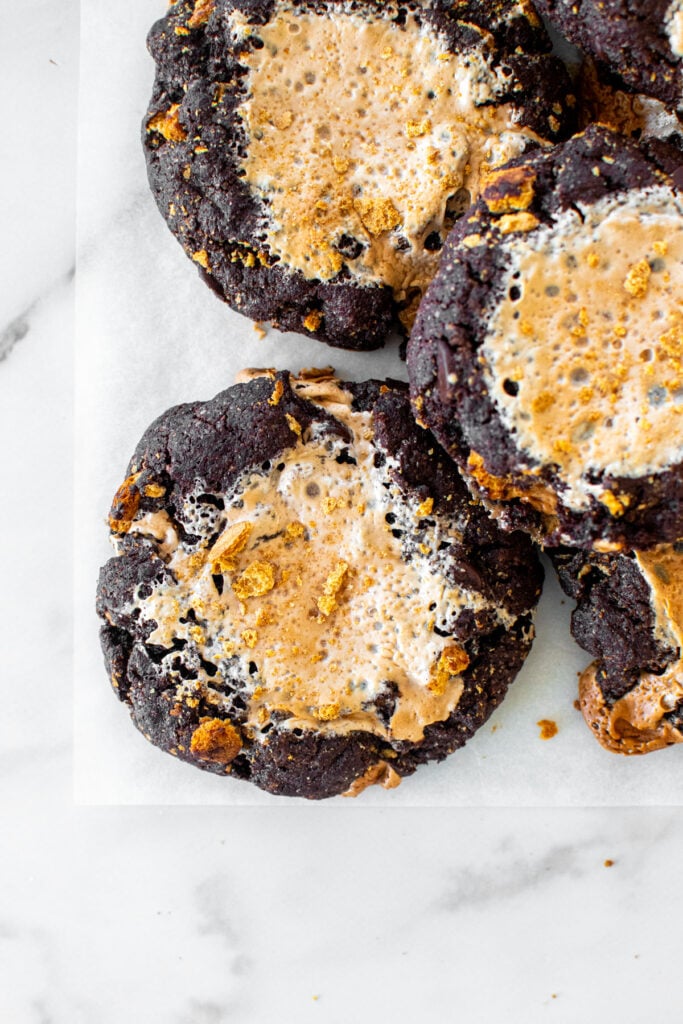
- If you want to make summer s’mores, the larger size fits perfectly on half a graham cracker! You'll just need to torch the marshmallow using a kitchen torch instead of roasting over an open flame. These homemade marshmallows don't have stabilizers like store-bought versions, so they need quick and hot heat to roast up beautifully!
How to Make Homemade Chocolate Marshmallows Without Eggs
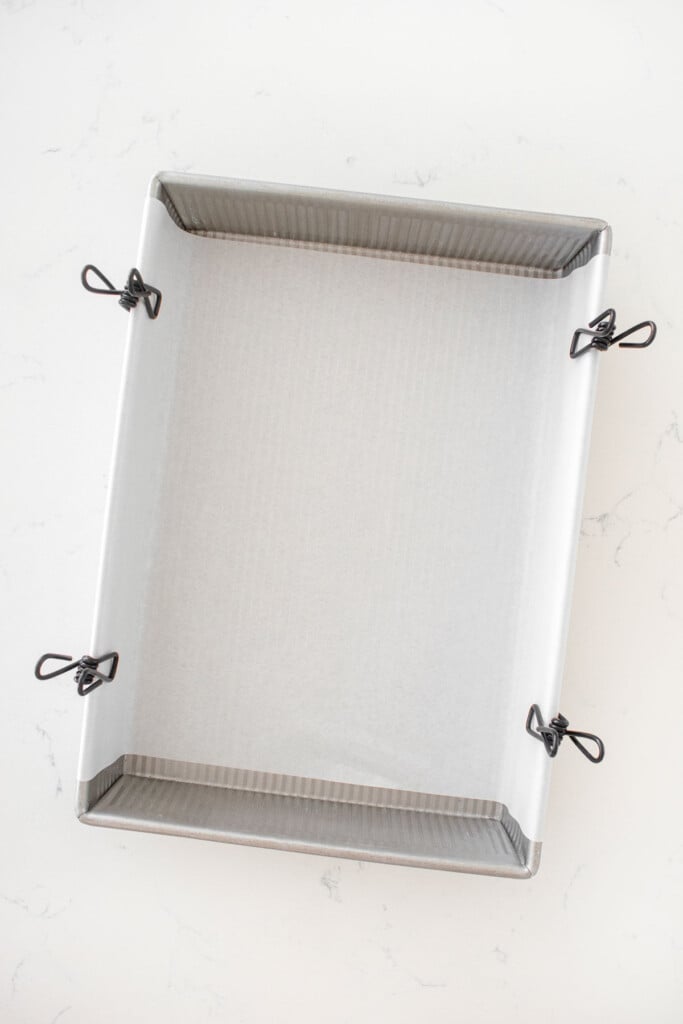
- Place a piece of parchment paper in a 9 x13-inch pan. Let the parchment fold over the dish on two sides, but make sure the other sides are cut to fit the dish exactly, otherwise the corners of the marshmallows will not be perfectly square.
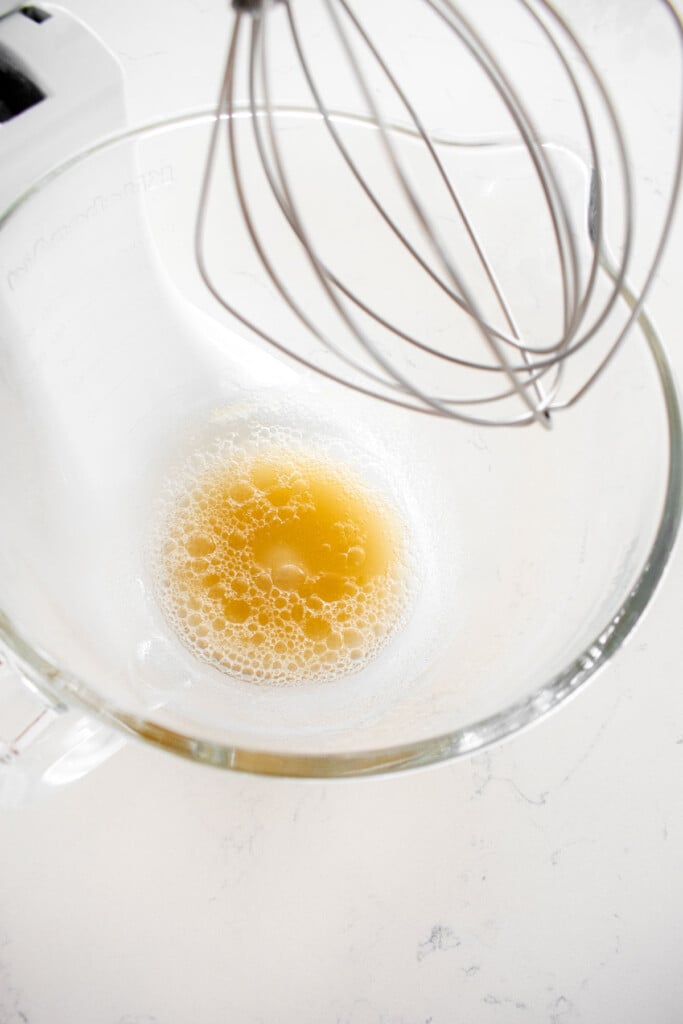
- In the bowl of a stand mixer fitted with the whisk attachment, add ½ cup of the cold water and gelatin. Immediately stir together with a spoon so it doesn’t clump. Set aside.
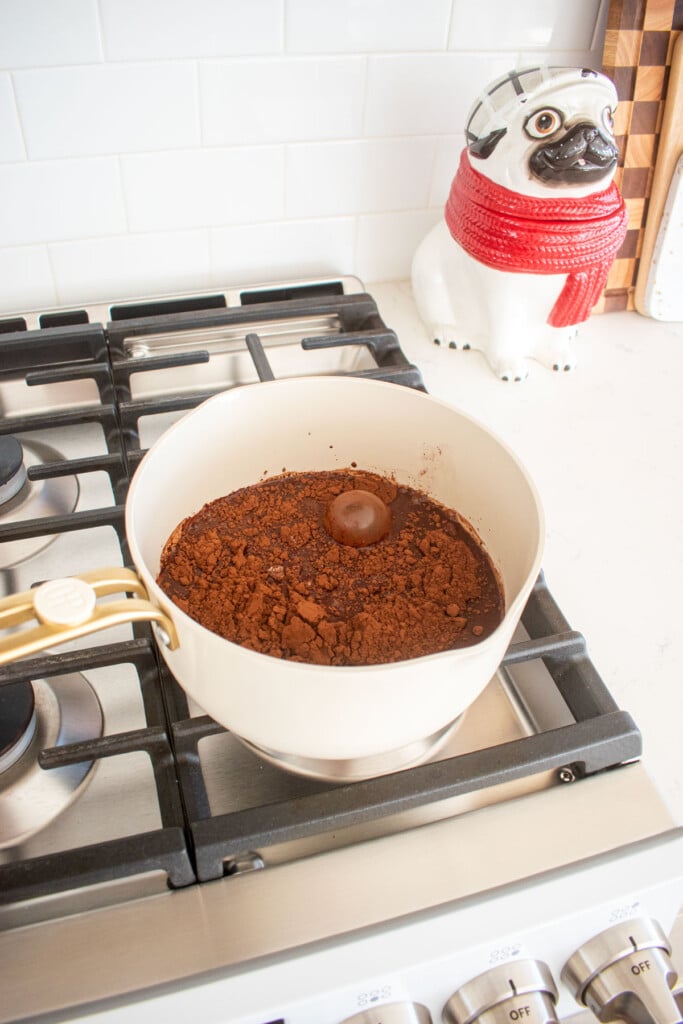
- In a medium-sized saucepan, add the cane sugar, corn syrup, the ½ cup water, cocoa, and sea salt.
- Put over high heat and stir with a high heat spatula until all the sugar has dissolved and you have a liquid.
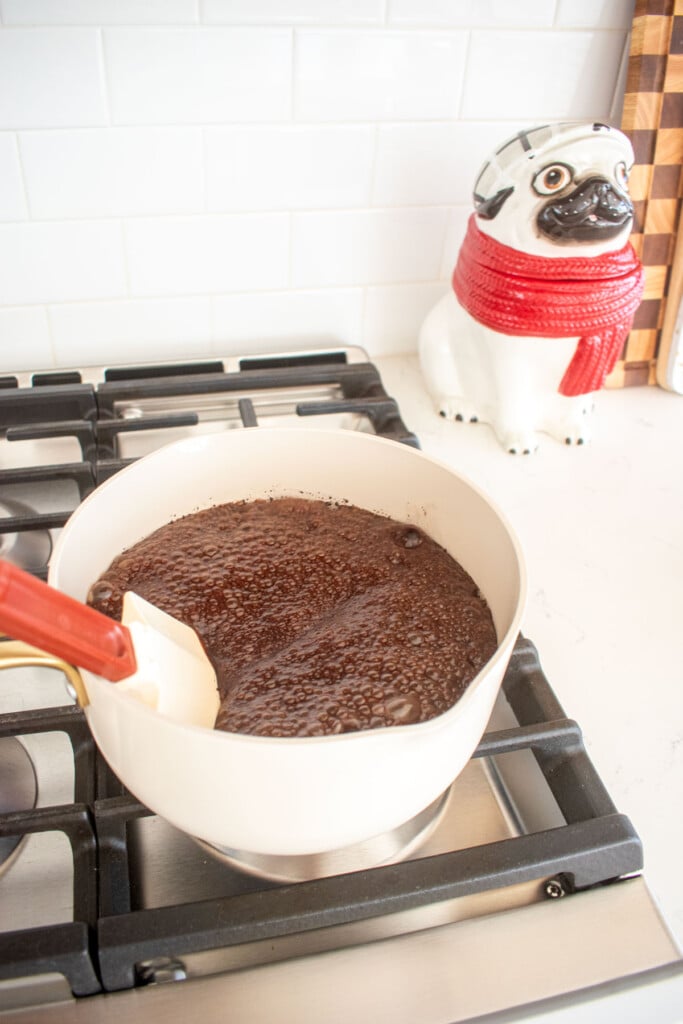
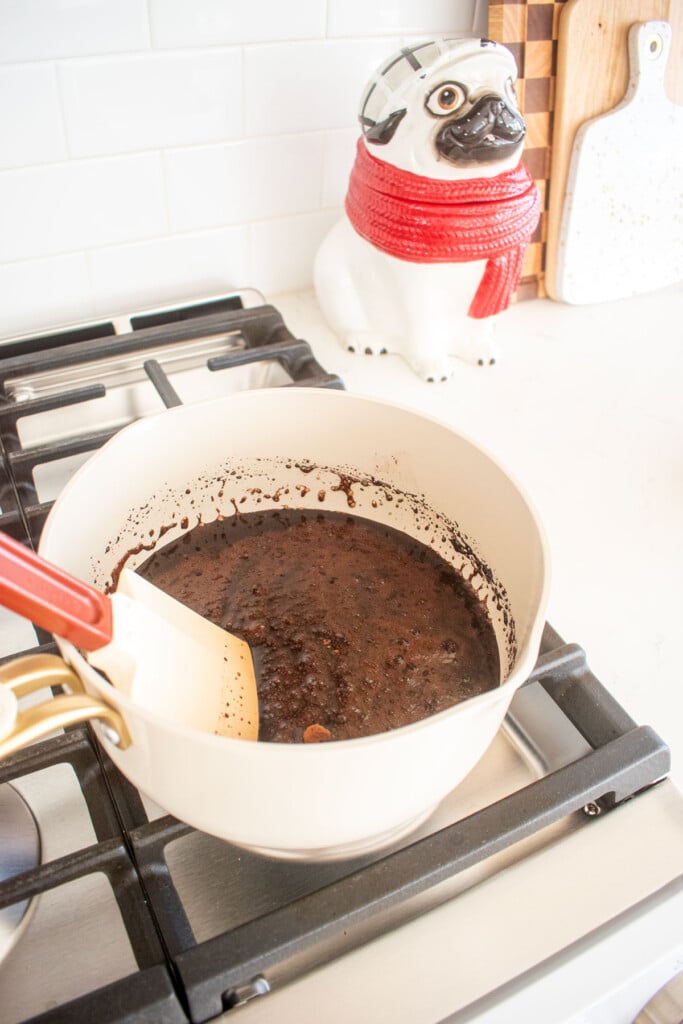
- Periodically stir the sugar mixture until it starts to boil, bubble and rise up.
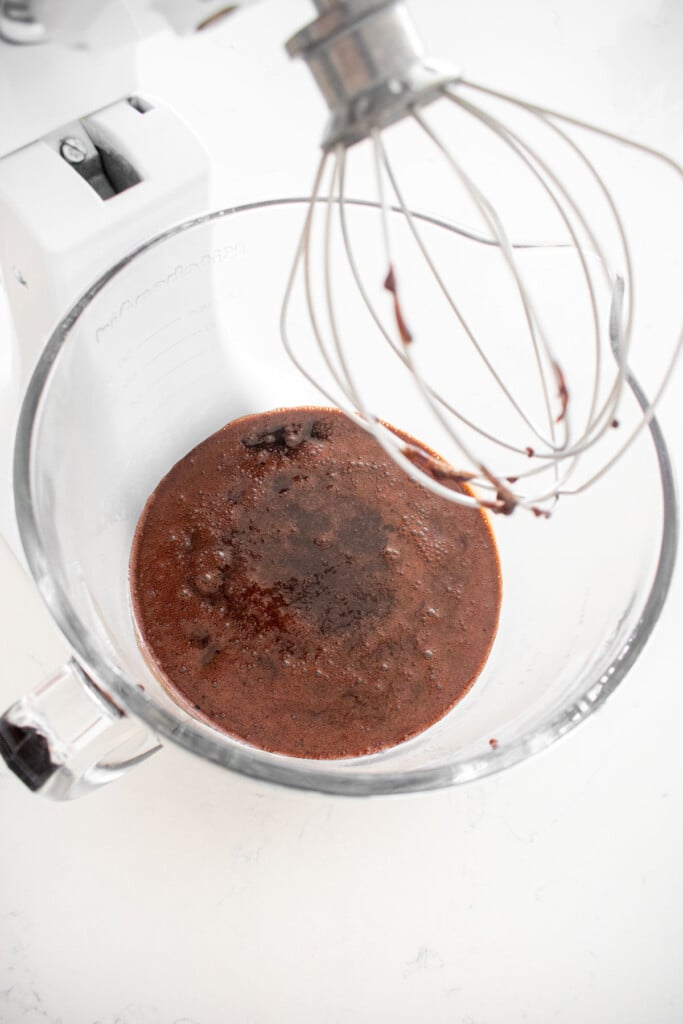
- Remove from the heat and pour directly over the gelatin in the mixing bowl.
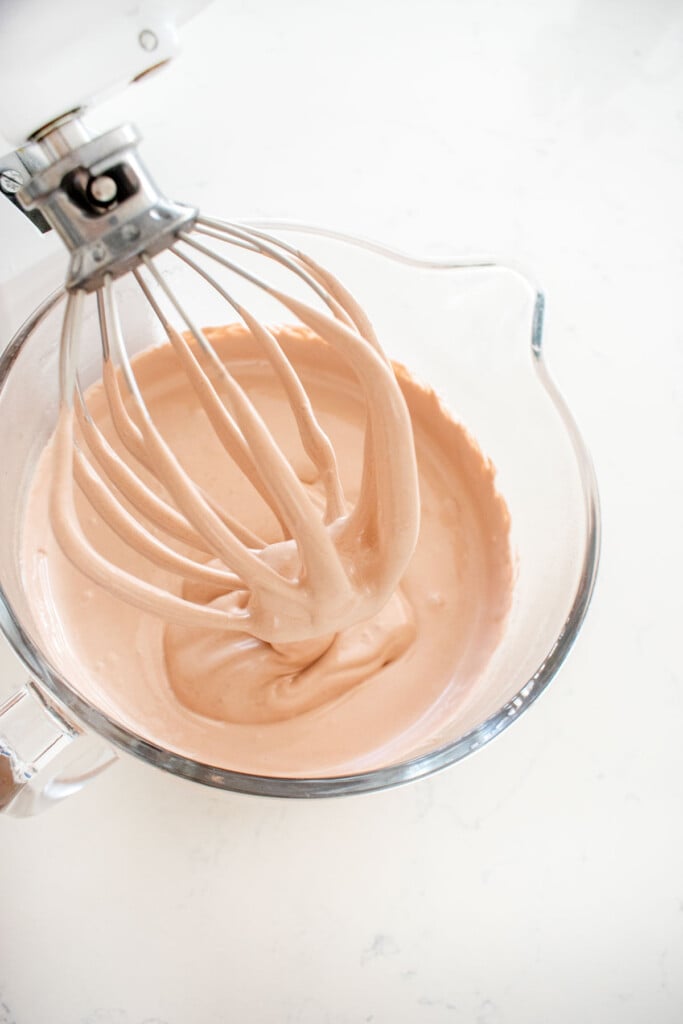
- Start mixing on low and gradually increase the speed as the mixture starts to thicken. It will start out as an opaque color and slowly it will start to lighten in color as it thickens. Keep increasing the speed until you are at full speed. Start mixing on low and gradually increase the speed as the mixture starts to thicken. It will start out as an opaque color and slowly it will start to lighten in color as it thickens and turns glossy. Keep increasing the speed until you are at full speed. Continue mixing on high until the mixture is a thick consistency and resembles marshmallow fluff. It should be sticky and hold its shape for a short period of time. The entire mixing time should be about 10 to 15 minutes. Last, add in the vanilla extract and whisk to combine completely.
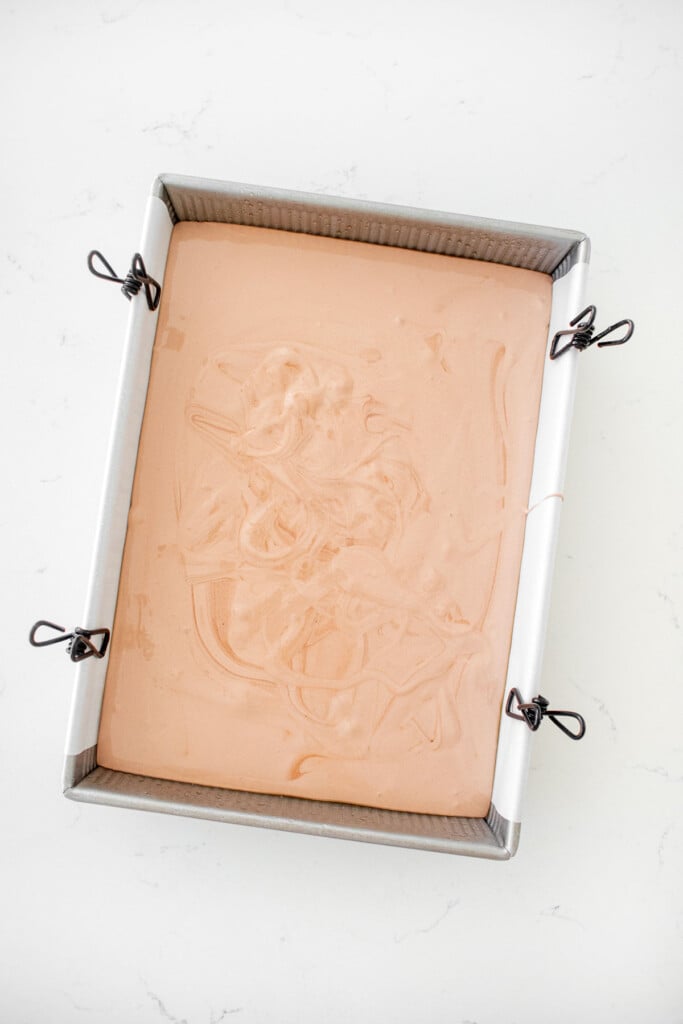
- Grease the prepared parchment paper and two additional sides of the baking dish with olive oil spray. Immediately pour the marshmallow mixture into the pan. Let the marshmallow set overnight.
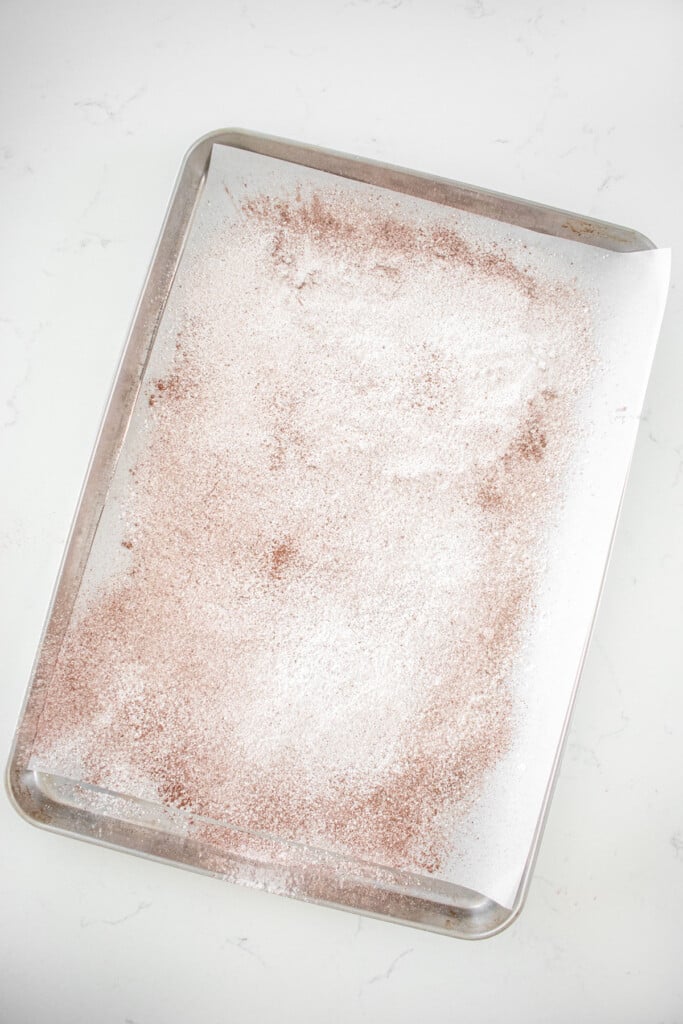
- In a sifter, add the powdered sugar and cocoa. On a baking sheet with parchment paper, or a work surface, sift some of the powdered sugar and cocoa mixture onto the parchment paper. Slowly pull at the ends of the marshmallow that are not against the parchment paper so it’s not stuck to the pan.
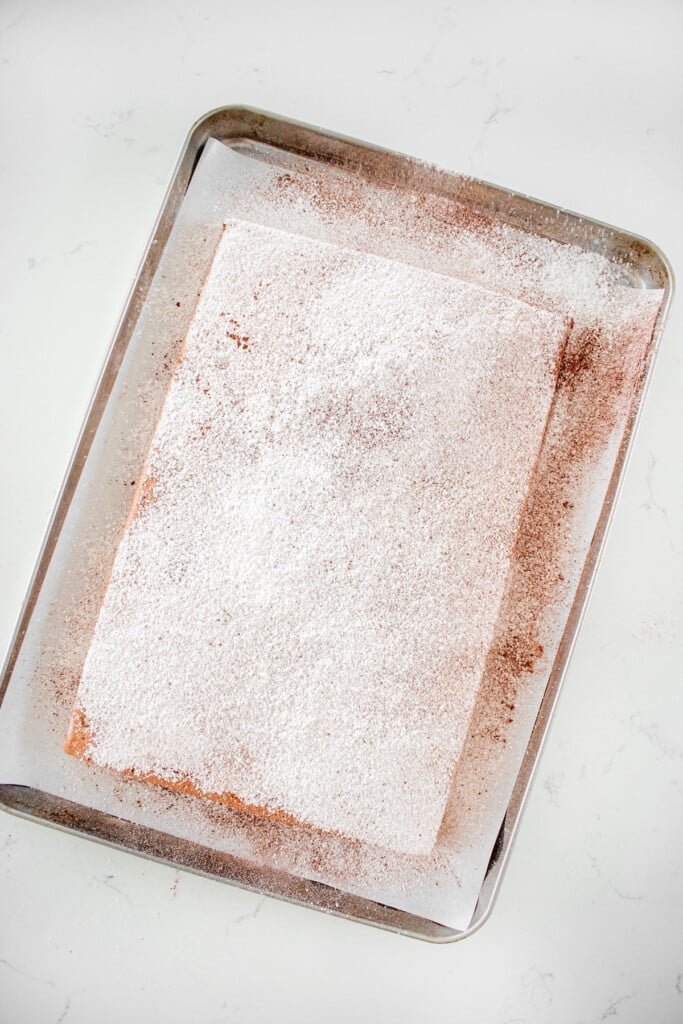
- Lift the entire marshmallow out of the pan and turn it upside down onto the powdered sugar and cocoa mixture. And sift the remaining on top.

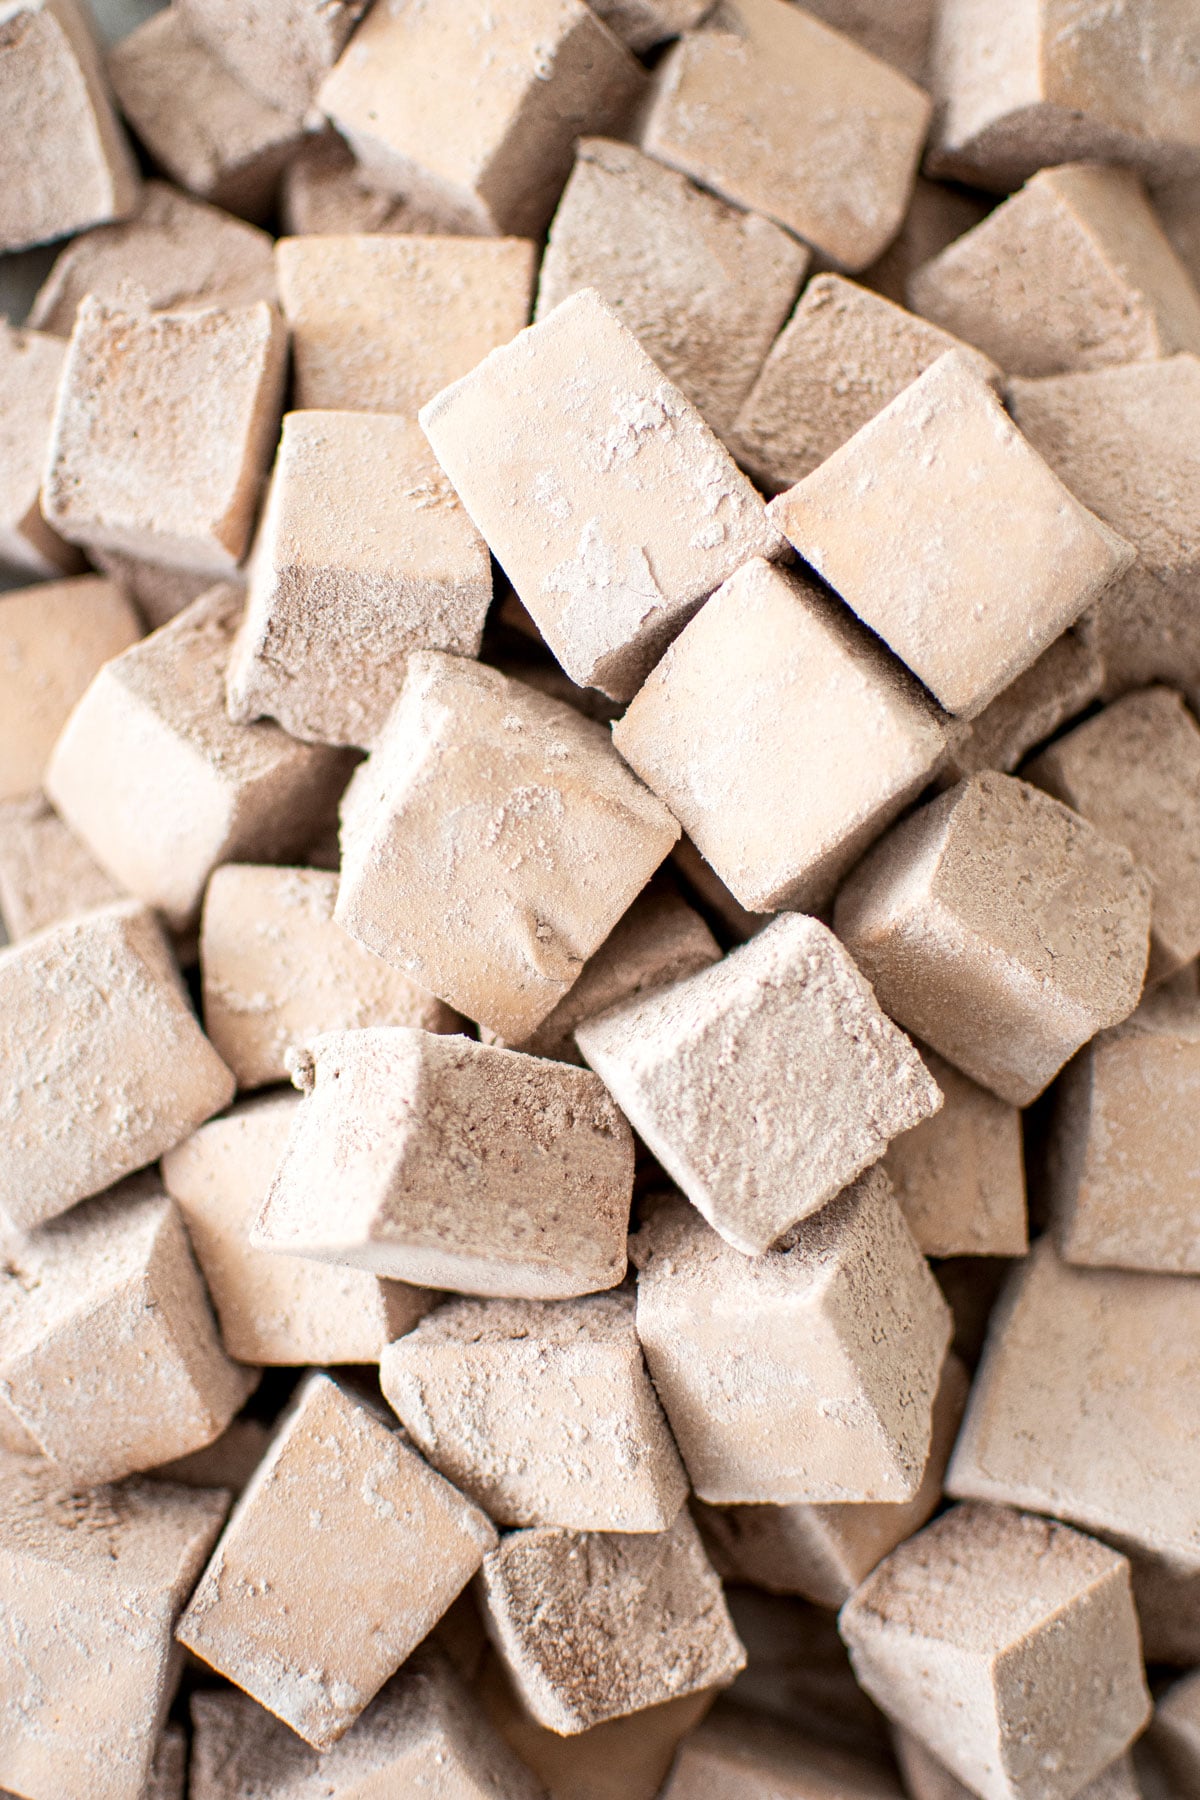
- Using a pizza cutter (this is a great trick, but a sharp knife will do as well), cut into 24 squares (six by four). Roll each side in the powdered sugar to keep from sticking together.

- You can leave as large marshmallows or cut each square into four pieces for mini marshmallows. Allow them to sit out overnight before storing so the powdered sugar can form to the sides and they won’t stick together.
Recipe FAQ's
If you don't want to use corn syrup, you can use honey in its place. It will give these chocolate marshmallows a little honey flavor though (which I think is delicious). But, if you don't want a honey flavor, stick with organic corn syrup.
I feel the cooking spray works best for making these marshmallows easy to remove. If you simply don't have any kind of cooking spray, you can use a little melted coconut oil or olive oil, rub it onto the pan and parchment paper really well!
When the mixture begins to boil and visibly rise up the pot (like it's going to overflow) then it's ready. Watch the video to see exactly what this looks like!
If you didn't whip them long enough, then they will not set up properly. Make sure to watch the video so you can see the texture and use the trick I show to check your marshmallows are whipped enough.
When the marshmallow mixture looks like fluff and not liquid, then it's ready. I show an example of this in the video. And the trick is, if you can write the first letter of your name with the fluff and you can still see it, then it's ready. Watch the video to see this!
If you whip longer than needed, the marshmallow will just begin to get really stiff and it will be difficult to spread out as you'll loose more moisture.
The whipping process will take about 10 minutes. The first stage will be liquid, then it will turn opaque, and then it will turn into a light chocolate color. As it thickens, it will resemble fluff. The video shows this really well, so make sure to give it a watch!
It's best to leave marshmallows overnight to set. I recommend at least 12 hours.
No, you will still get super fluffy and squishy marshmallows when making this chocolate marshmallow recipe.
Yes, but you'll need to roast with a kitchen torch. Because homemade marshmallows don't have any stabilizers, they will not roast over low heat like classic store-bought versions do. Instead, they need high heat and fast. So, a kitchen torch works perfectly!
I have found that the best way to cut marshmallows is with a pizza cutter! This ensures your cut cleanly and through the mallows as the wheel really helps do this. You can also grease the pizza cutter if you like, though I don't usually do this.
Because my marshmallows are made without eggs or egg white, they do not need to be refrigerated.
Store in a covered container, airtight is best to keep the squishy, in a cool dry place. I like to store in a glass jar in my pantry!
They are best eaten right away, but they should last for about 2 weeks.
How to Enjoy Homemade Chocolate Marshmallows
- These are a delicious treat all on their own!
- Add into your favorite hot cocoa like Caramel Hot Cocoa, Coconut Hot Chocolate, Chai Tea Hot Chocolate, or Boozy Pumpkin Spice Hot Chocolate.
- Add on top of cakes or cupcakes.
- Add into a DIY Christmas Cookie Box as another treat. These make a great filler for cookie boxes!
- Check out How to Make Homemade Hot Cocoa Mix for Gifts and add a bag of these mini marshmallows to go with it!
- Drizzle them with Homemade Caramel Sauce with Bone Broth or Gingerbread Caramel Sauce for a sweet treat or drop them into hot chocolate with this extra touch.

More Chocolate Dessert Recipes

Loved it? Tell us!
Thanks a waffle lot for stopping by 🧇 If you loved this recipe, sprinkle some love by leaving a ⭐⭐⭐⭐⭐ review — it inspires others to try this recipe and helps me organically reach dog loving foodies like you! I personally read and appreciate every message!
Also, be sure to subscribe to our YouTube channel and join John John and me in the kitchen for step by step recipe videos! And subscribe to our newsletter for new and seasonal recipes!
Homemade Chocolate Marshmallows Without Eggs
Equipment
- Digital Food Scale
- Small Pot
- Stand Mixer
- 9×13-inch Baking Pan
- Parchment Paper Sheets
Ingredients
Marshmallows
- ½ cup cold water
- 22 grams grassfed gelatin
- 454 grams cane sugar
- 312 grams light corn syrup
- 28 grams Dutch cocoa powder
- ½ cup water
- ½ teaspoon fine sea salt
- 1 teaspoon vanilla extract
- olive oil cooking spray
Topping
- 71 grams powdered sugar
- 14 grams Dutch cocoa powder
Instructions
- Place a piece of parchment paper in a 9 x13-inch pan. Let the parchment fold over the dish on two sides, but make sure the other sides are cut to fit the dish exactly, otherwise the corners of the marshmallows will not be perfectly square.
- In the bowl of a stand mixer fitted with the whisk attachment, add ½ cup of the cold water and gelatin. Immediately stir together with a spoon so it doesn’t clump. Set aside.
- In a medium-sized saucepan, add the cane sugar, corn syrup, the ½ cup water, cocoa, and sea salt. Put over high heat and stir with a high heat spatula until all the sugar has dissolved and you have a liquid.
- Periodically stir the sugar mixture until it starts to boil, bubble and rise up. Remove from the heat and pour directly over the gelatin in the mixing bowl.
- Start mixing on low and gradually increase the speed as the mixture starts to thicken. It will start out as an opaque color and slowly it will start to lighten in color as it thickens and turns glossy. Keep increasing the speed until you are at full speed.
- Continue mixing on high until the mixture is a thick consistency and resembles marshmallow fluff. It should be sticky and hold its shape for a short period of time. The entire mixing time should be about 10 to 15 minutes. Last, add in the vanilla extract and whisk to combine completely.
- Grease the prepared parchment paper and two additional sides of the baking dish with olive oil spray. Immediately pour the marshmallow mixture into the pan. Let the marshmallow set overnight.
- In a sifter, add the powdered sugar and cocoa. On a baking sheet with parchment paper, or a work surface, sift some of the powdered sugar and cocoa mixture onto the parchment paper. Slowly pull at the ends of the marshmallow that are not against the parchment paper so it’s not stuck to the pan. Lift the entire marshmallow out of the pan and turn it upside down onto the powdered sugar and cocoa mixture. And sift the remaining on top.
- Using a pizza cutter (this is a great trick, but a sharp knife will do as well), cut into 24 squares (six by four). You can leave as large marshmallows or cut each square into four pieces for mini marshmallows.
- Roll each side in the powdered sugar to keep from sticking together. Allow them to sit out overnight before storing so the powdered sugar can form to the sides and they won’t stick together.
- Store in an airtight container for up to 2 weeks.
Video

Notes
- Always weigh ingredients for the best results!
- You really need a stand mixer (like KitchenAid) for this recipe as they need to whip for so long.
- When you add the cold water to the gelatin, stir it up immediately. This will prevent any clumps from forming. I do not bloom gelatin in the traditional way (which is to sprinkle gelatin on top of cold water and not touching it). I have taught so many people how to make marshmallows when I owned my bakery, and I found this method far exceeds the traditional method of blooming to reduce clumps.
- Feel free to use honey in place of corn syrup (same exact weight measurement). This will give a slightly honey flavor to these chocolate marshmallows (which I love), but if you don't want that then stick with corn syrup.
- You can cut these into large mallows or mini marshmallows, either works. I love using a pizza cutter for cutting, it makes it so easy and it's really fun.
- Make sure to coat the marshmallows in the powdered sugar and cocoa mixture so they don't stick together.
- If you want to make summer s’mores, the larger size fits perfectly on half a graham cracker! You'll just need to torch the marshmallow using a kitchen torch instead of roasting over an open flame. These homemade marshmallows don't have stabilizers like store-bought versions, so they need quick and hot heat to roast up beautifully!
- High Altitude — Follow the recipe as noted.
Nutrition
The Bake Shop
Visit The Bake Shop for foodie inspired tees, sweatshirts, and accessories. Find my favorite kitchen tools (with discounts!) in the Kitchen Shop. And shop our collection of food inspired dog accessories too!


These are perfect in hot chocolate!
Yum, yum, so delicious as a treat by themselves or richen up your hot chocolate with them 😋😋
Absolutely incredible!